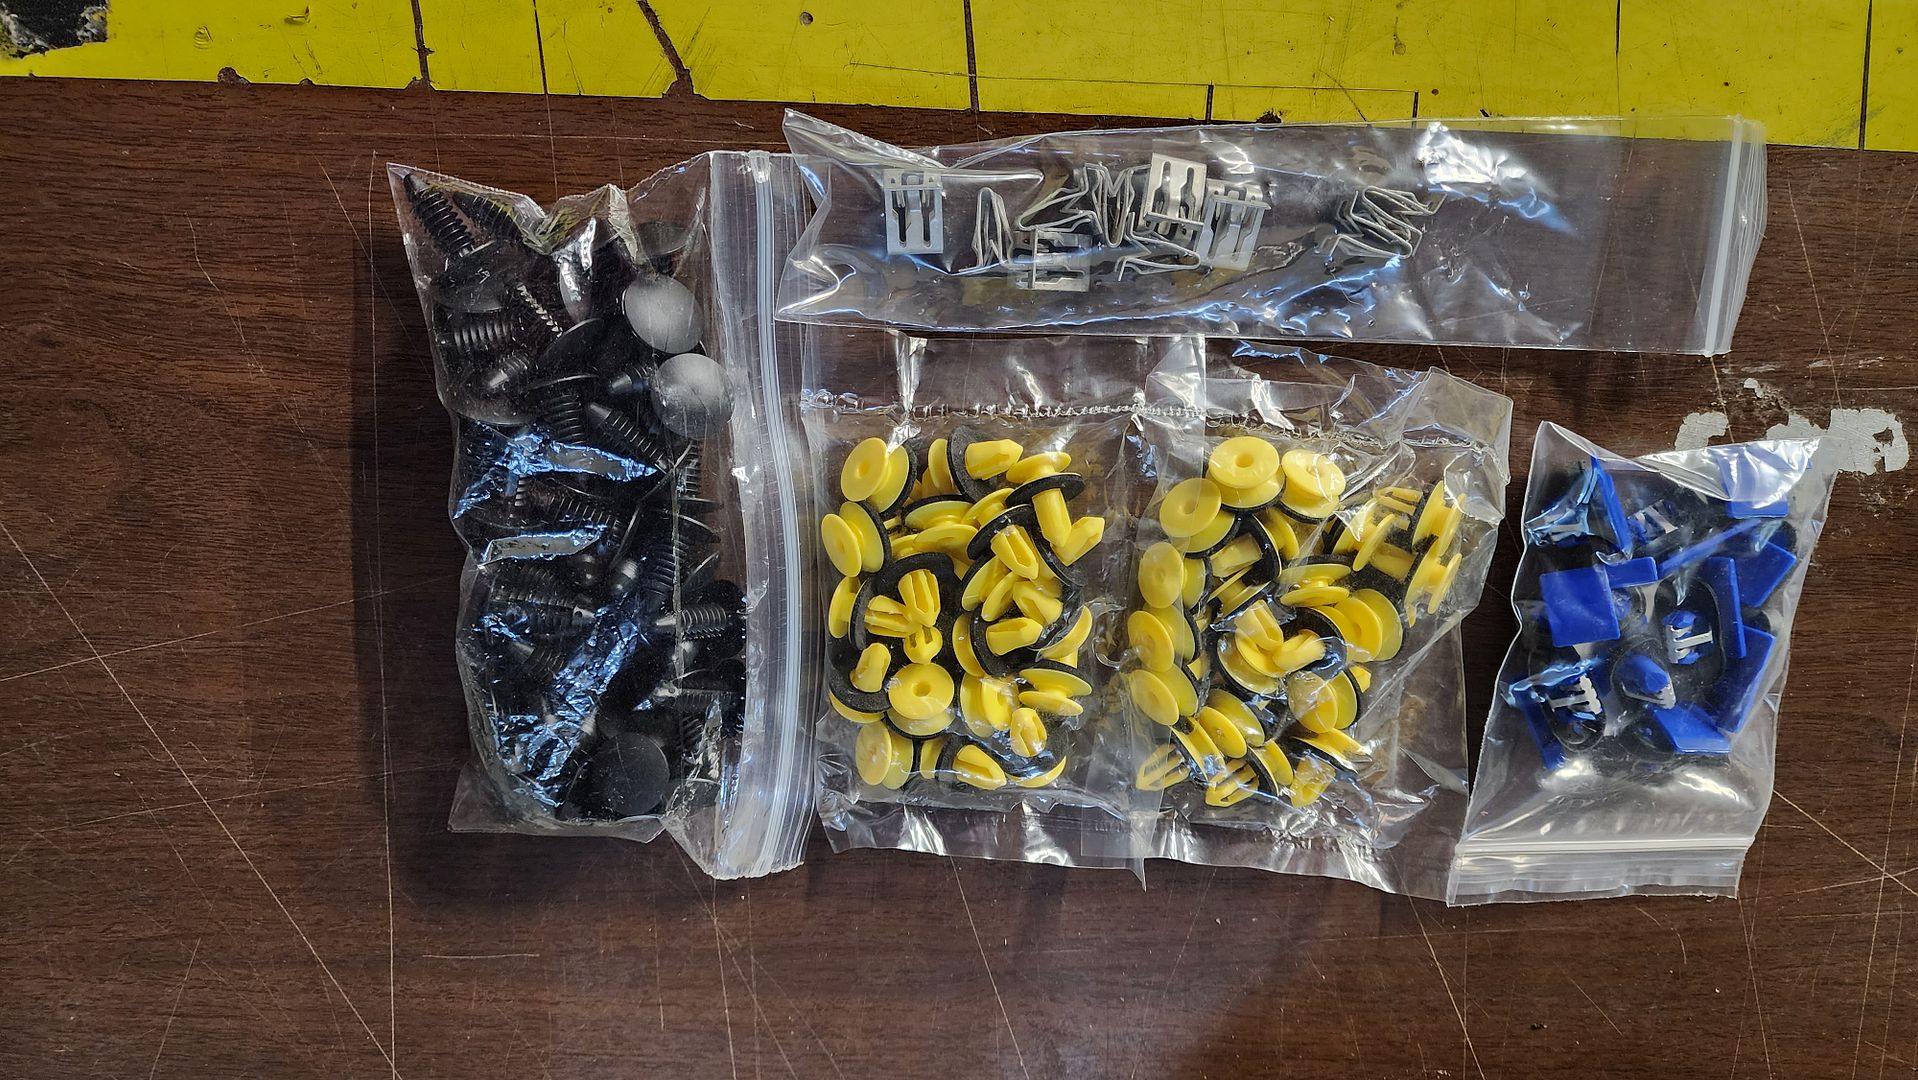
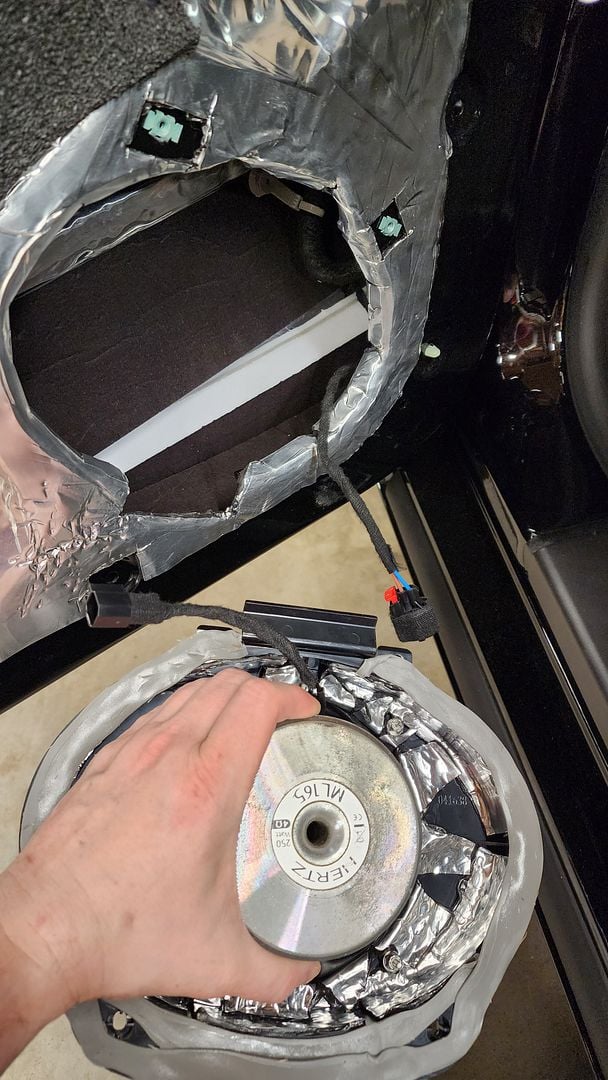
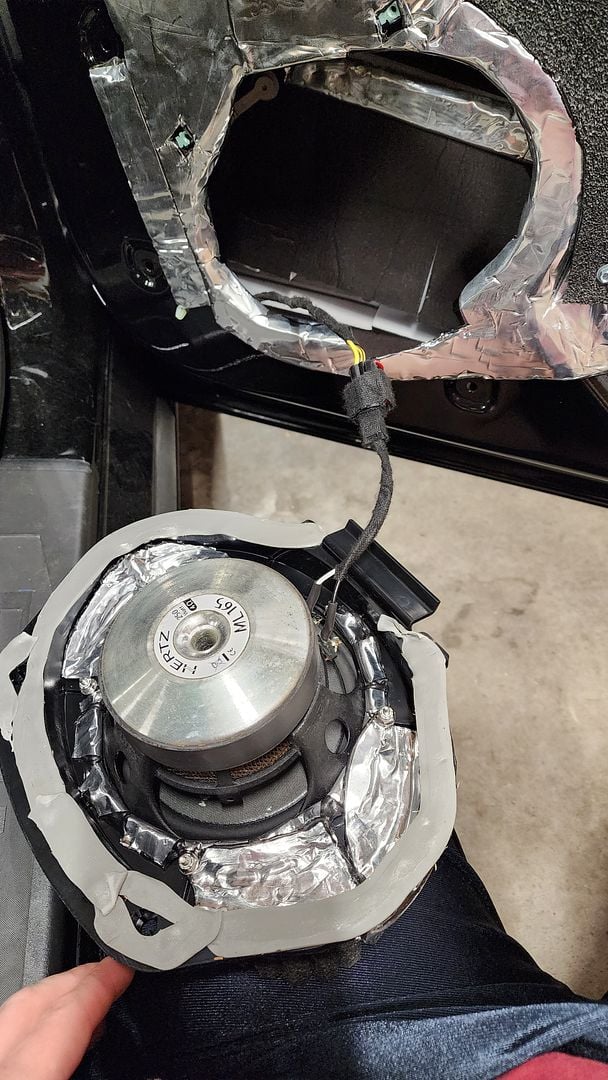
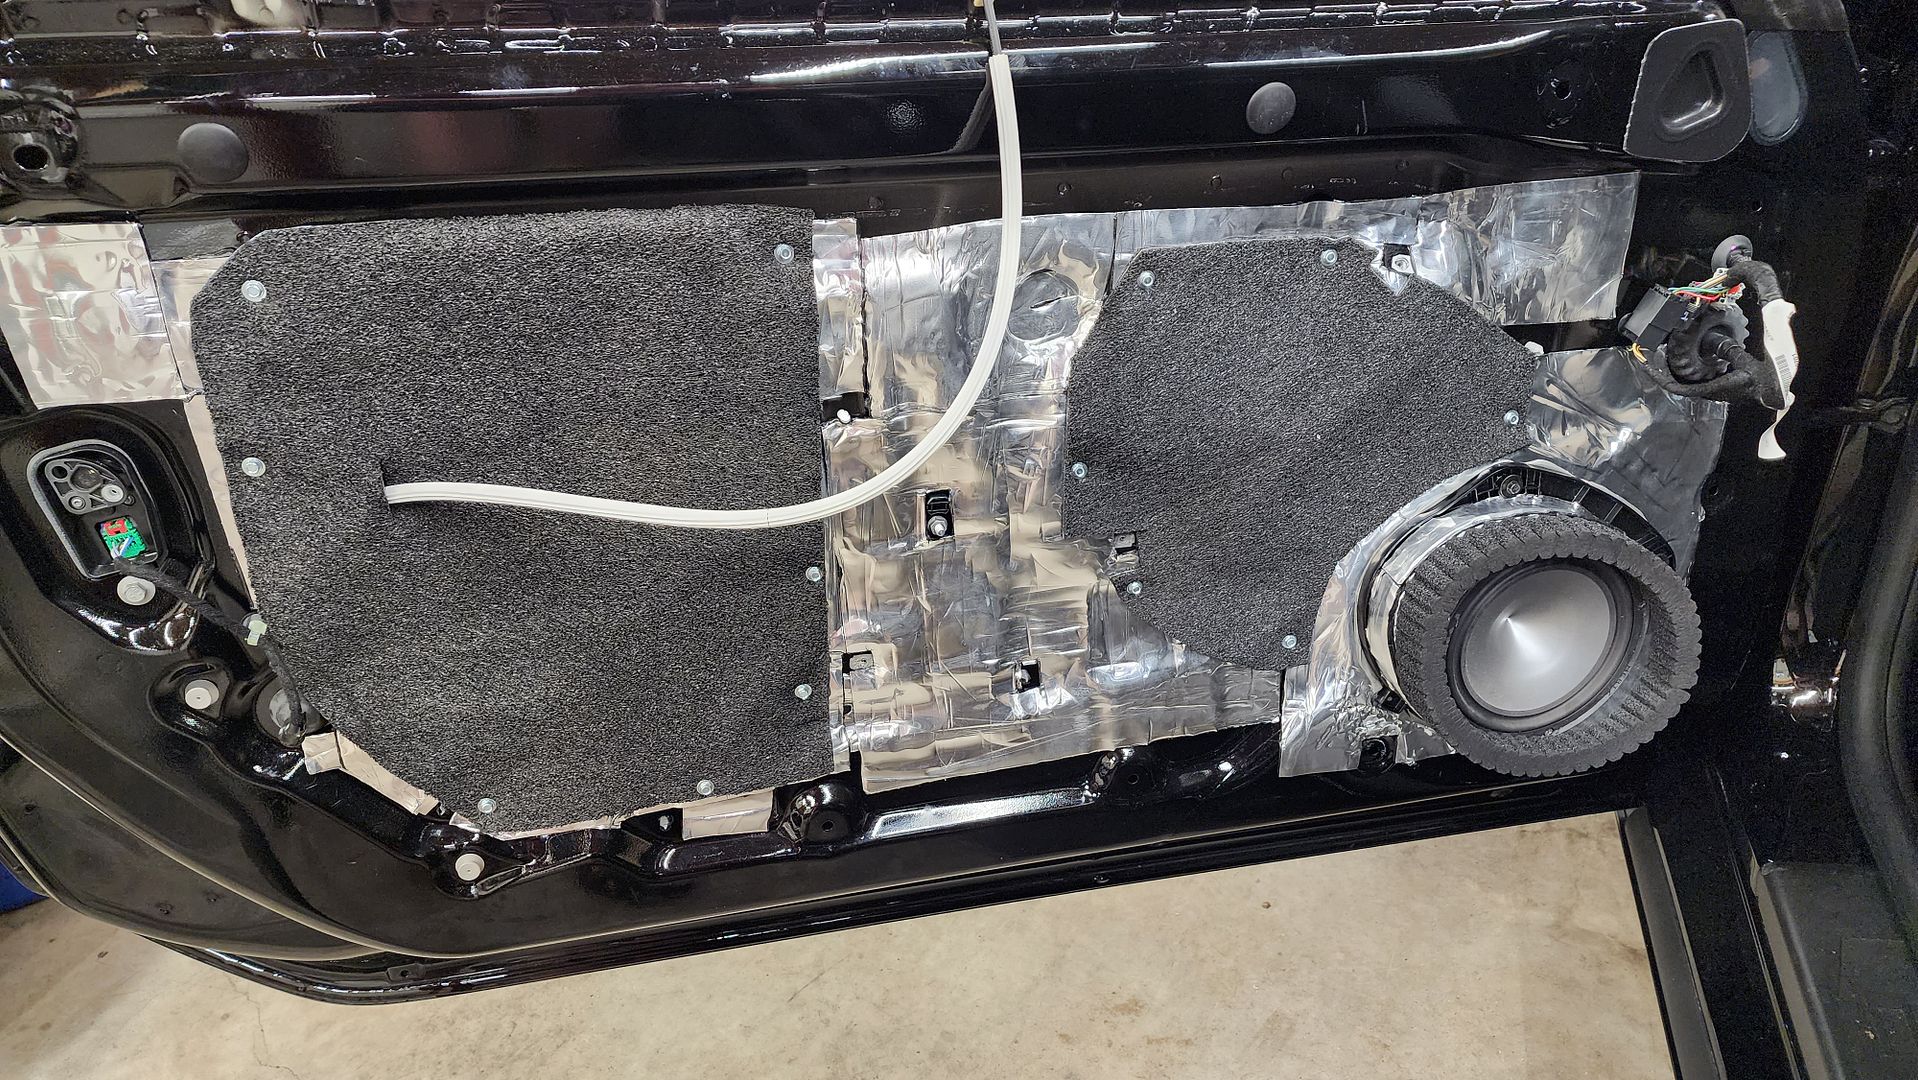
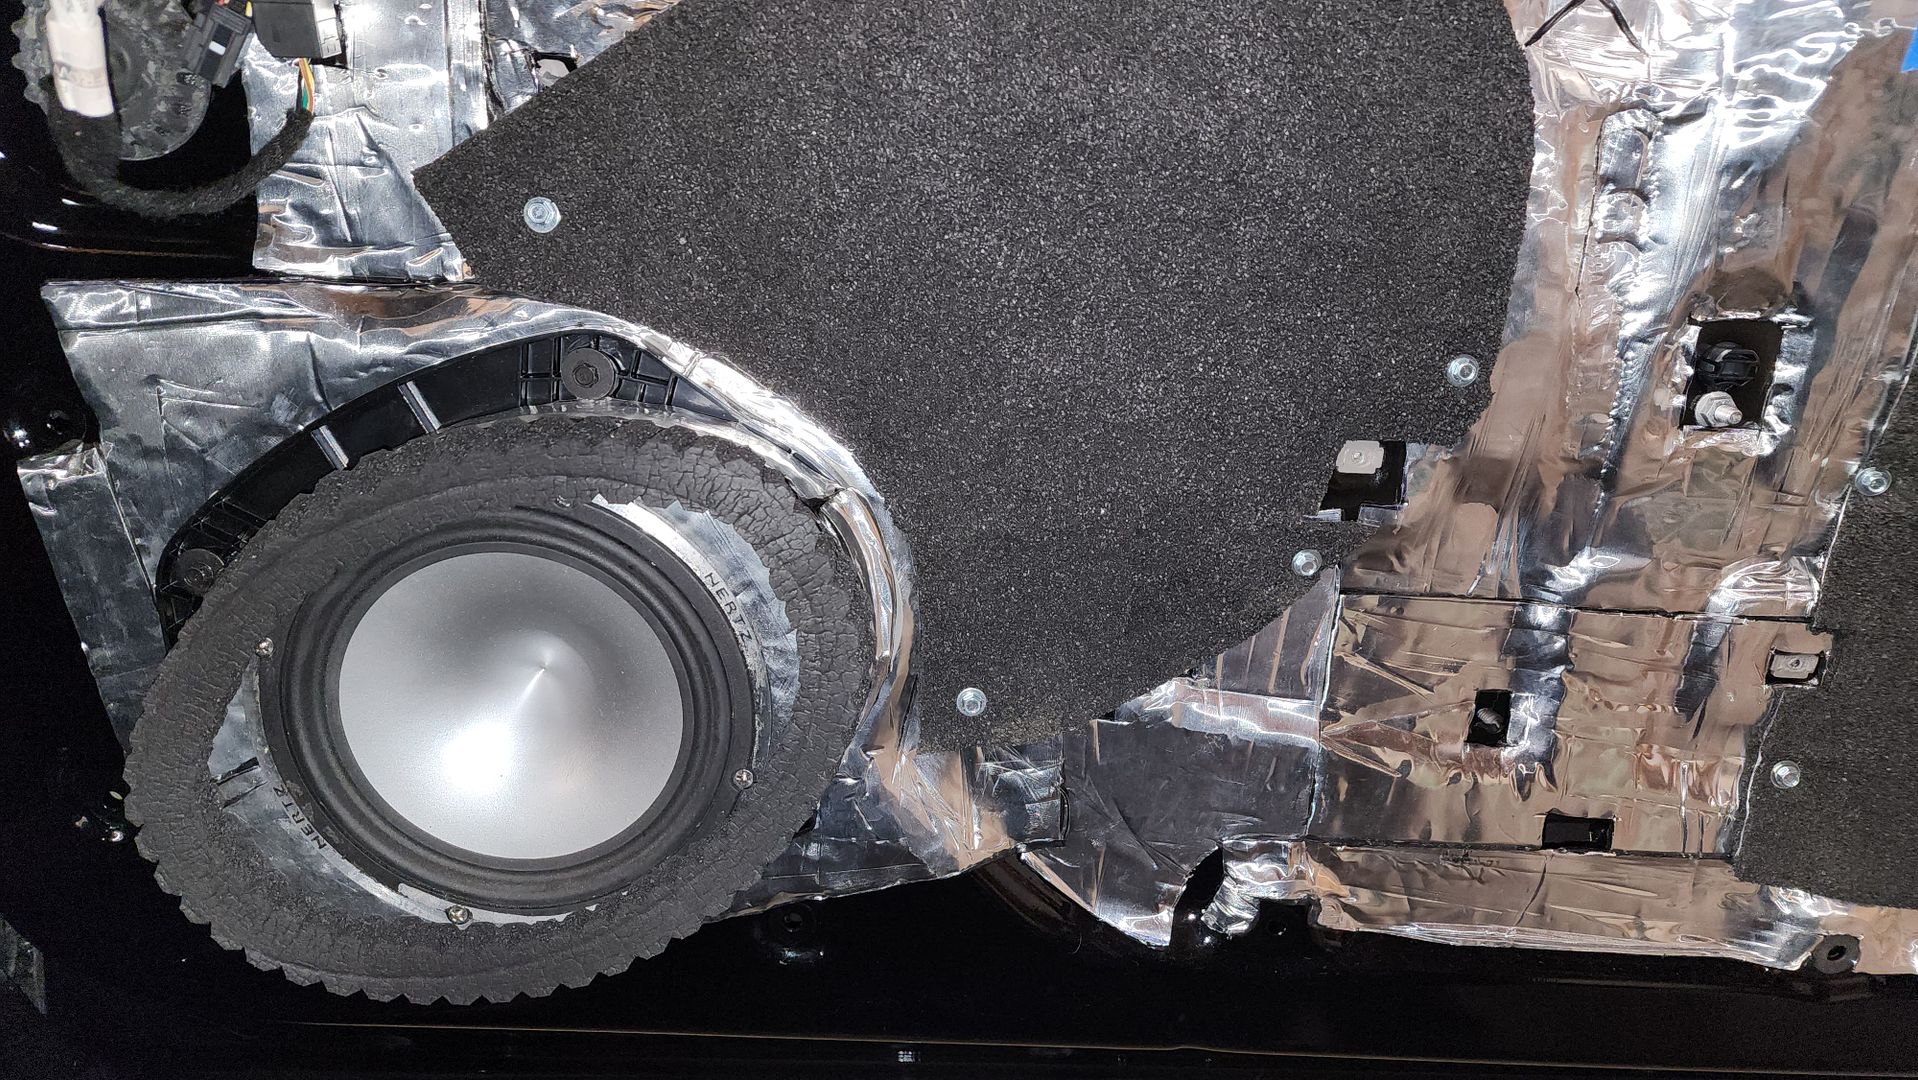
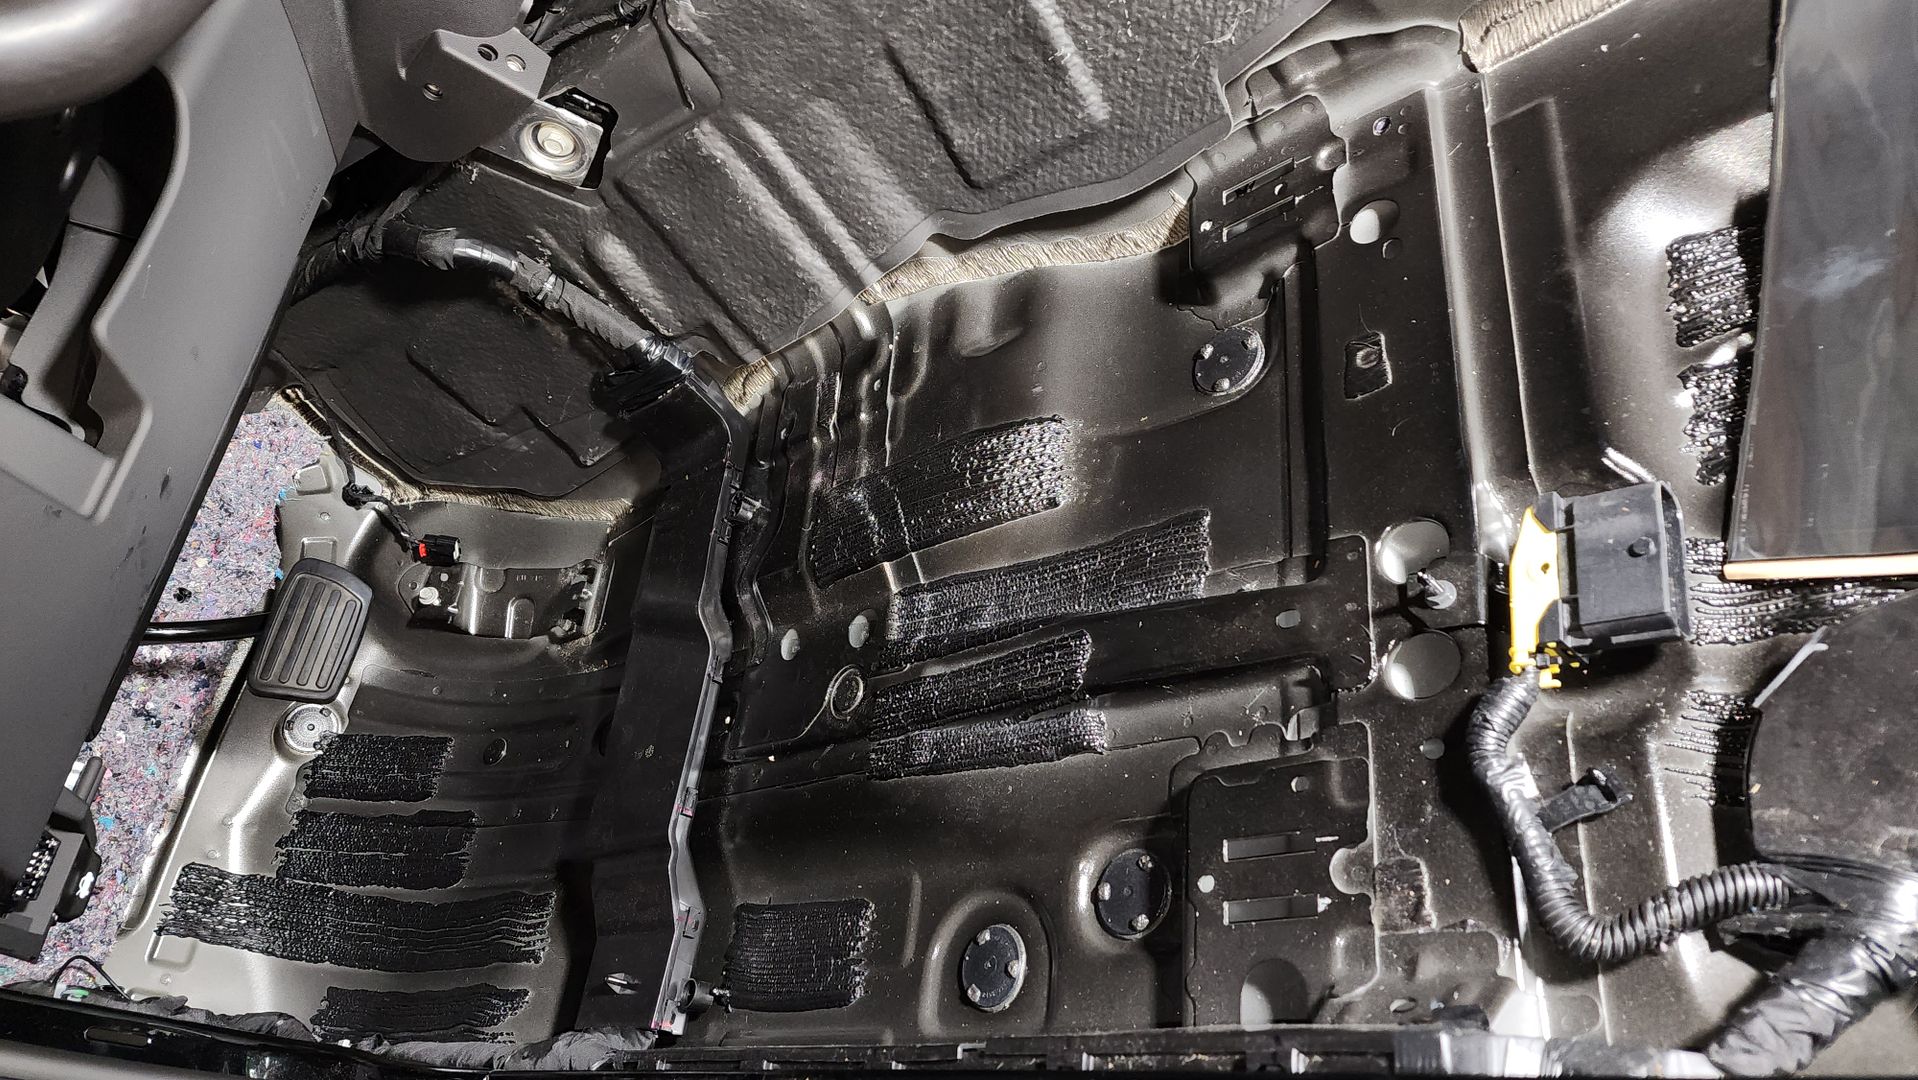
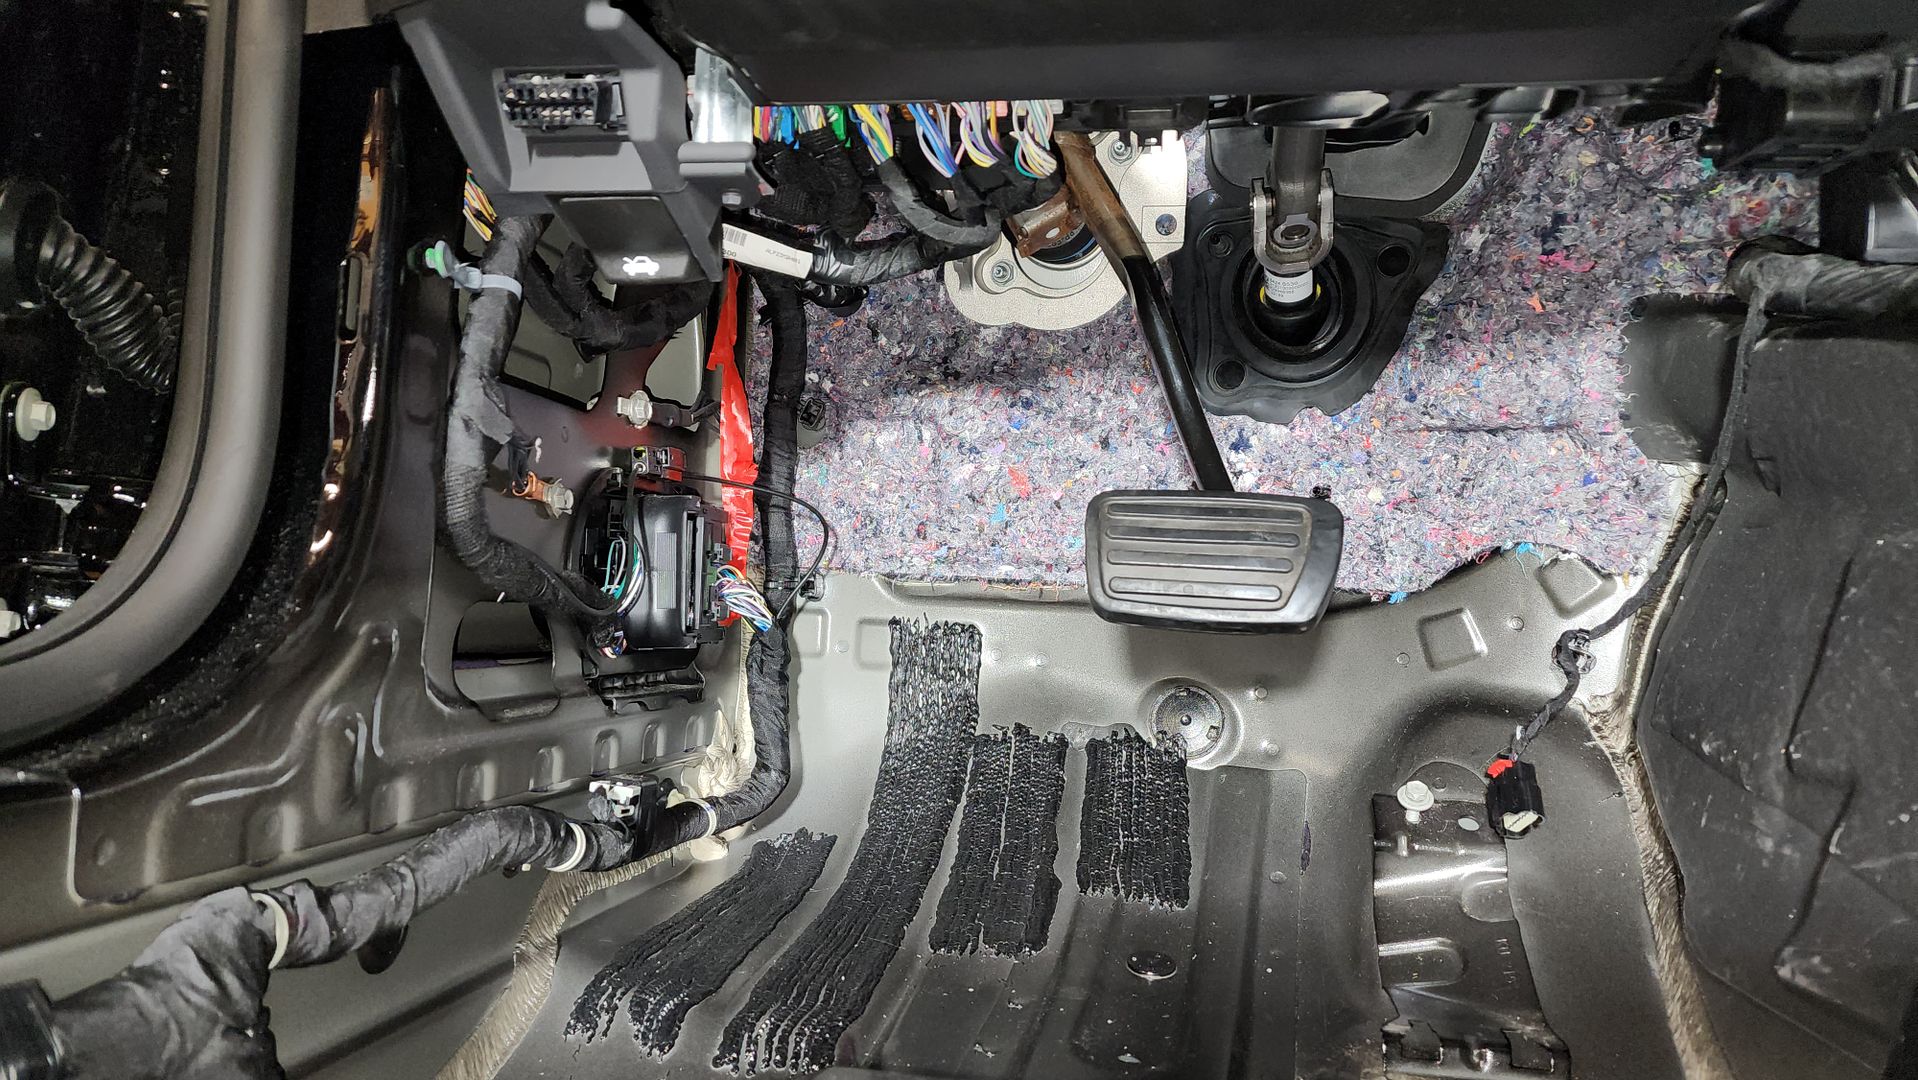
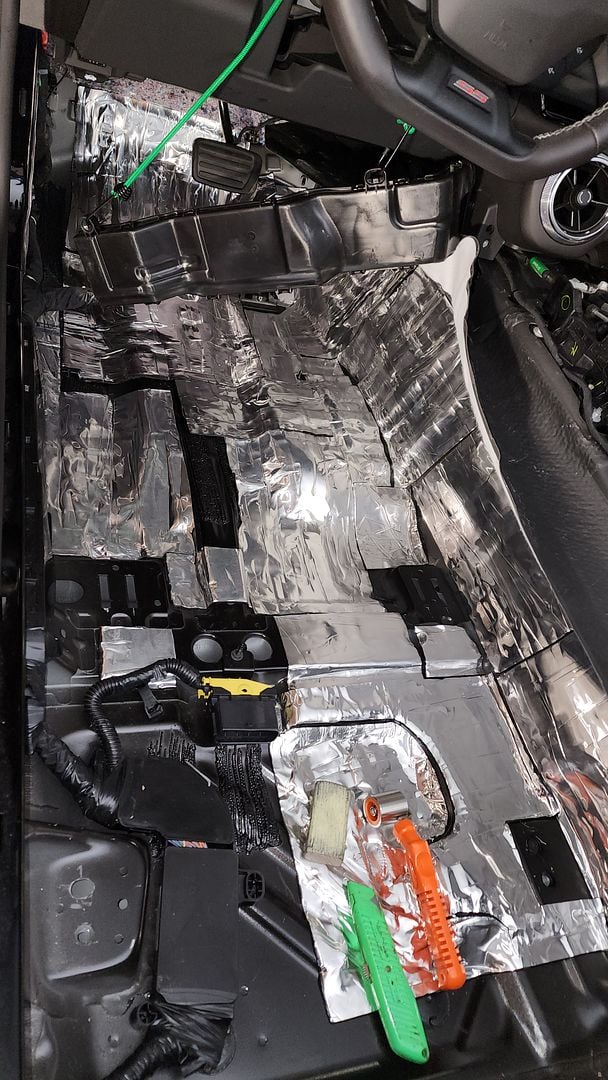
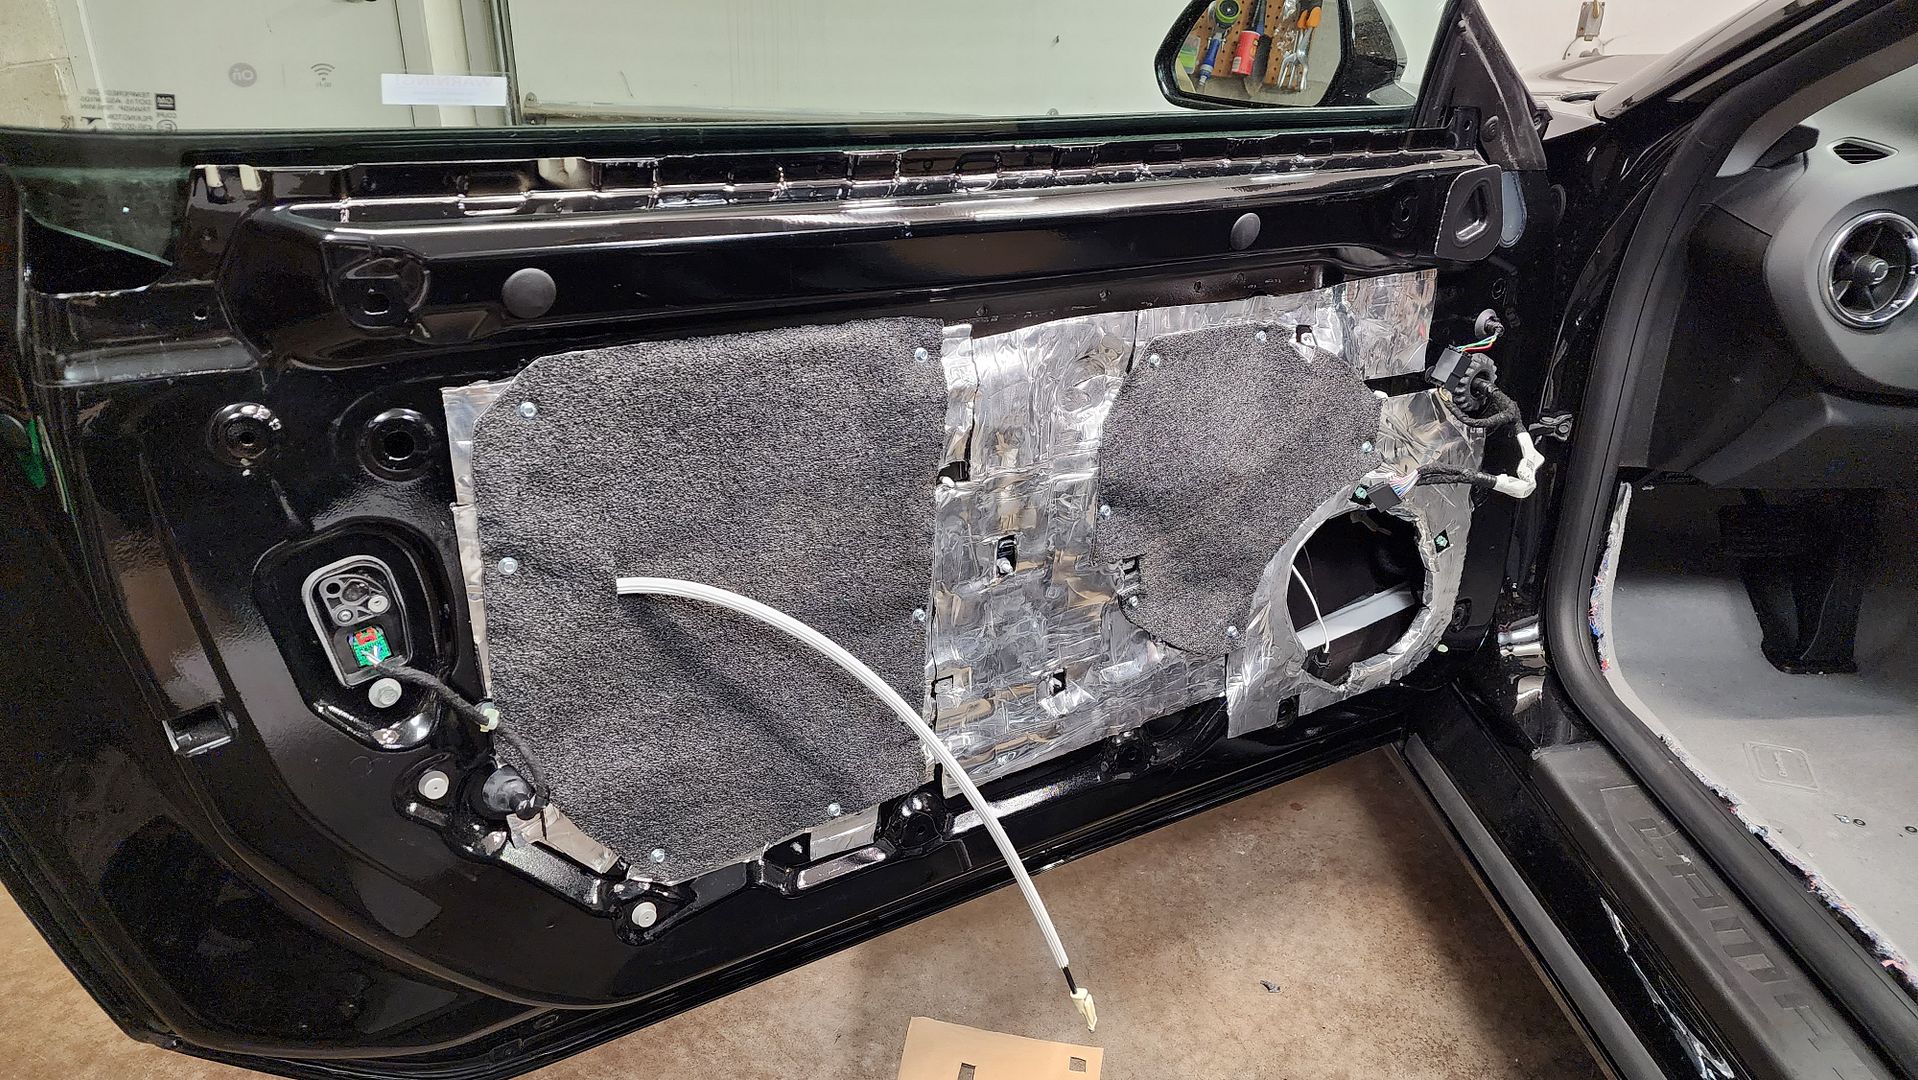
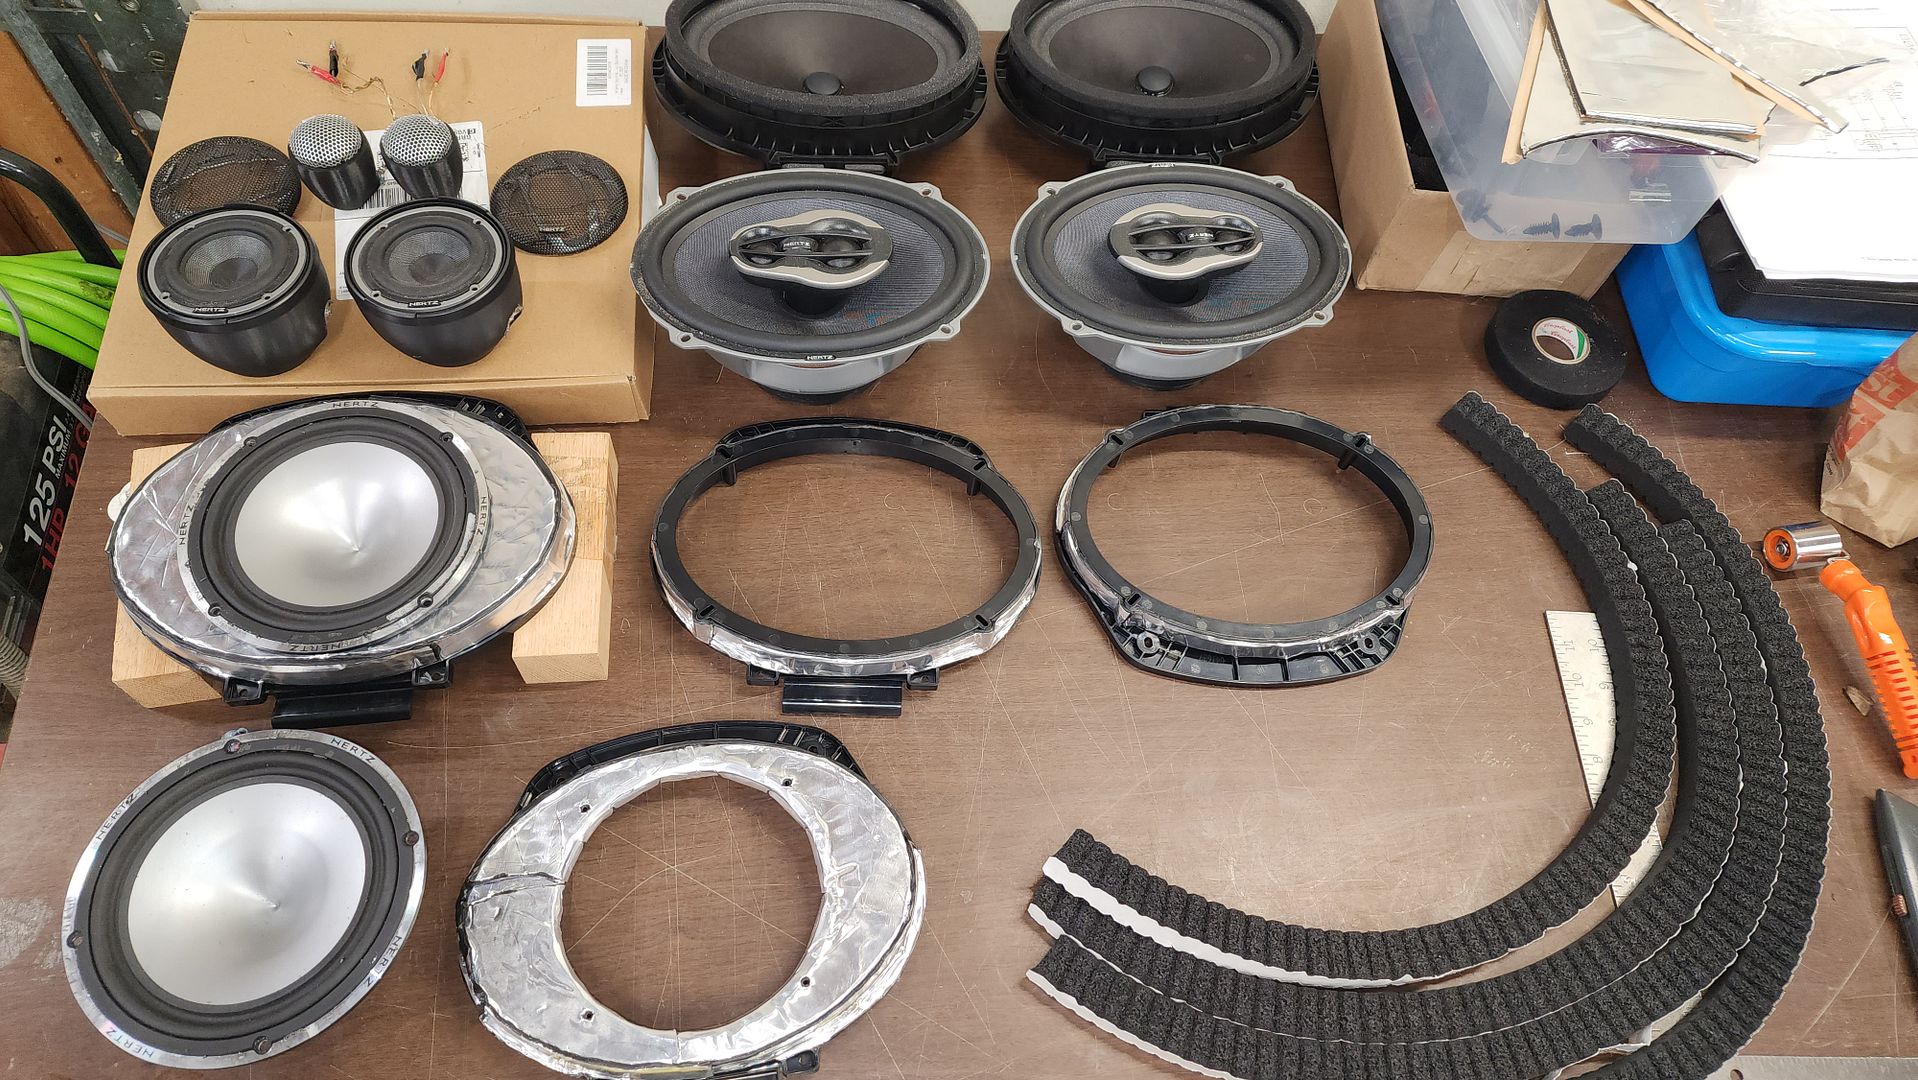
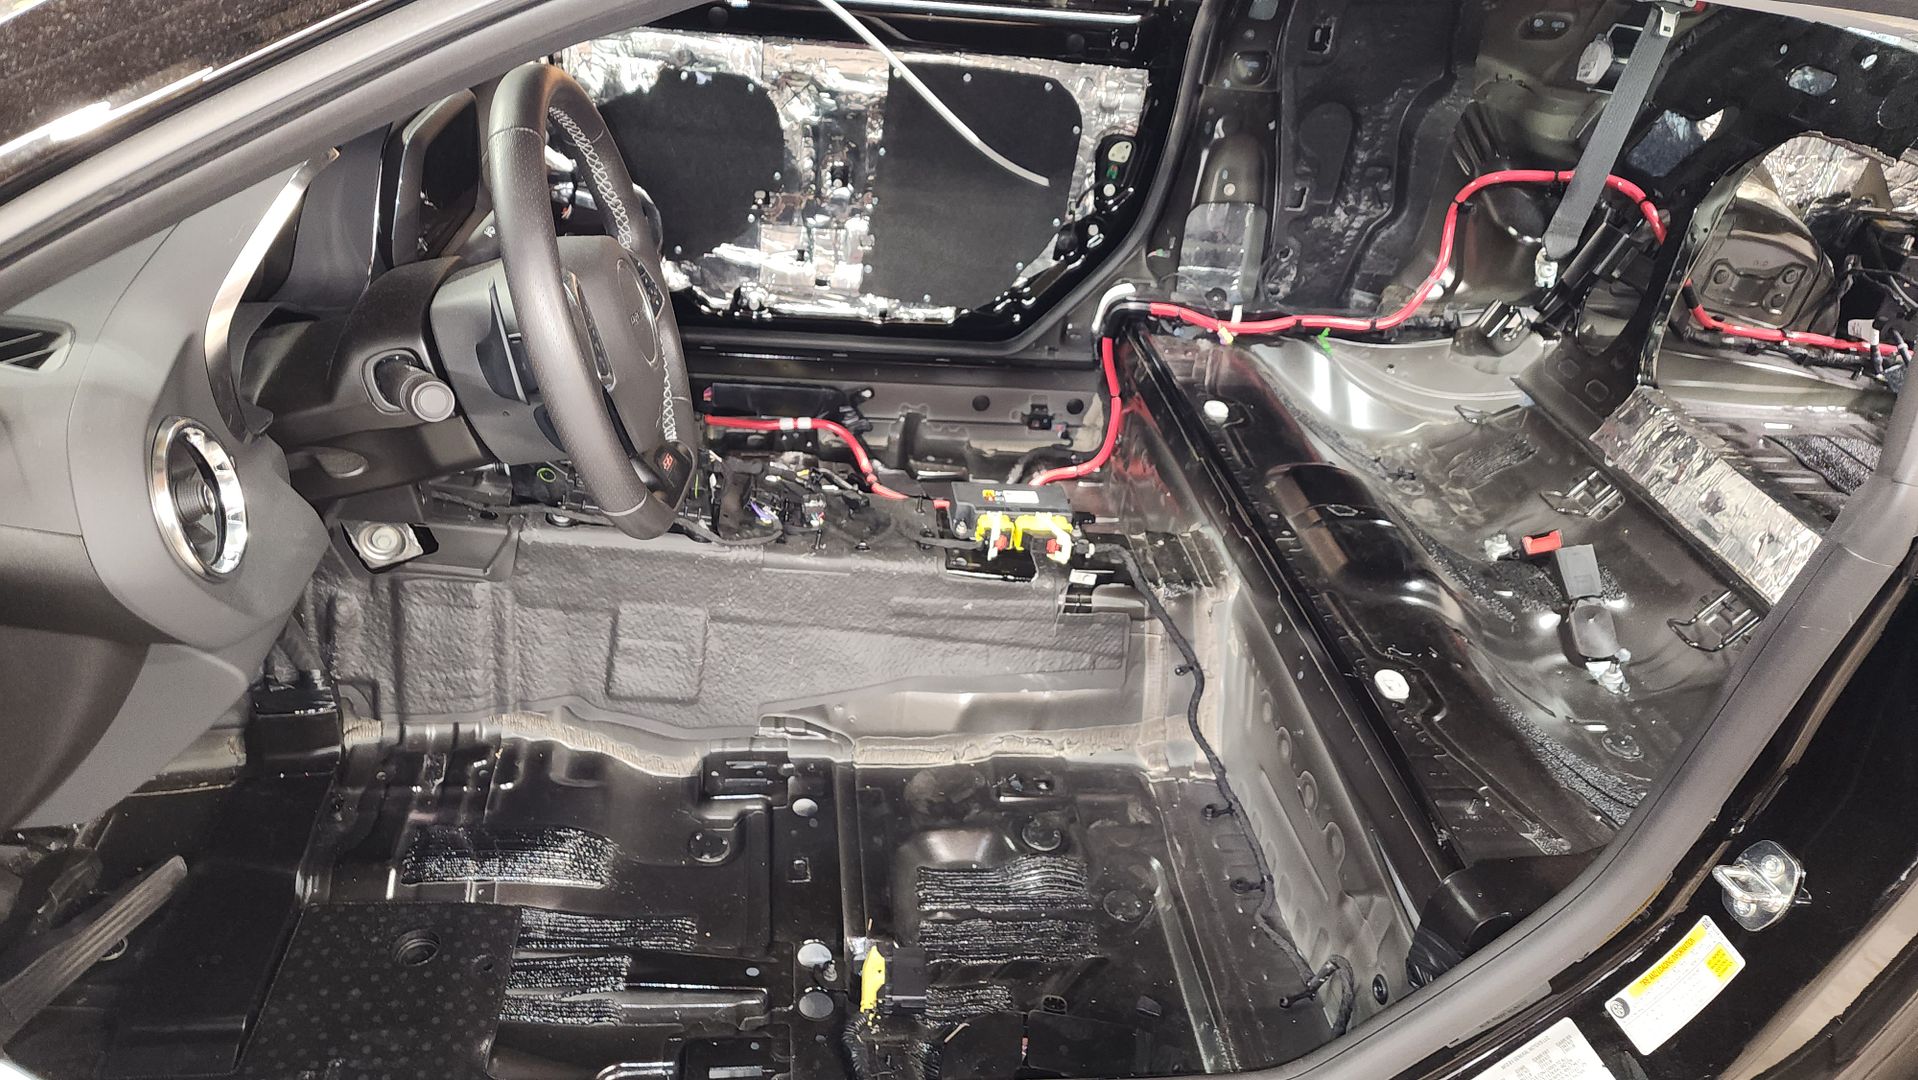
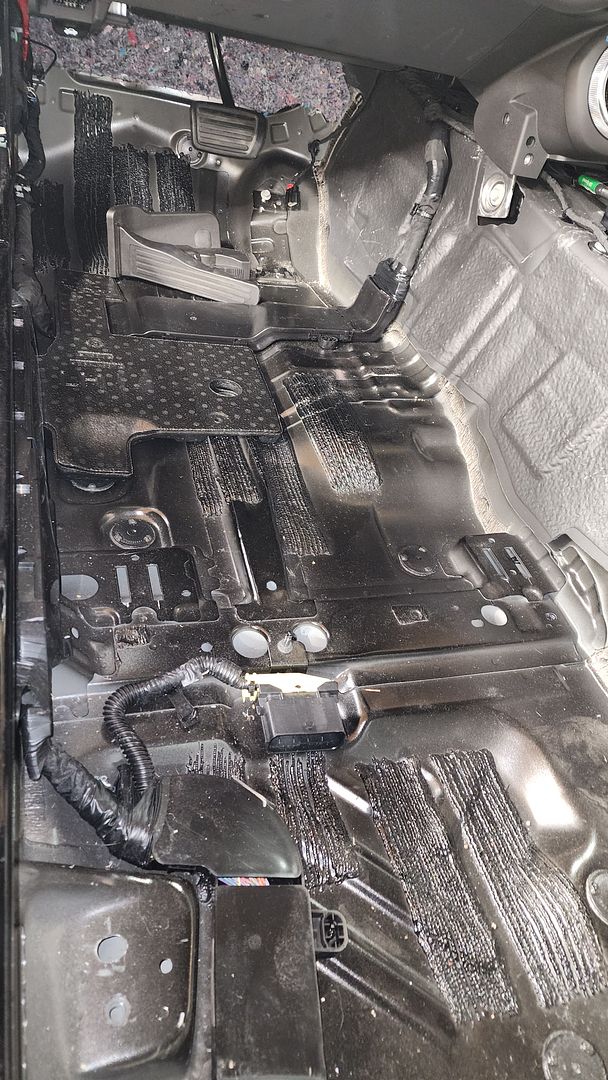
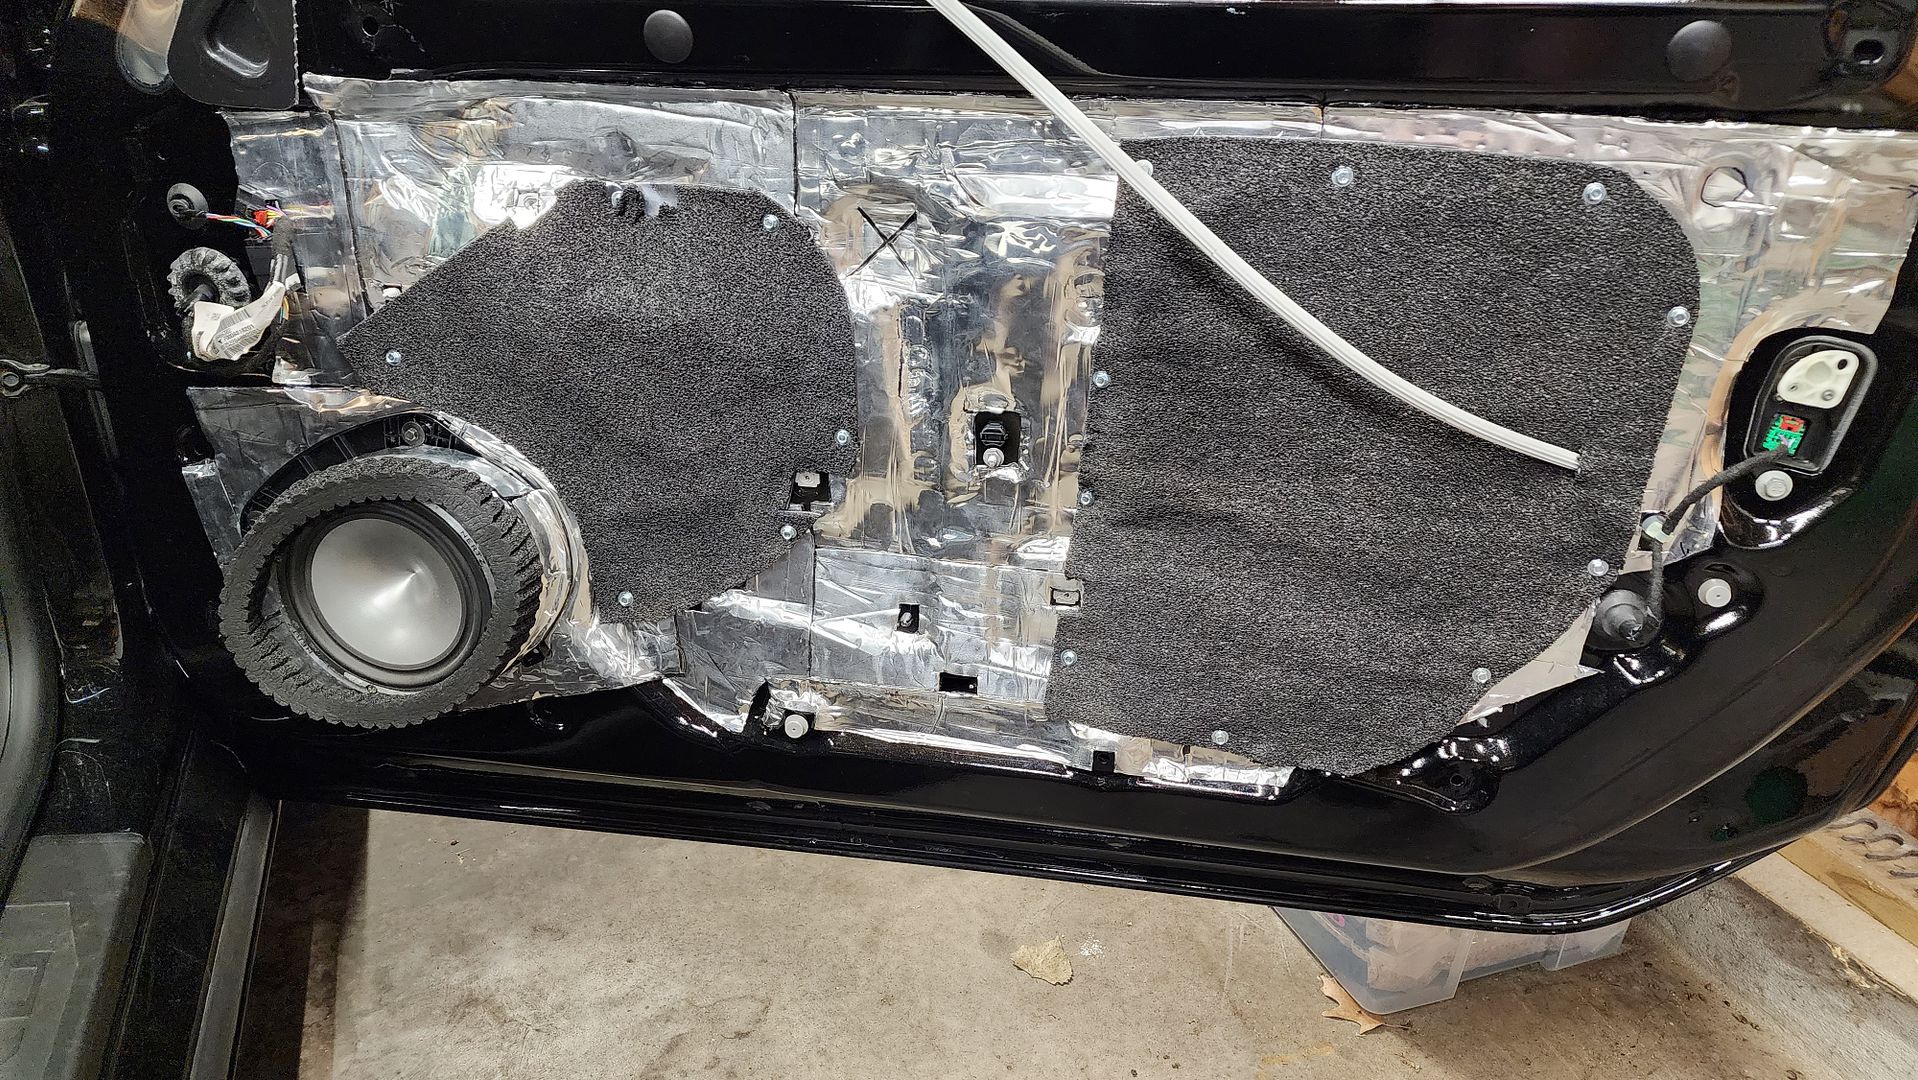
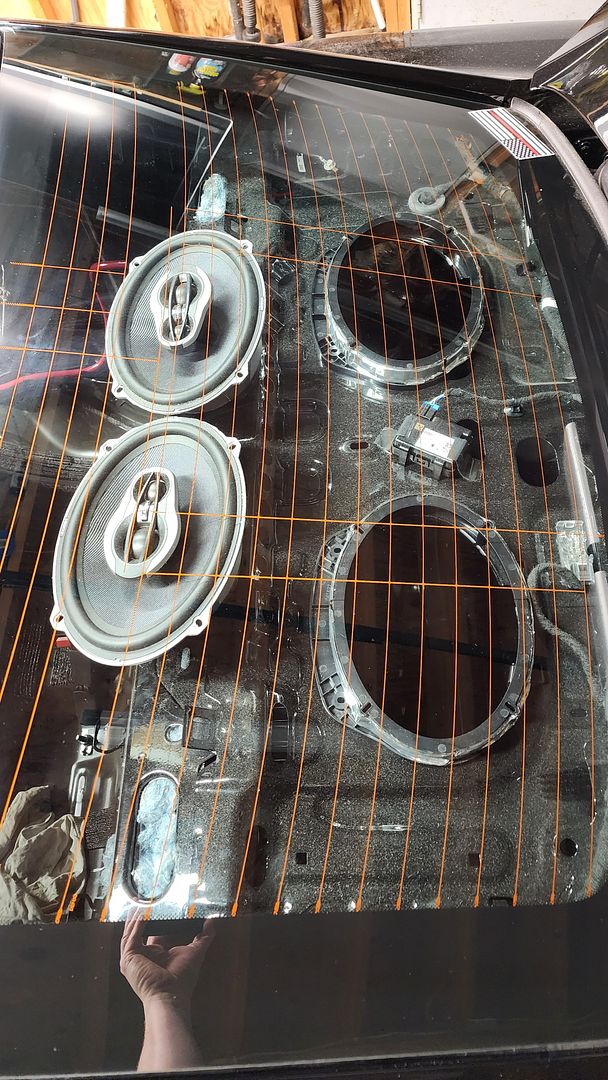
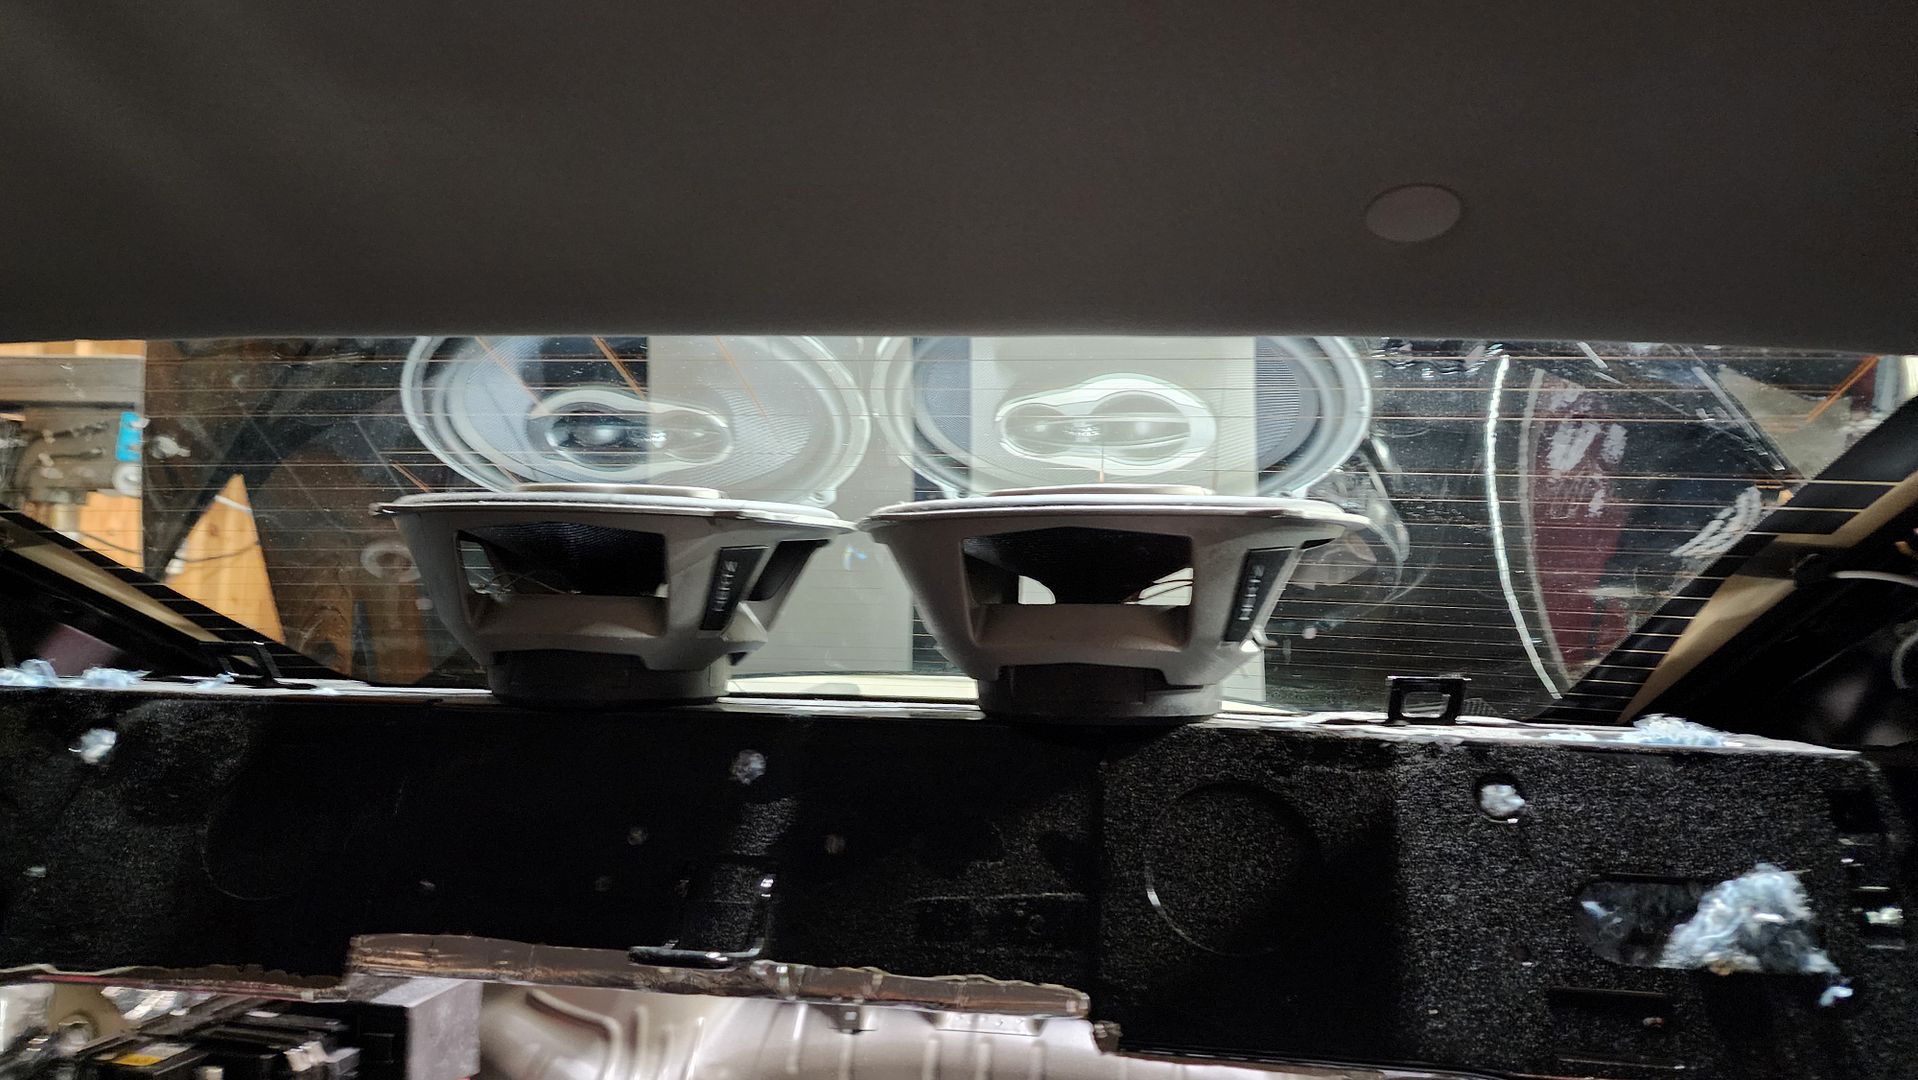
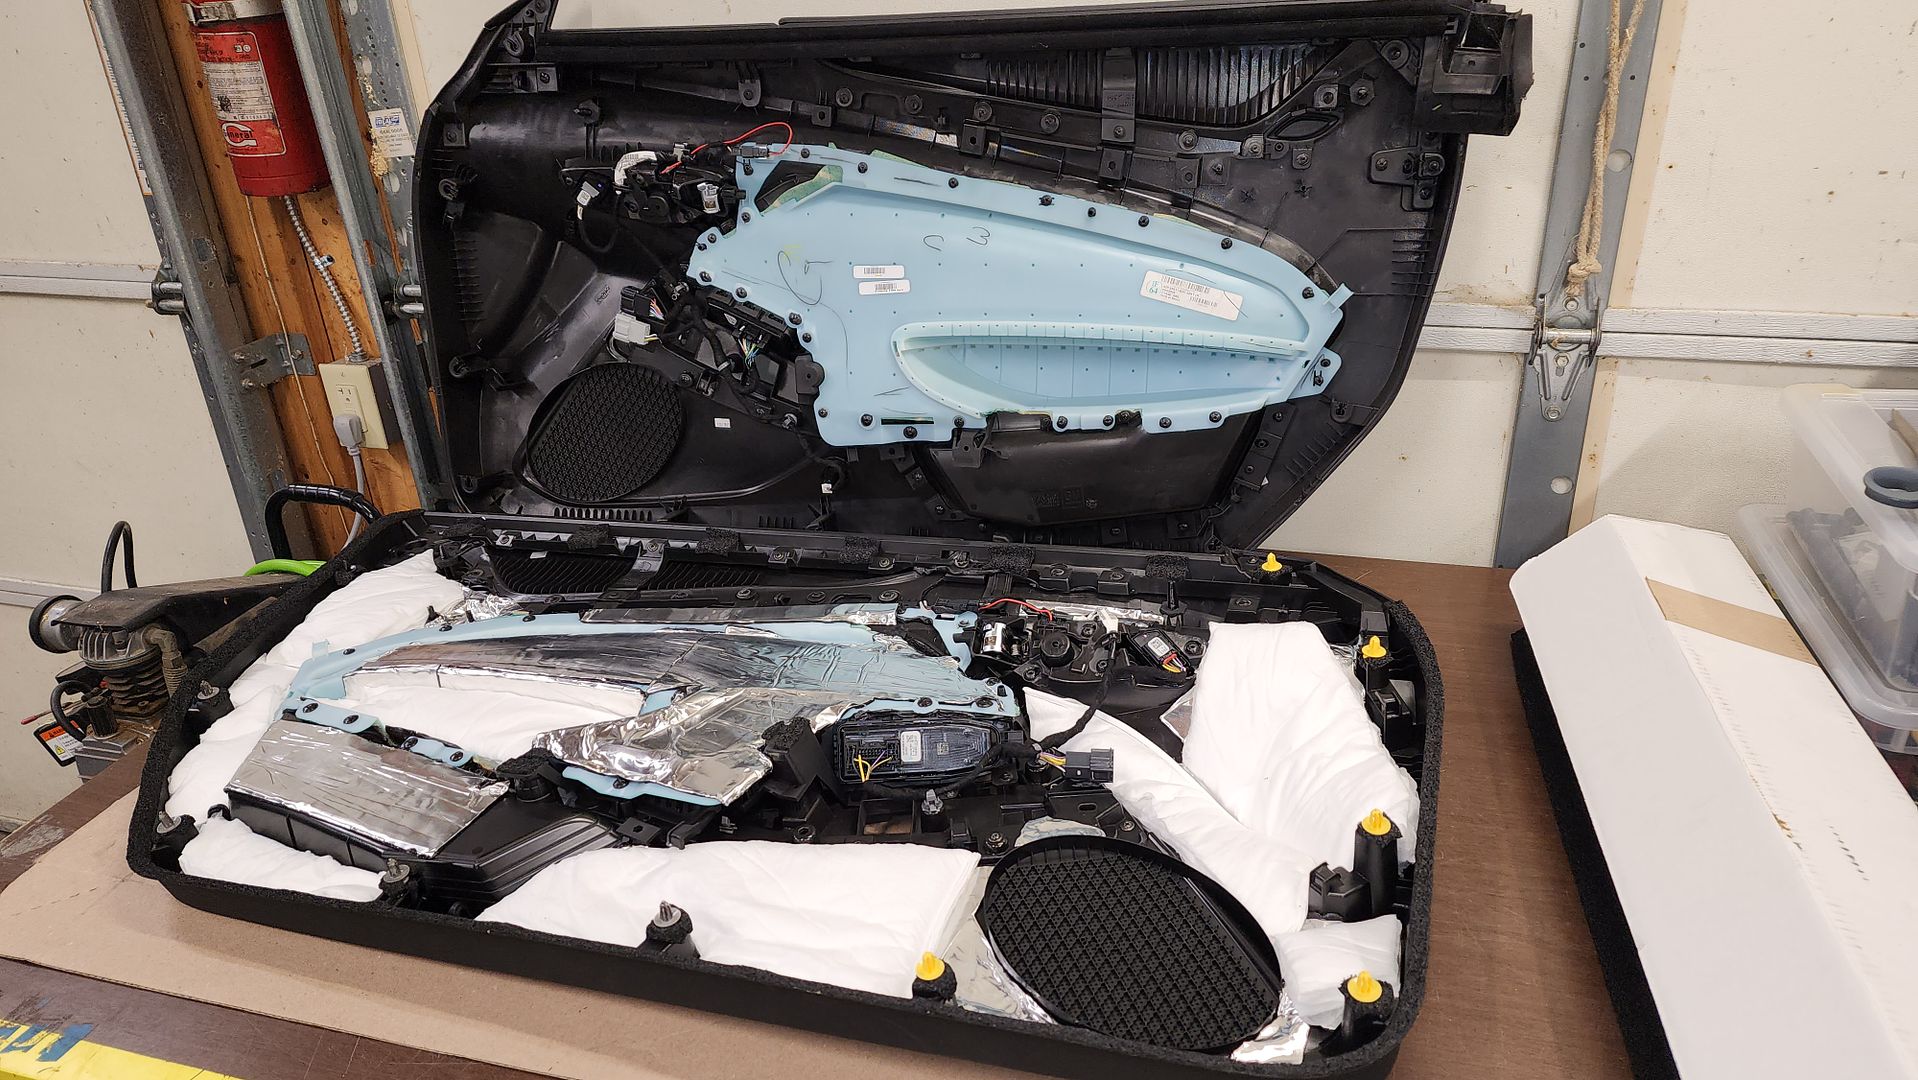
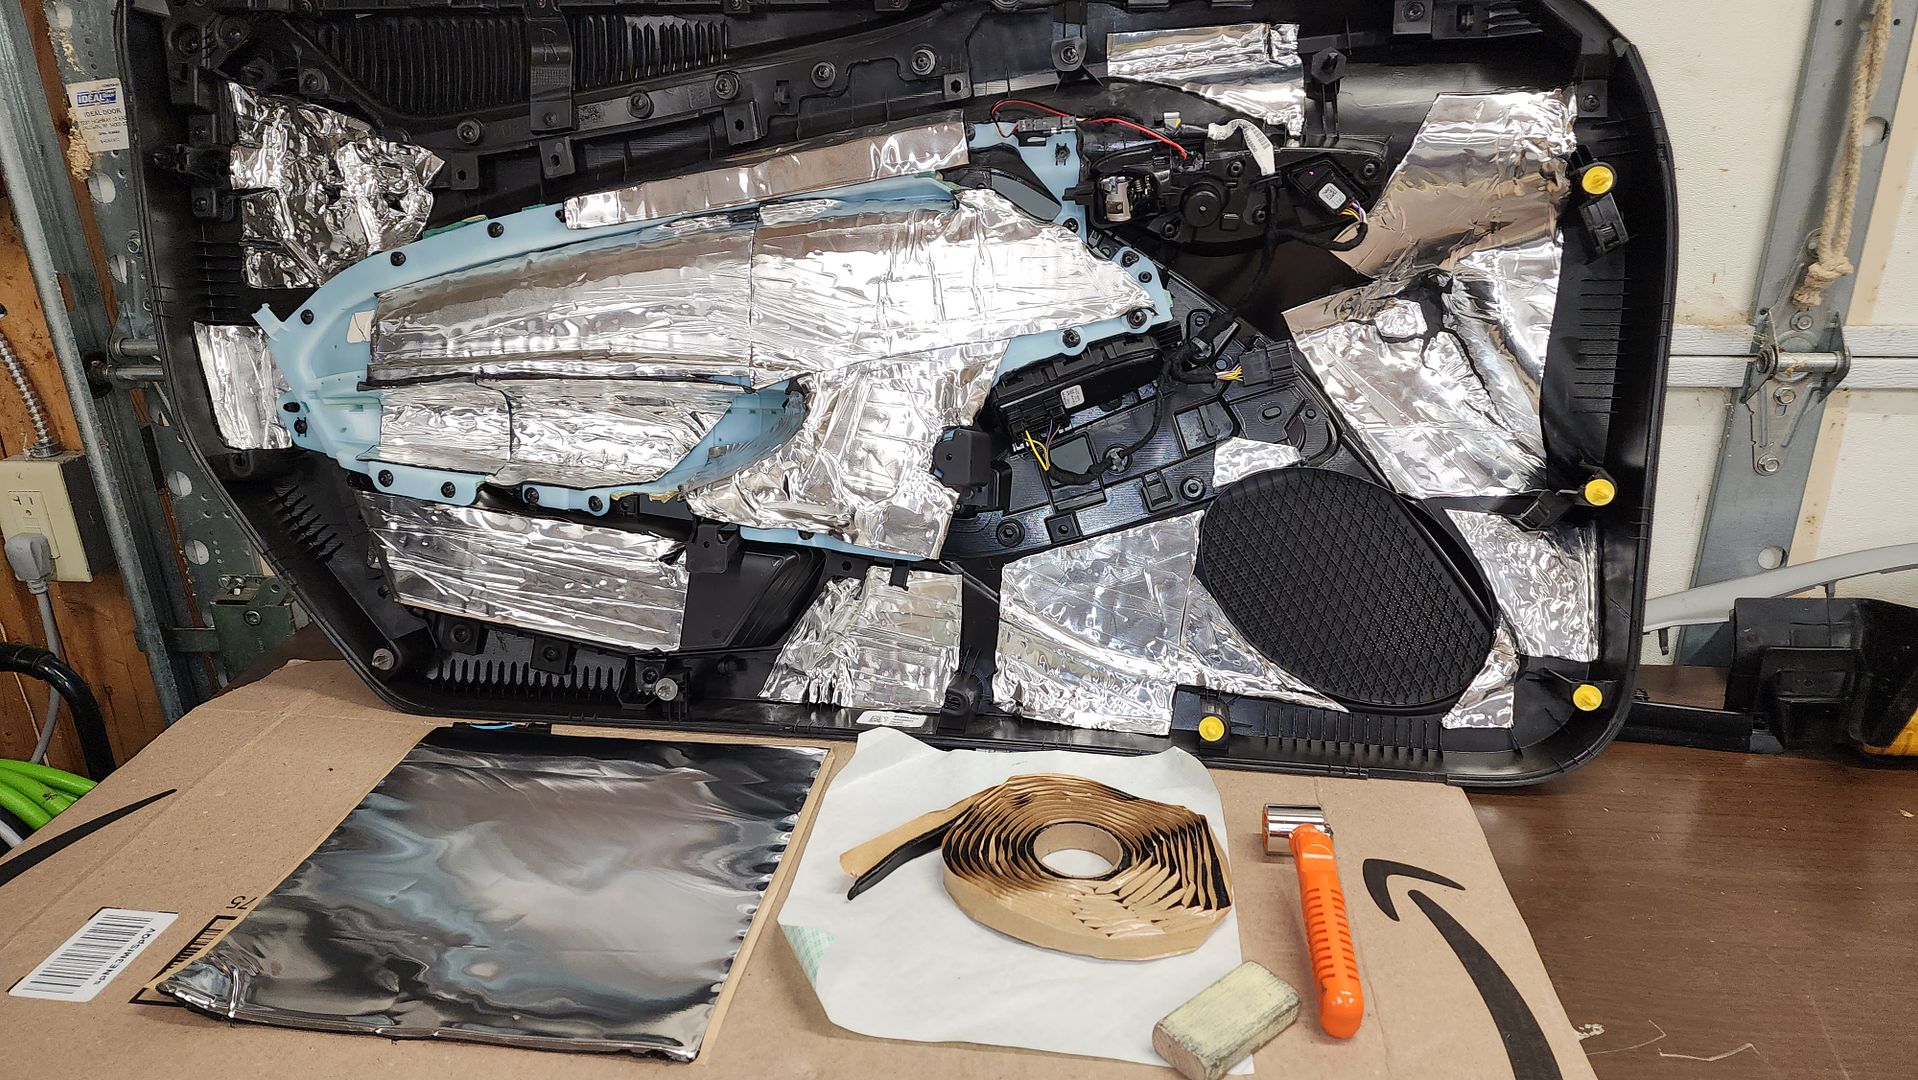
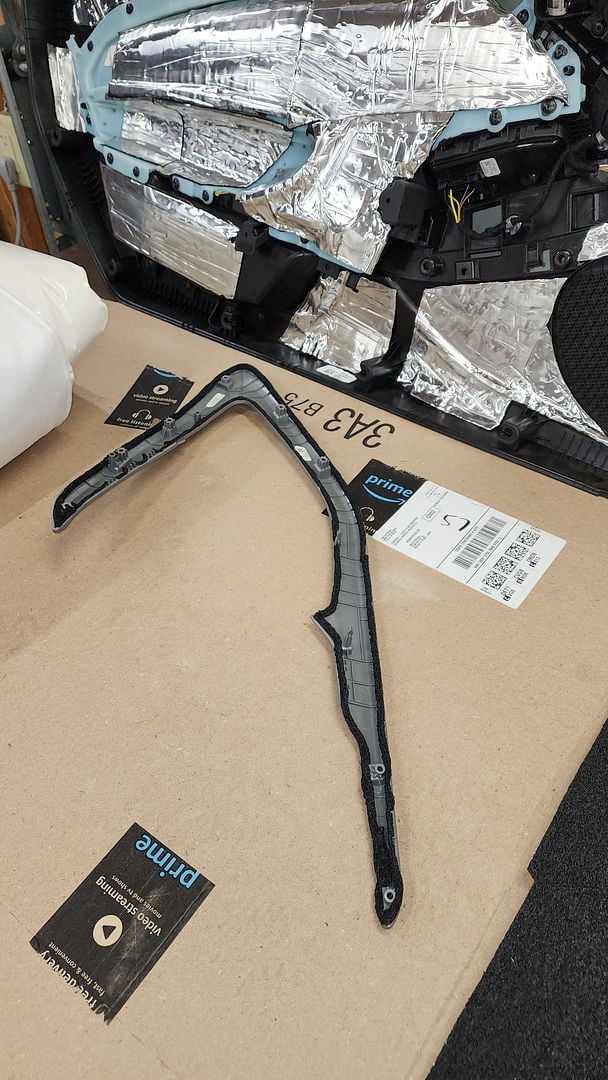
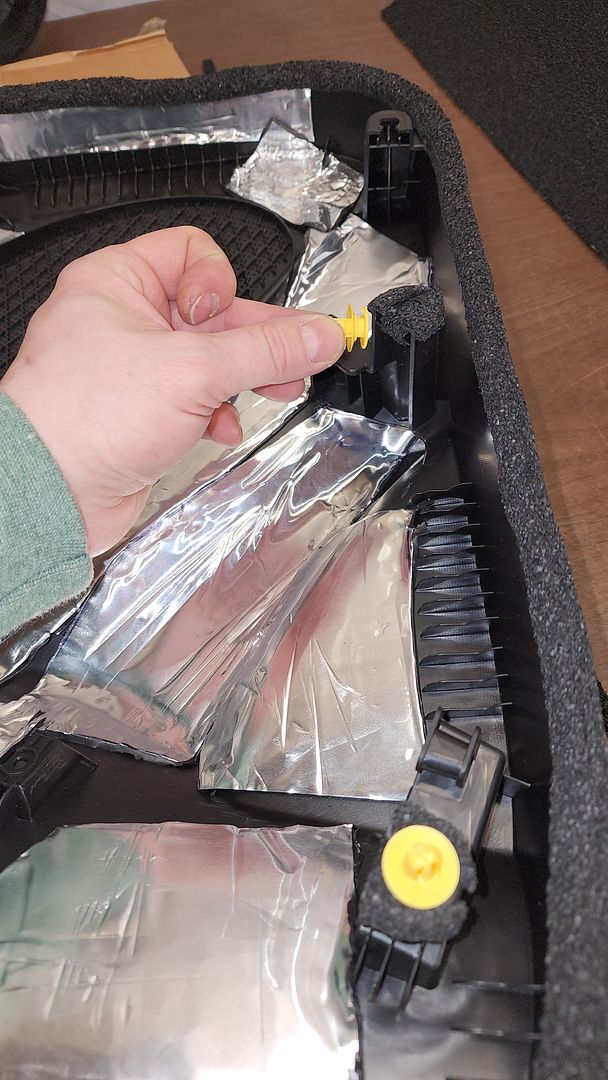
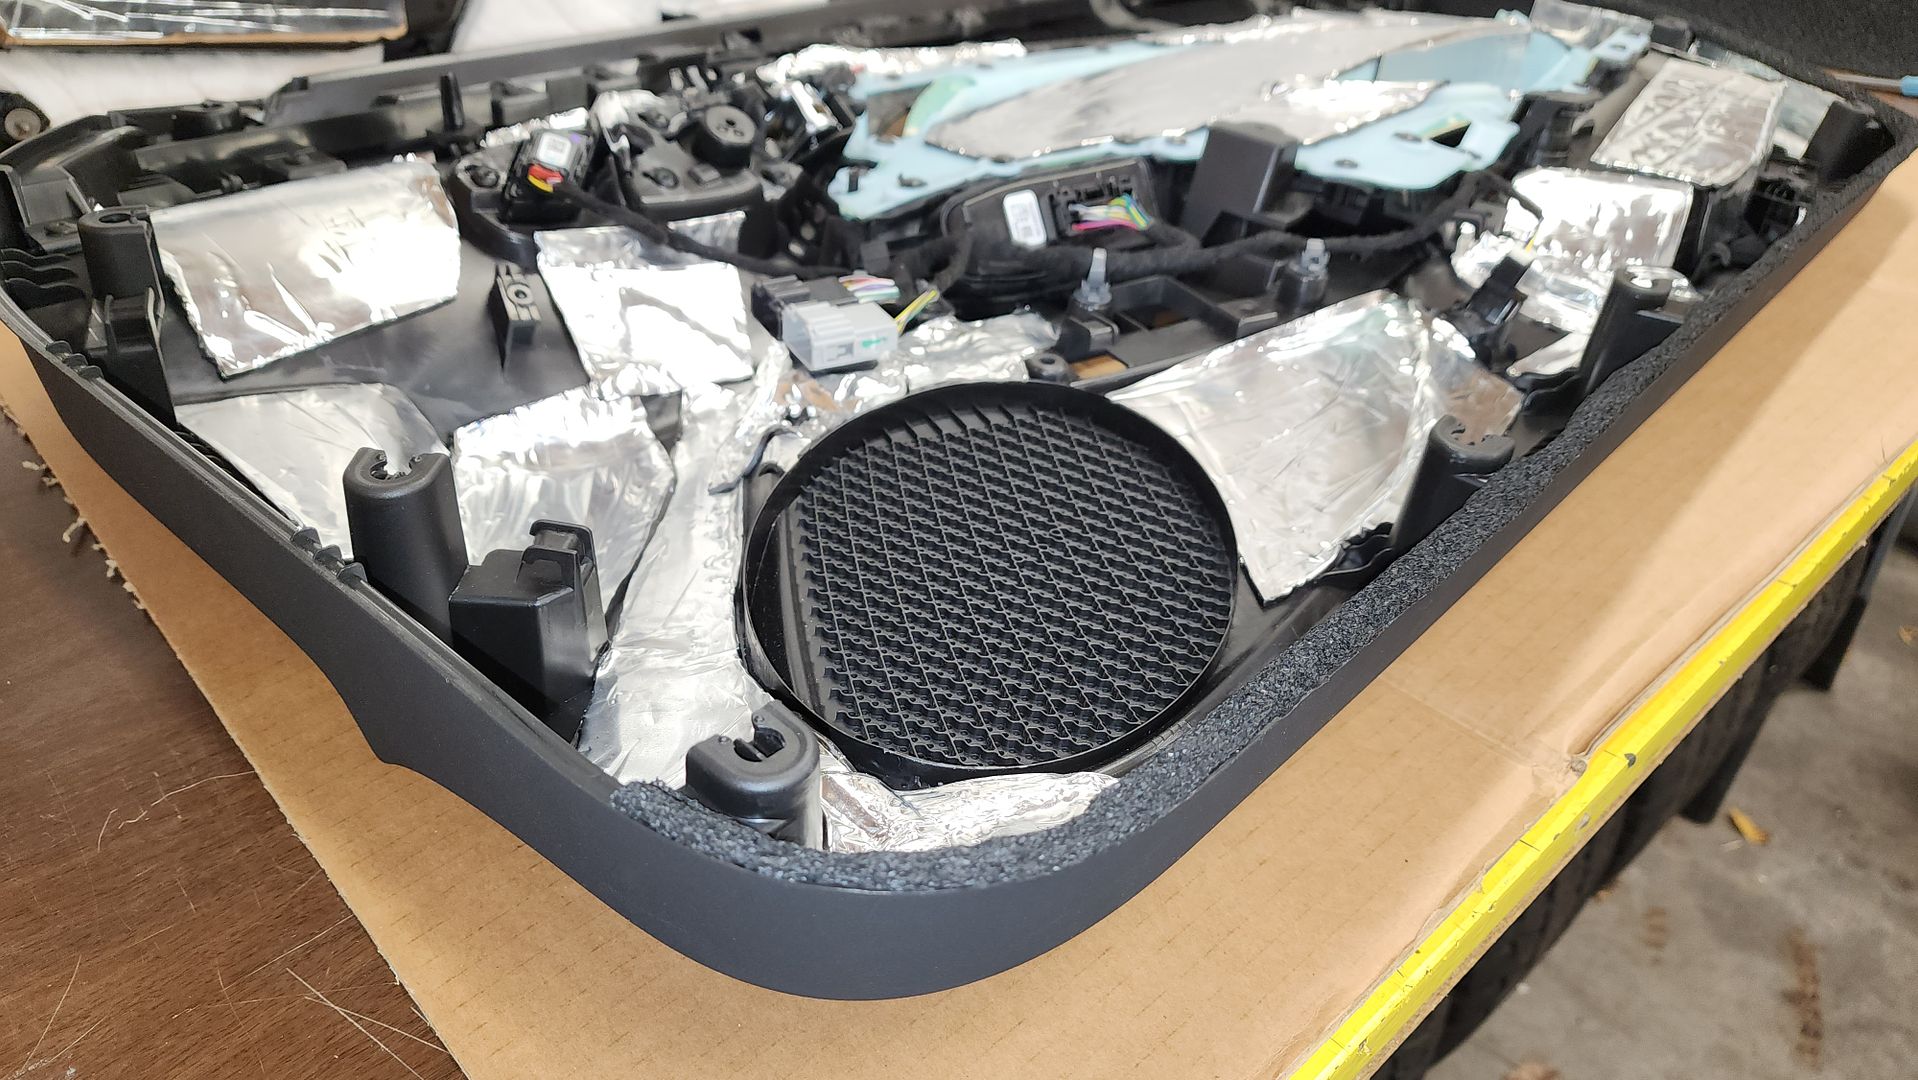
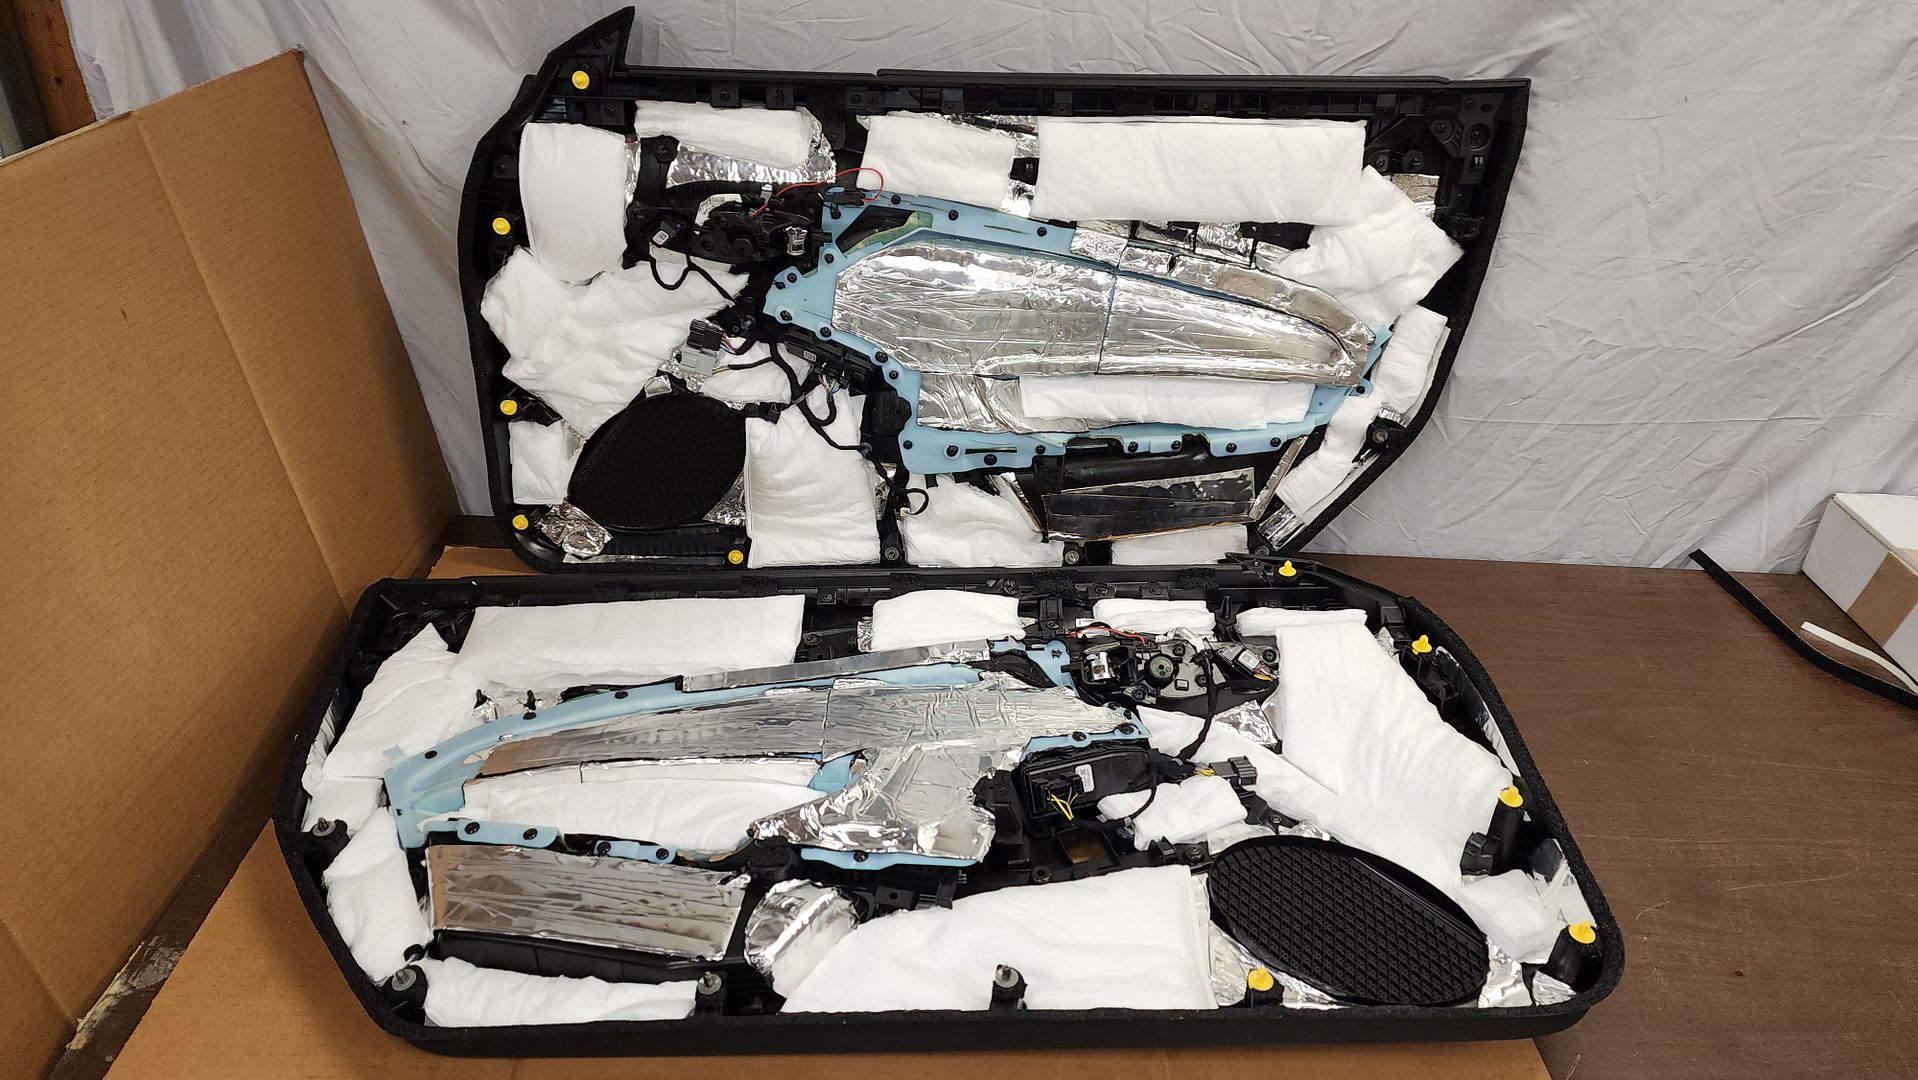
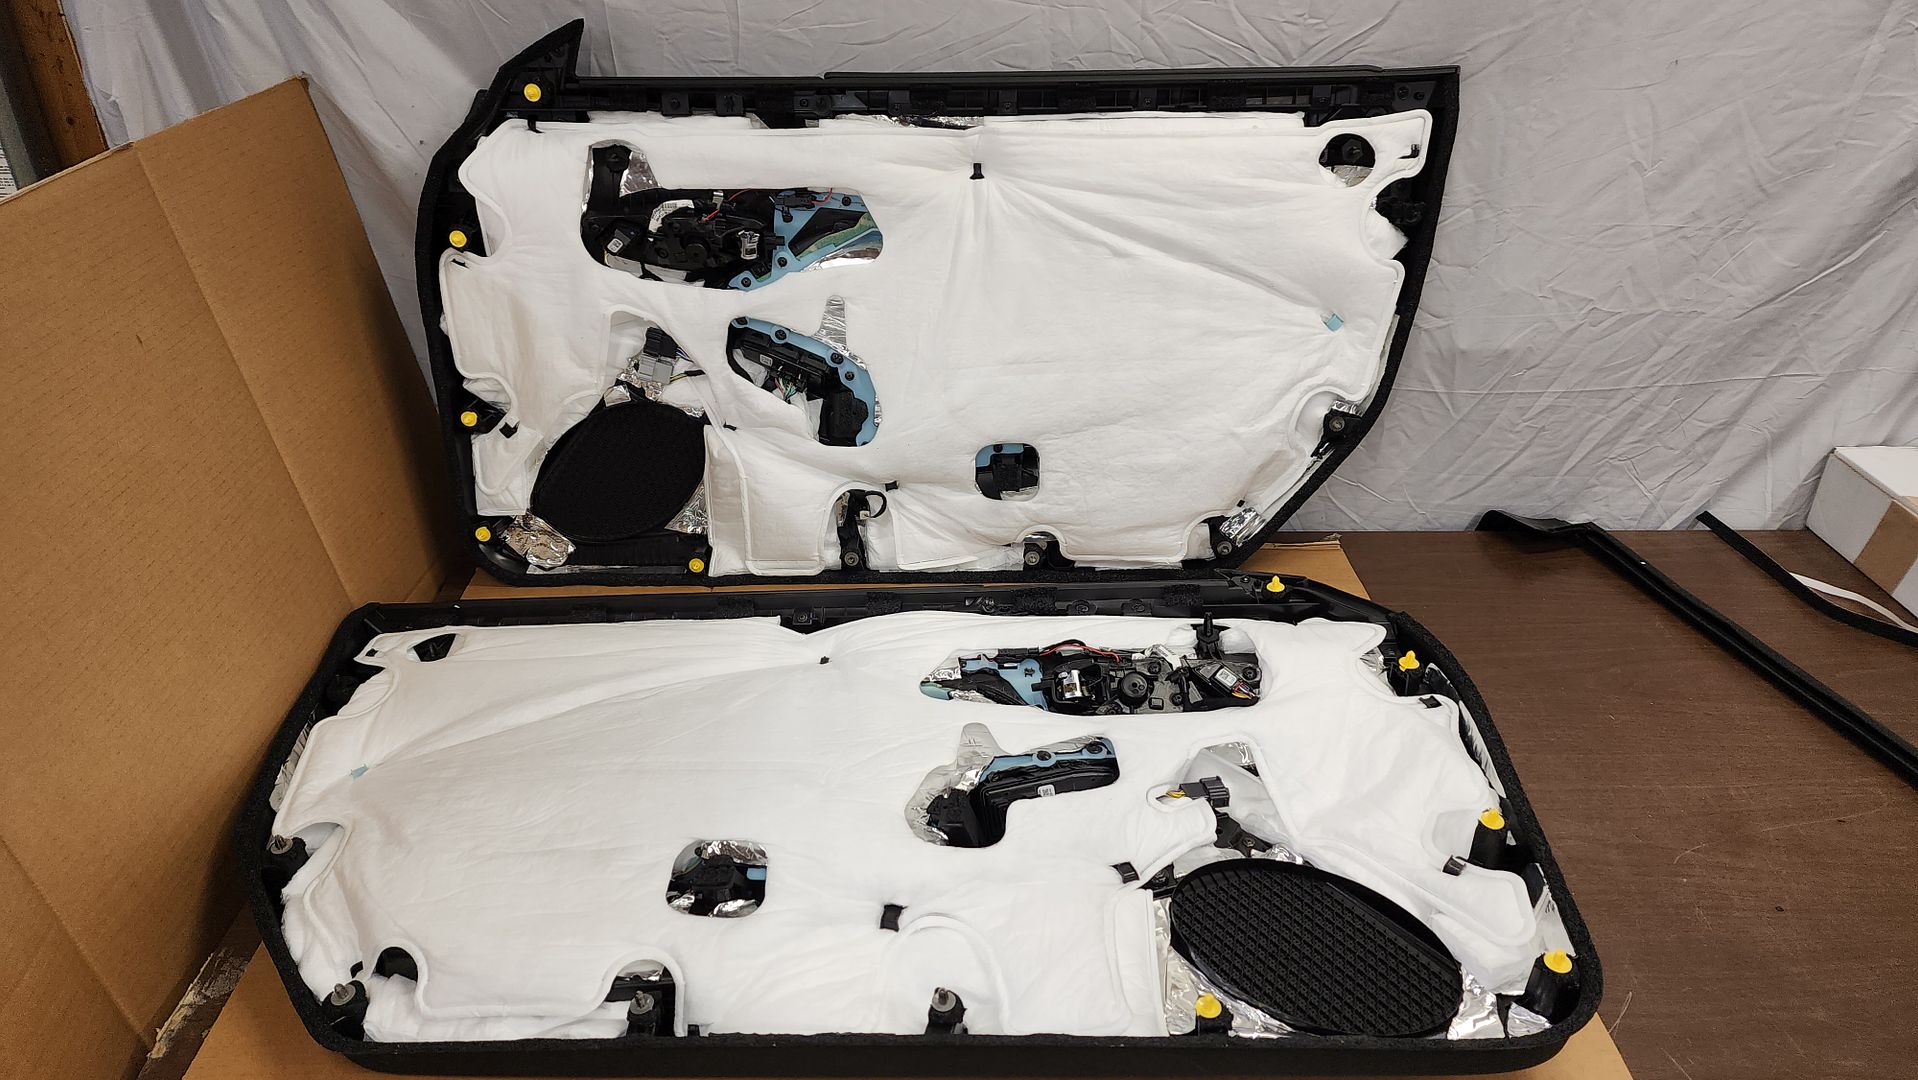
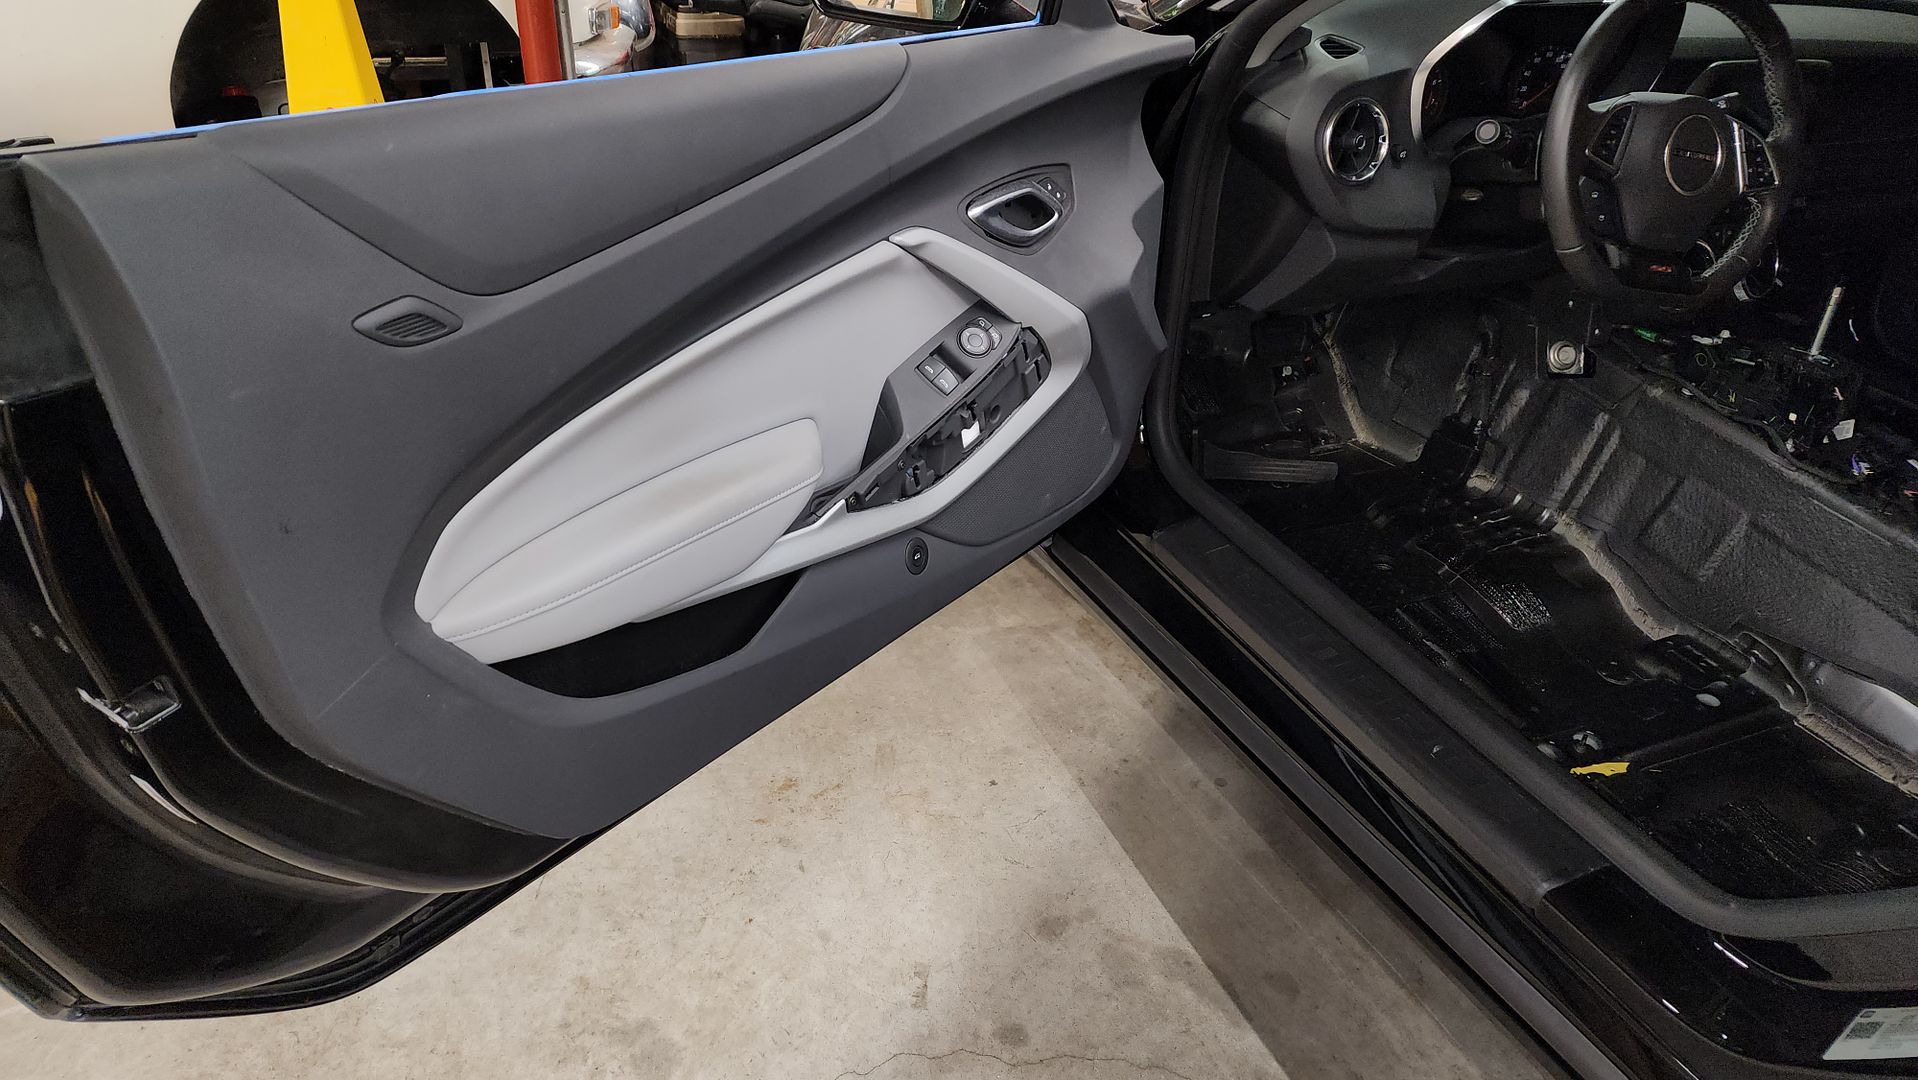
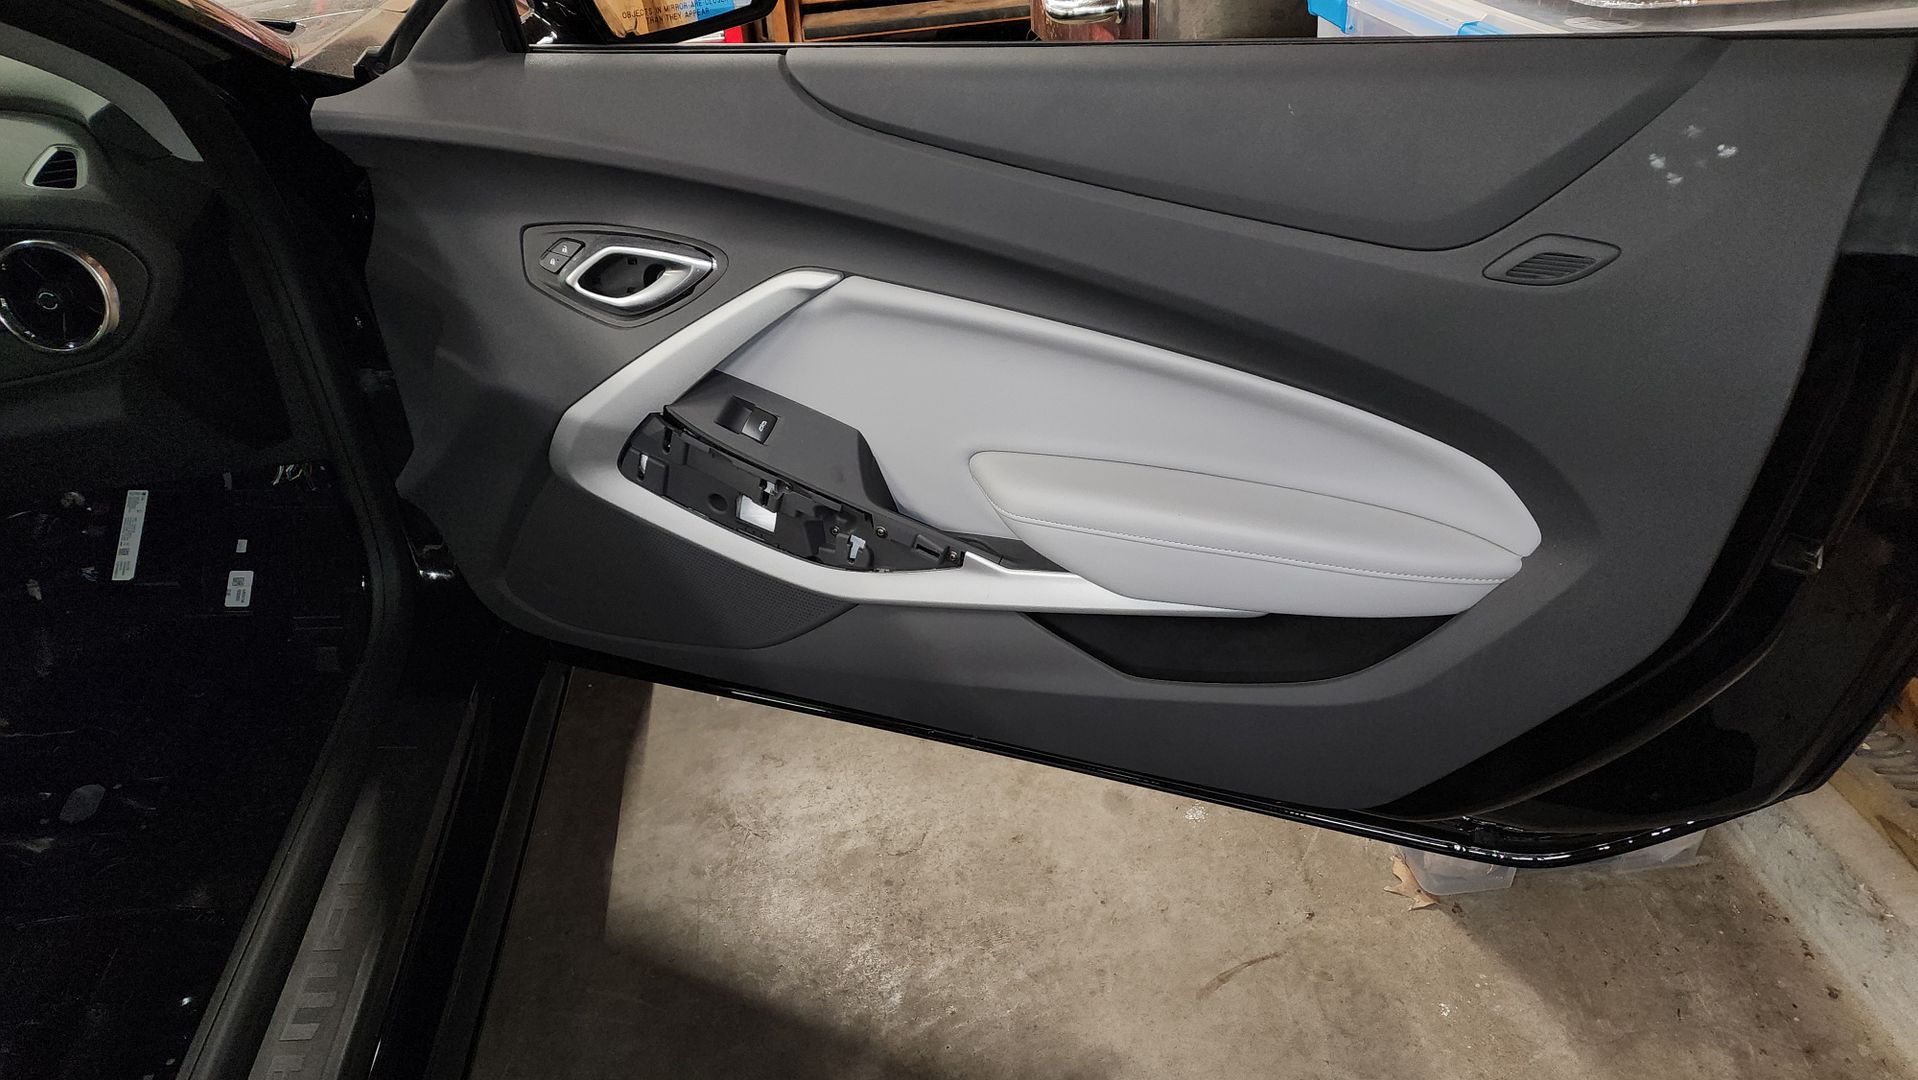
FEATURED KHA 2023 SS Camaro - SQ Build Log

Been busy, but made a bit more progress getting the front door midbass speakers installed. Used 6-32 bolts and nylon locking nuts and washers, all stainless steel.

Gasketing options, I choose what makes the most sense for the application.
20230928_175137.jpg


20230928_175143.jpg


Ready for mounting to the door:
20230928_180234.jpg
 
Finshed a layer of Resonix CLD on the inner door skin, and then used Resonix Moldable Barrier to close up the openings. Using the barrier was a joy compared to my traditional methods of aluminum sheets with CLD and CCF.

20230914_200747.jpg


20230914_200807.jpg


20230914_200827.jpg


20230914_205331.jpg


20230914_211645.jpg


20230914_213546.jpg
Im still seeing everyone with more hair on theyre head than me these days. I TELL YA..LOL. Looks fantastic man. Always to detail on your vehicle builds.
 
Almost done with the door speaker brackets, they weigh about 10x as much now and are acoustically dead. Just need fasteners, will be using 6-32 bolts. This is also a view of the drivers being used. Hertz is my go-to speaker manufacturer and what we have here is a ML28 tweeter, HL70 midrange, and ML165 woofer for a front 3-way. The HCX-690 will go in the rear deck but will be turned off for windows-up SQ listening with an excellent sound stage, and the rear 6x9 will be engaged for windows-down louder listening without a focus on a sound stage. I'm excited to hear what the rears can do when they are that close to the rear glass. The challenge is that I'll need to build enclosures for the rear deck speakers so the subwoofer doesn't manipulate them. It's a lot of work for something that will usually just be off.

20230917_235309_bPoXLeBW5jaYjysjwuQaVb.jpg


Ready to start treating the floor:
20230917_234121_iMn9dcBqGRCUR24UBpStiE.jpg


20230917_234131_oYXM28C4AeDqcmEzTShG2z.jpg
Its Deff. a must to seal those rear deck speakers off if a subwoofer is used in trunk space. I learned my lesson years ago damaging two sets before I figured it out. It didnt take long for them to xmax and become damaged and distorted. I ended up using 1/2" plywood and encased them and never had an issue afterwards. I Flex Stoned them later on to match the color scheme at that time and turned out very nice and they sounded great!
 
Ordered new clips to replace the stock clips that aren't in good shape (some appear to be single-use).
20230930_181220.jpg


Tessa tape on the connectors and wiring and sealant on the back of the adapter.
20230930_182356.jpg


20230930_185015.jpg


end result
20230930_183754.jpg


20230930_185134.jpg


The rear deck is so tight, you cannot fit a useful speaker back there. If these are going to be in the rear deck, it will have to be from below. I haven't decided yet if they are even worth the effort, but the nice thing about mount from below is that I don't have to make my mind up now, I just need to prepare it. I have some stainless thumb-turn screws that I can embed into the mount, so I won't need access to the top of the bracket.

20230930_190317.jpg


20230930_190250.jpg
 
The doors are finally done and reassembled!

The door panels require a lot of attention to detail in order to be acoustically dead. I spent about 2 hours per door panel.

Before vs After
20231018_212354.jpg


I used Resonix CLD, Butyl Rope, thin CCF, and Fibermat 45. Start by cleaning the panel off then removing necessary items to identify gaps and parts/pieces that require Butyl Rope. Stuff the Butyl Rope by first removing sections then warming/stretching to make it pliable then stuff it into the gaps. This is tedious, but is an important step to prevent rattles/buzzing from those annoying plastic parts. This works well around loose connectors as well.

Then apply CLD by using the largest pieces you can manage. Lots of small pieces aren’t effective, so just stick to the large areas. Be creative and use paper to build templates, these areas are weird.

20231009_223000.jpg


Next, cut the CCF into thin strips and apply to the parts and pieces you removed to keep them from buzzing. Then you can also do any mating surfaces with the door metal itself. Lastly, foam the door clip locations as they can buzz/rattle in the door.

20231018_185529.jpg


20231018_190702.jpg


20231019_233053.jpg


20231019_231938.jpg


20231019_233100.jpg
 
Now you’re ready for Fibermat. This is fairly easy but tedious as well. Fit as much as you can before putting the factory sound absorption back over. Templates work very well here, as do large/sharp scissors. When you’re dealing with interior pieces, you need to carefully pull the adhesive away from the rear layer by rolling it with your fingers in a corner, otherwise you’ll just pull the whole adhesive layer off.

20231018_193833.jpg


20231018_194639.jpg


20231020_002231.jpg


20231020_002234.jpg


20231020_002225.jpg


20231020_003347.jpg


You’re now ready for reinstallation. The upper door molding clips are a PITA. They actually clip onto the door metal then the weatherstripping falls onto them. You have to align them with the door panel holes, which is made easier with a strip of masking tape to mark the hole locations then transfer to the door panel. This was the most annoying part of the whole process.

20231020_014111.jpg


20231020_013351.jpg


It’s also helpful to do a quick test fit and then check your speaker gasket foam for an indentation, it should have a clear and clean mark where the door panel plastic fits against the foam.

20231018_210342.jpg


With the door panels installed, a major milestone has been hit.
 
Once the doors were done, it was time to focus on the floor. The floor in these vehicles is pretty stiff, thanks to the awesome chassis, but all metal is resonant.

20231020_205417.jpg


20231020_205406.jpg


I plan on using the Resonix Barrier to build covers for the front kick panel openings as that is a source of tire noise. I will stuff Fibermat inside those cavities as well.

I lifted the wiring channels up off the floor to gain access, a bungee cord worked well.

20231020_215957.jpg


I even foamed under the Styrofoam blocking to prevent any squeaking. The Resonix CCF is awesome to work with.

20231020_222715.jpg


With the floors treated, the cabin is much less resonant.

20231024_002209.jpg


20231024_002152.jpg


This process will continue throughout the rear of the vehicle.
 
God damn man, how much you charge to do this on someone's vehicle?

Matt

If you look at the 2011 Scion tC, that was a similar build that i did for a buddy, 200 sq.ft. of deadener in that car made it crazy quiet. I don't do builds like this for just anyone, only for close friends that come hang out with me, and then it's pretty much two guys hanging out, having fun. When I am hired for jobs, my hourly rate depends on the actual task and travel requirements, usually between $20-45/hr. Overall, I anticipate I'll have 200 hours in this car when it's "done".

My Camaro has been sitting in my detached garage since I took it apart. As a result, it's a bit annoying that I haven't had more time to execute faster, thus letting me drive the thing! Clock is ticking, though. Winter is coming and plastic interior panels don't like being manipulated when they are cold.
 
For most of the past year, my expectation is that I was going to install the Hertz HCX690 coaxial speakers in the rear deck of the Camaro. I’ve been excited about these, as they are the best sounding coaxial speakers I’ve heard. However, this car does not lend itself to a rear speaker installation given the very short distance between glass and deck. With the rear glass removed, it’s possible to do an awesome install. Installation from below is complicated by a lack of access to one screw hole and a lip that prevents proper mating to the mounting adapter.

20231026_175548.jpg


20231026_190327.jpg


So this effort included Resonix CLD on the rear deck cover, which doubled the weight. I then applied Resonix Fibermat45 and CL3 CCF gasketing,

20231026_194541.jpg


I used the factory jute sound absorption as a template, then cut the Fibermat45 accordingly.

20231026_204406.jpg


You have to consider the visible effects of products behind a speaker grill, here you can see white fibermat, before I added black CCF

20231026_210219.jpg

20231026_210932.jpg


With the black CCF, the exterior view will be clean:

20231026_211009.jpg


After the fibermat45, I added the thin CCF from Resonix to create a soft surface to isolate any possible buzzes or rattles against the metal framing.

20231026_213511.jpg


Lastly, we also need to close up the rear speaker holes, and Resonix Barrier is perfect for this application. So I cut CLD strips to adhere the edges of the Barrier to the metal, which is also held down by the Fibermat45.

20231026_214552.jpg
 
Activity
No one is currently typing a reply...

Similar threads

Could not tell you, but you may want to start by going to crutchfield and get a consensus on the 7 or so replacements they recommend. That average...
1
647
Ok so I started my install . I am doing it in stages so I am not without music for a week or two . I started by building and mounting the Amp...
2
956
Crutchfield can tell you what speaker will fit your car. for subs, Image Dynamics and Adire are still around. my last sub i bought was from...
3
796

About this thread

keep_hope_alive

Premium Member
Acoustics Engineer
Thread starter
keep_hope_alive
Joined
Location
Quad Cities, IL
Start date
Participants
Who Replied
Replies
40
Views
5,399
Last reply date
Last reply from
keep_hope_alive
pattern-wavelength.jpg

winkychevelle

    Apr 27, 2024
  • 0
  • 0
20221010_113336 (5).jpg

audiobaun

    Apr 27, 2024
  • 0
  • 0

Latest topics

Top