FEATURED KHA 2023 SS Camaro - SQ Build Log

keep_hope_alive
Premium Member

Acoustics Engineer
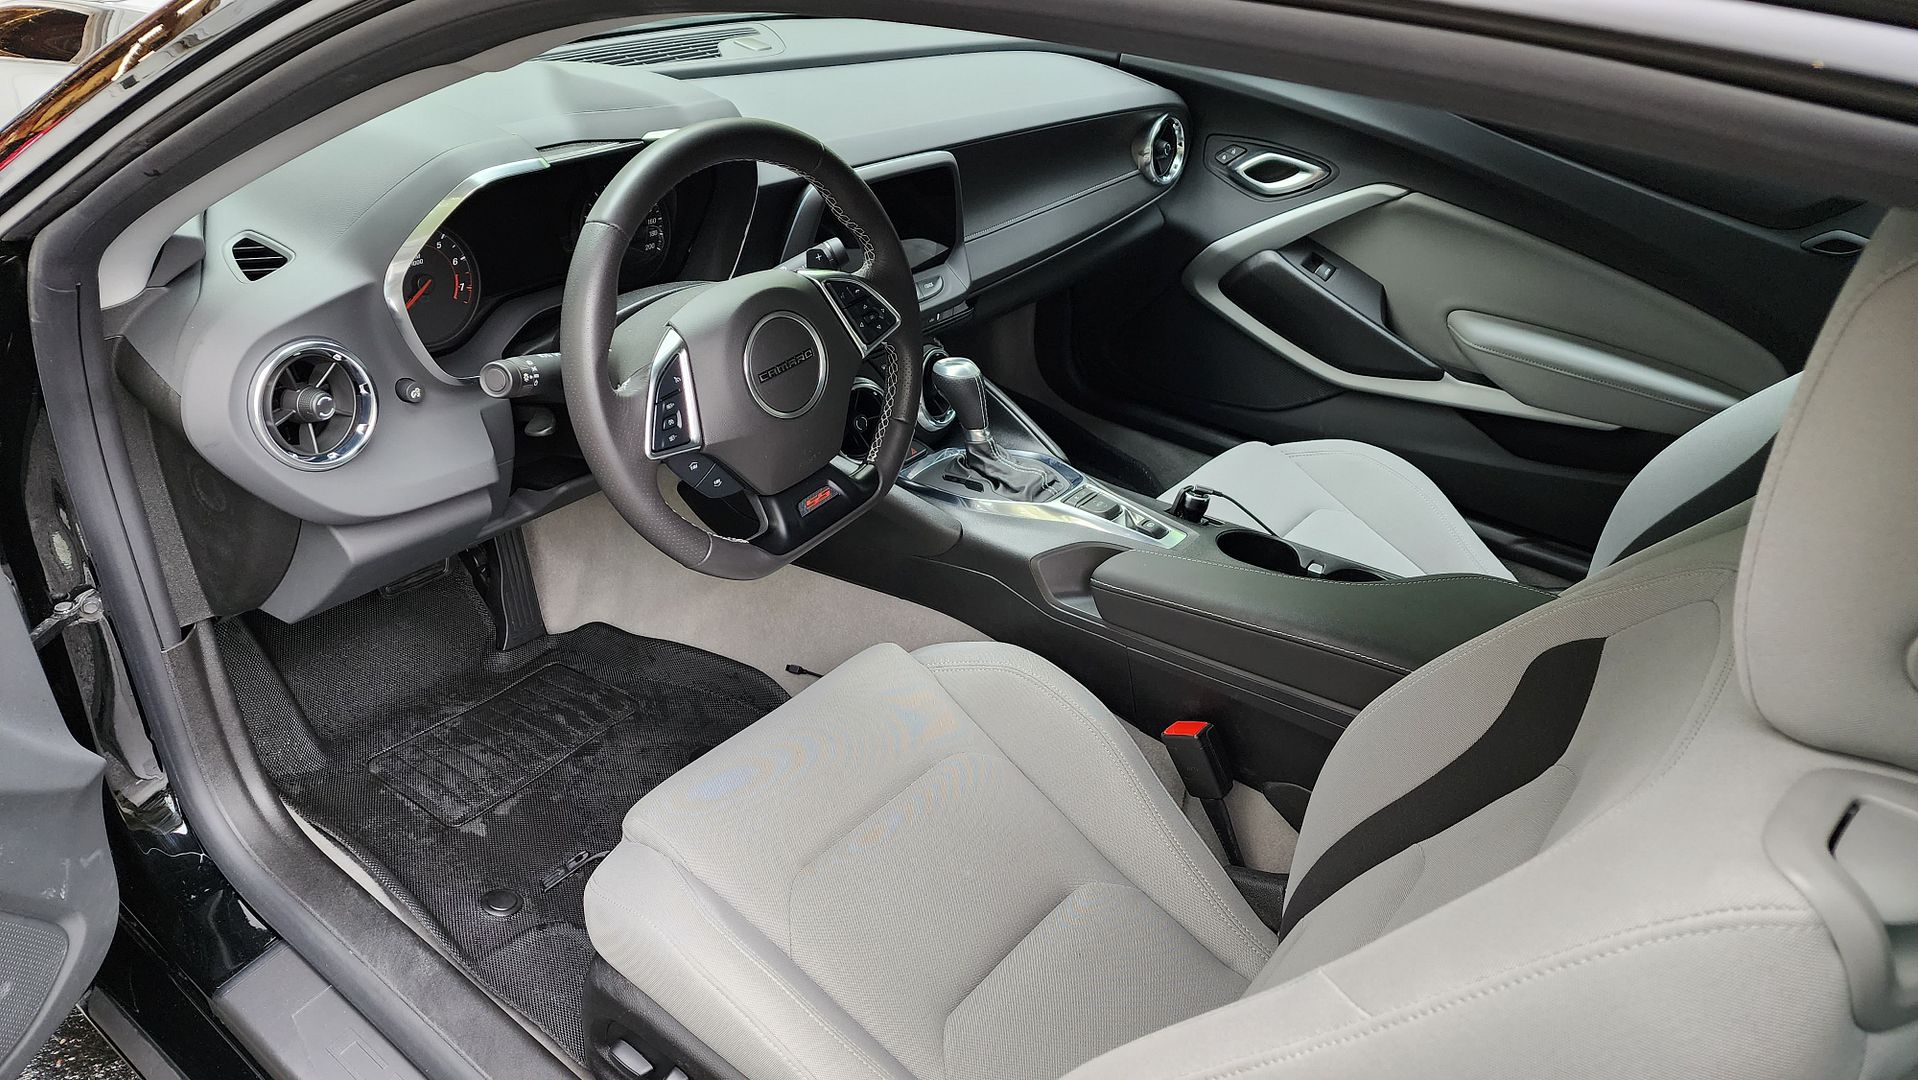
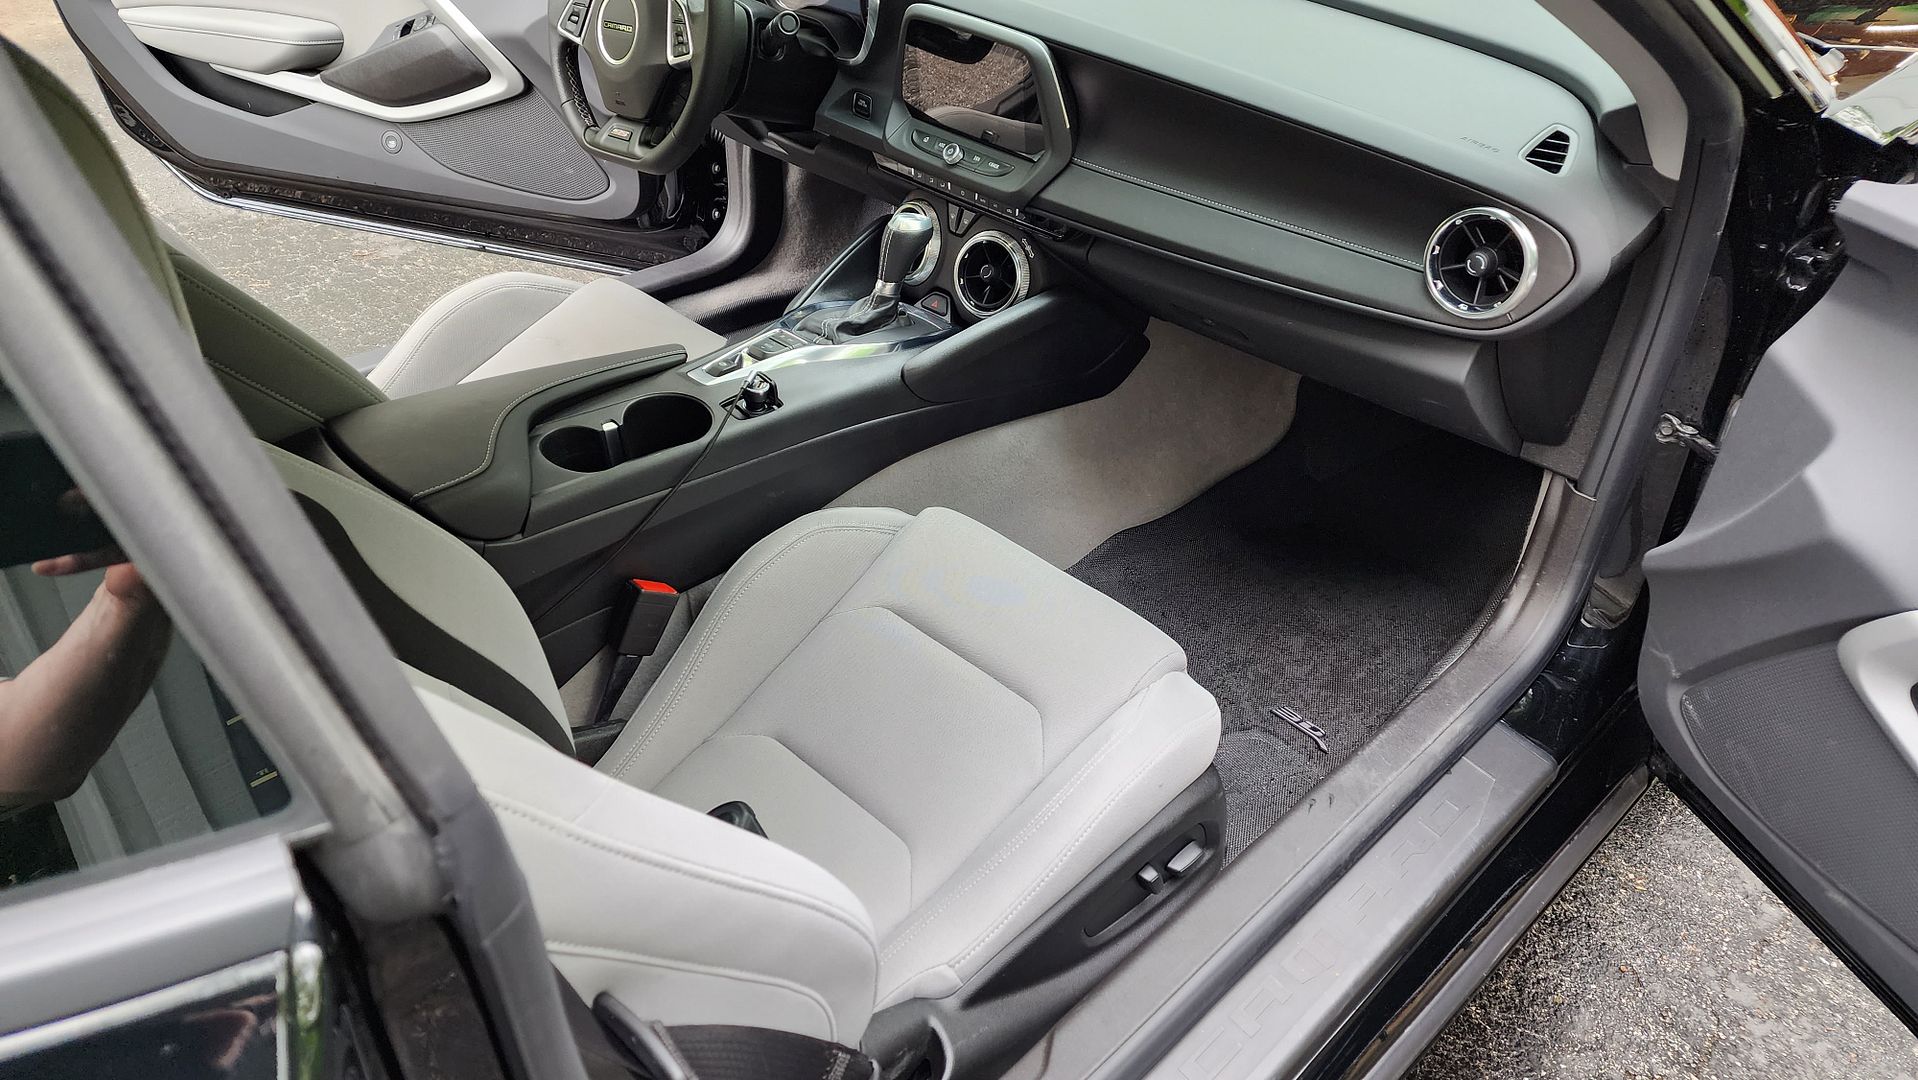
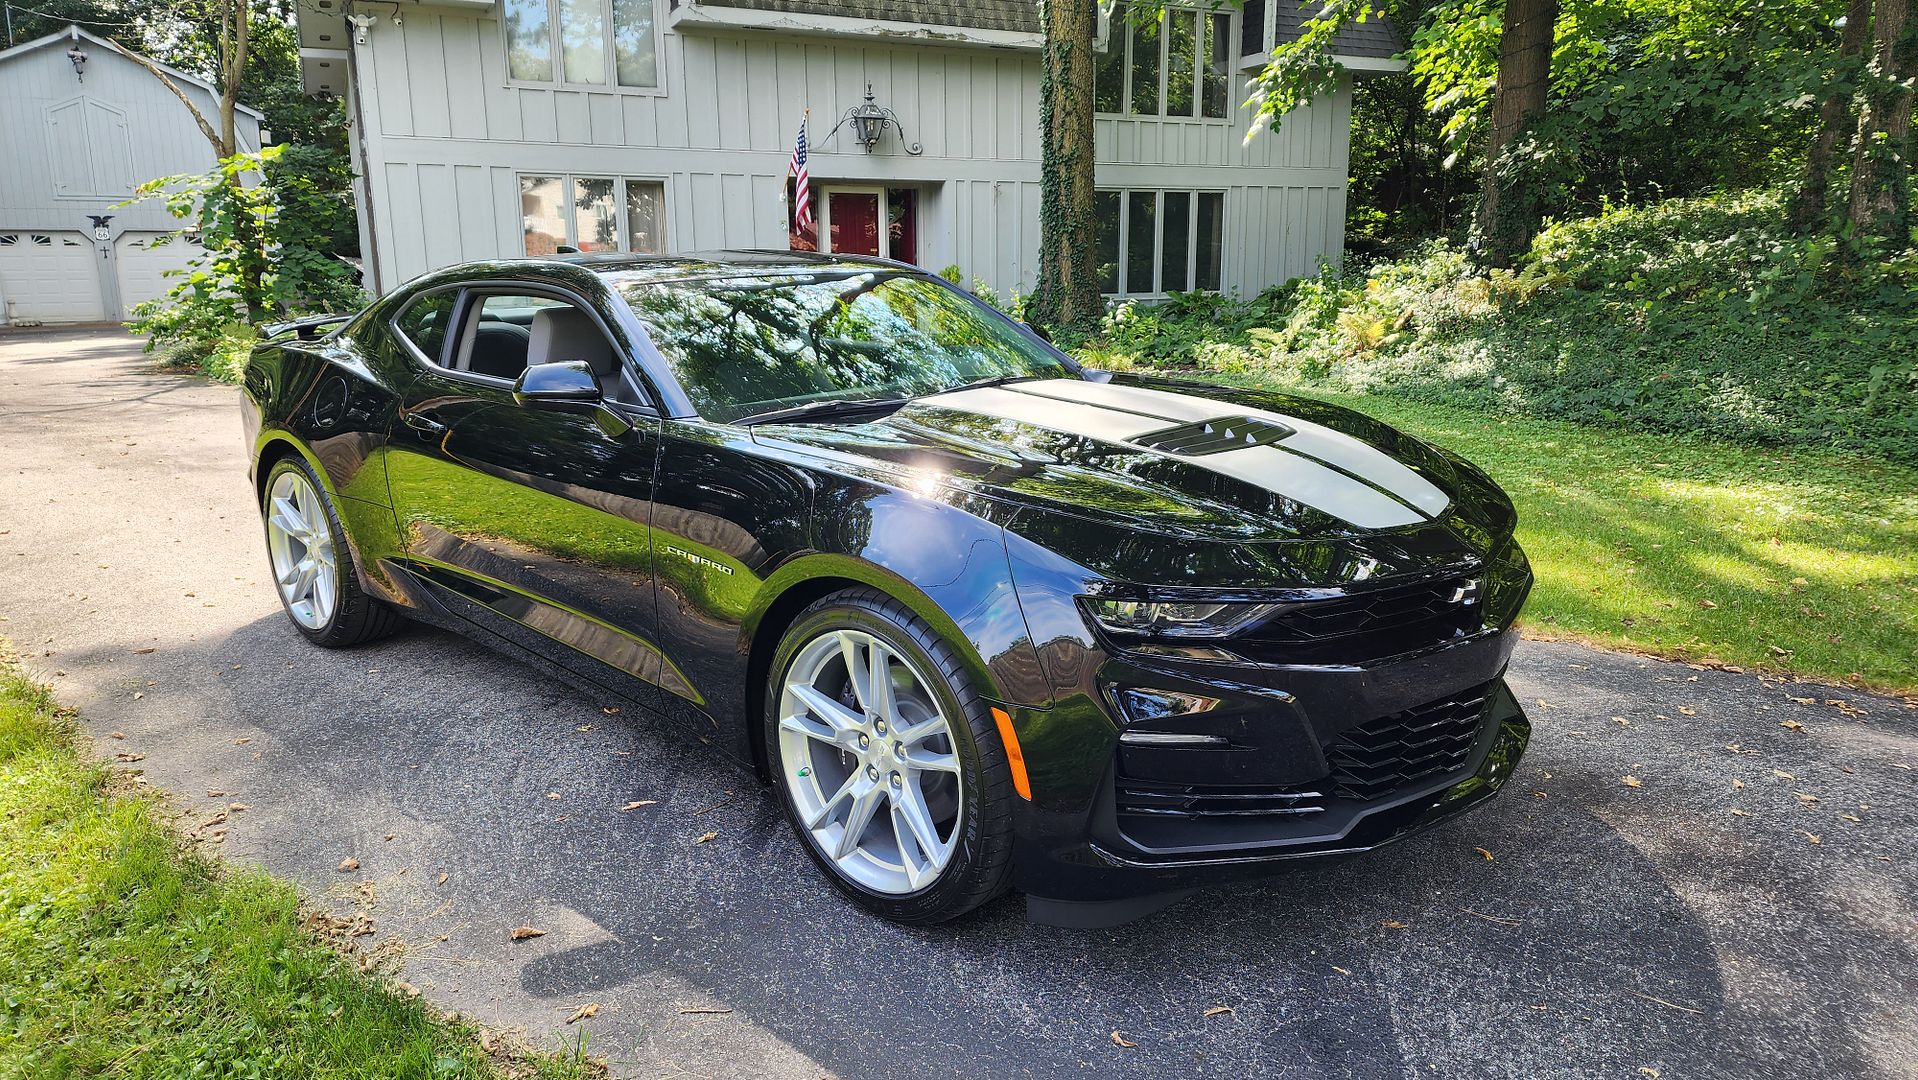
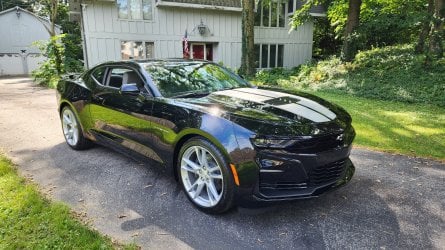
Welcome to the audio and acoustic build log for my 2023 SS Camaro. This will be long, with a lot of photos, because that is how all of my build logs are. 😊 Here are some pics of the car, I went with a black exterior with gray rally stripes and a gray interior:


20230508_181702.jpg


20230508_181716.jpg


20220910_113809.jpg


20220910_113648.jpg


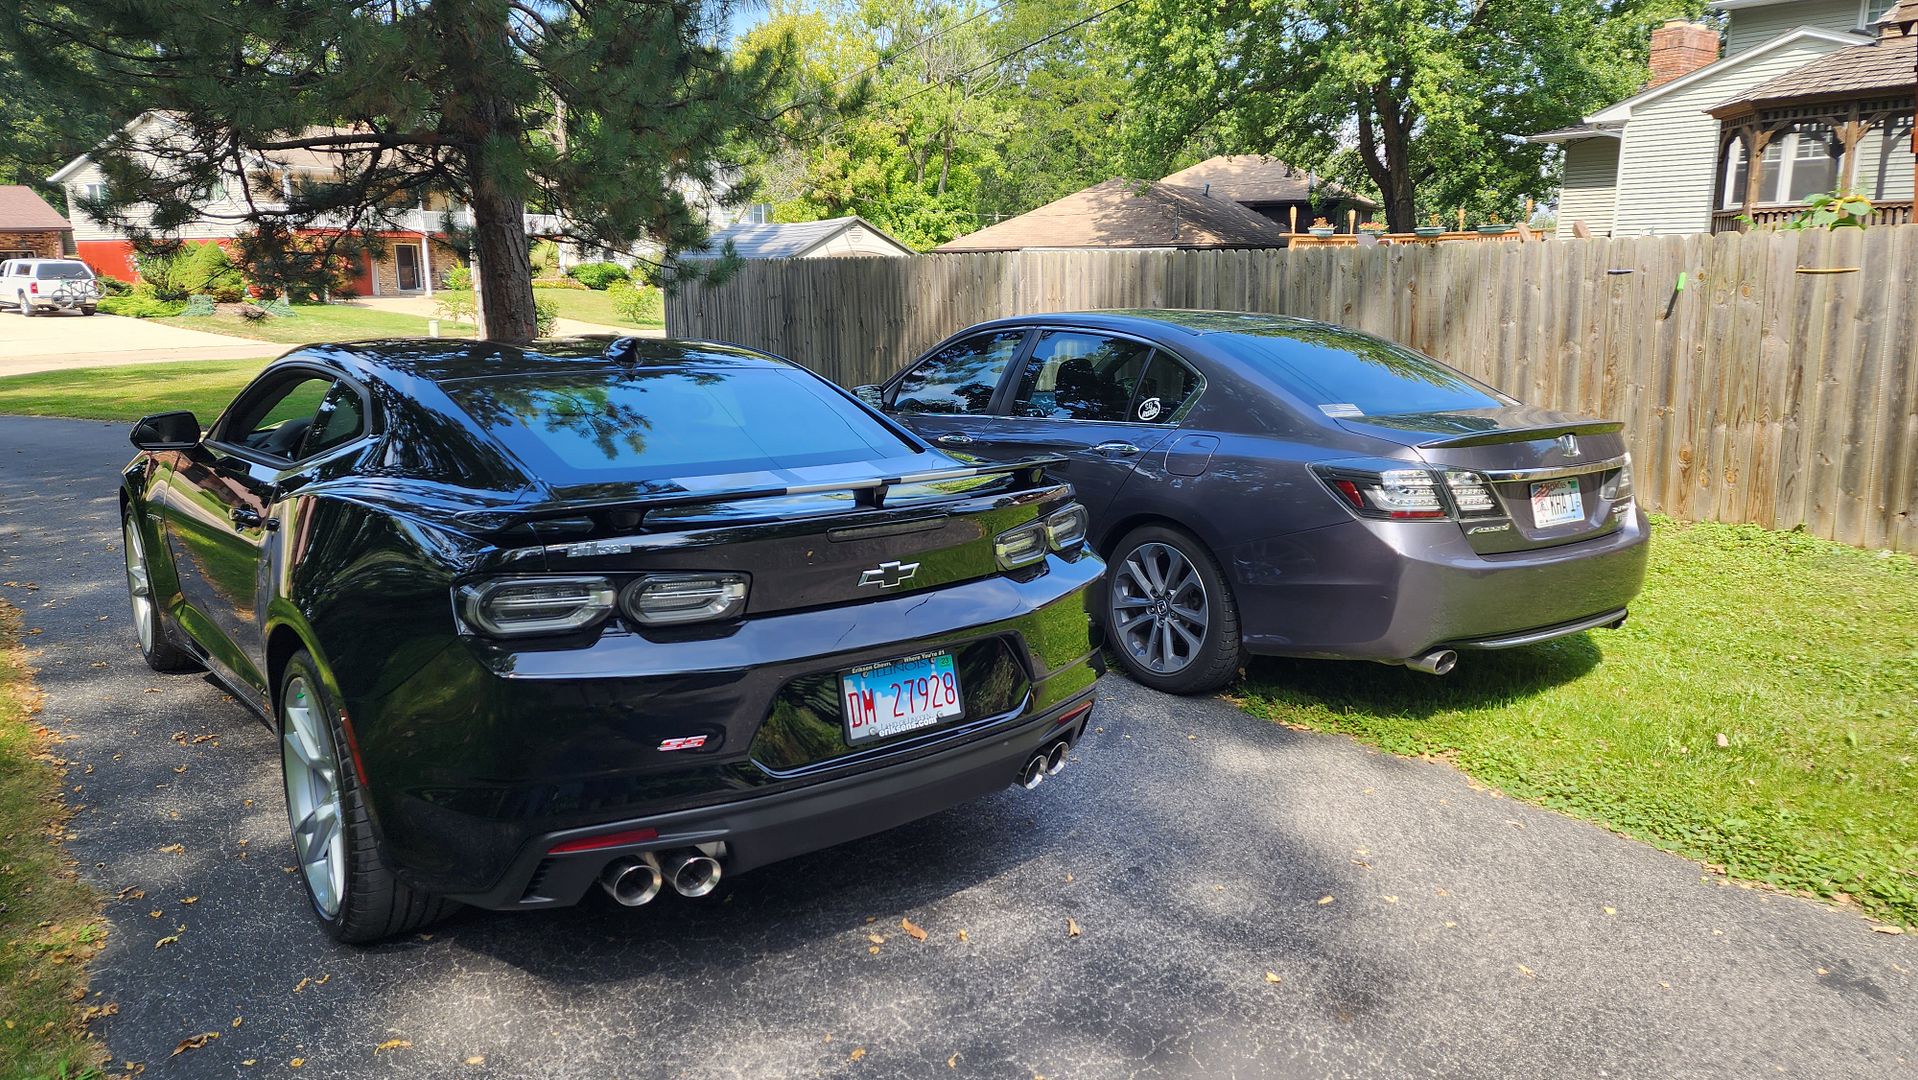
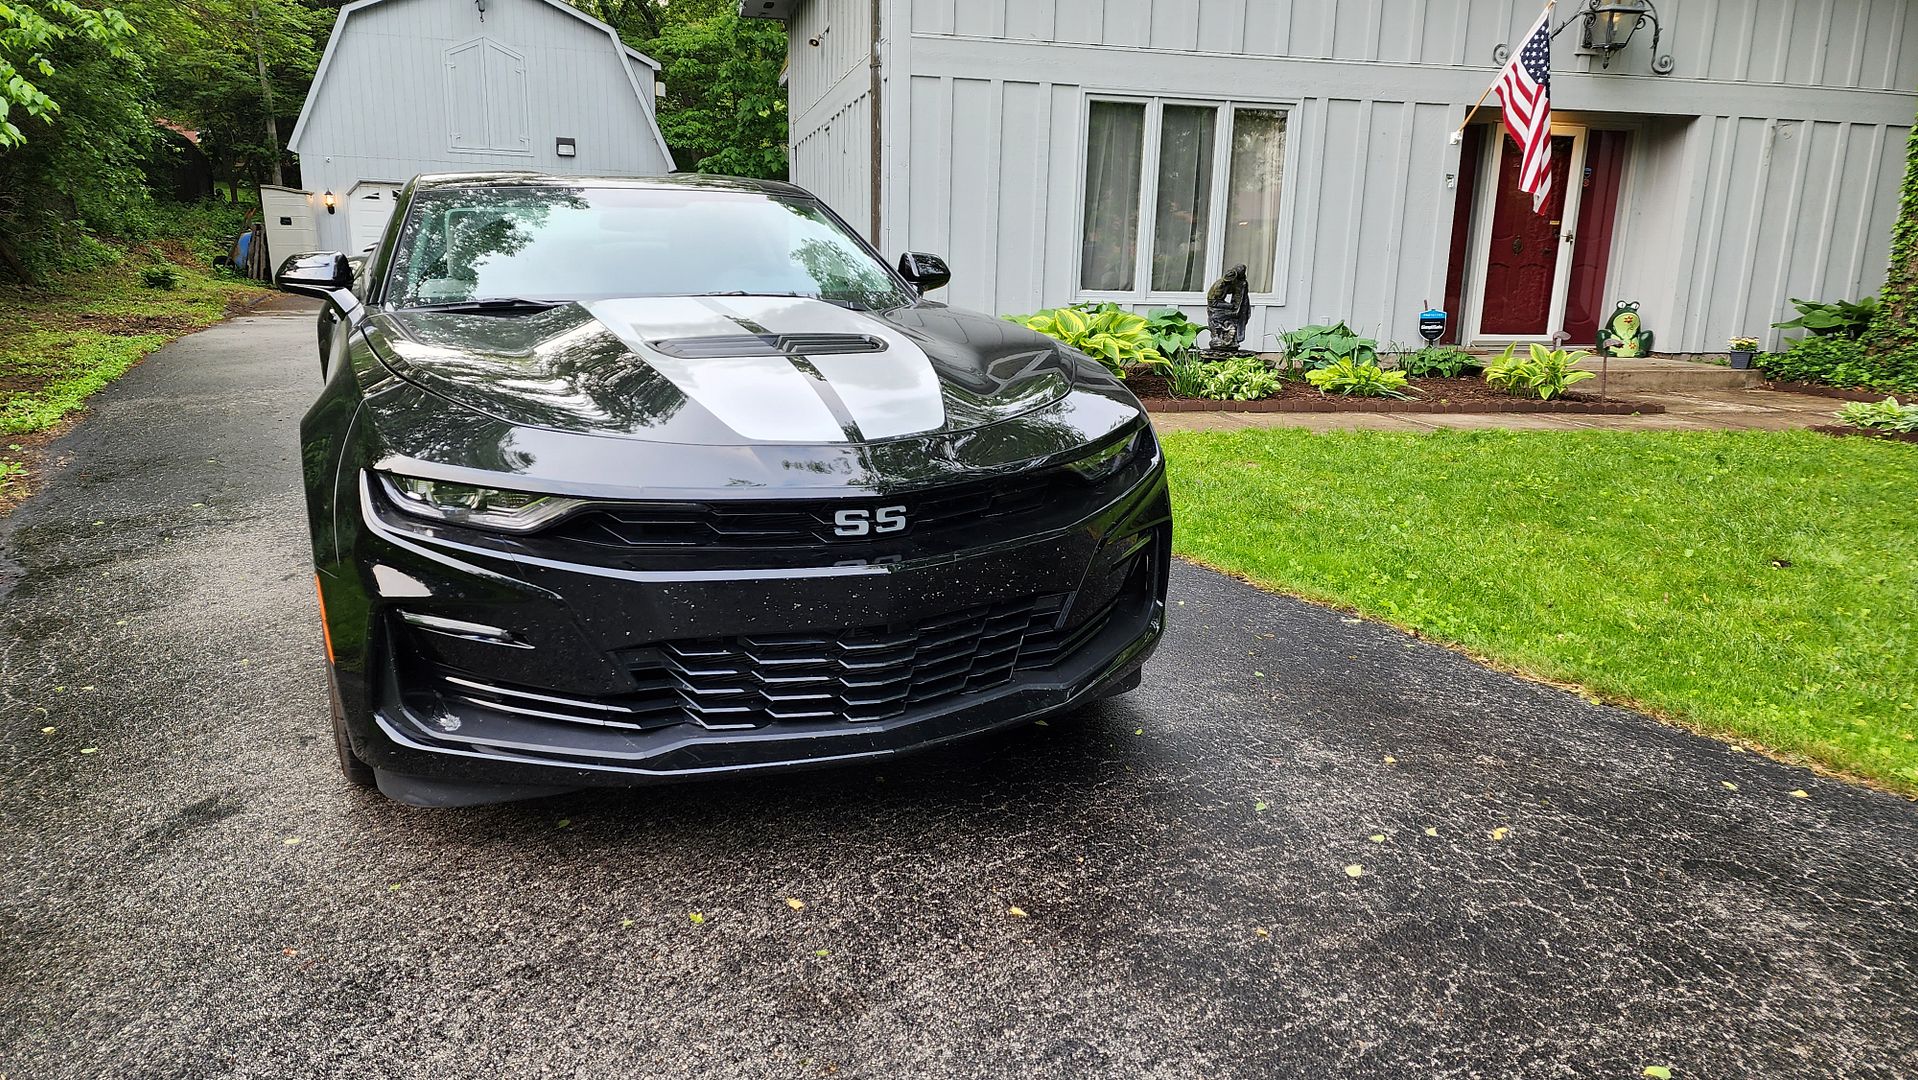
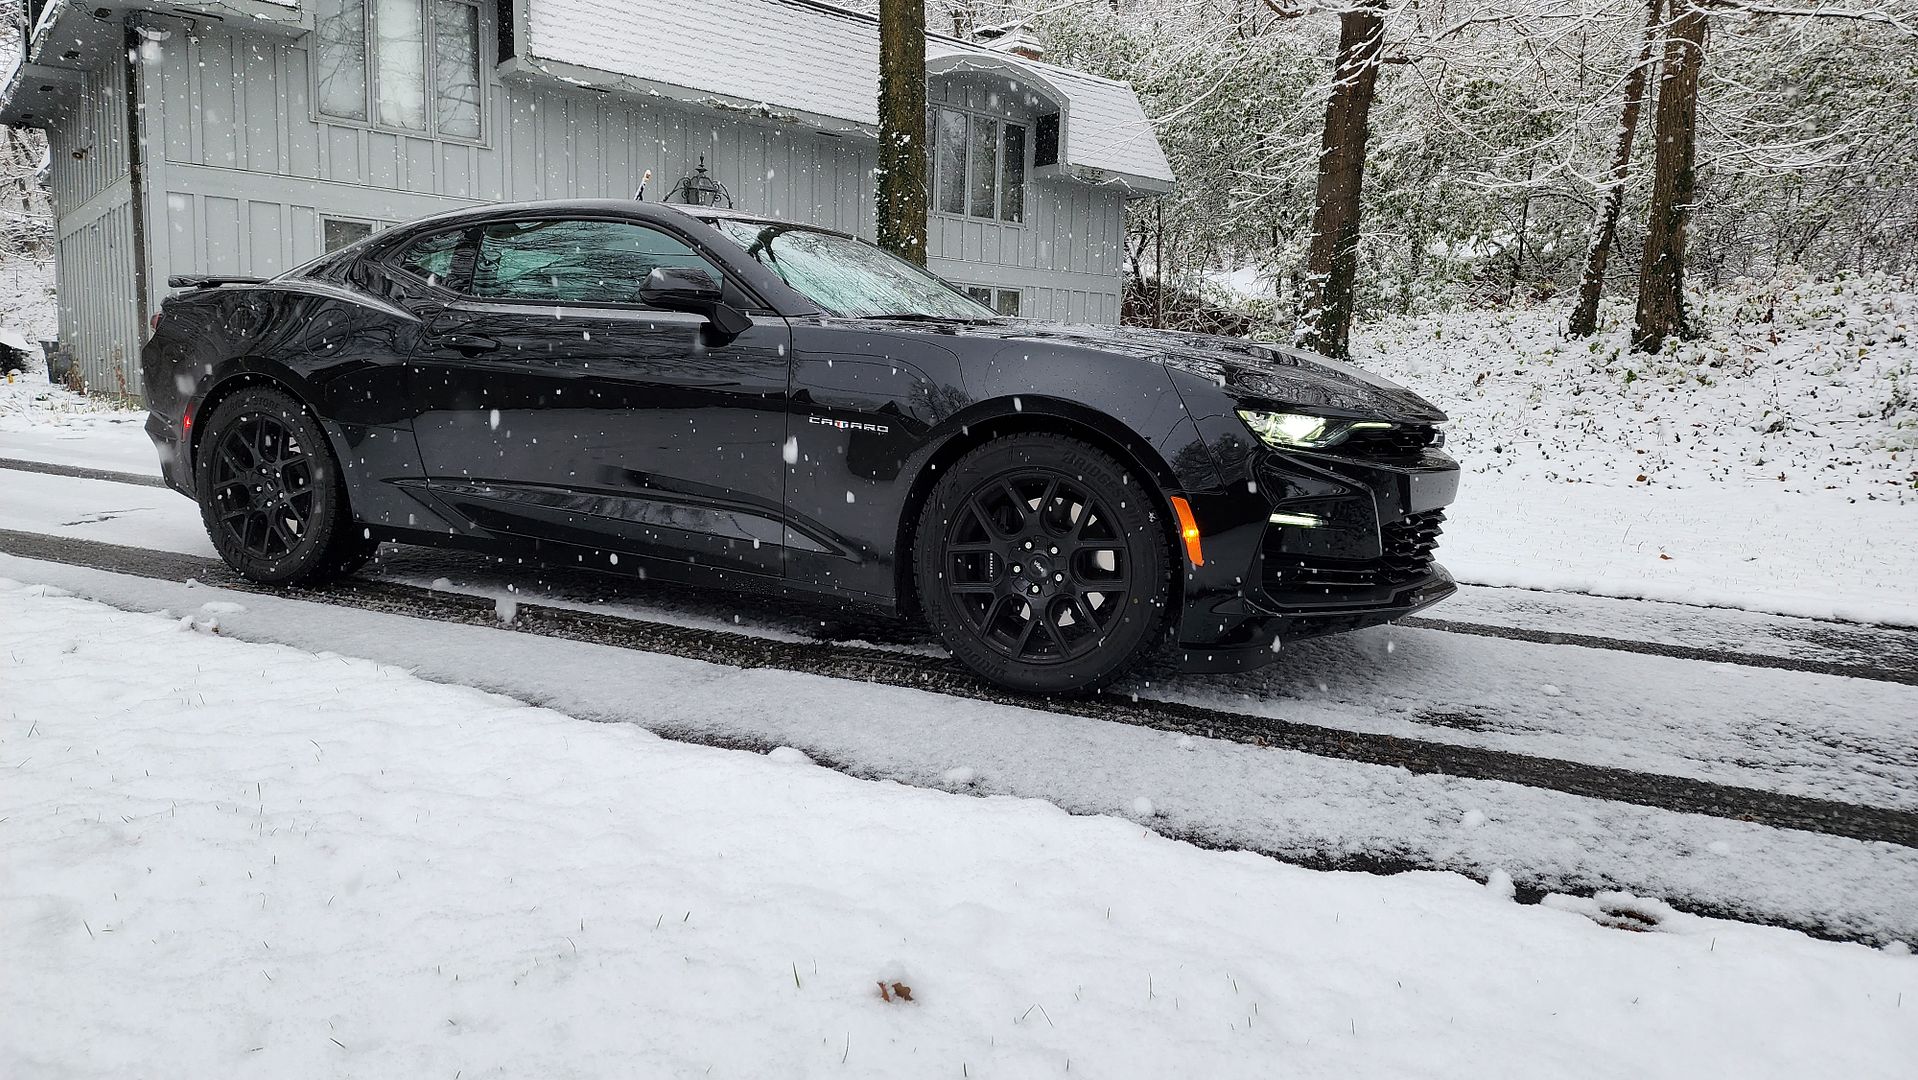
It is a daily driver, even in northern IL winters using Blizzak winter tires

20221115_072832.jpg


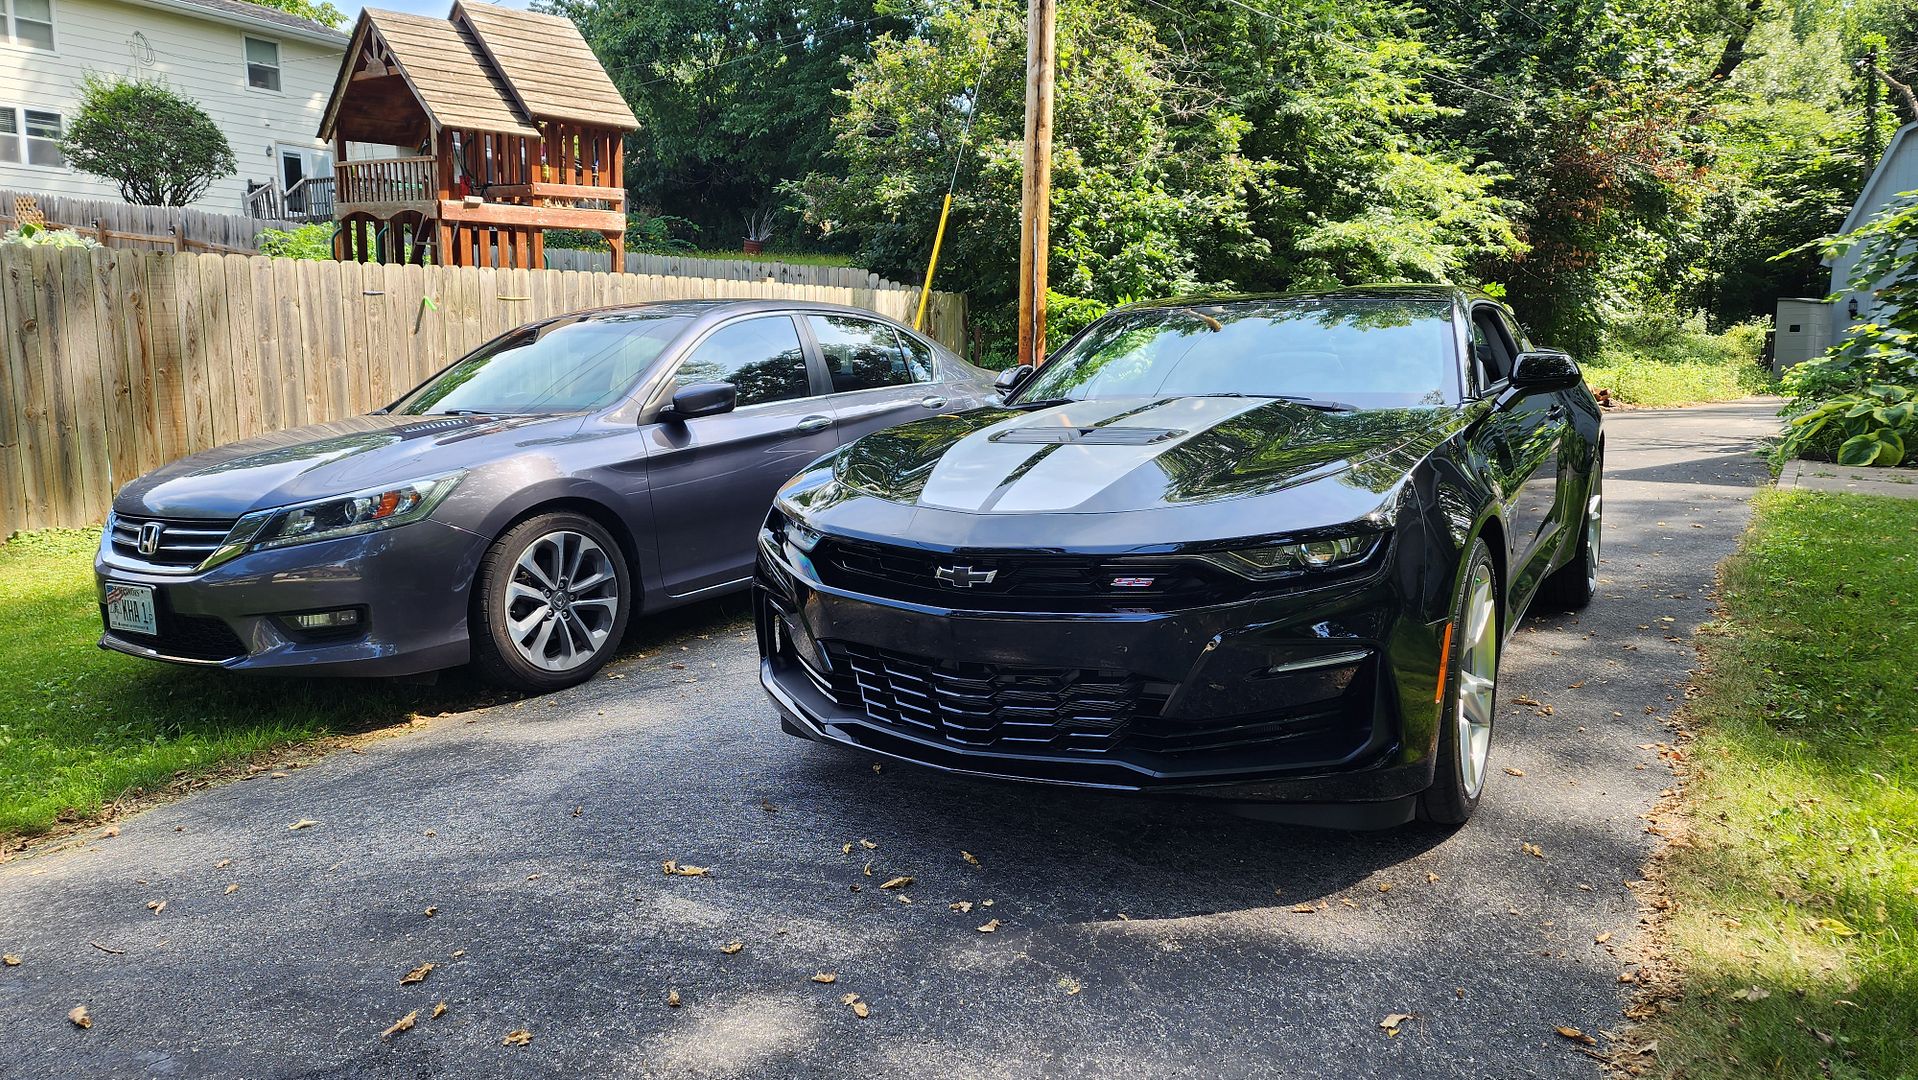
My 2014 Accord Sport with 220,000 miles as my previous daily driver and my new daily driver.

20220910_121059.jpg


20220910_121045.jpg


I also designed and 3D printed a custom SS emblem for the front grille

20230519_071203.jpg


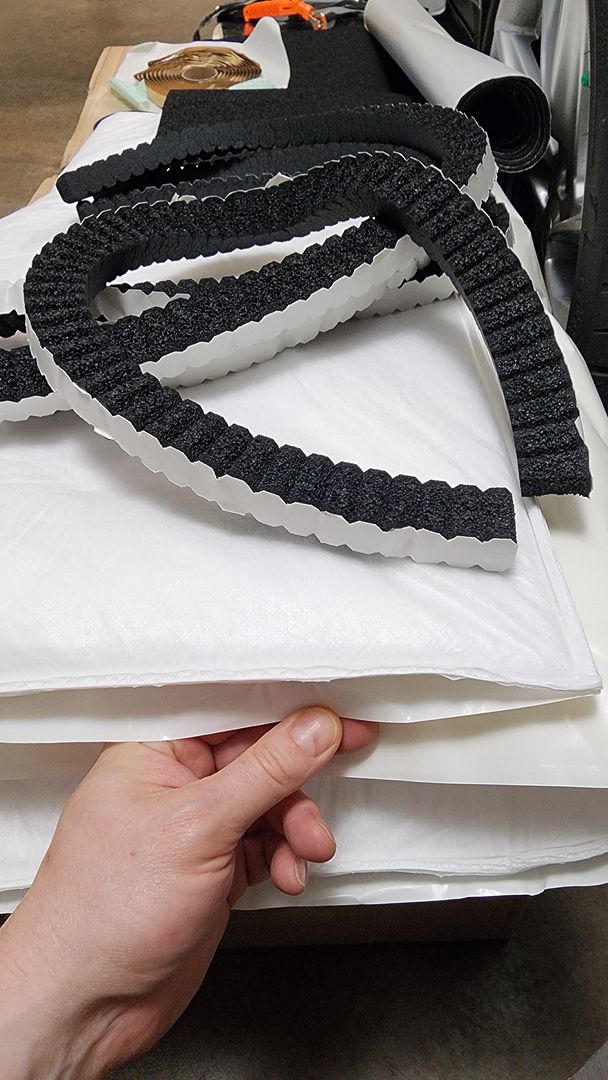
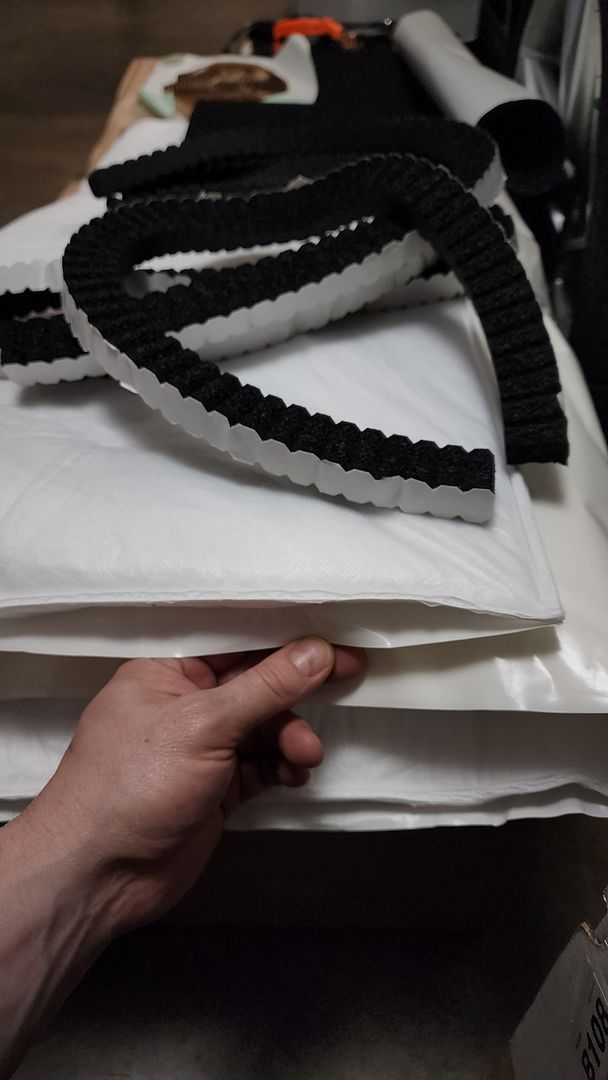
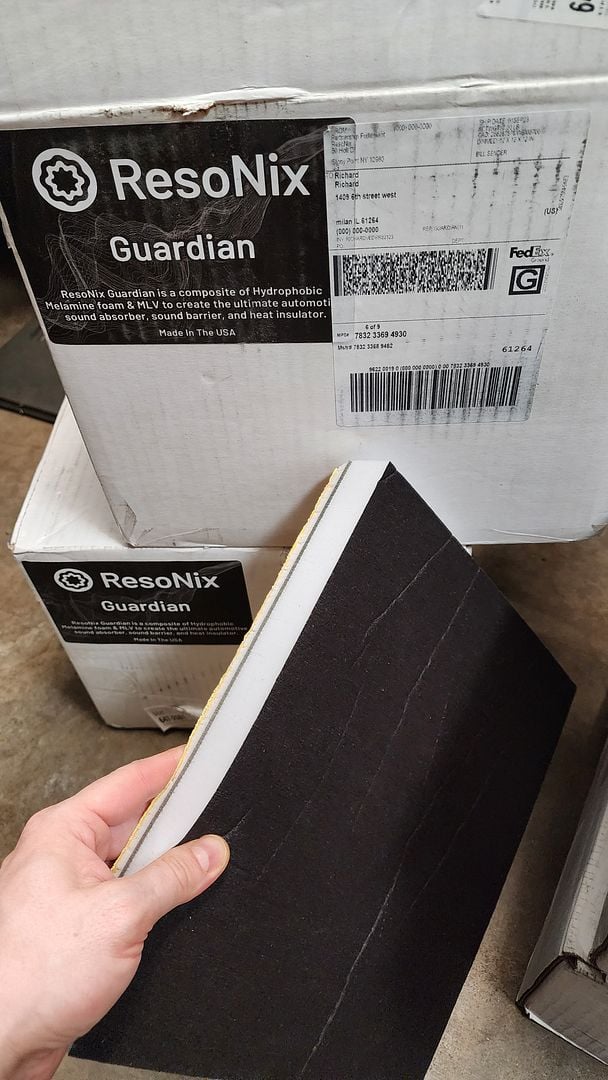
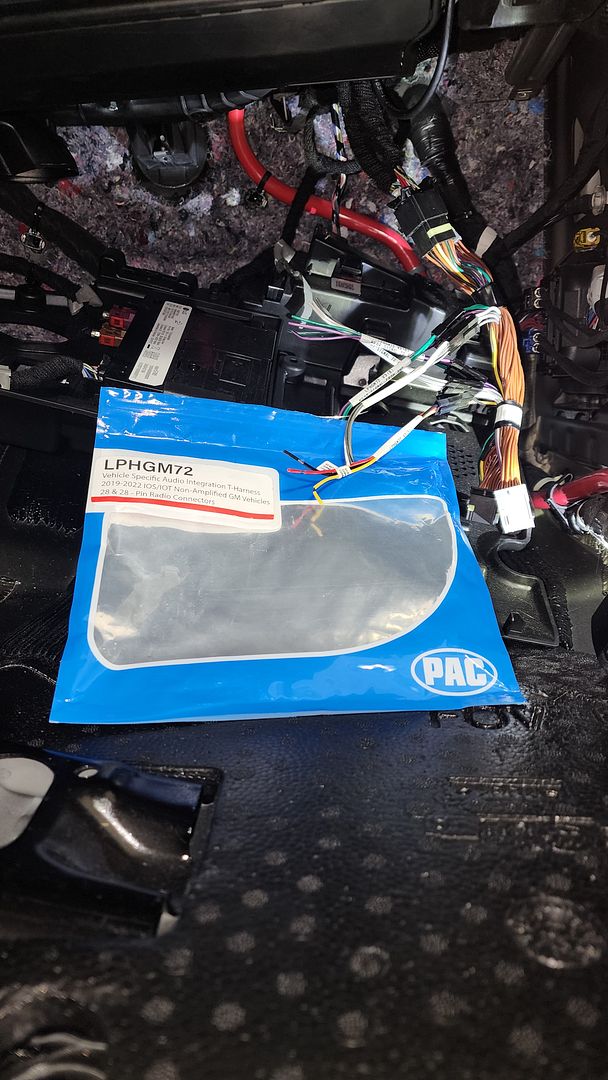
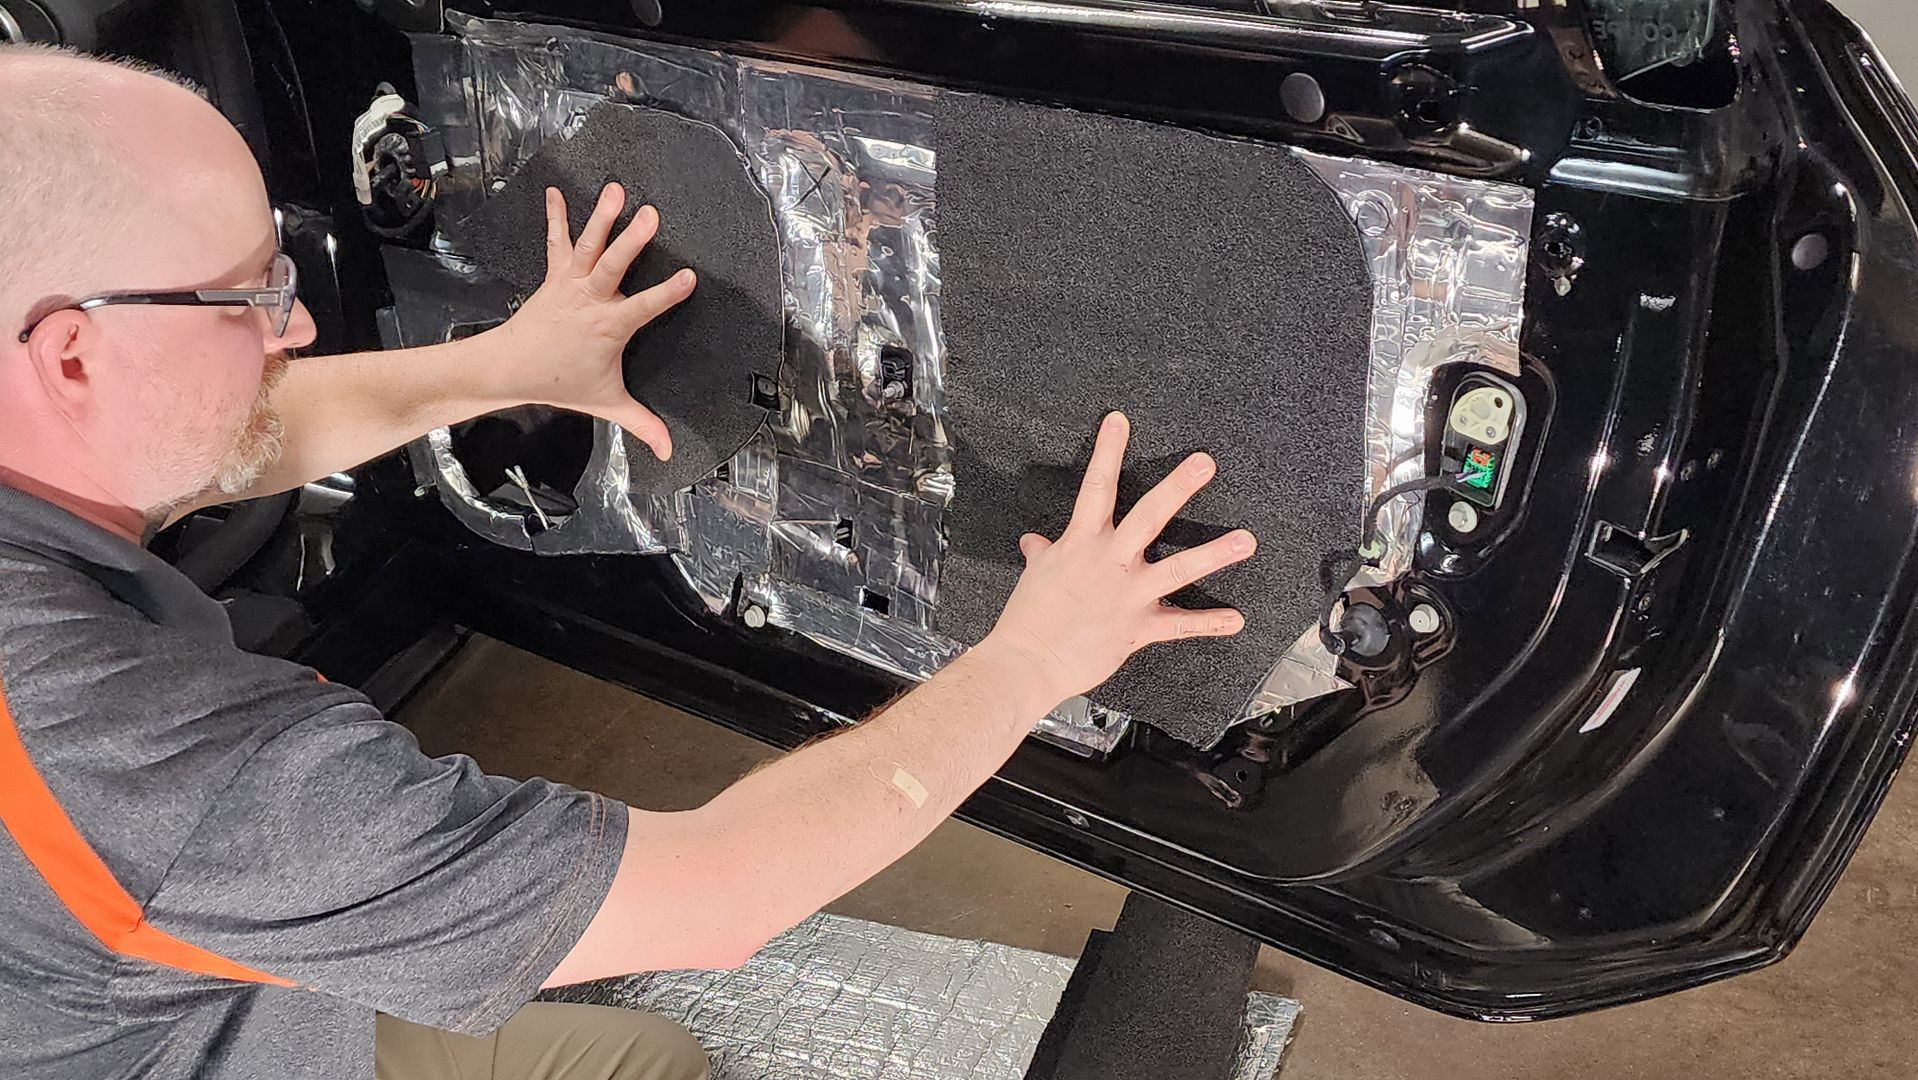
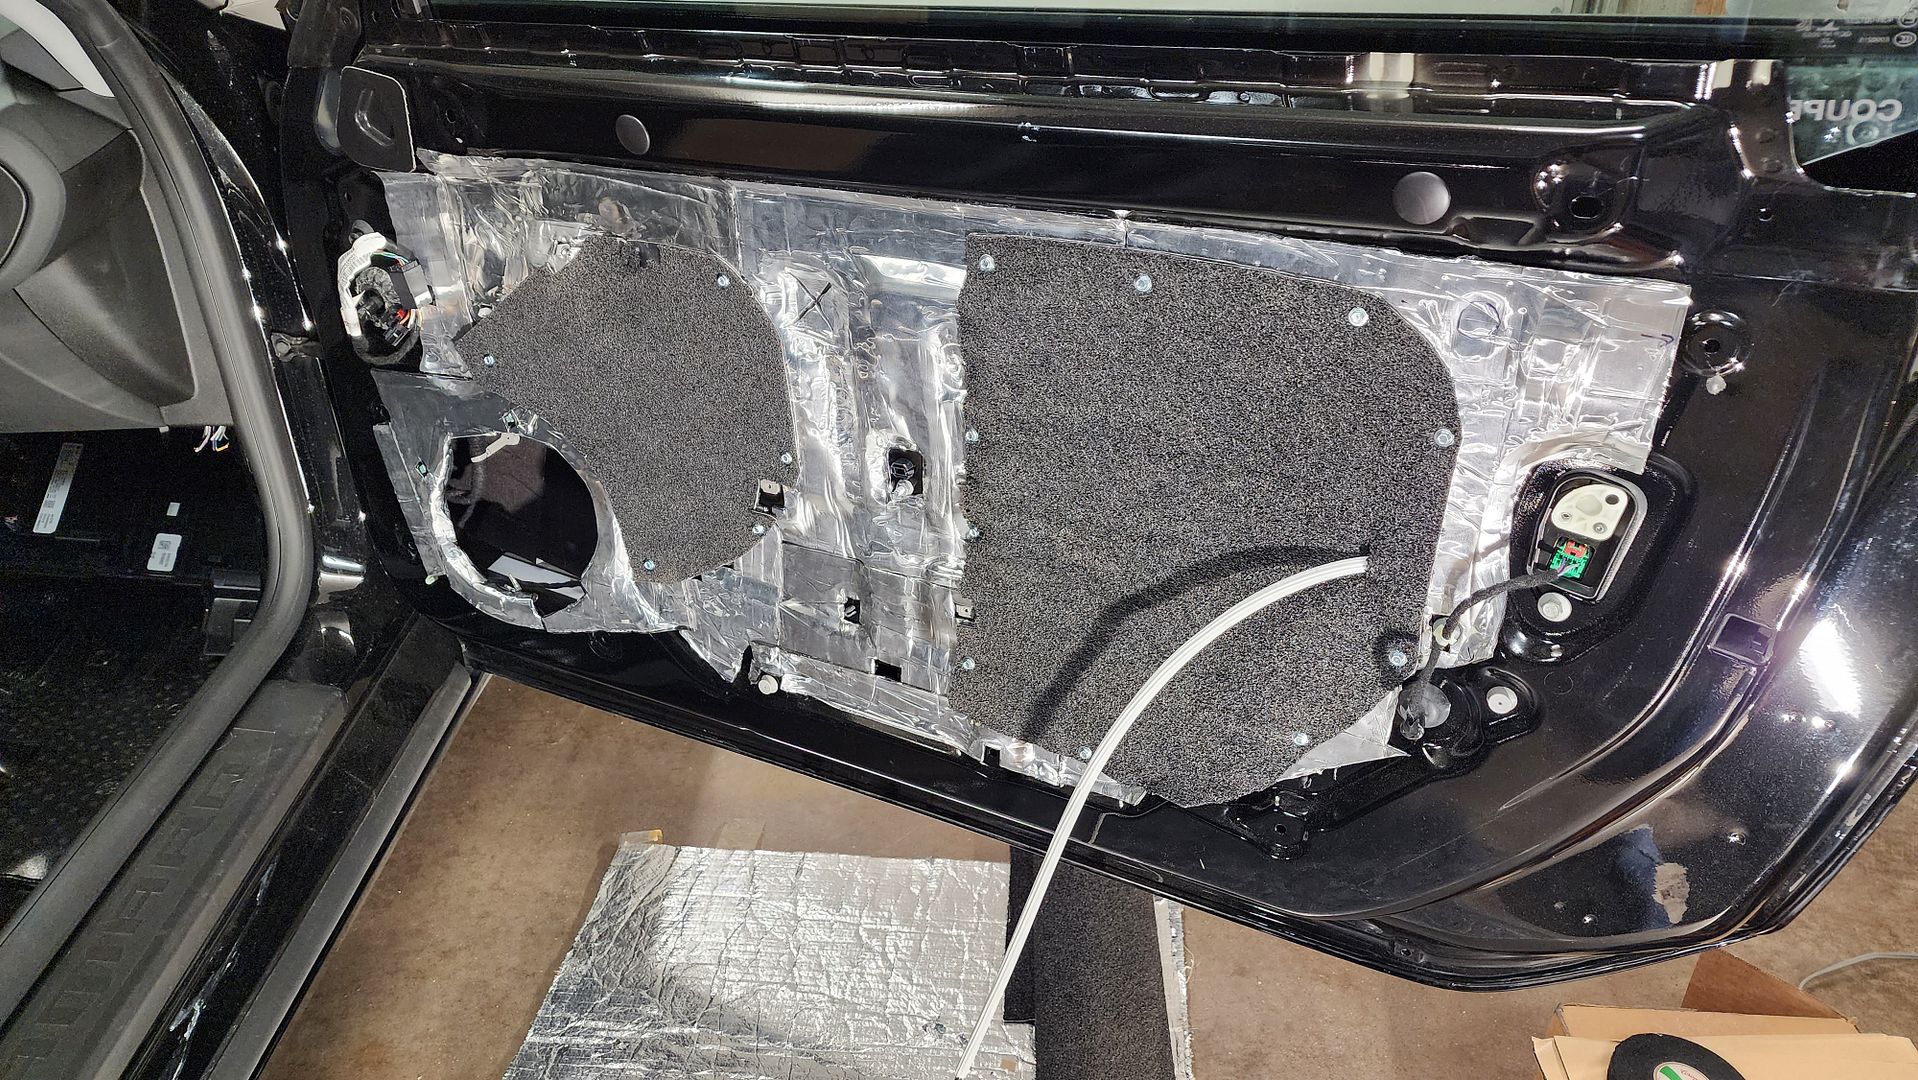
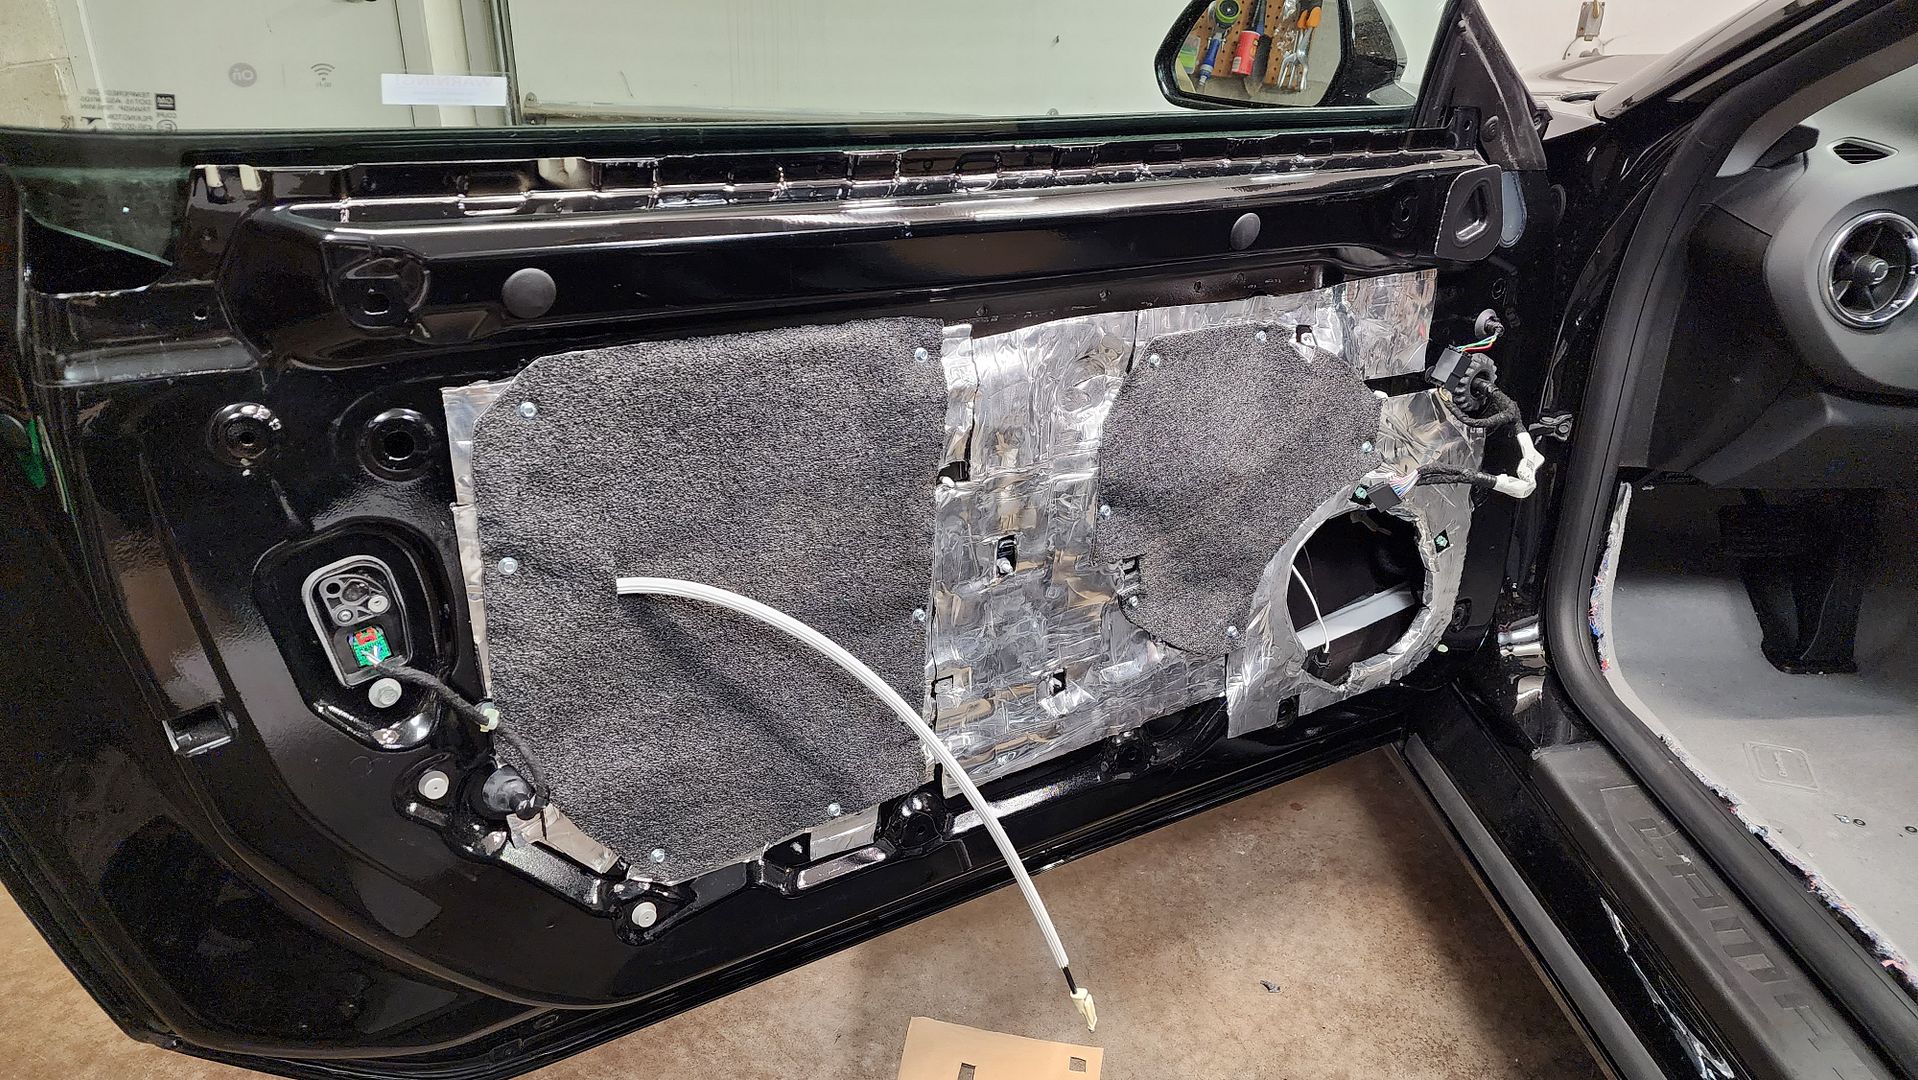
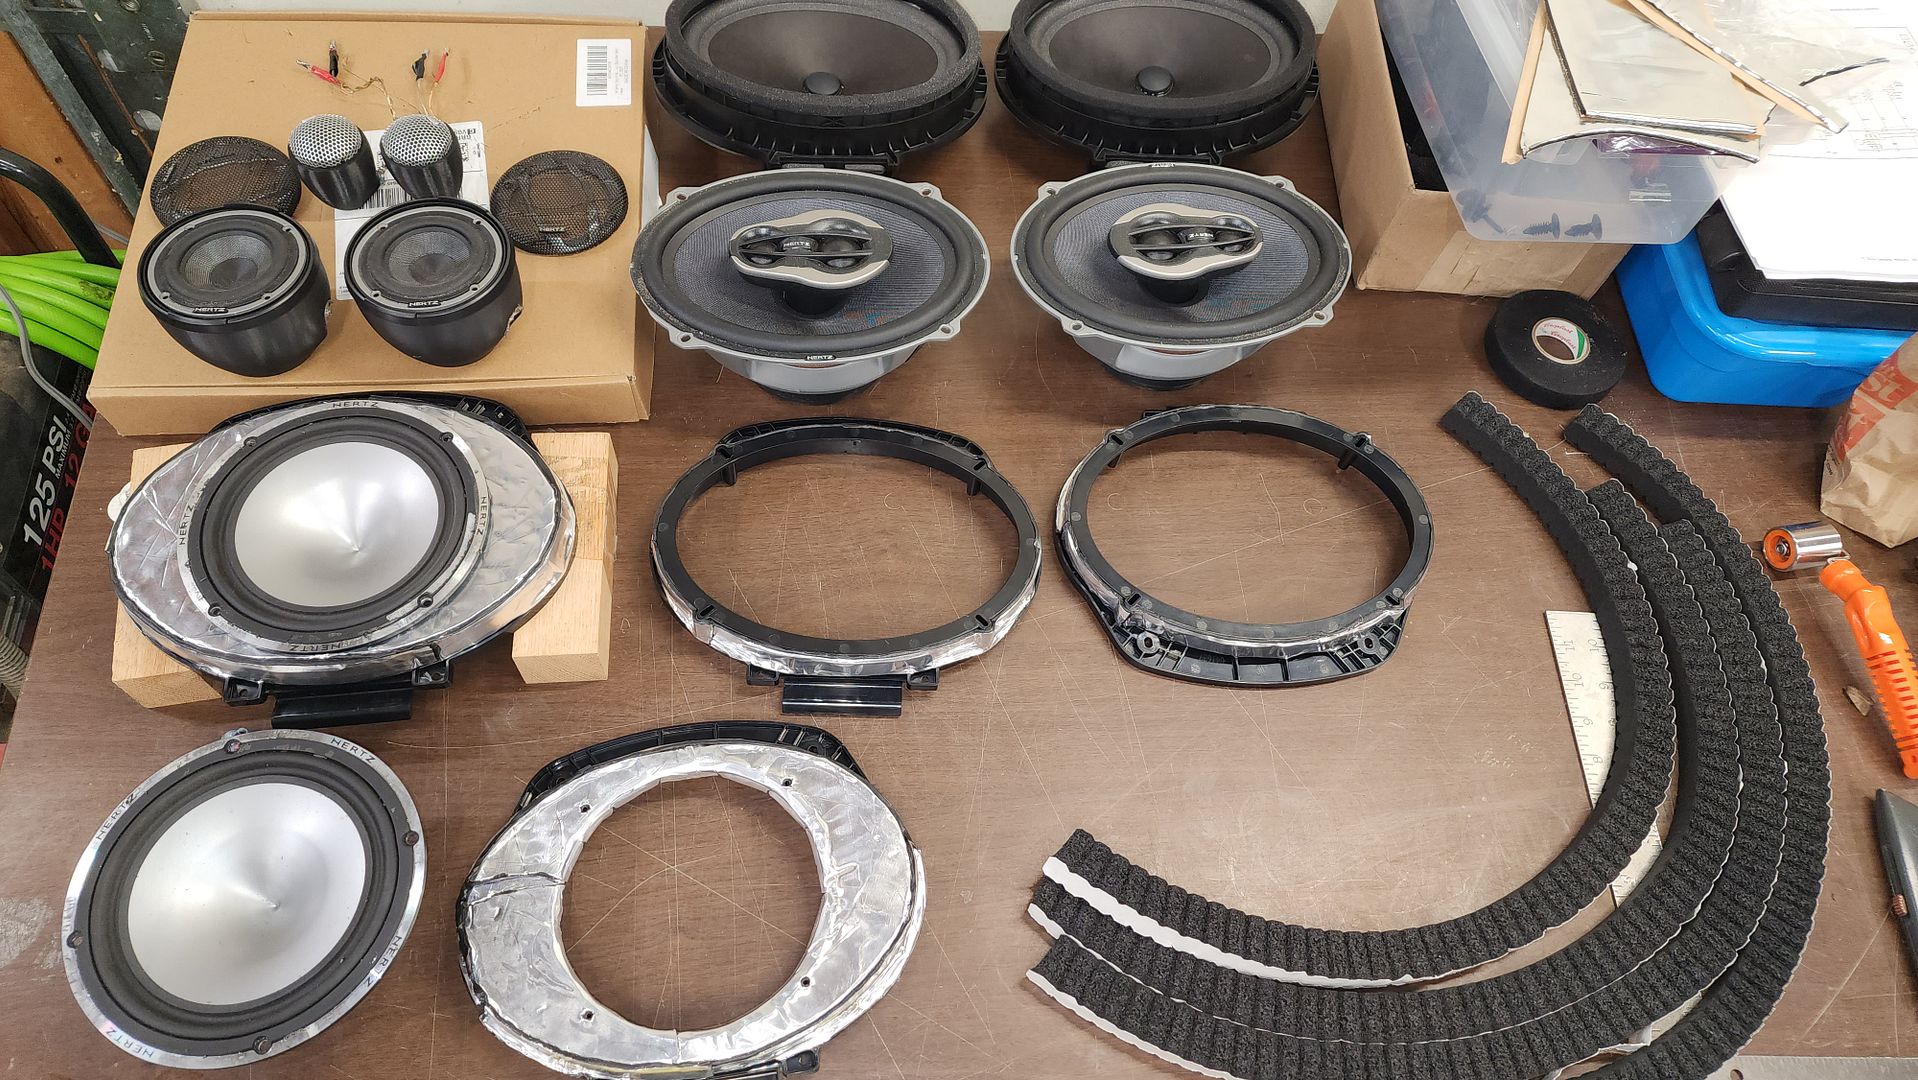
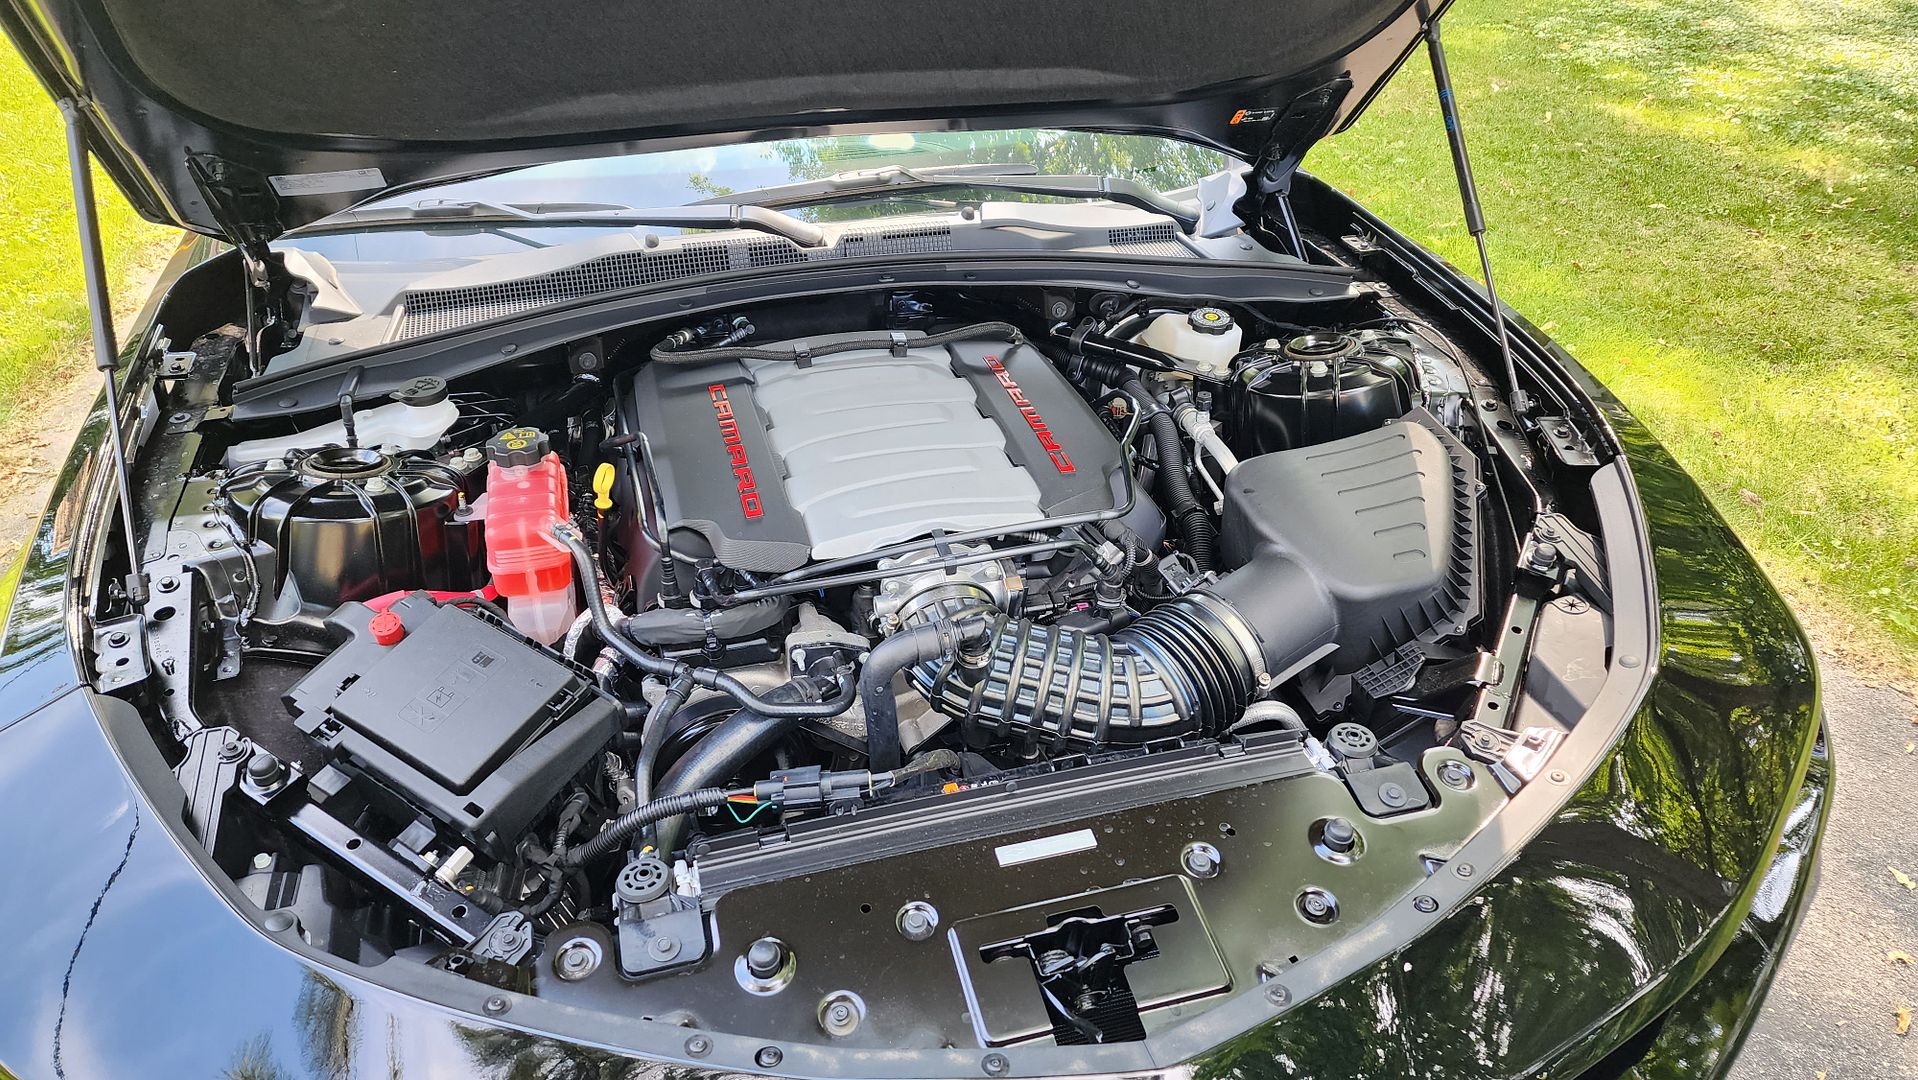
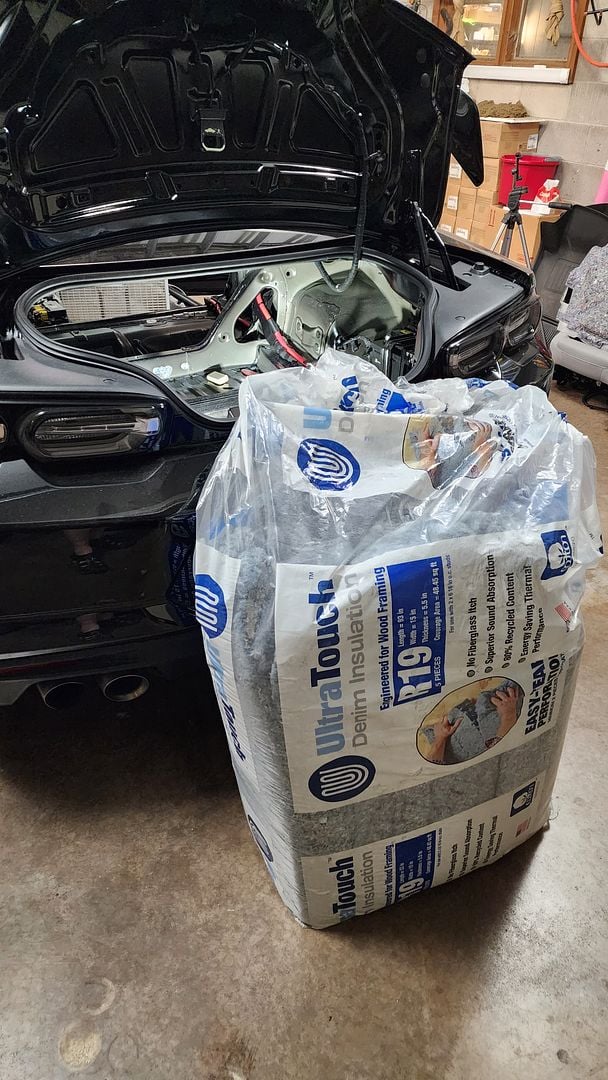
I ordered this car to my desired specification in May of 2022, it was built in August of 2022 and I took delivery in September of 2022. One year and 20,000 miles later, I am finally able to dissemble the car to do acoustical treatments and properly setup a sound system. I ordered the 1SS package because it included the 8” infotainment IOS interface but without Bose. As a result, I have a full-range signal out of the front that I can use. The plan is my typical equipment, transferred from my 2014 Accord: Hertz Mille front and sub stage and JL VXi (or MVi) amplifiers for the built-in DSP. Acoustical treatments will be by Resonix for their quality and performance.


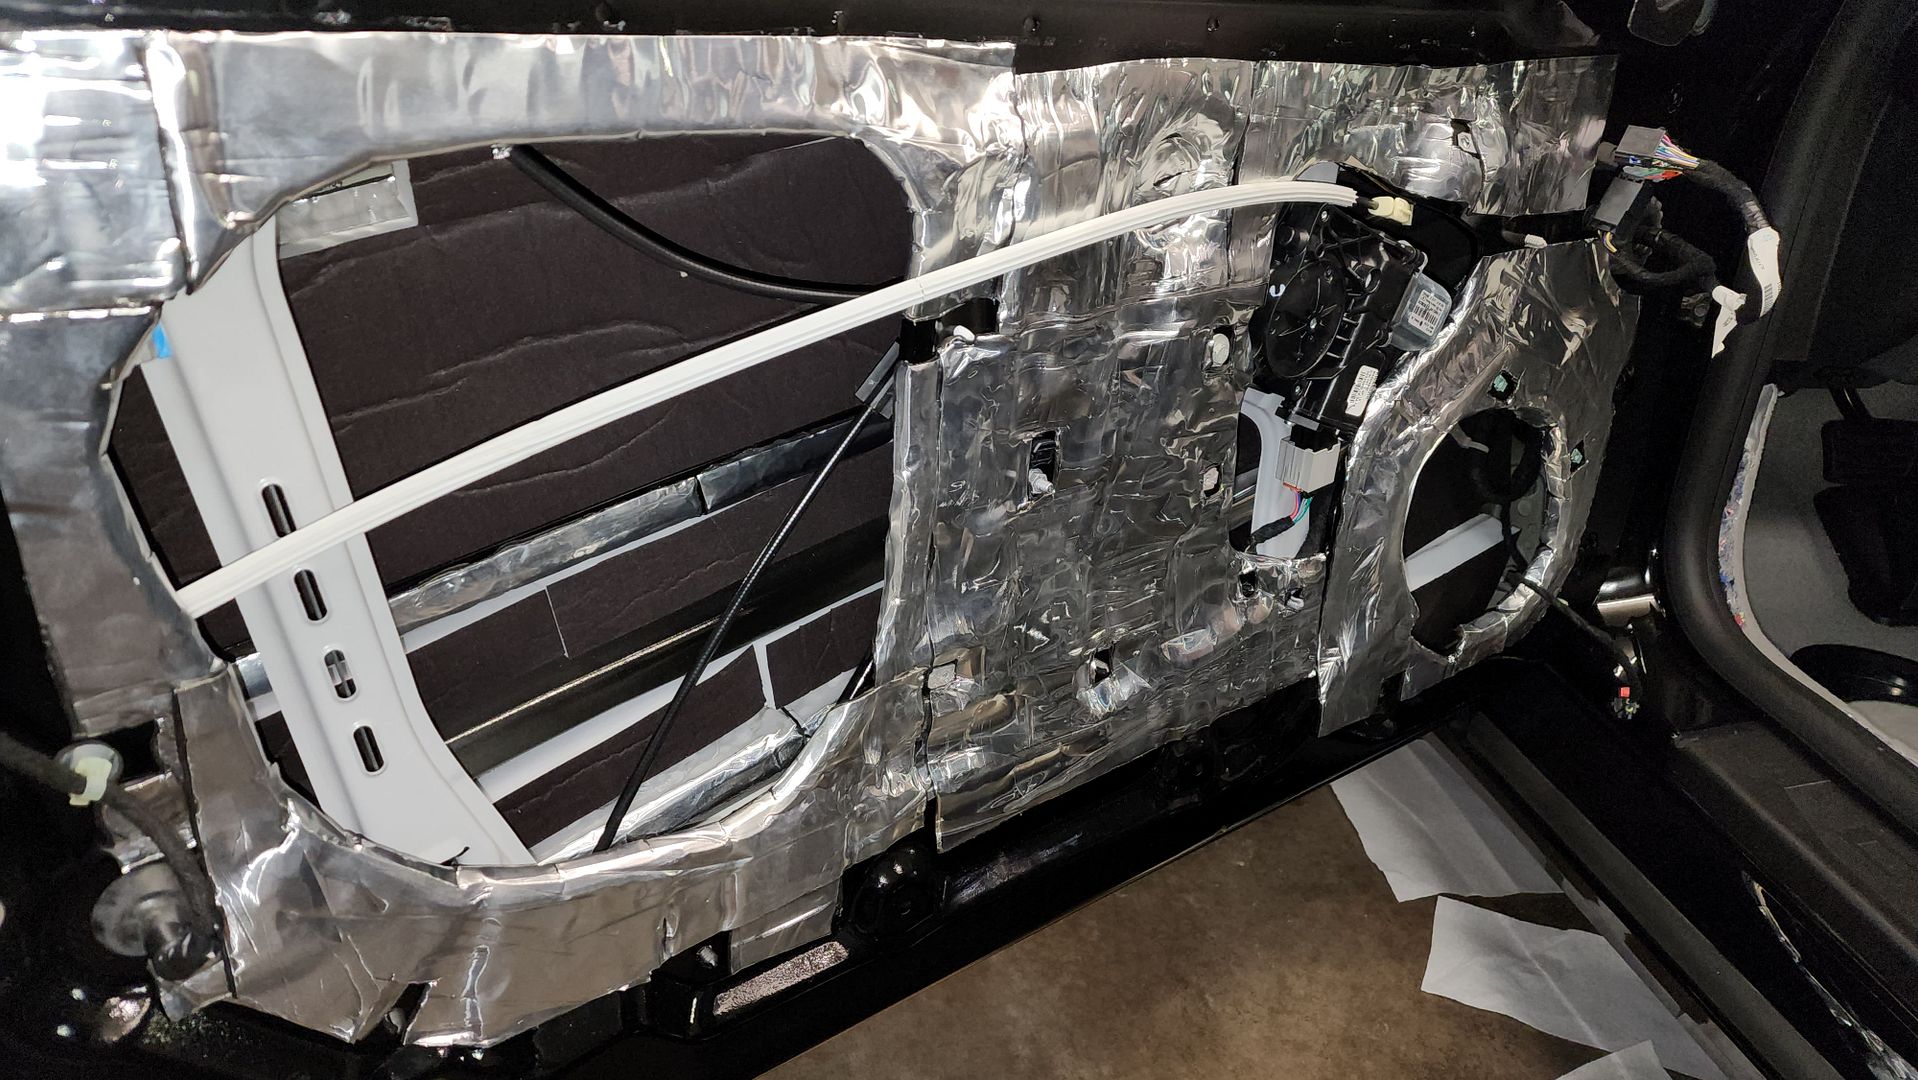
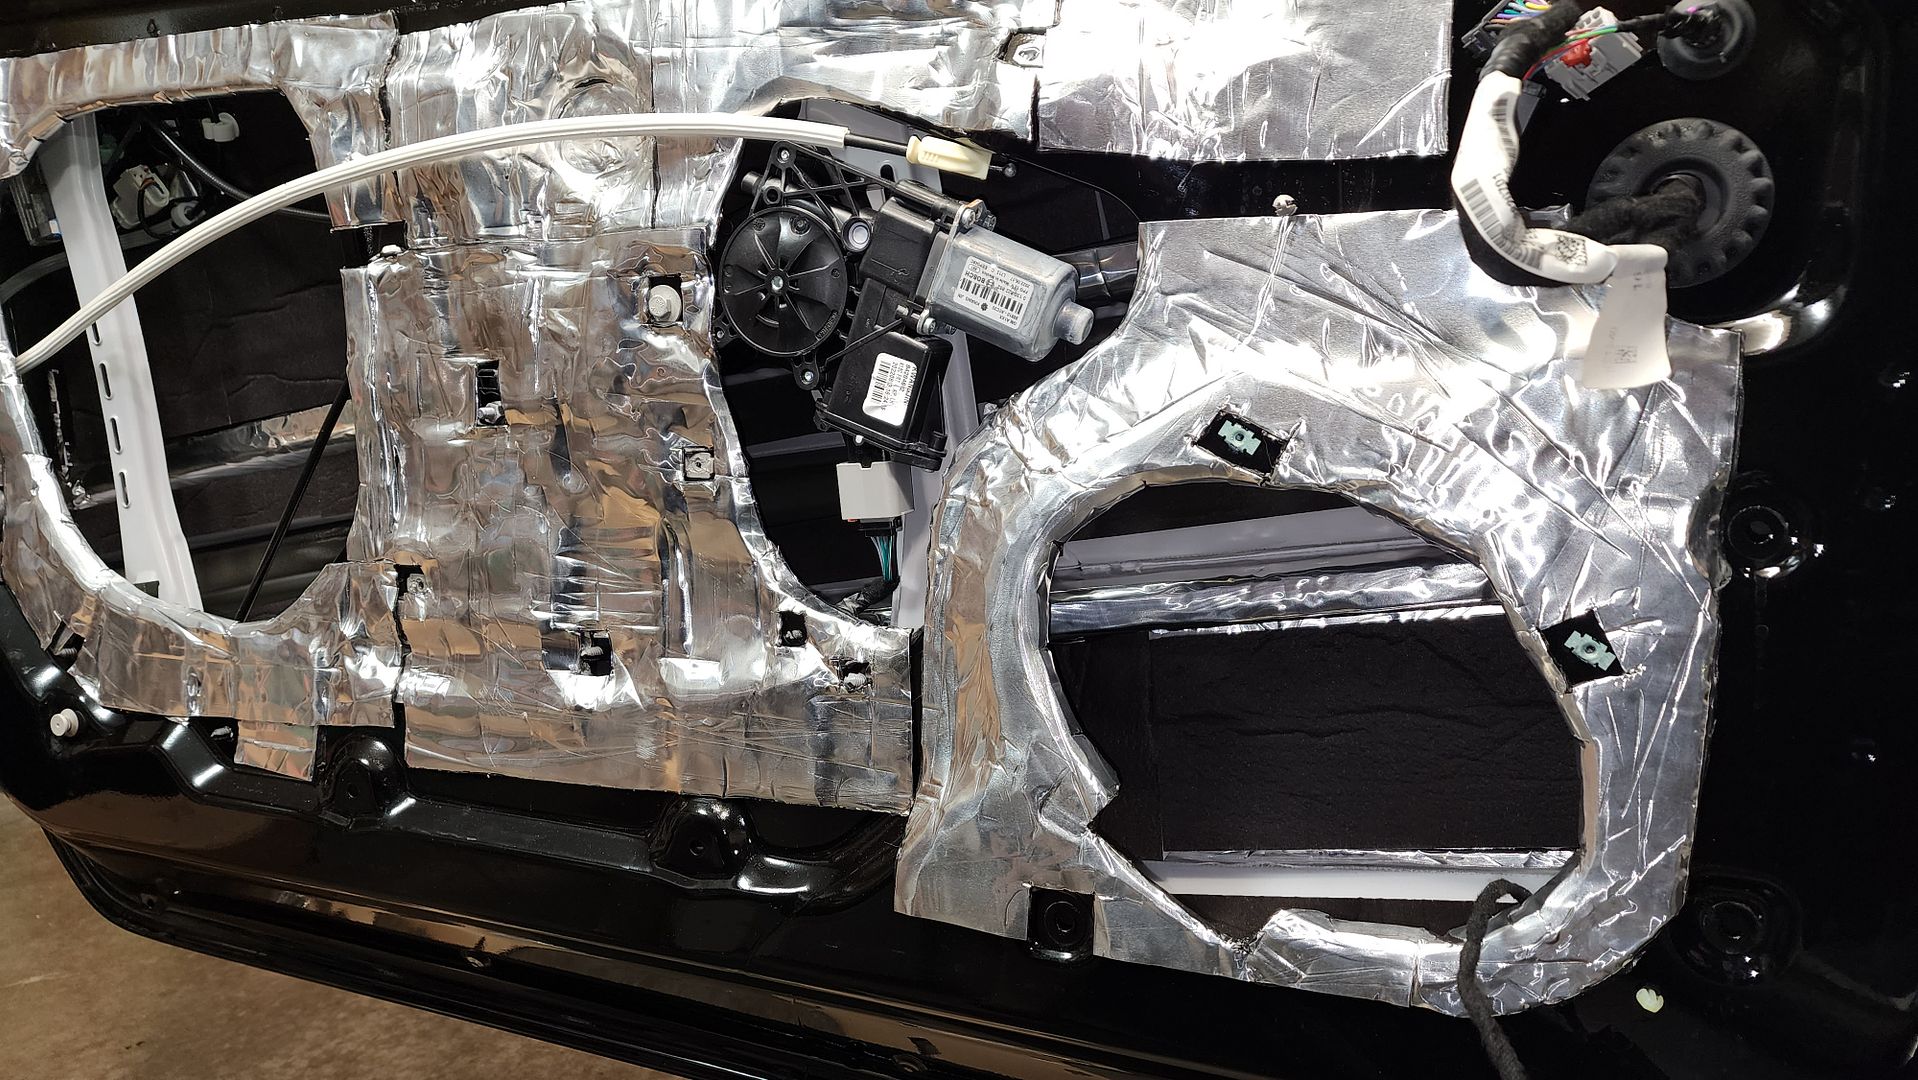
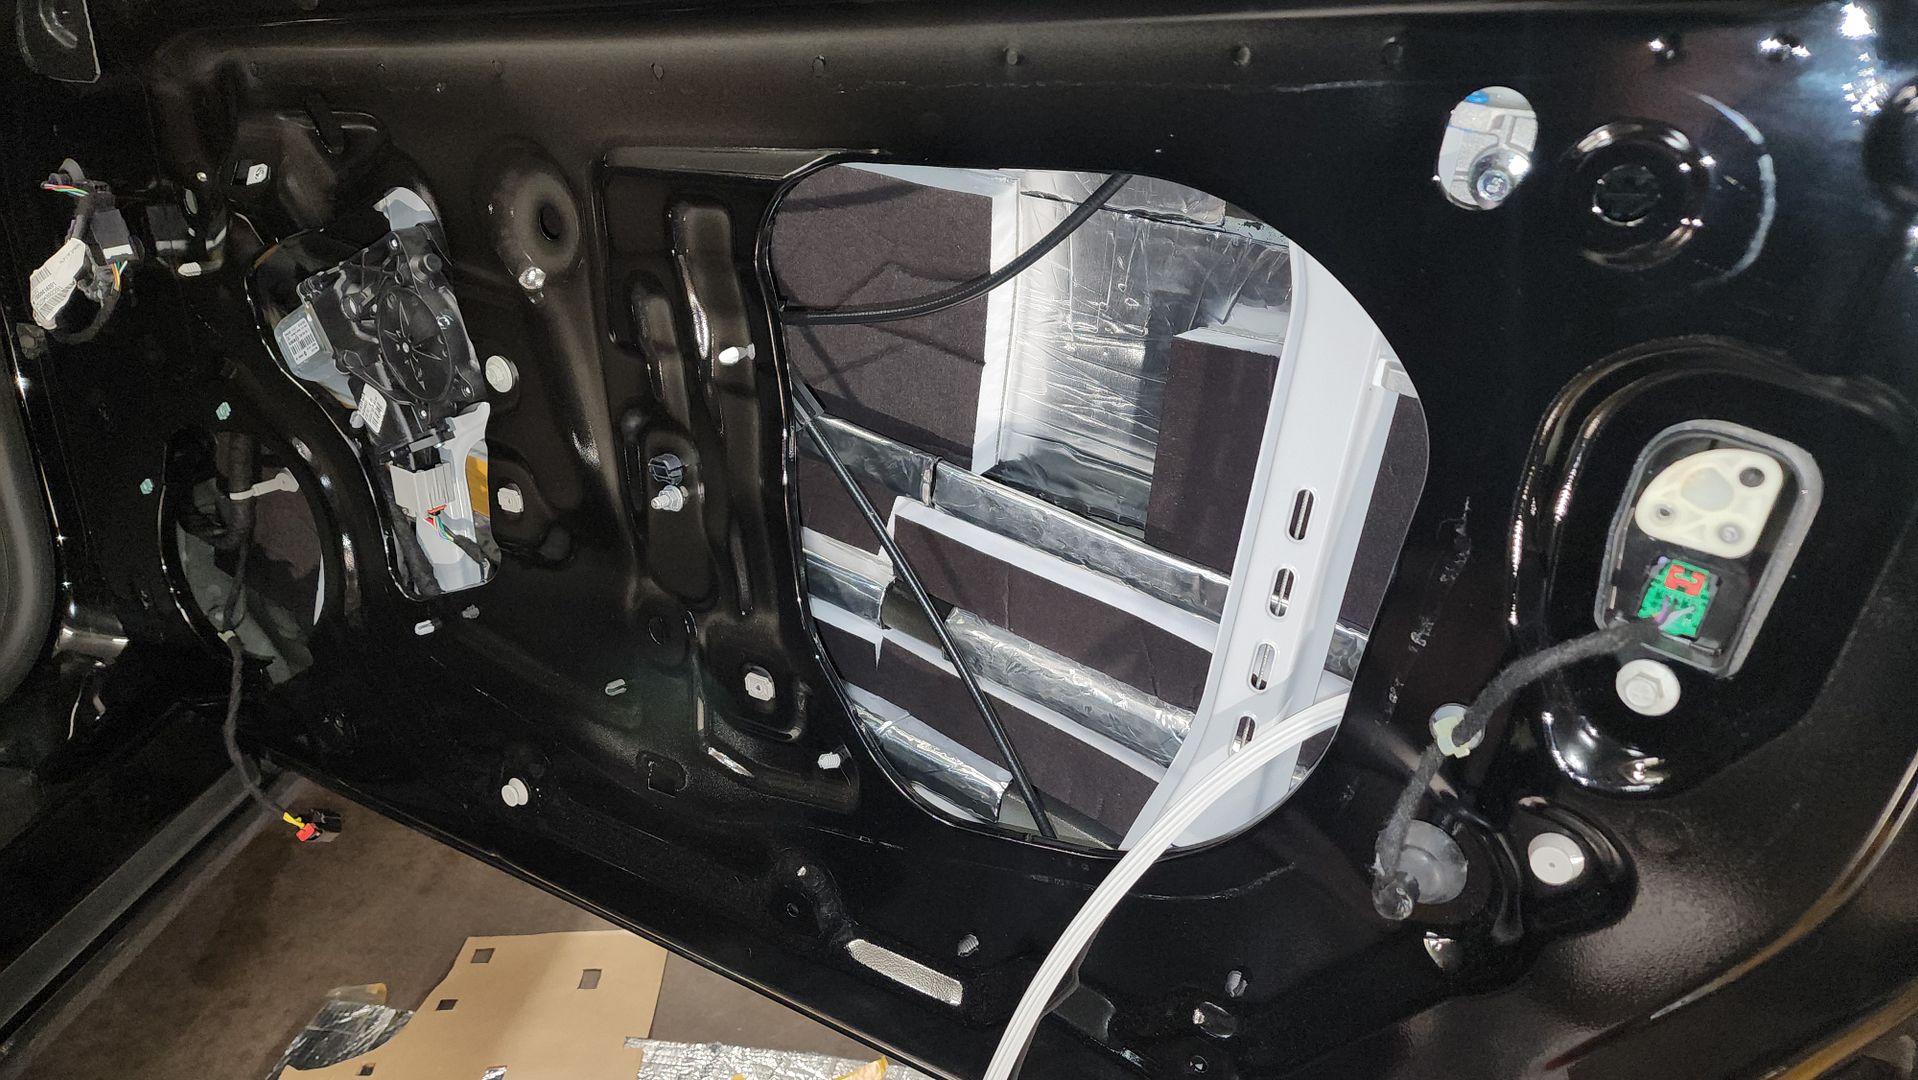
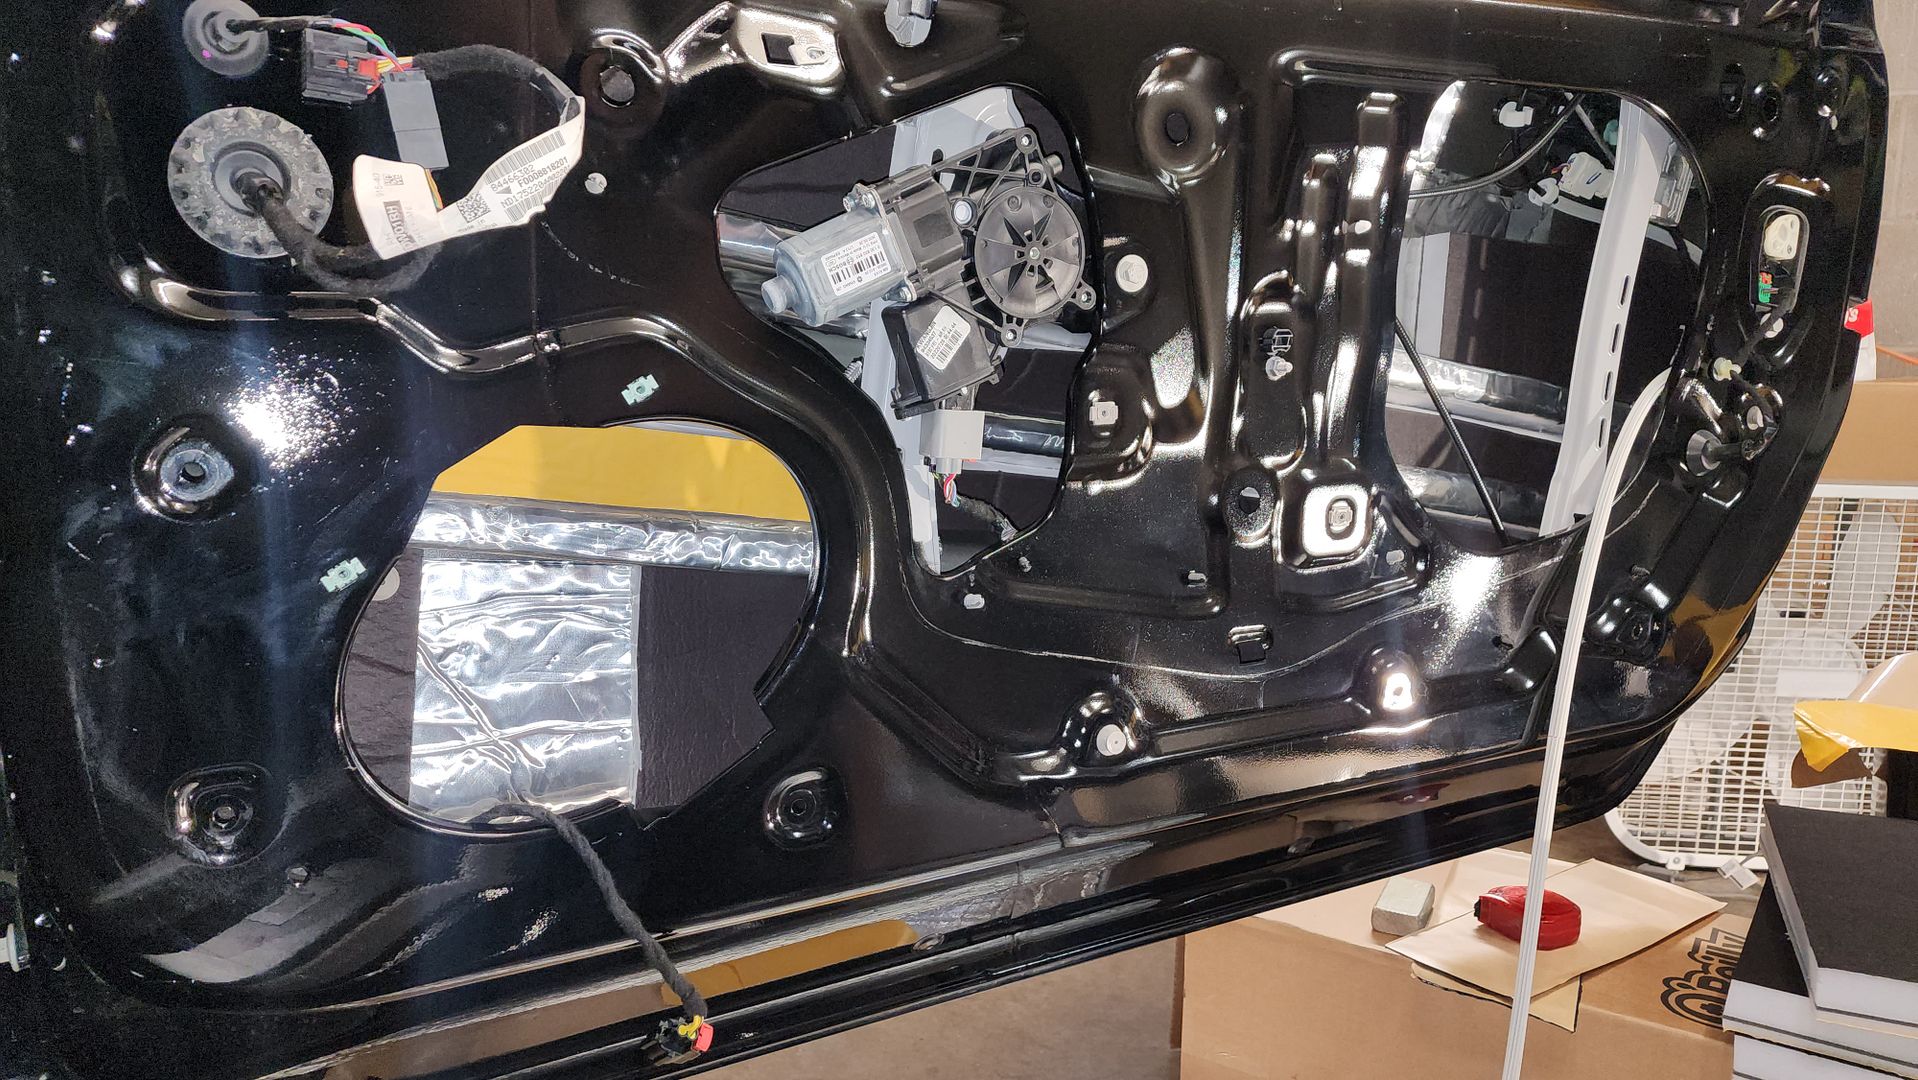
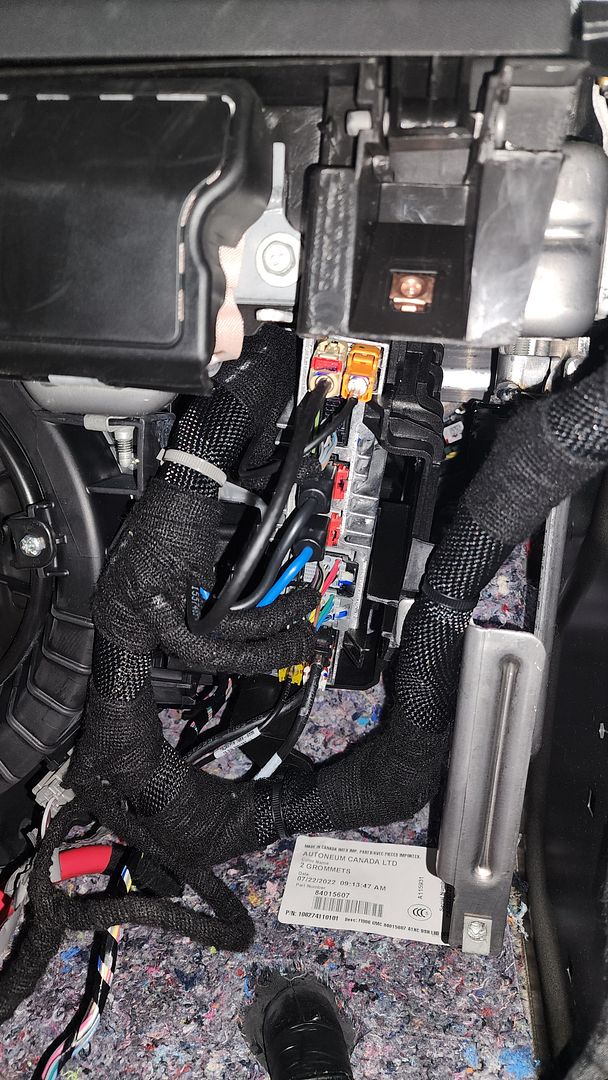
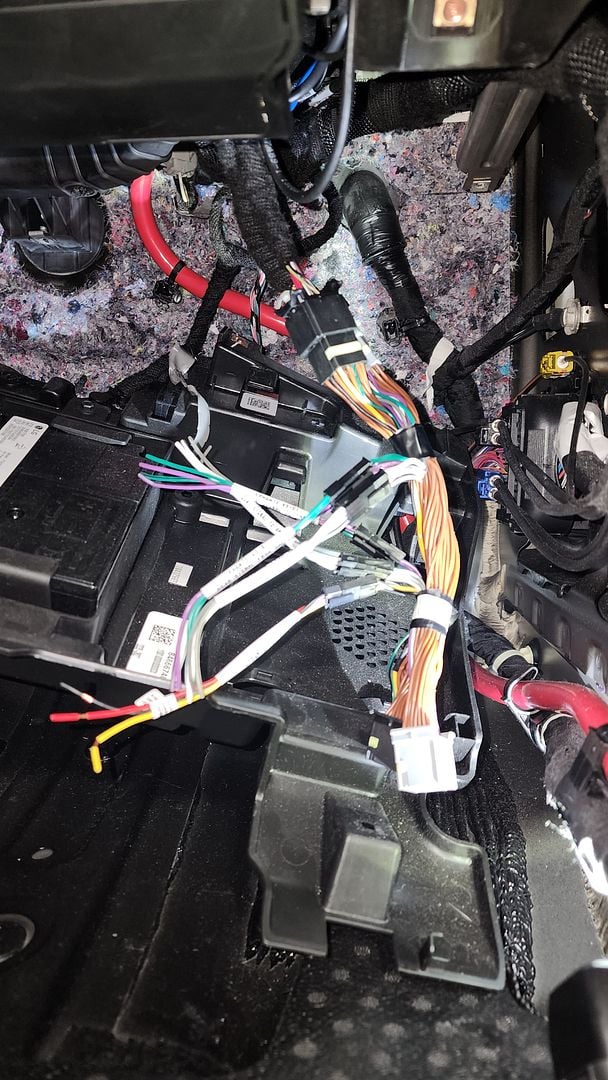
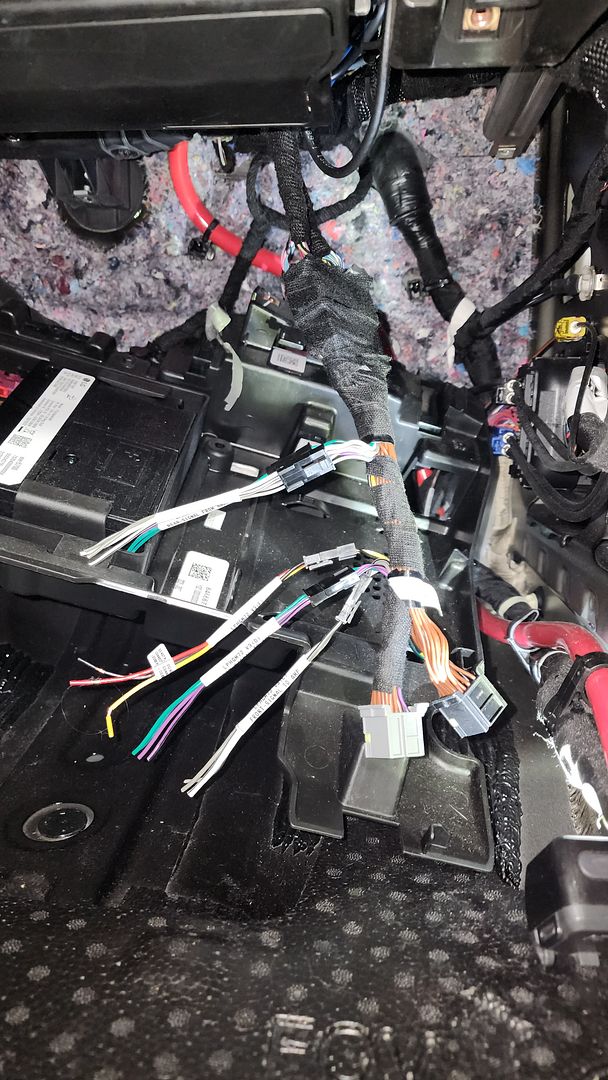
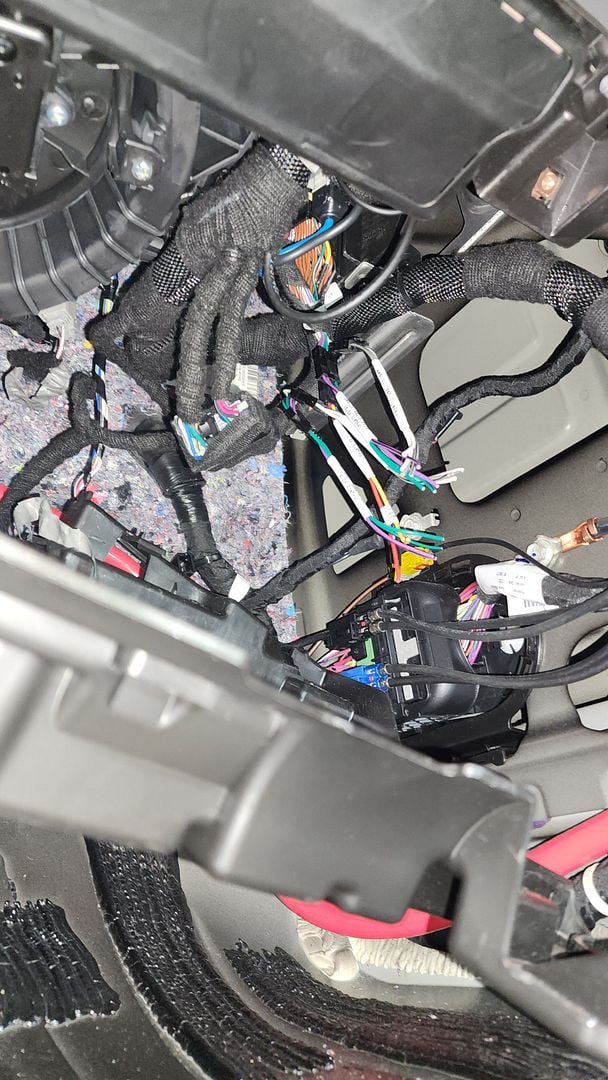
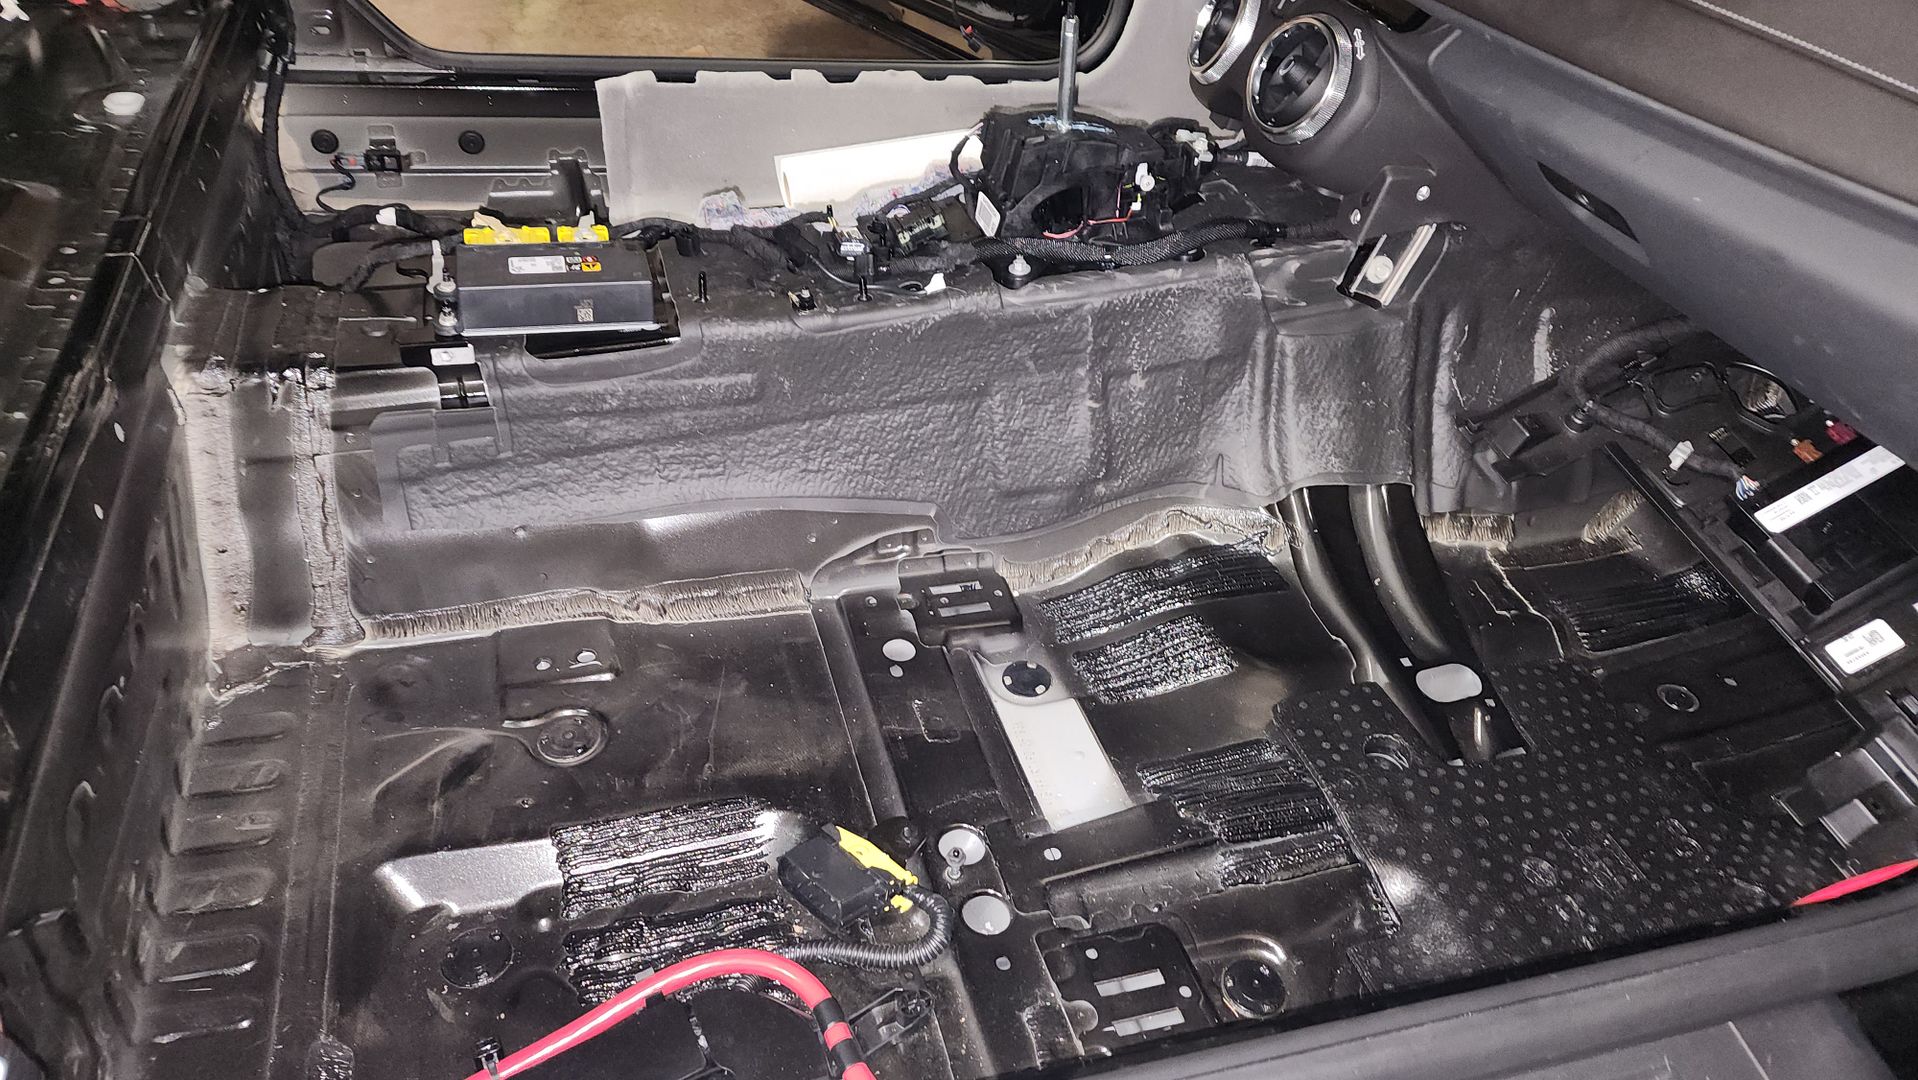
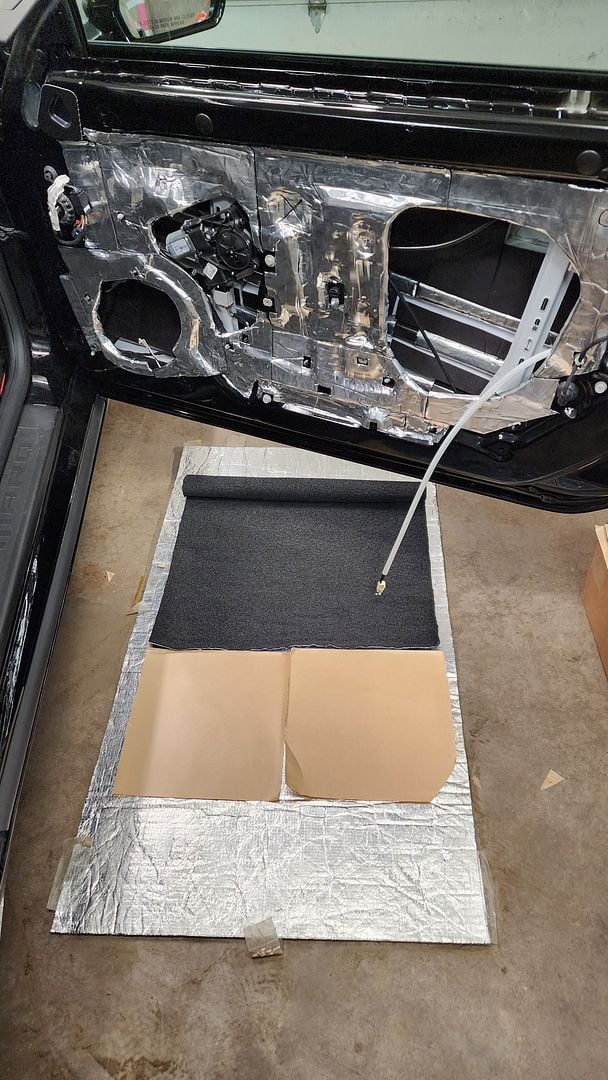
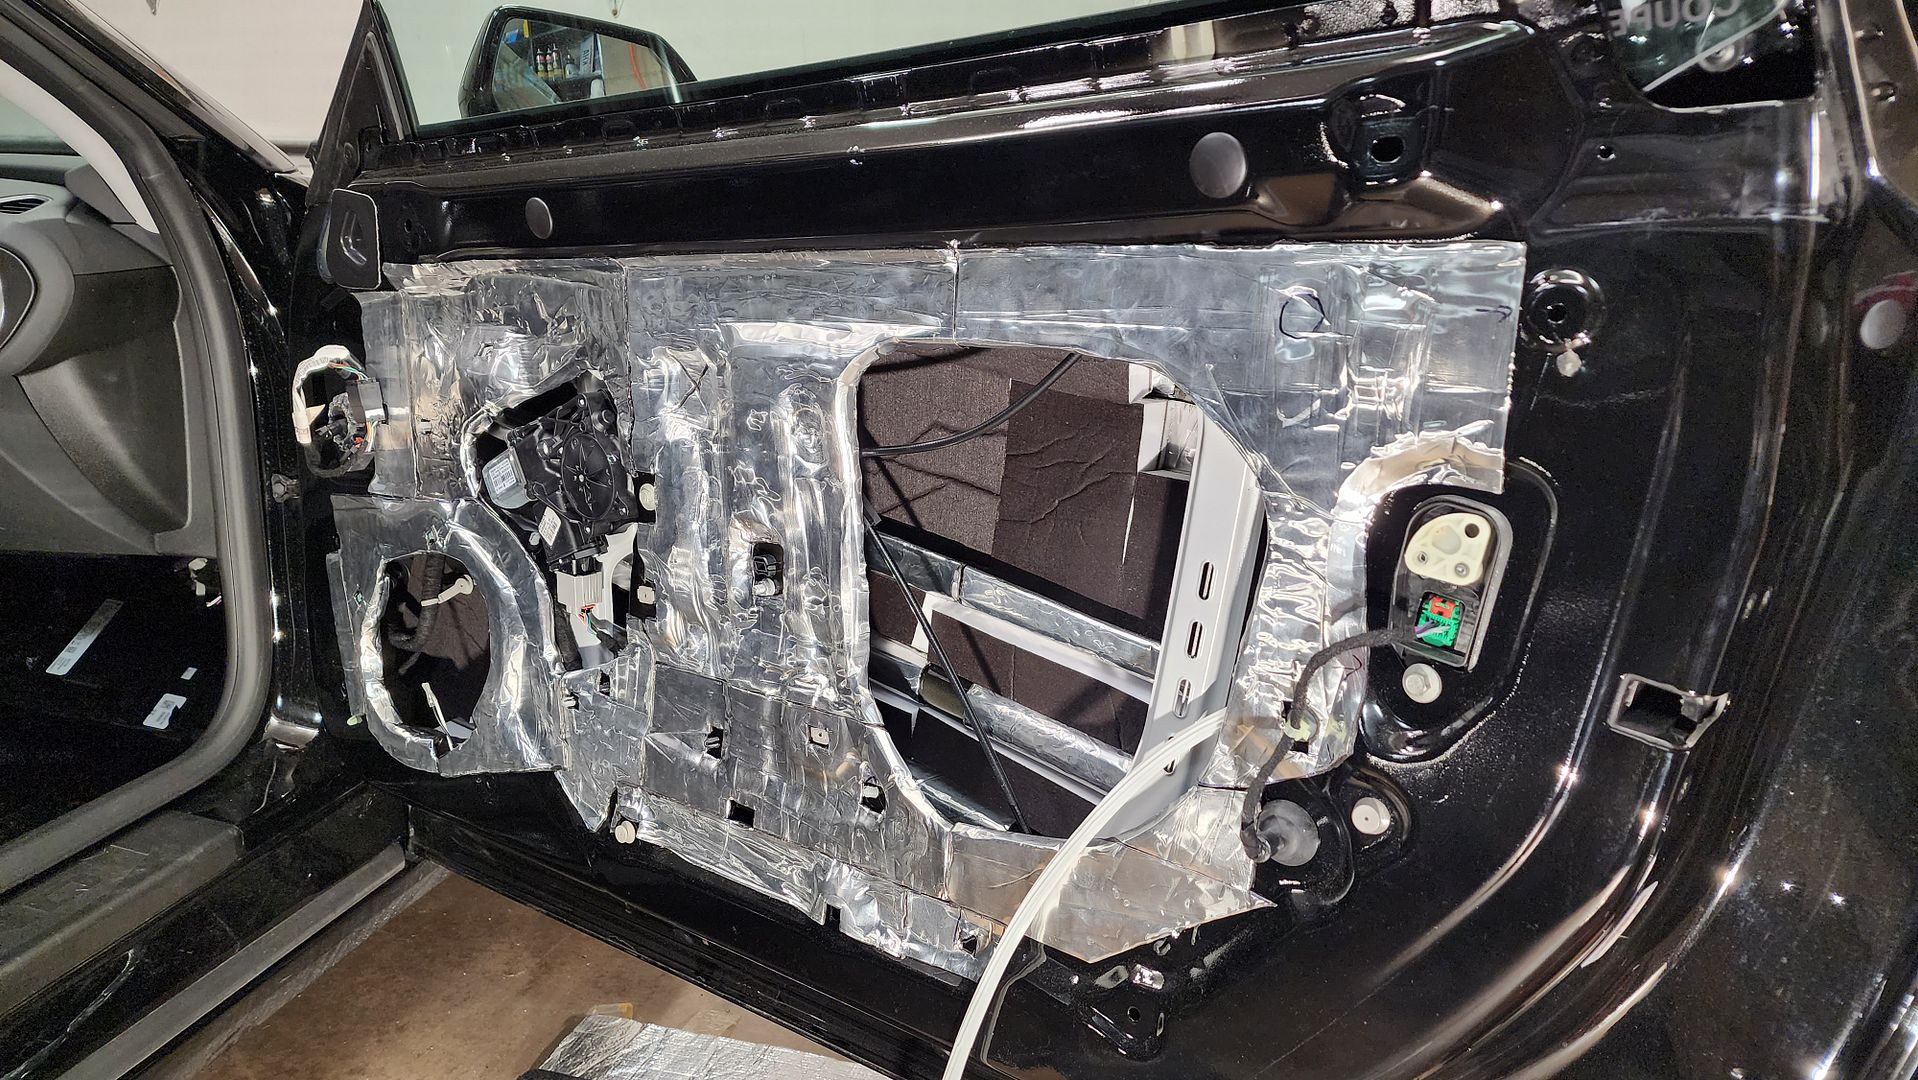
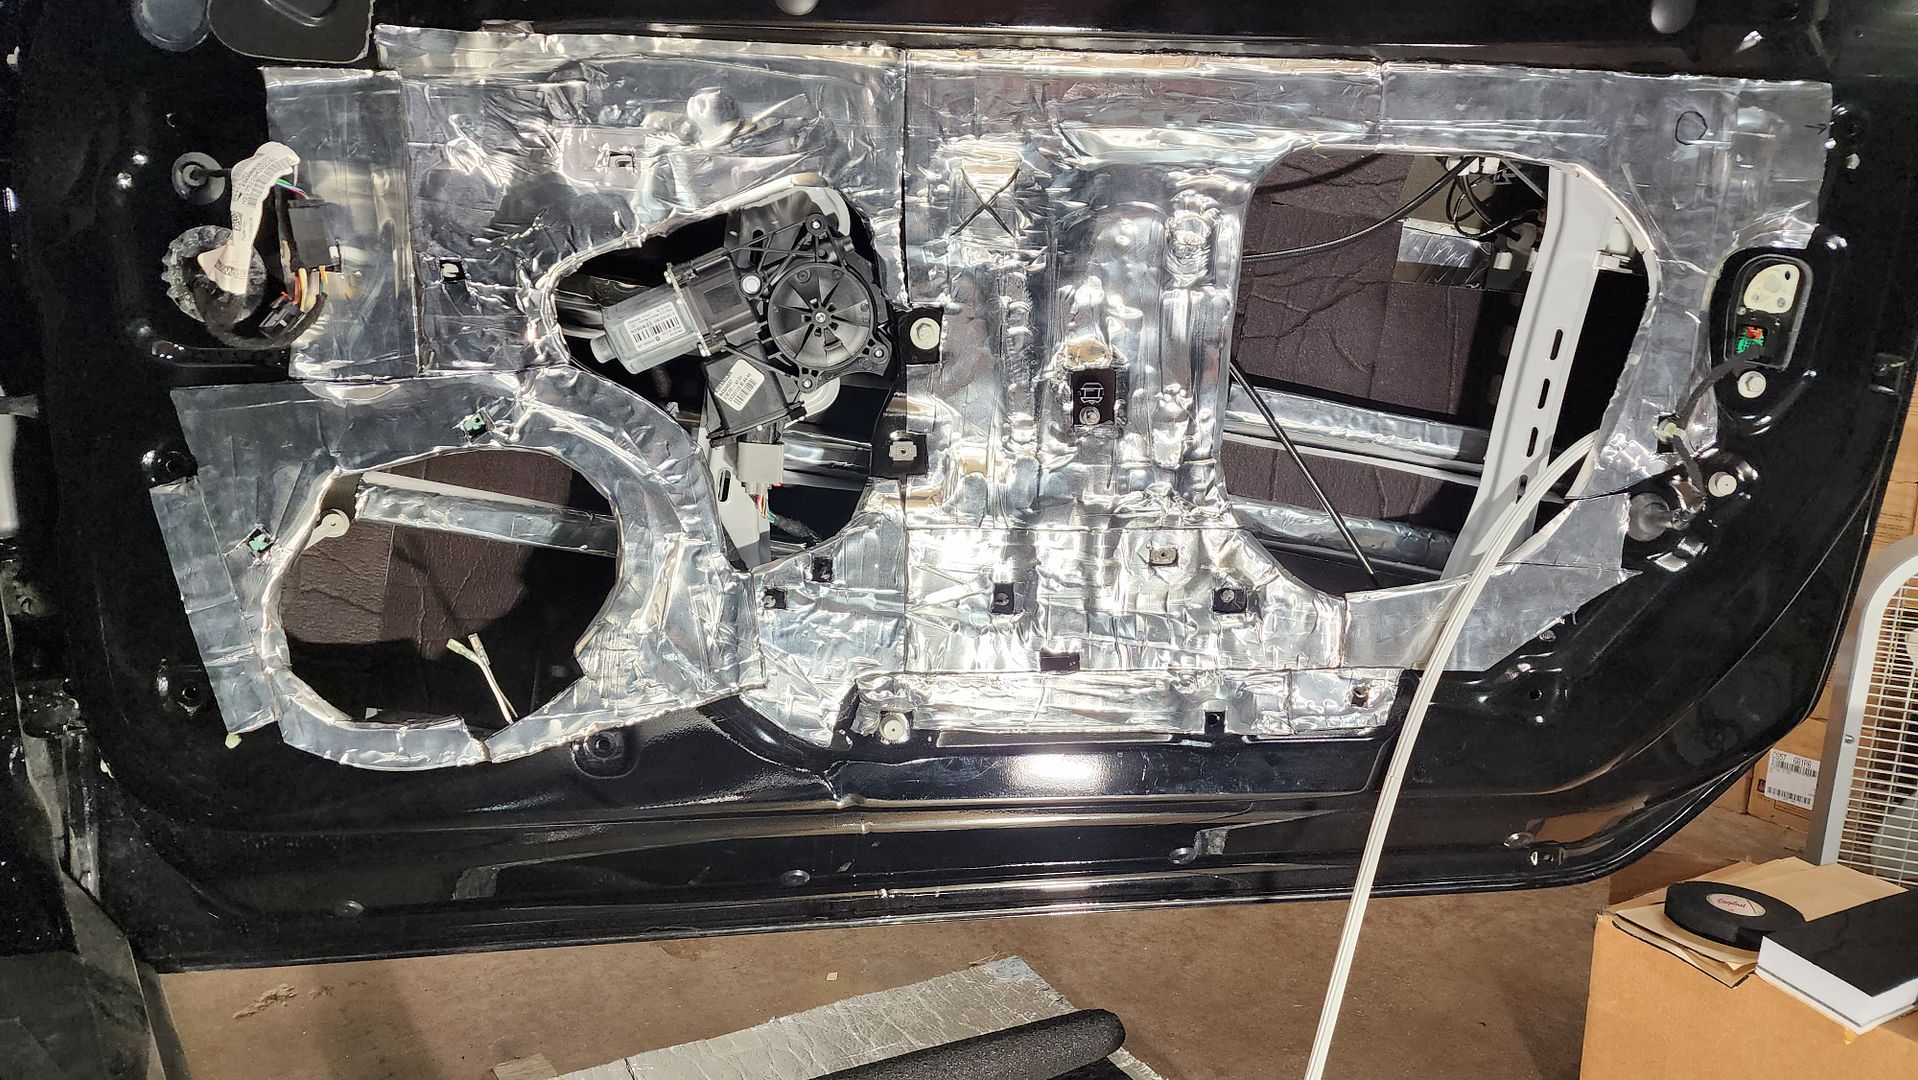
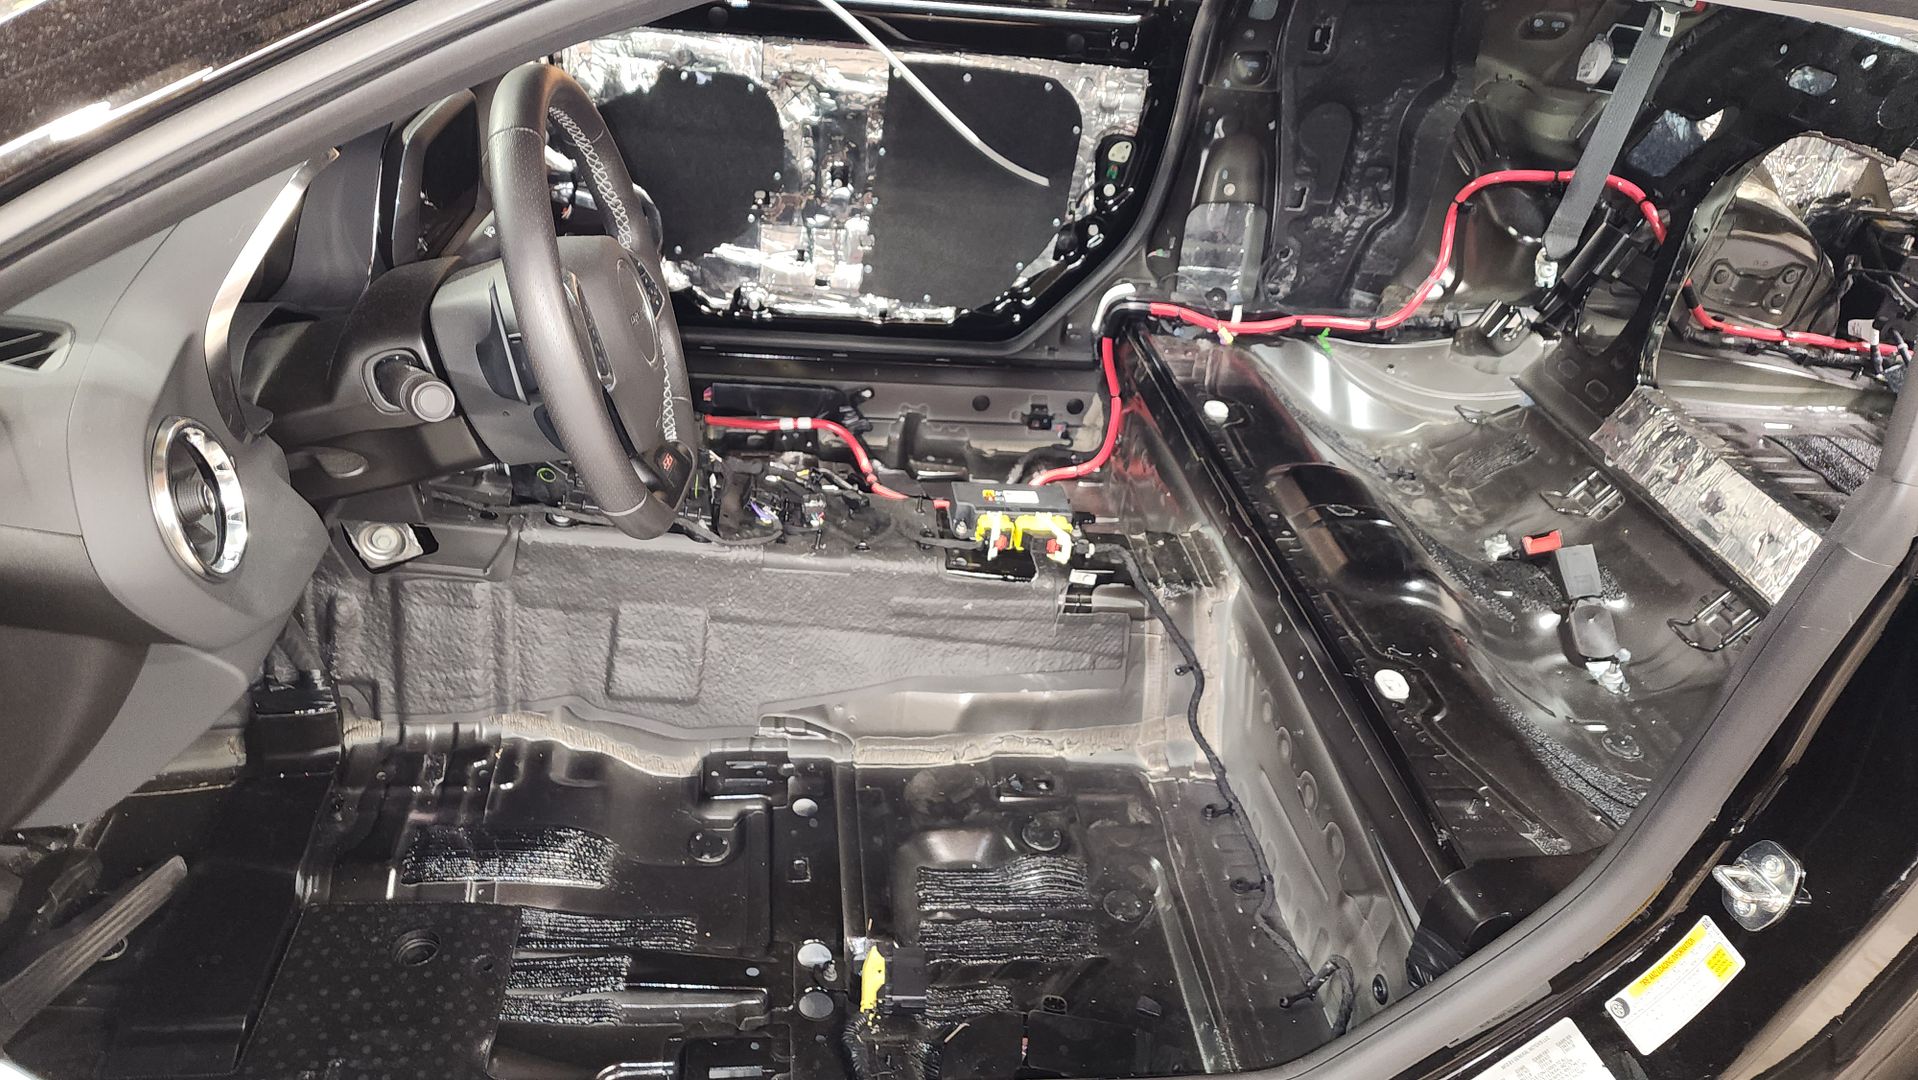
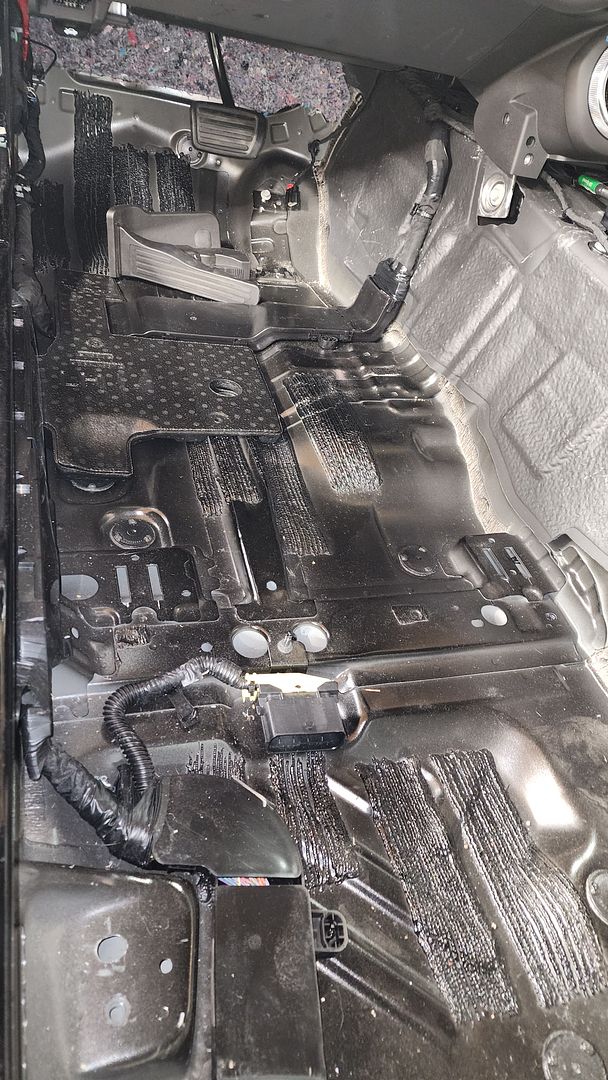
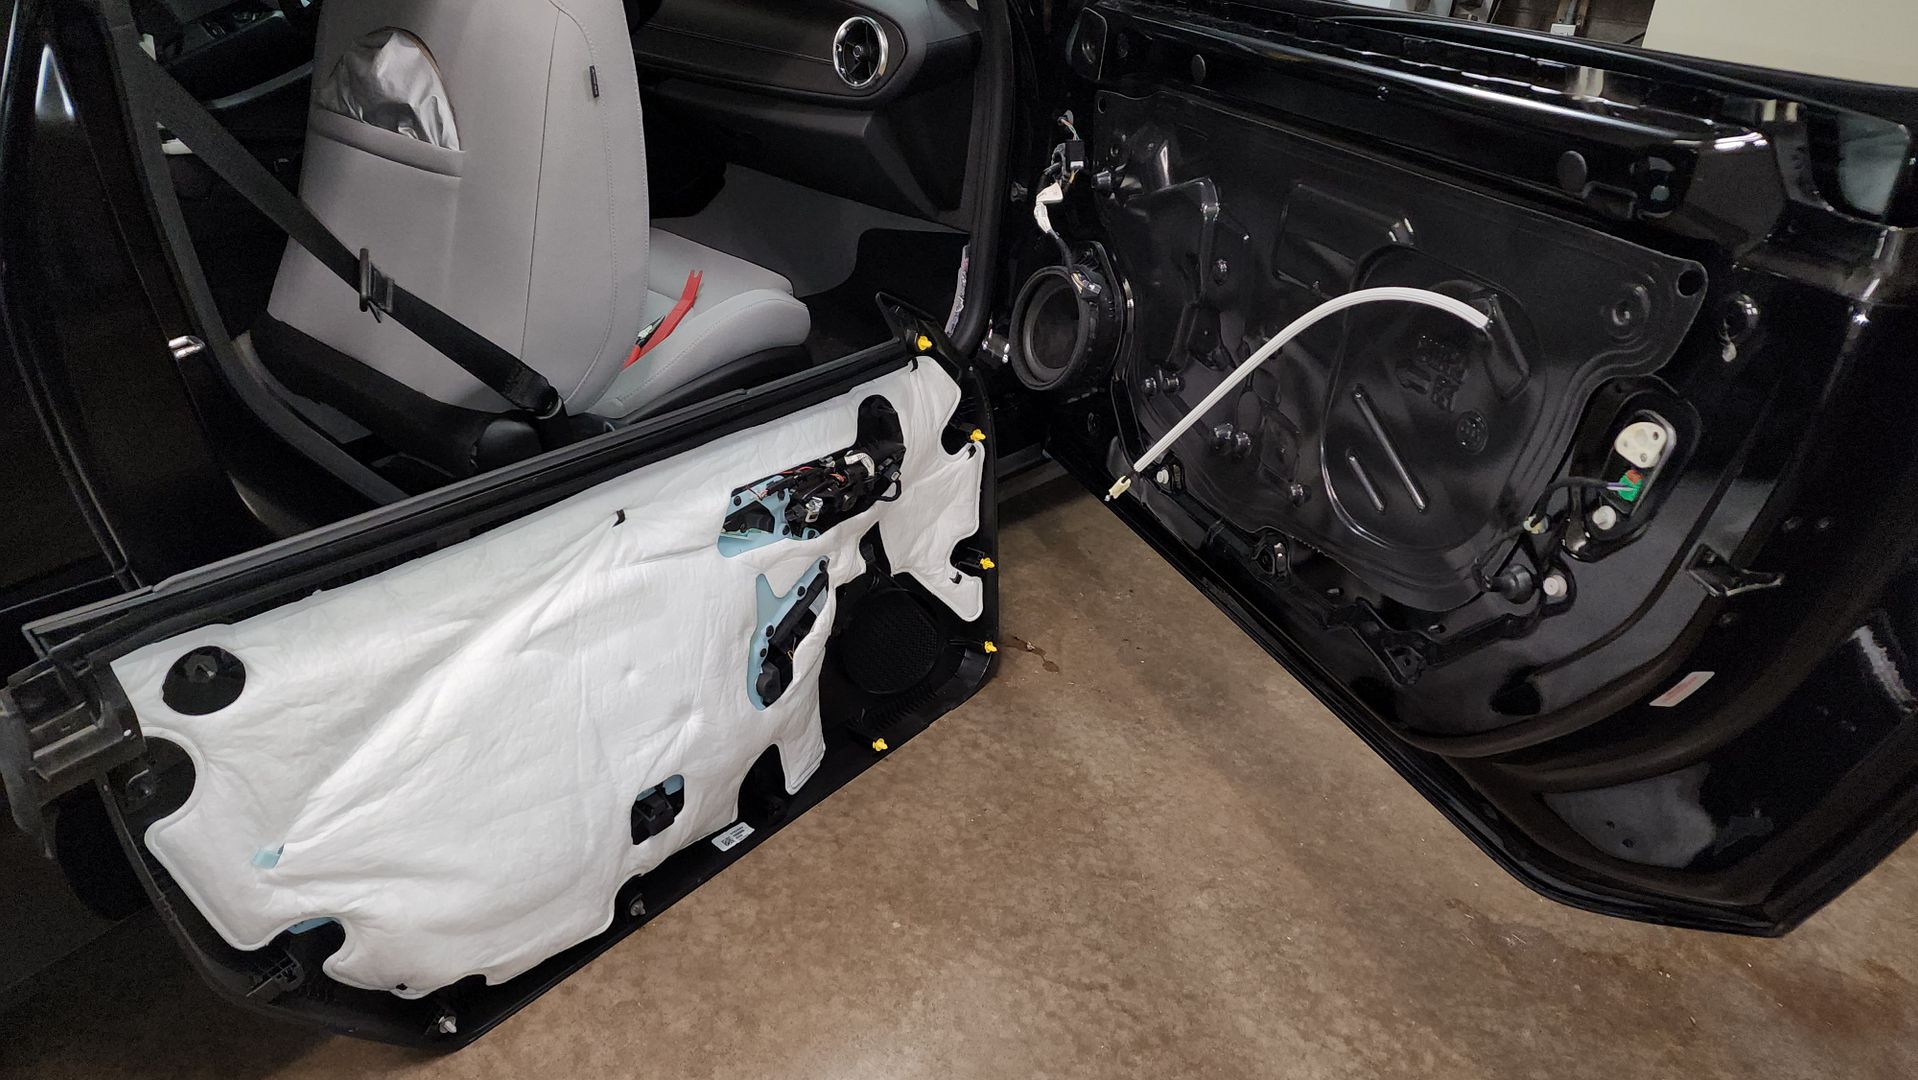
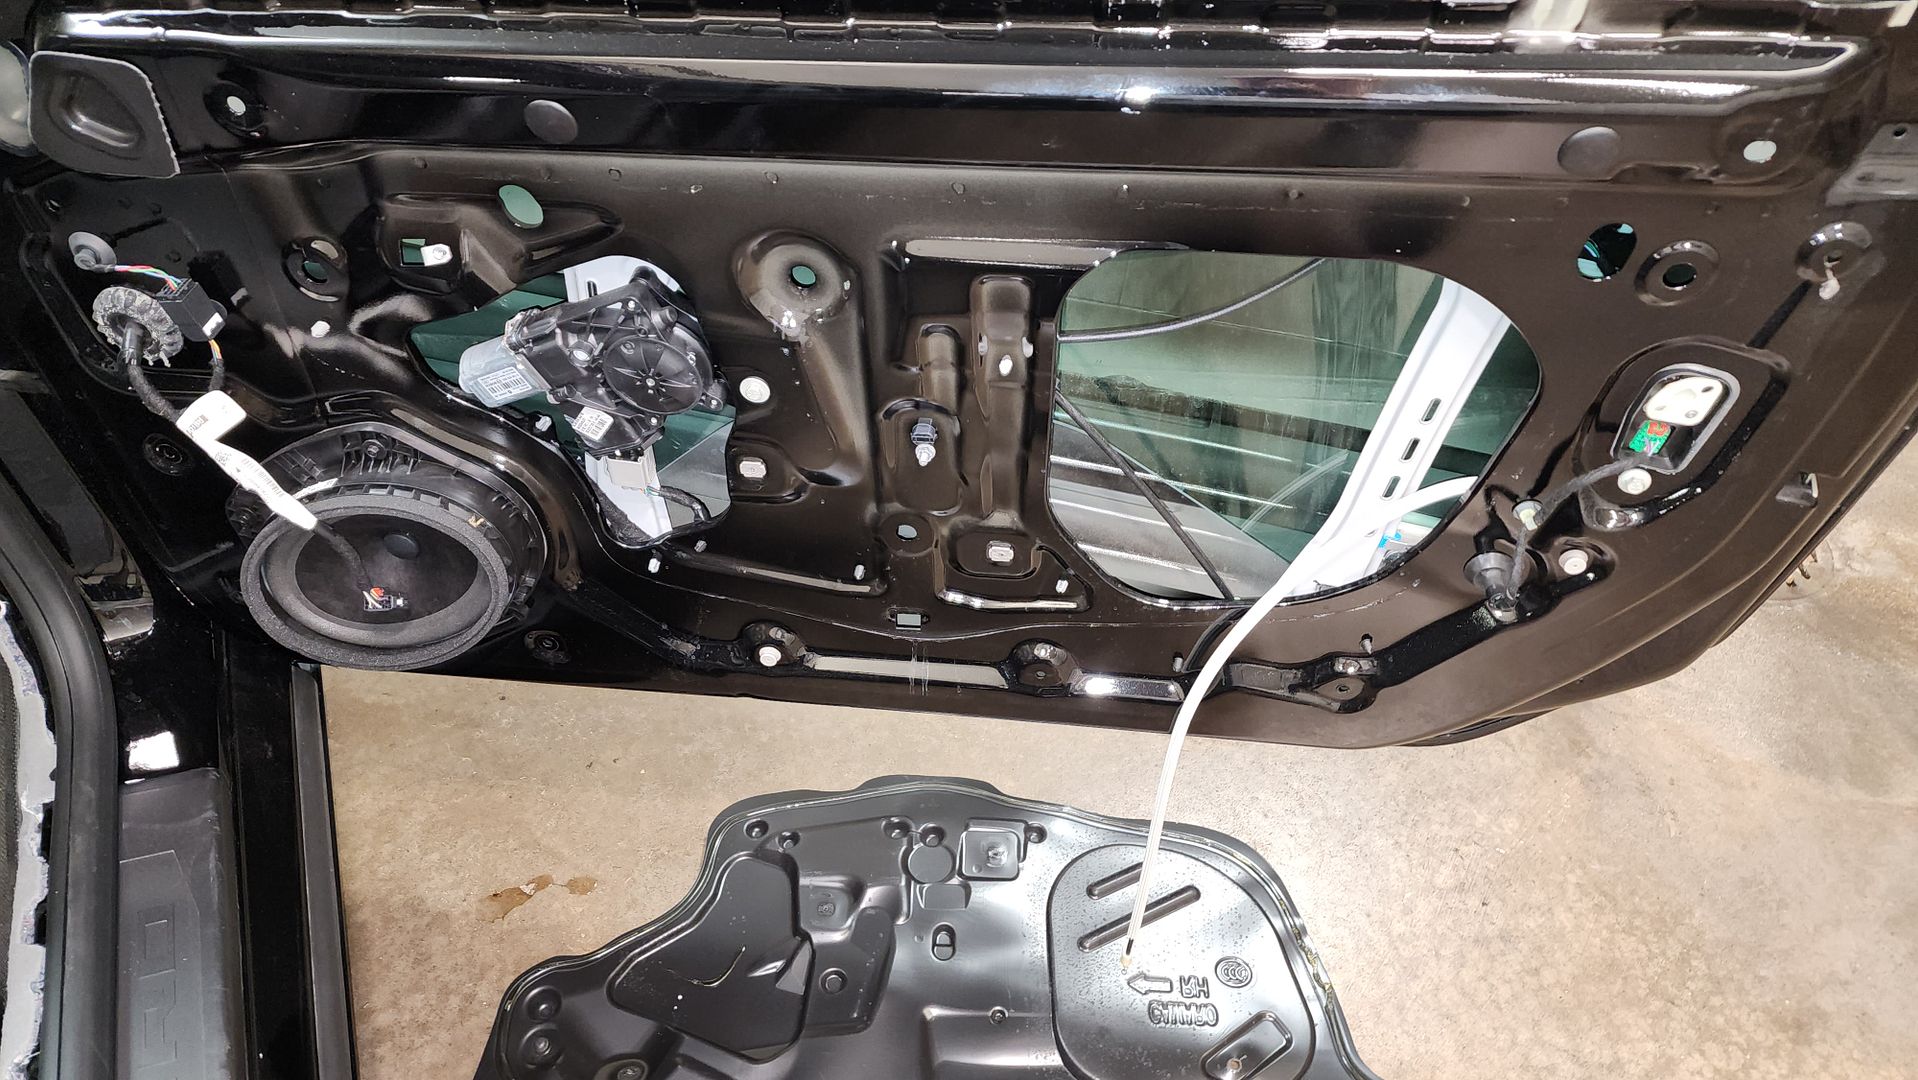
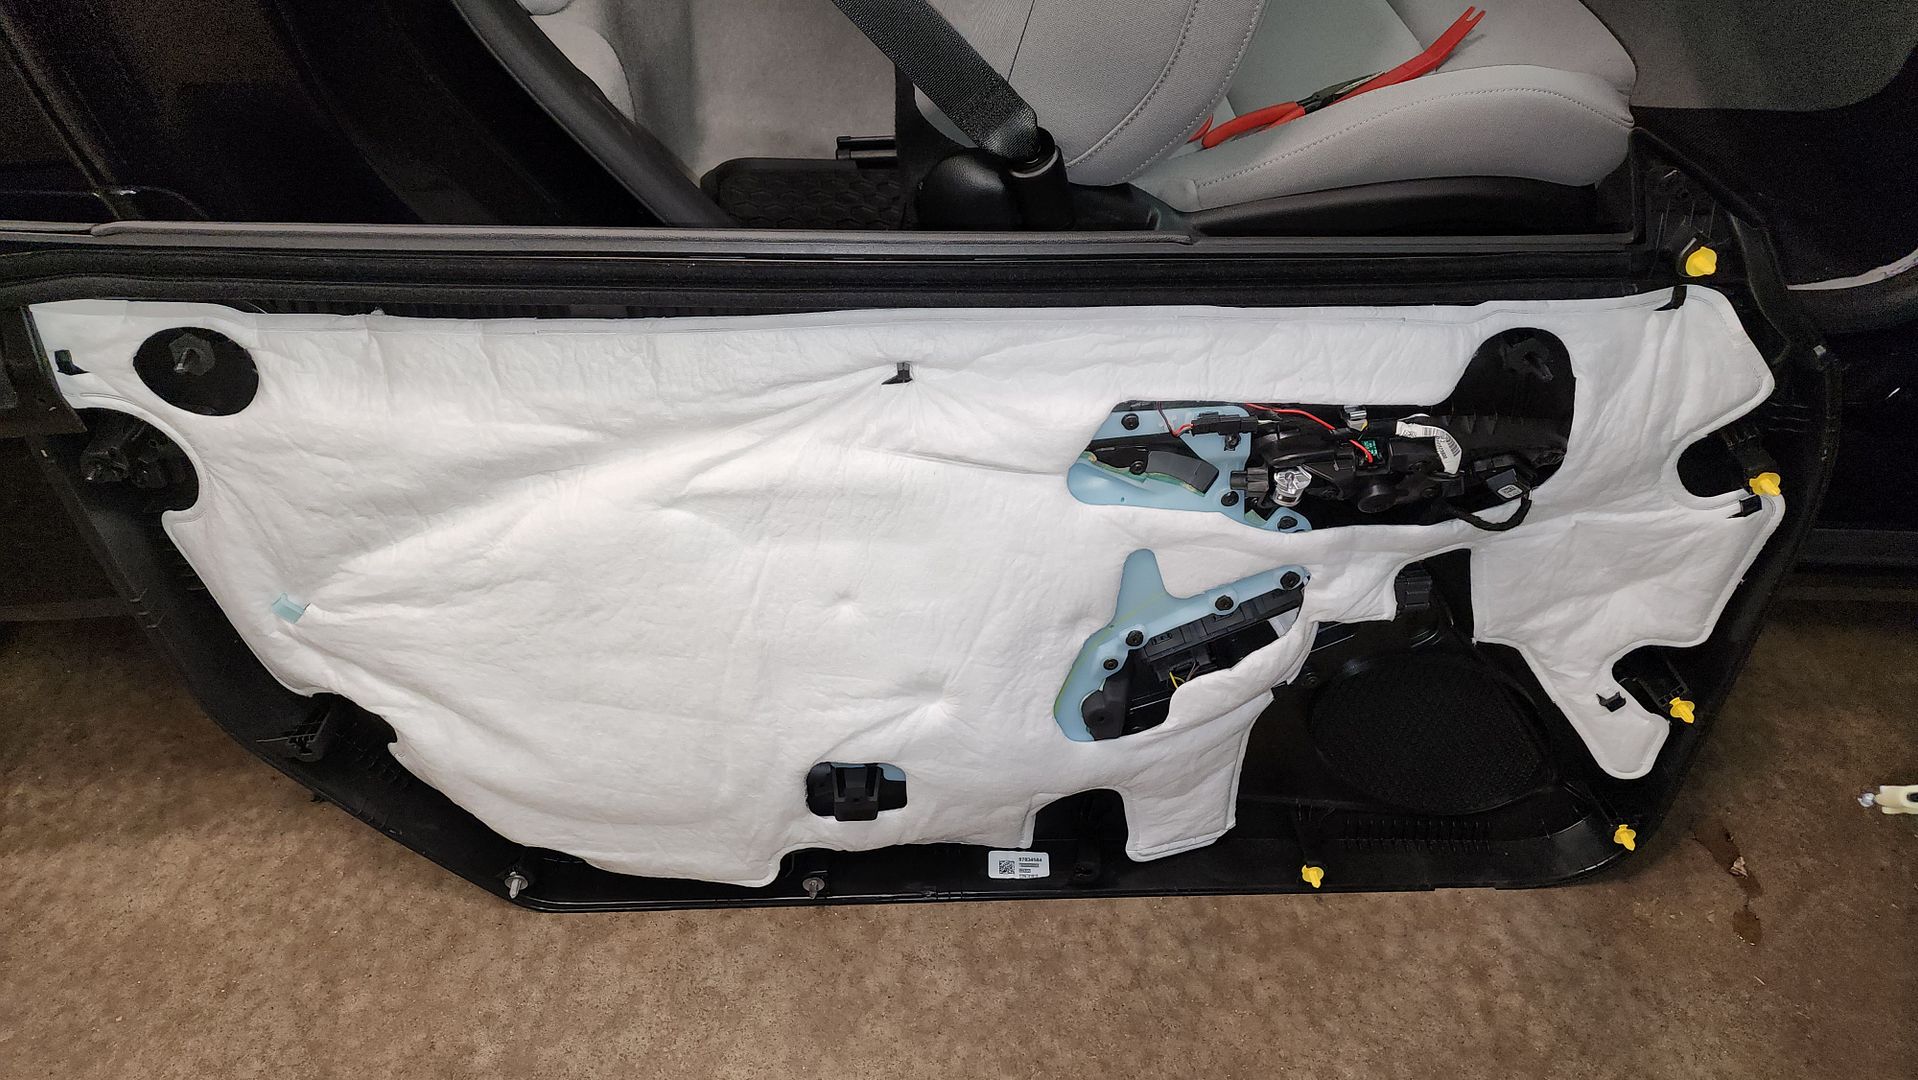
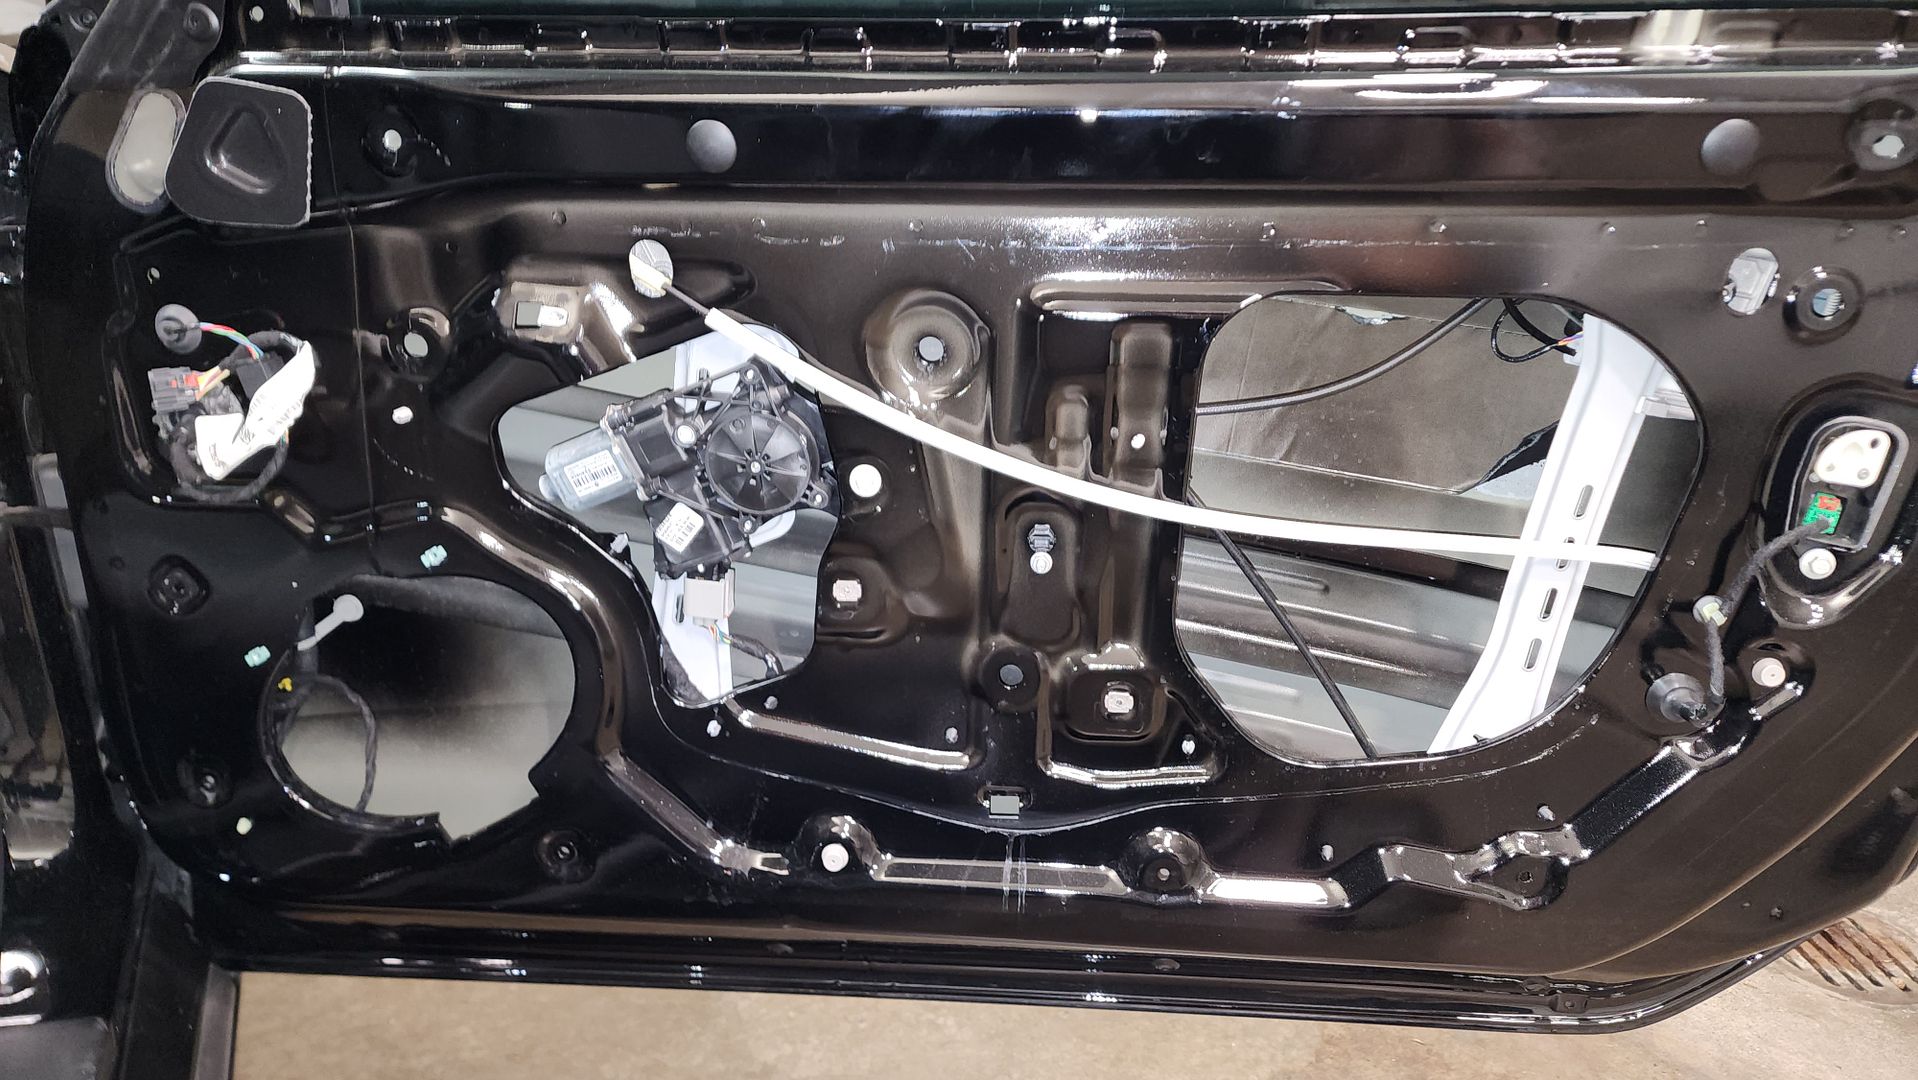
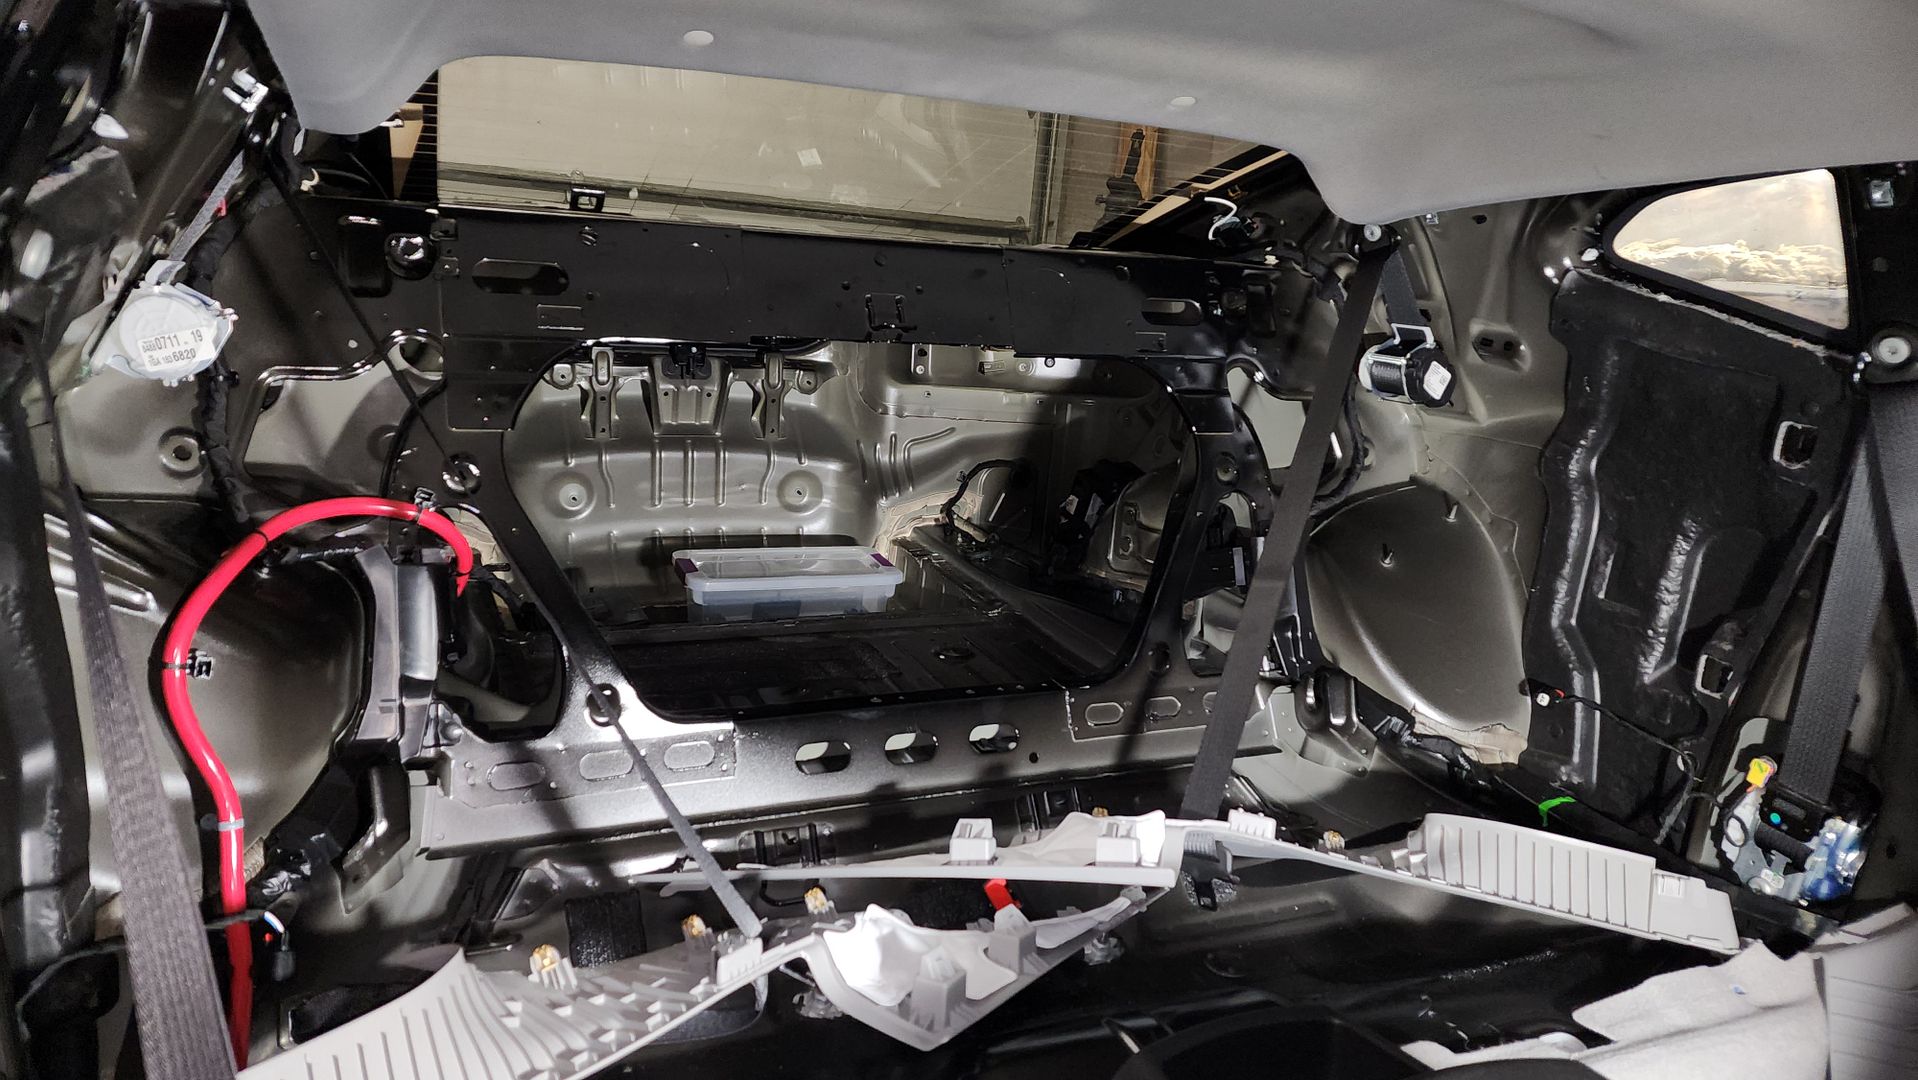
As with all of my builds, step one is disassembly. To do this safely, I purchased a subscription to ACDelcoTDS and used the access to the dealer service information to download instructions to disassemble all of the interior panels, as well as electrical schematics for most of the systems in the car. The disassembly instructions allow me to know exactly where fasteners and clips are, so nothing gets broken during the process.


Disassembly


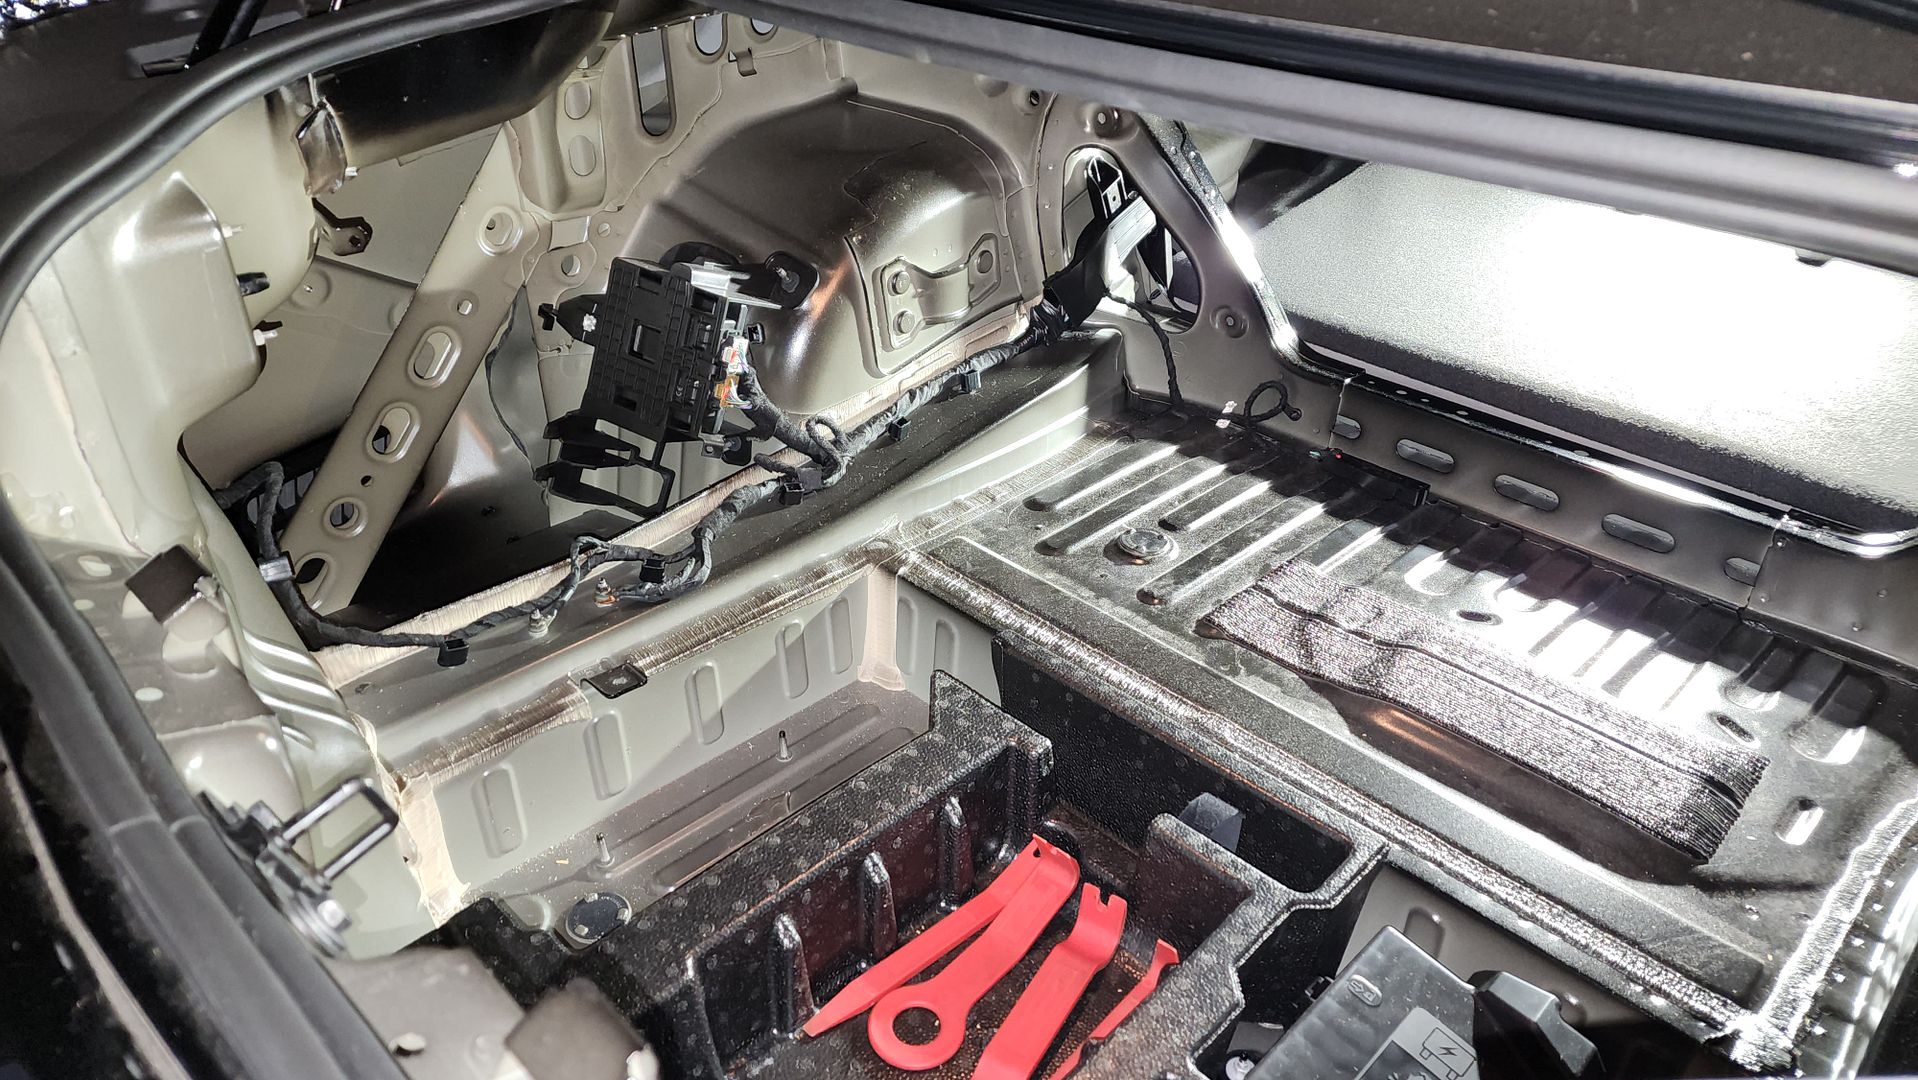
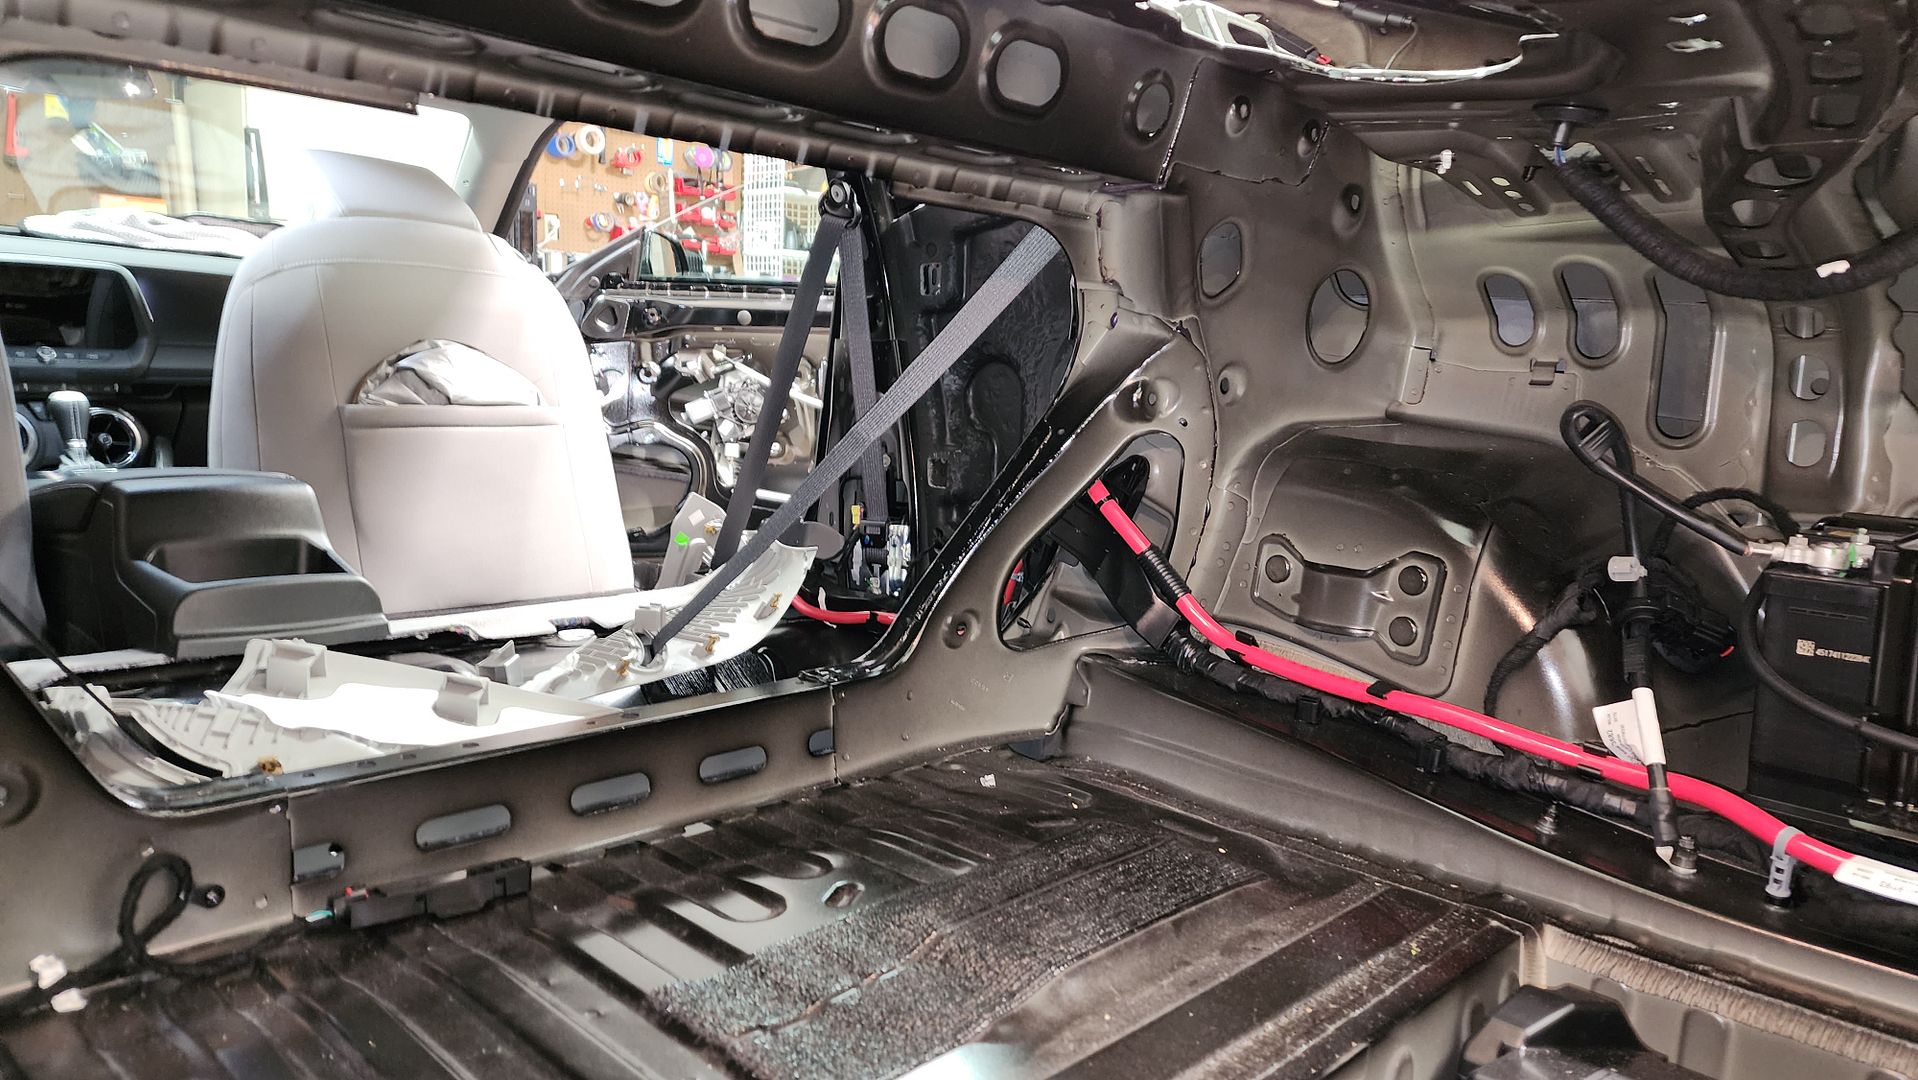
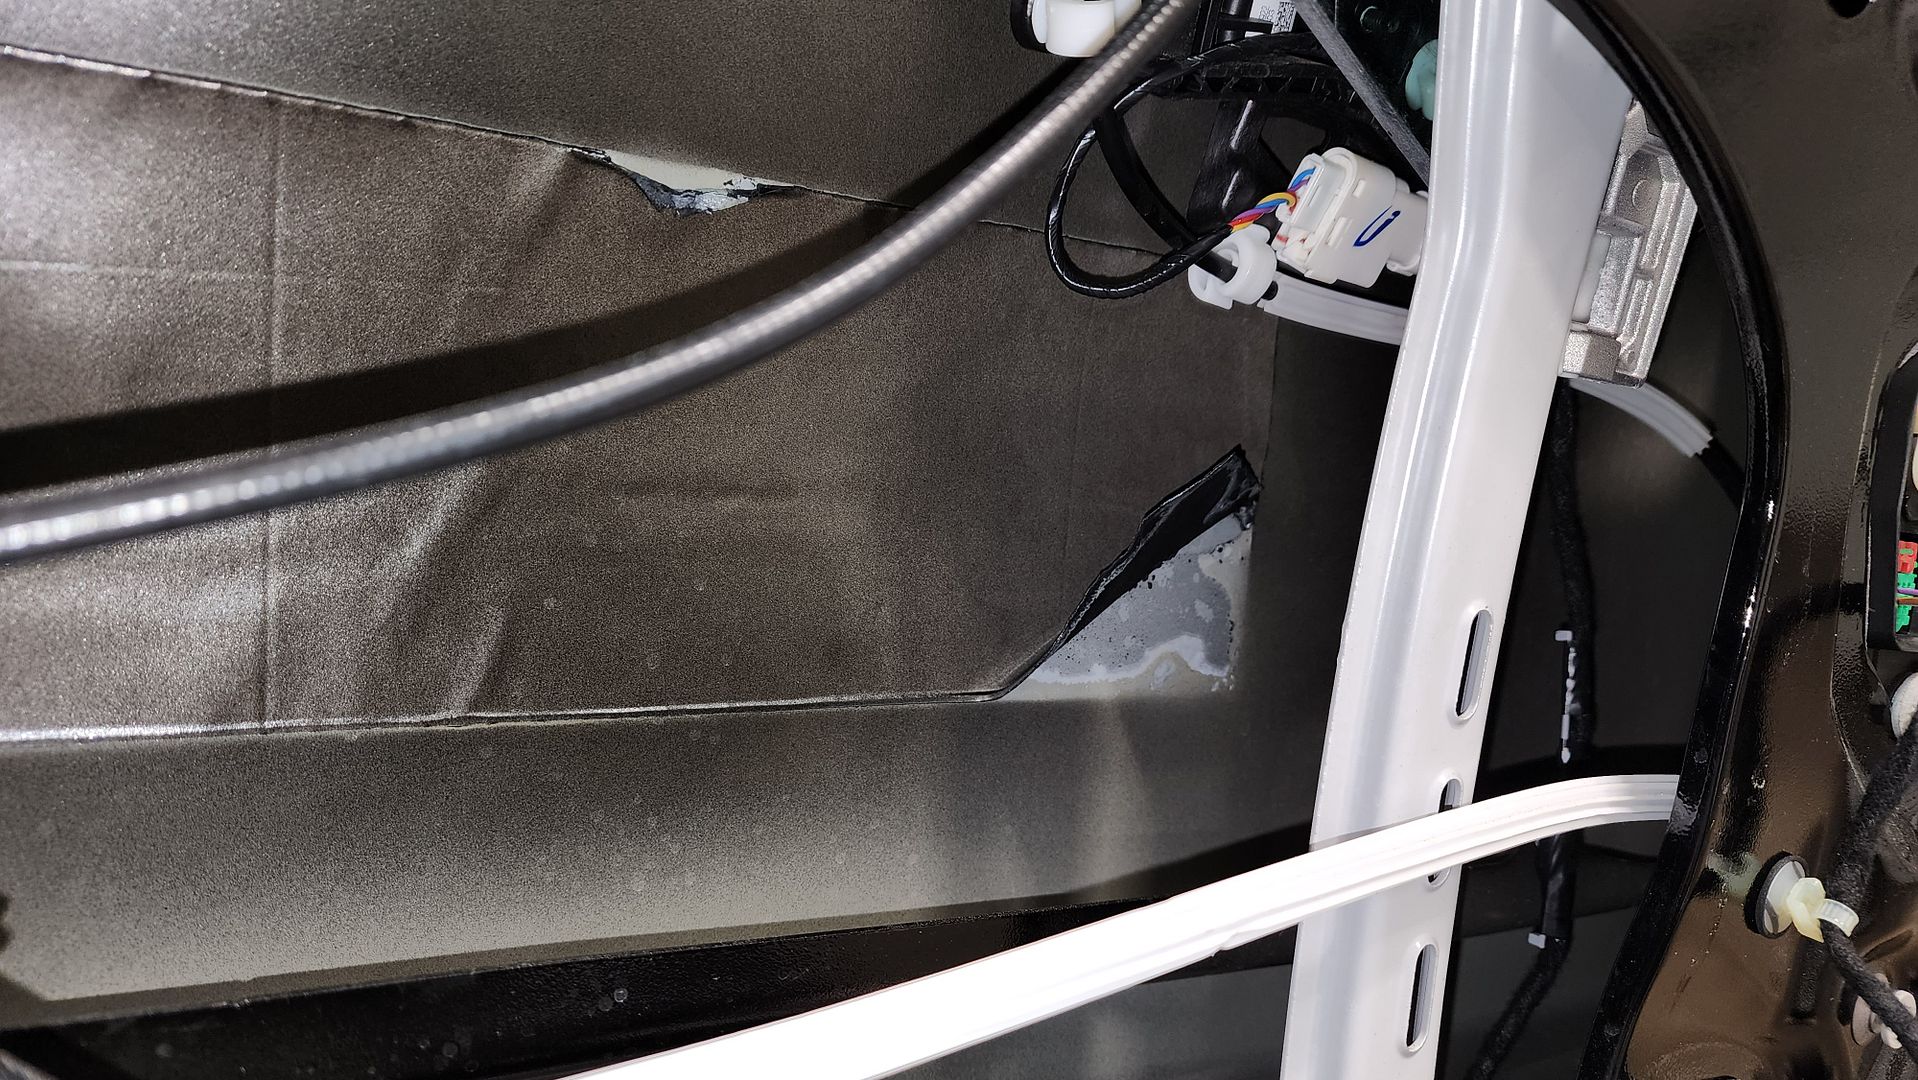
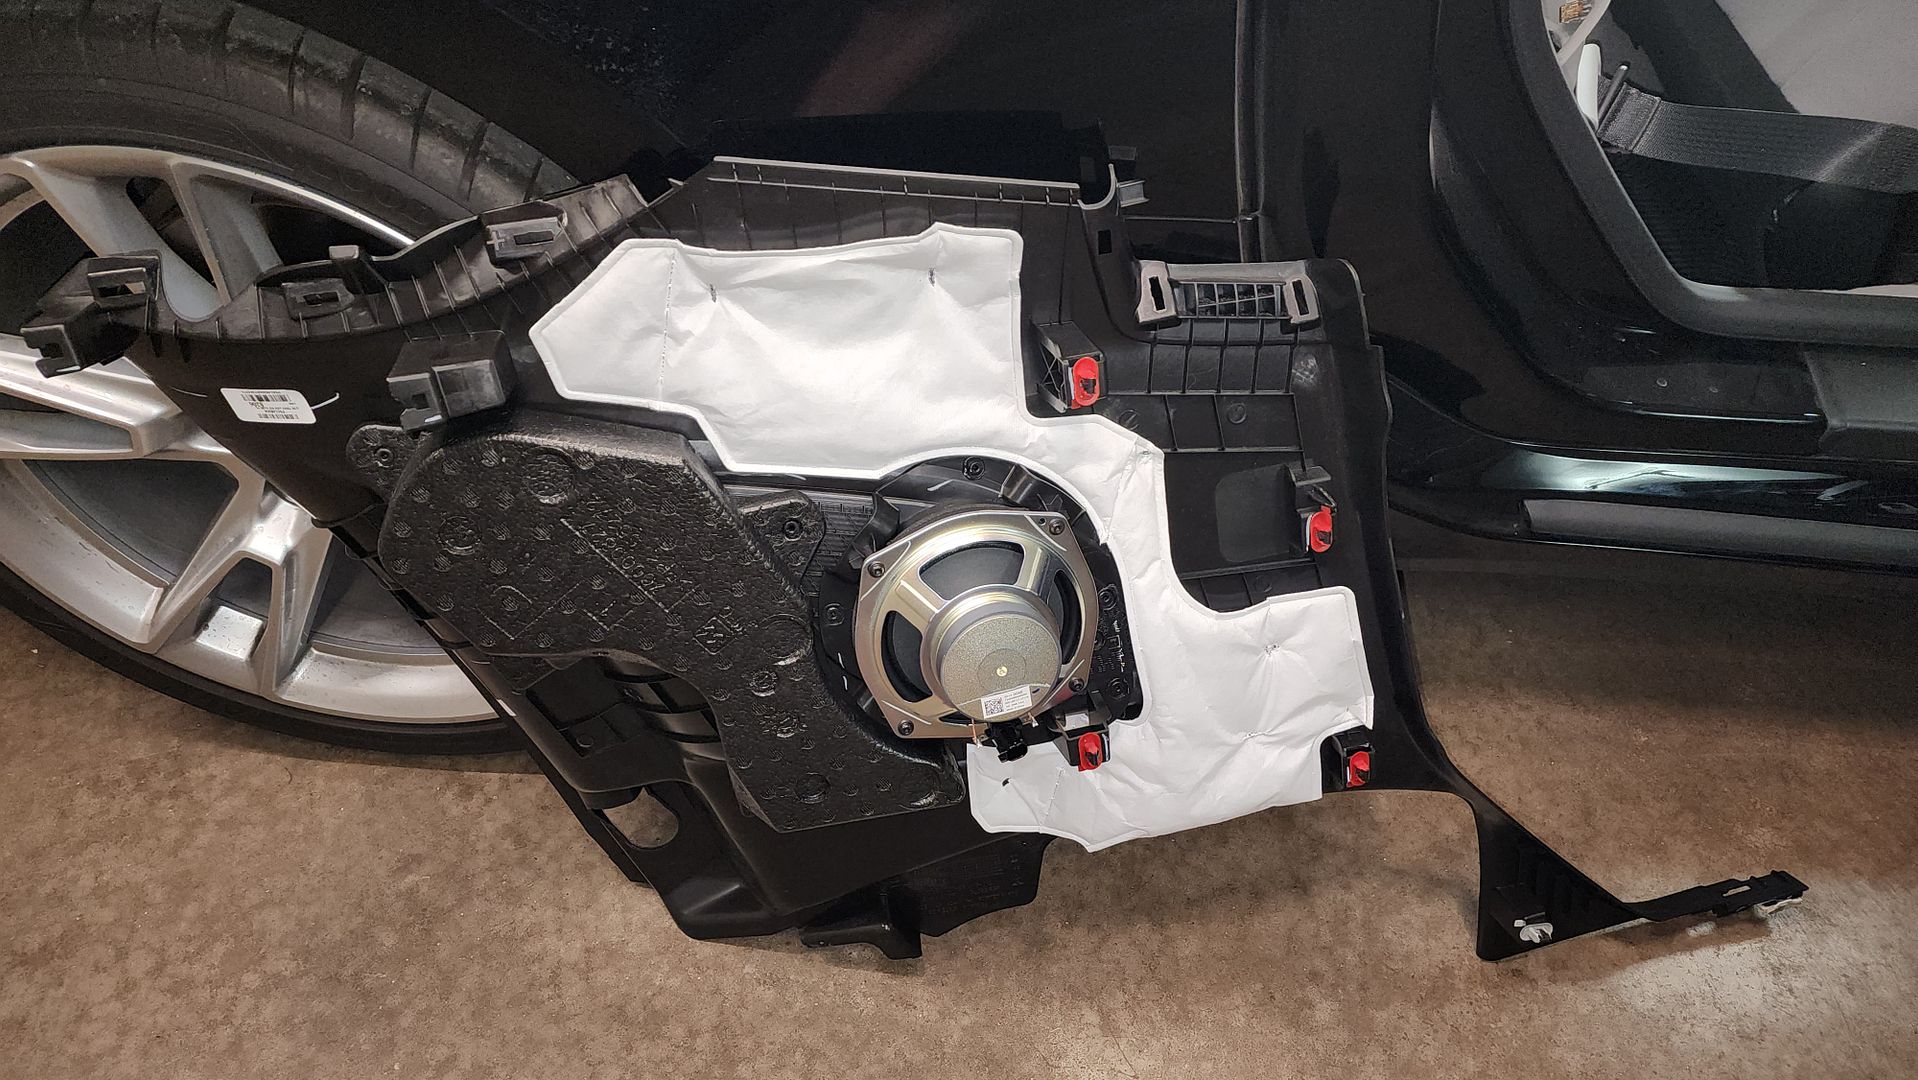
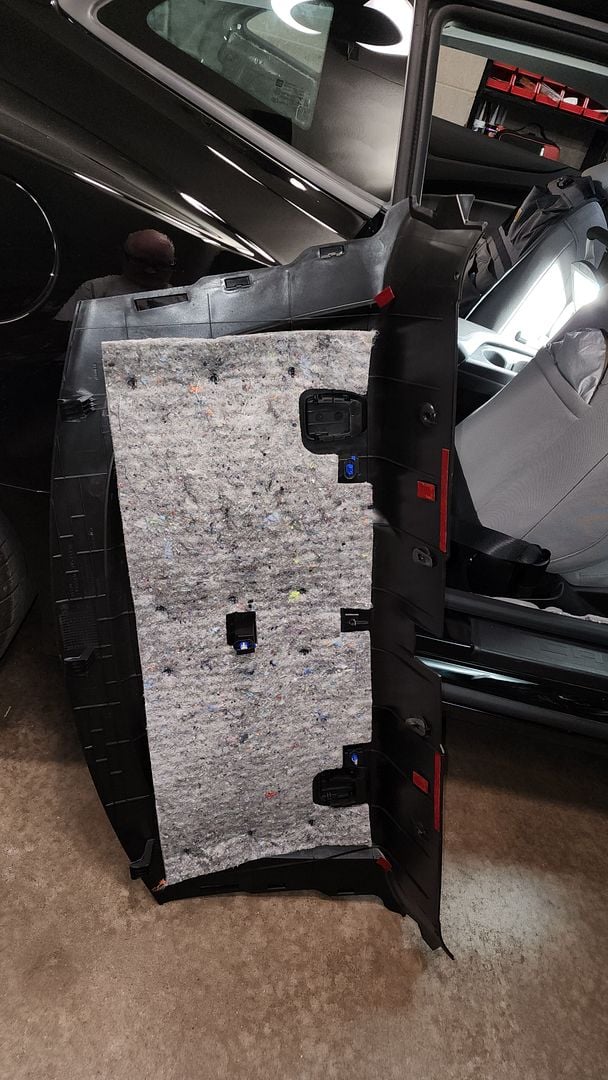
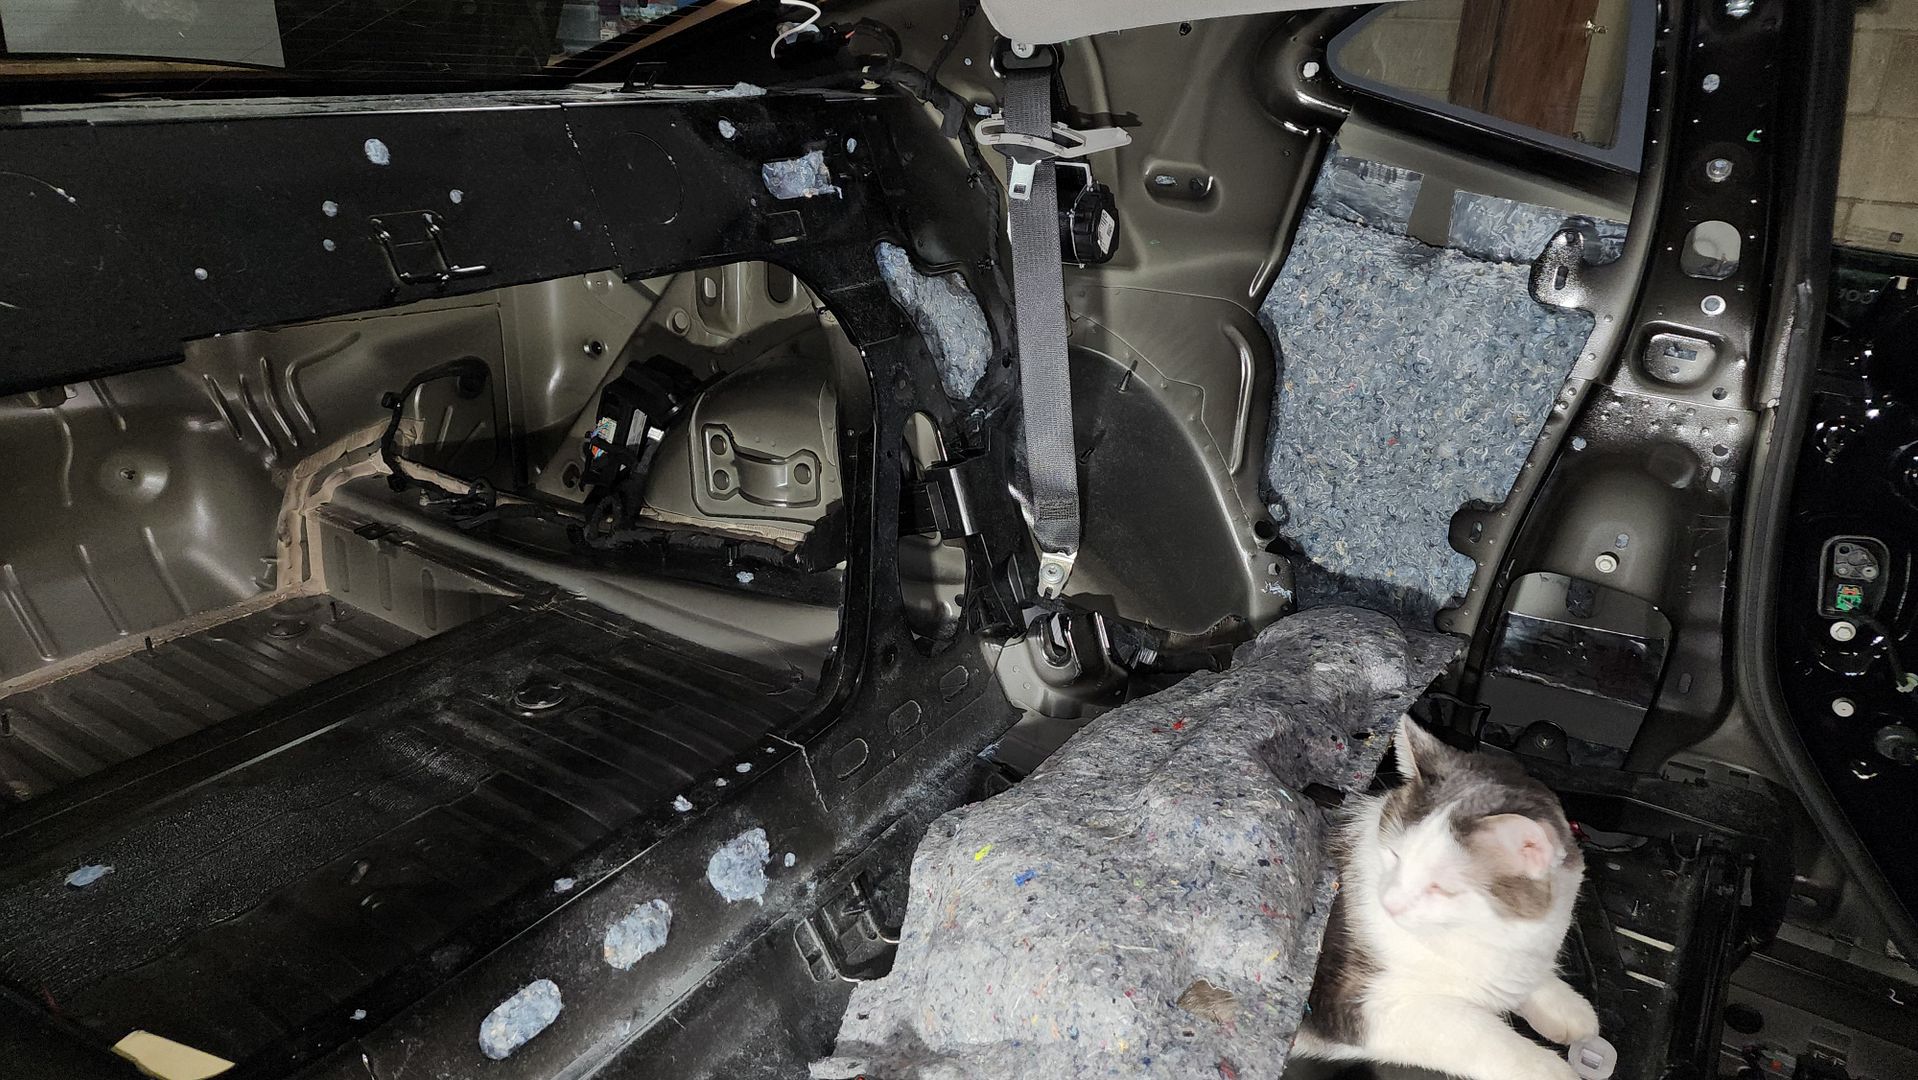
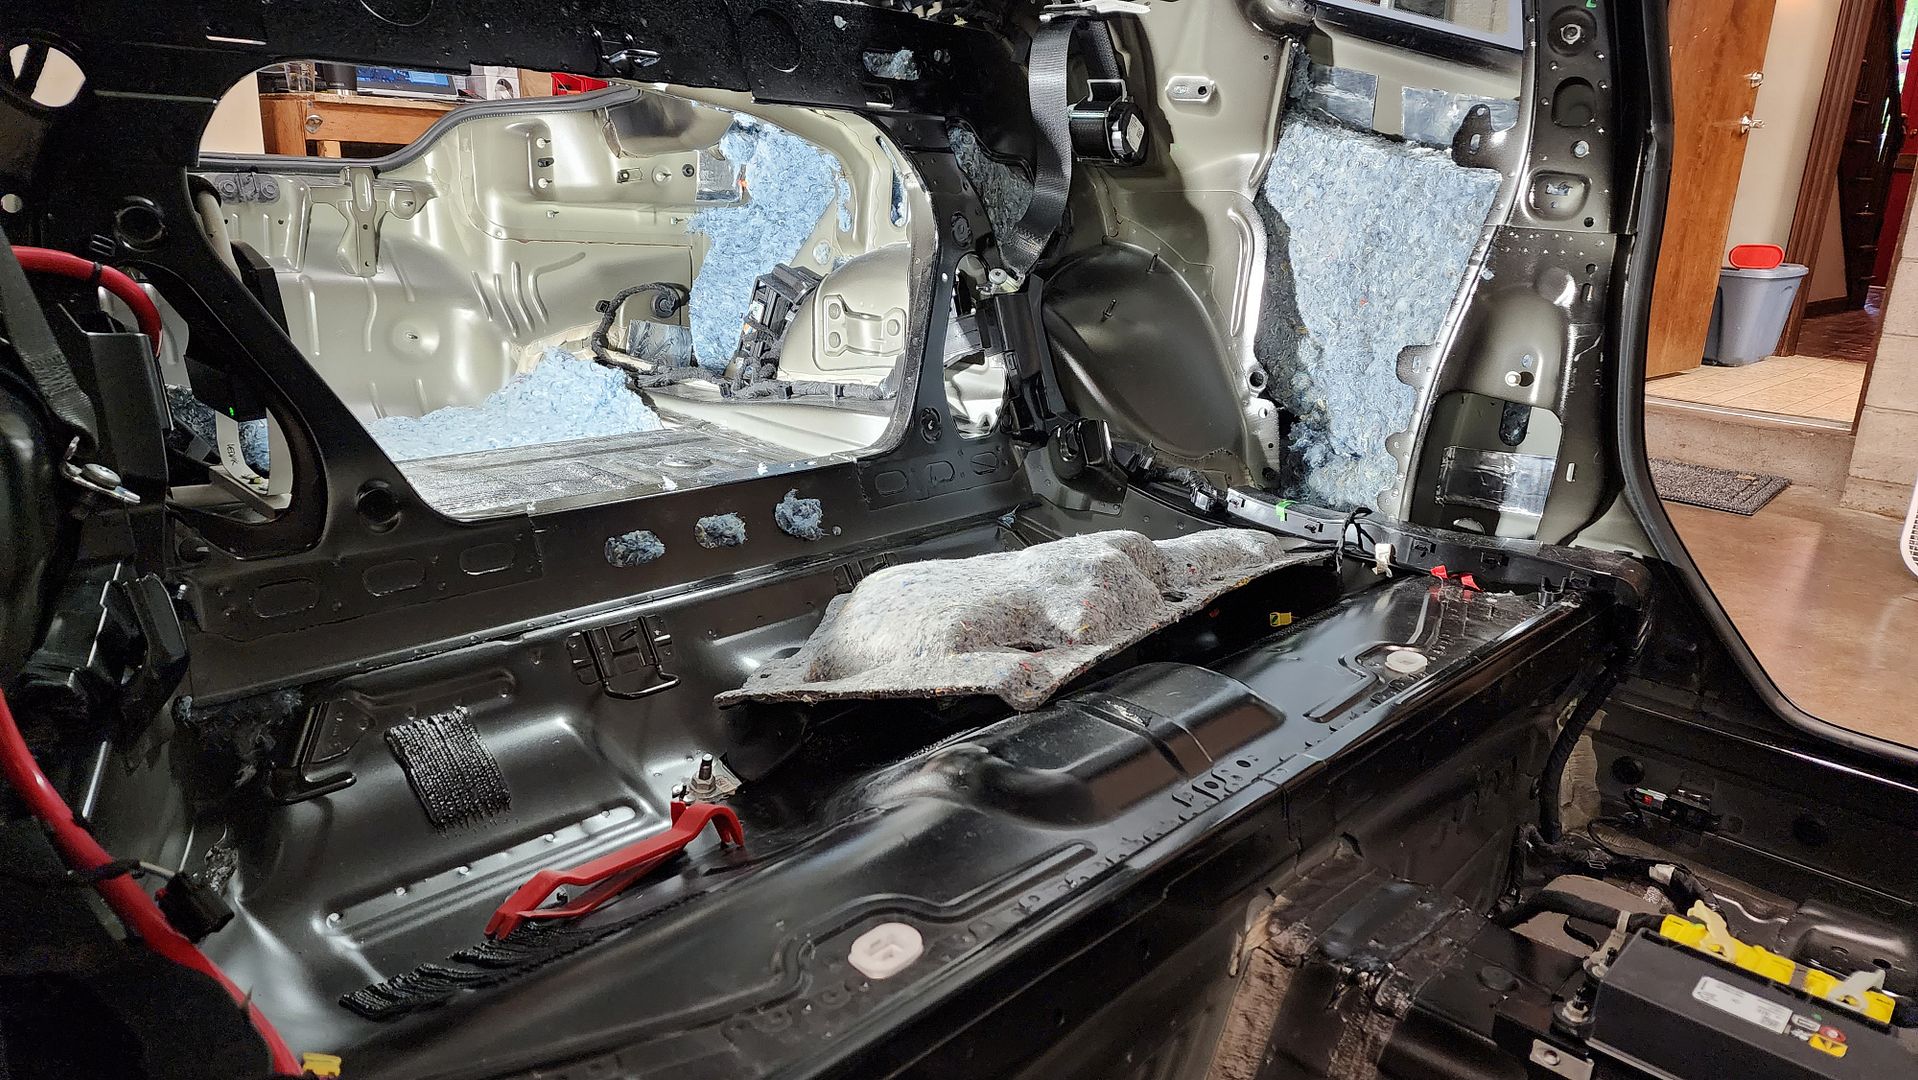
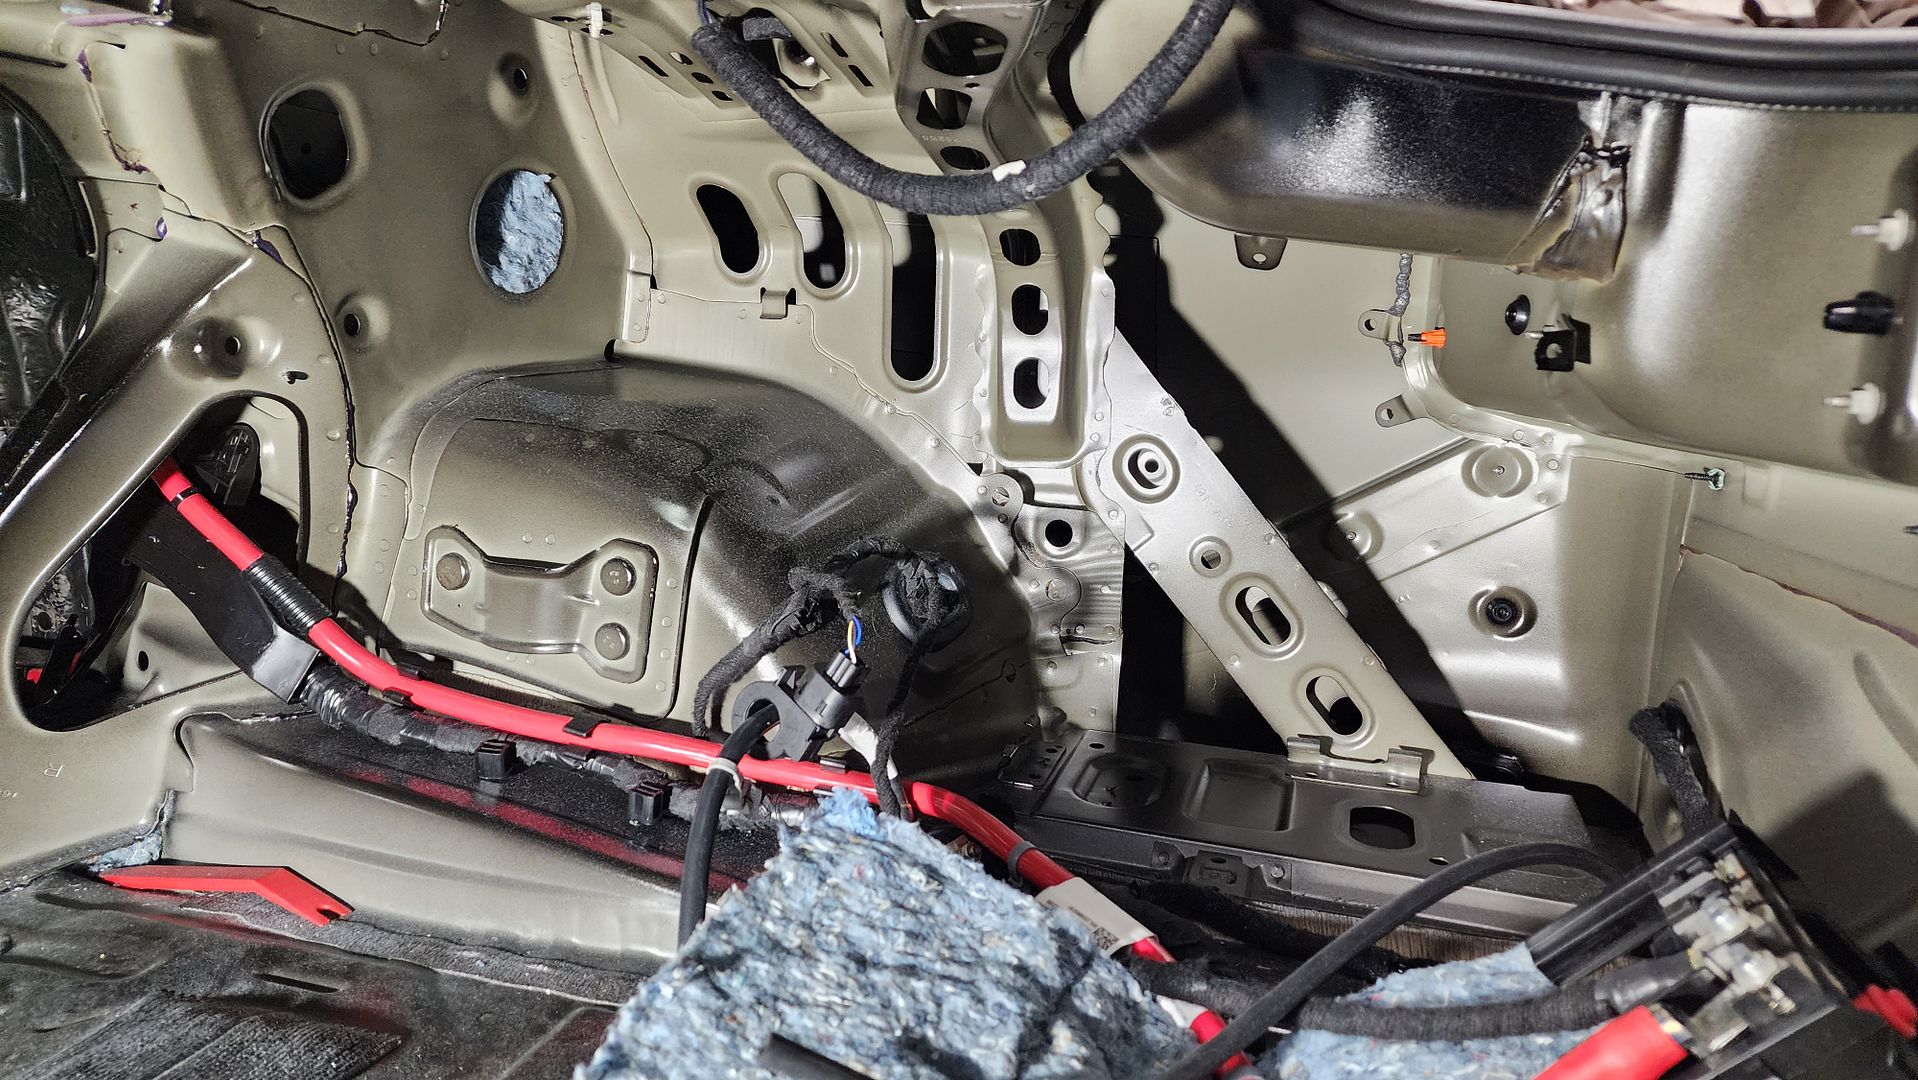
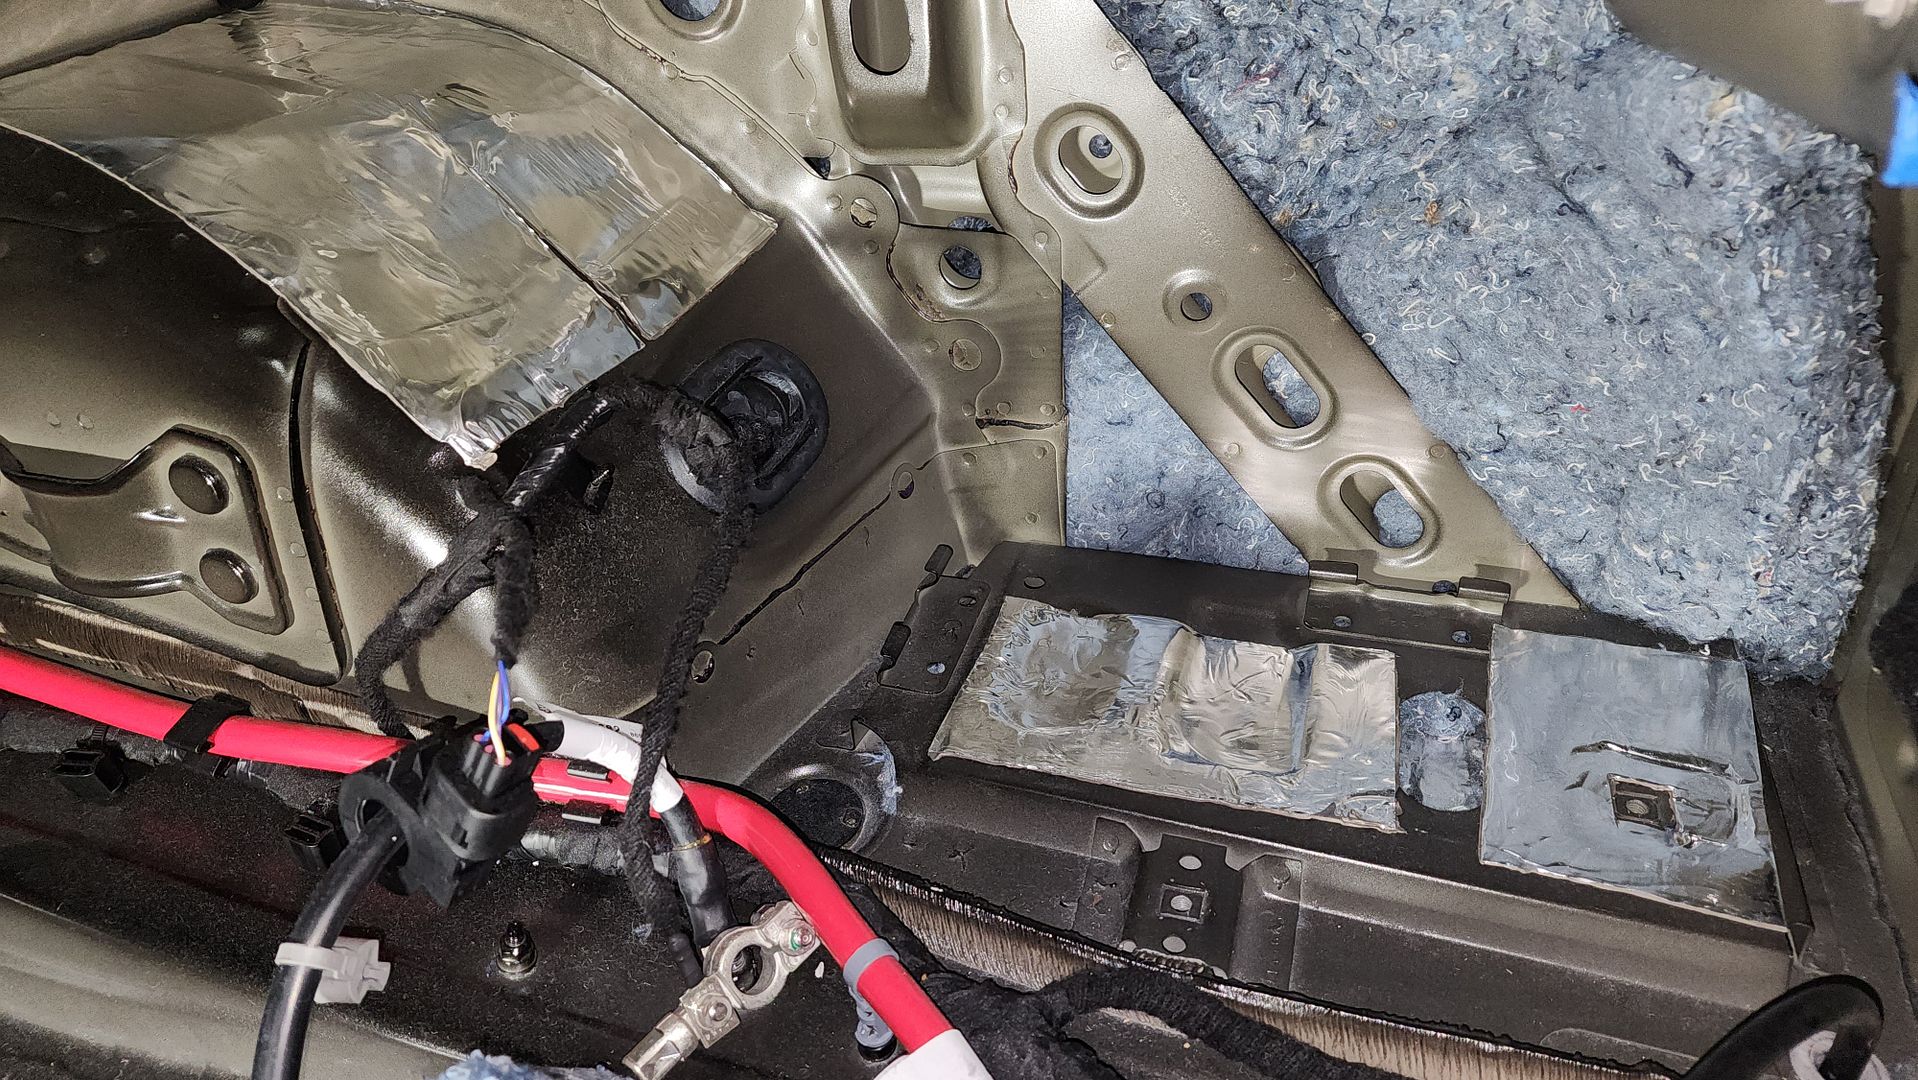
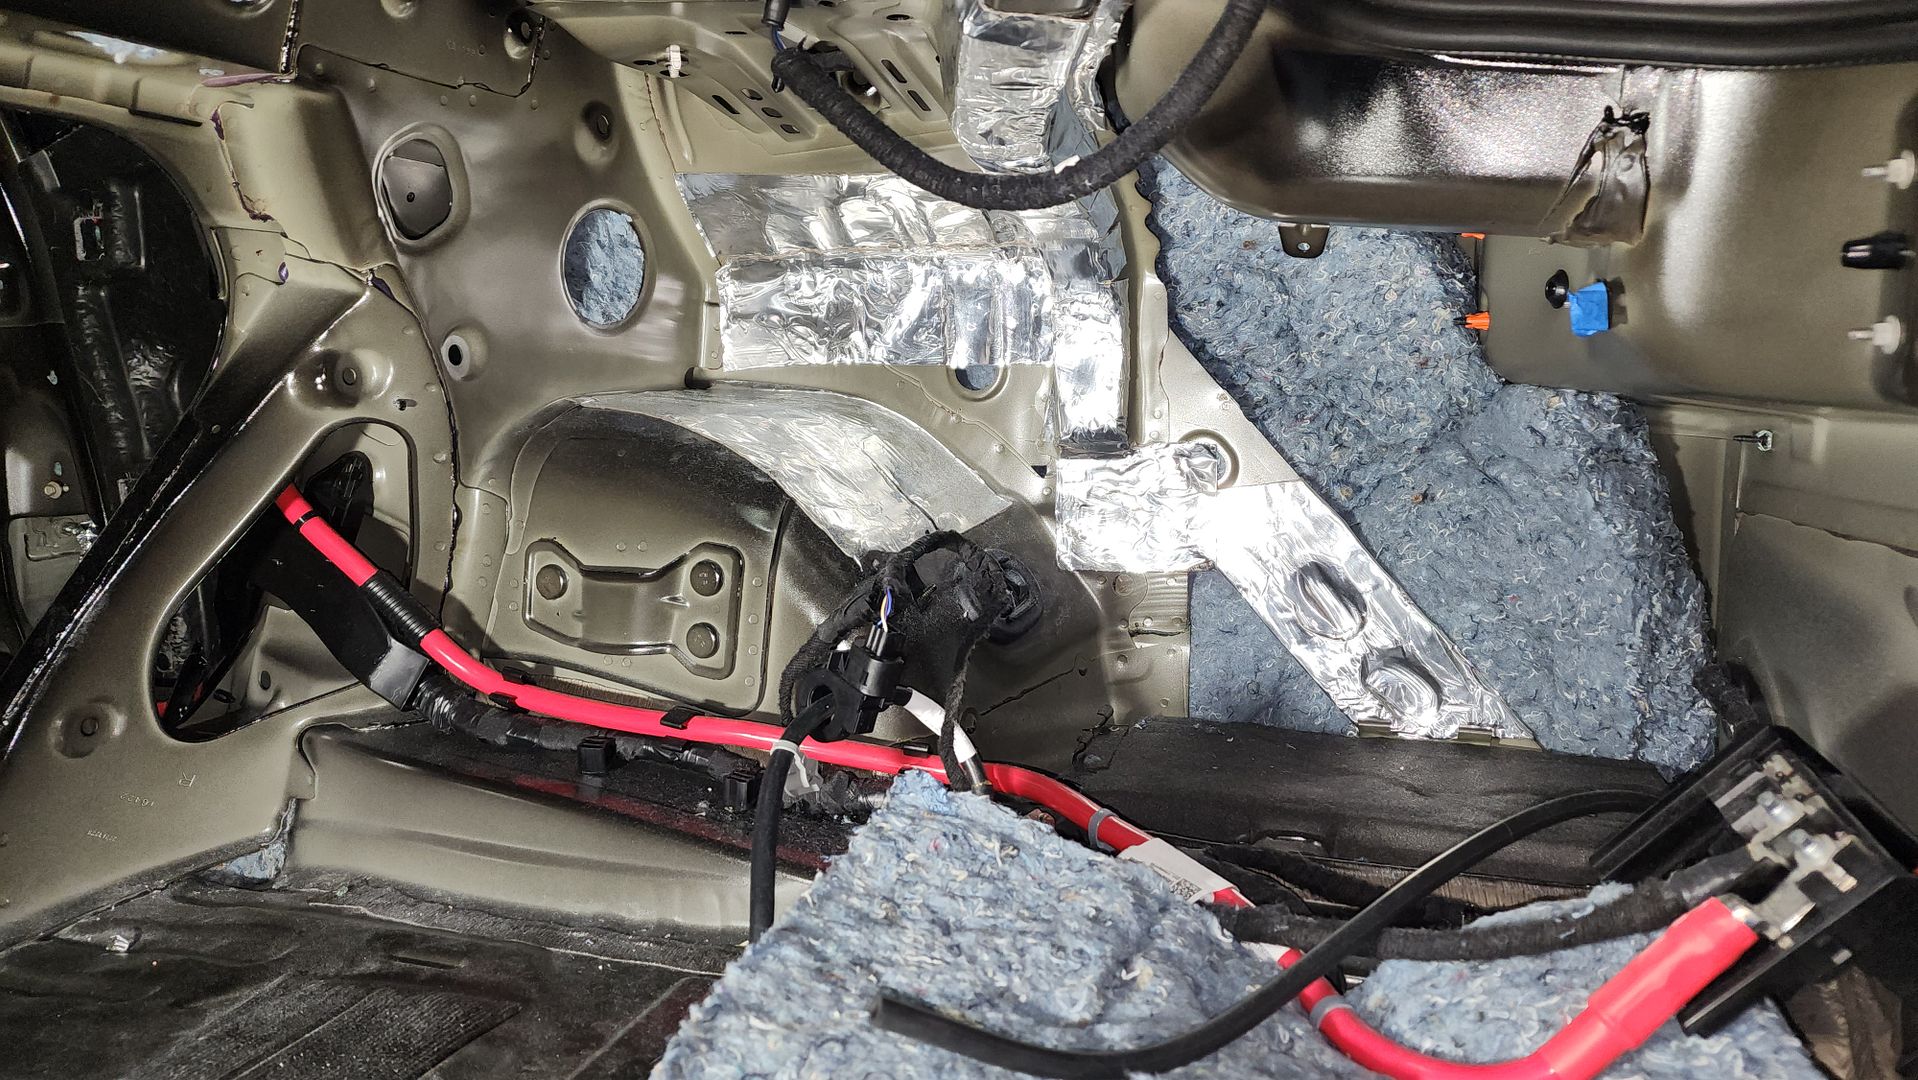
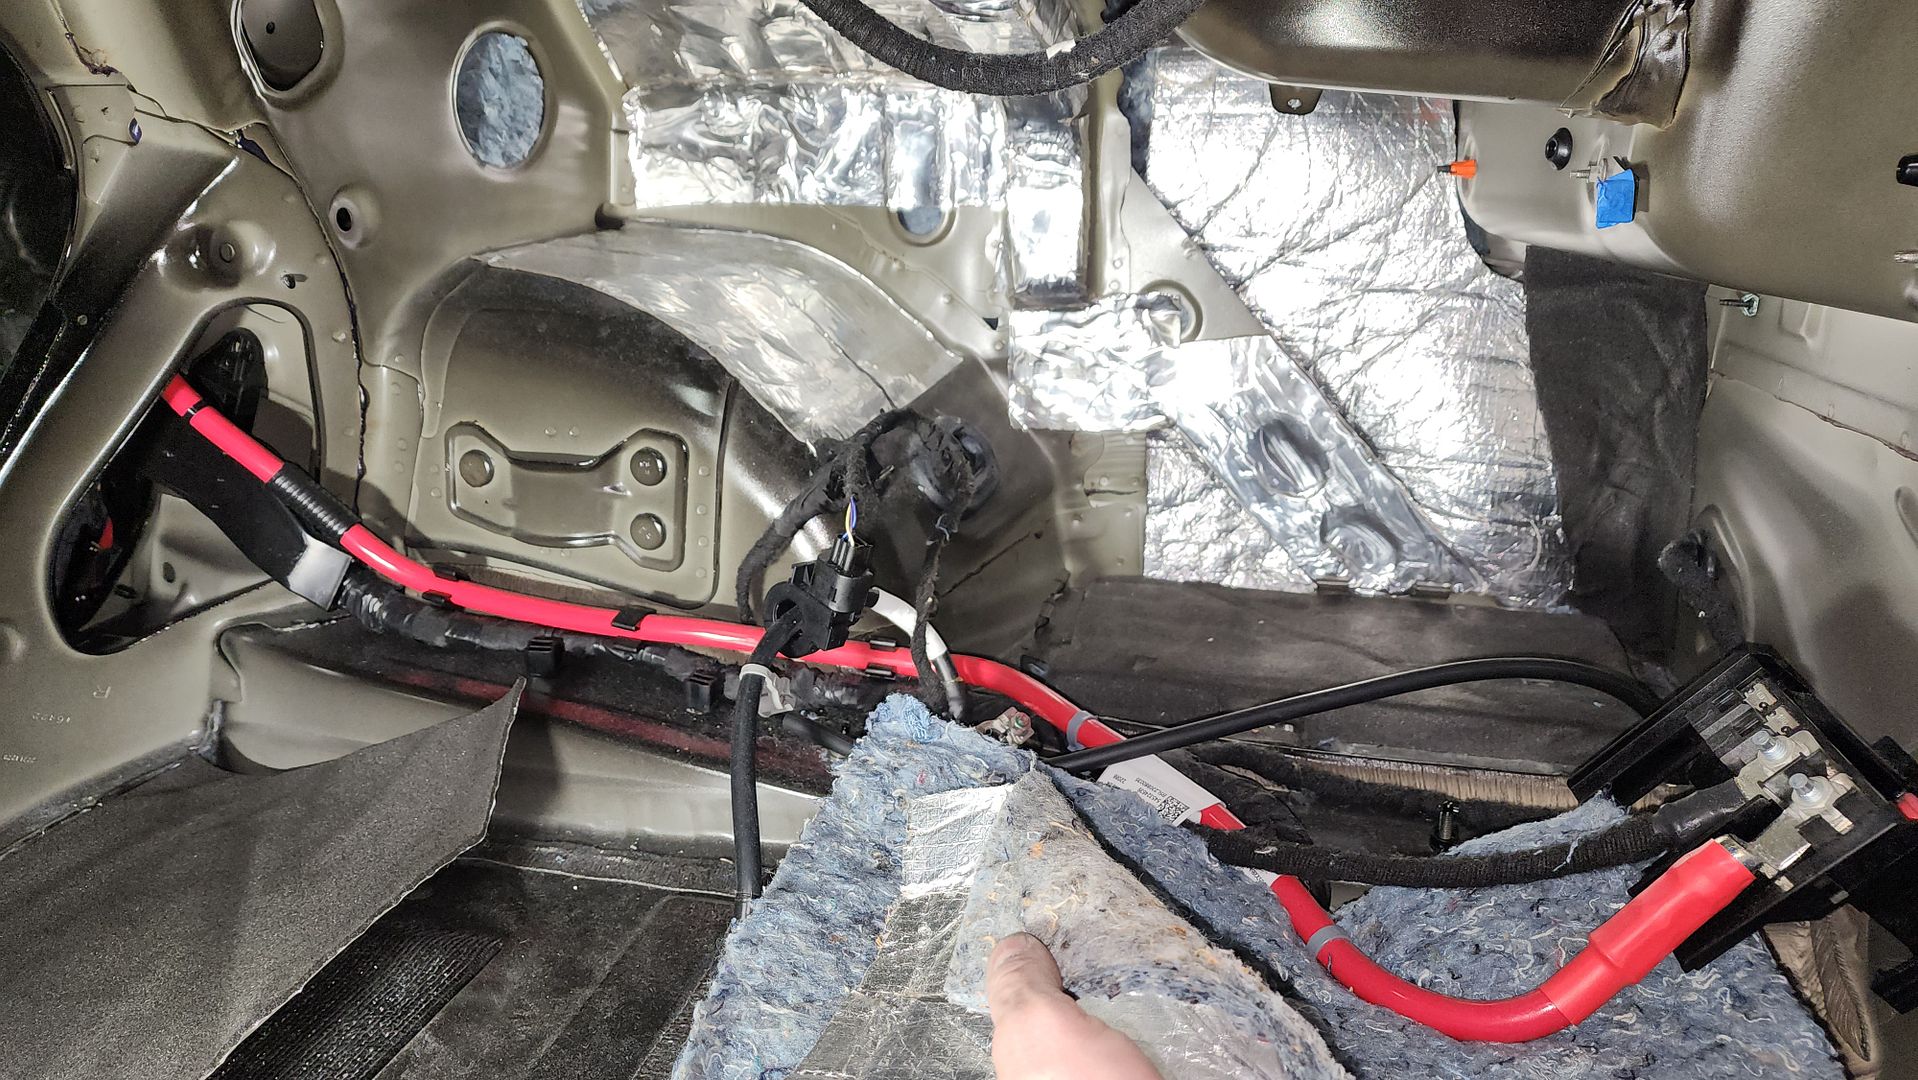
This is a sports car, no doubt, but a budget sports car. The budget aspect is very apparent when tearing into the interior. The interior plastic is cheap and the fasteners at the rear are mostly plastic push-in clips that you destroy when removing them. There are a lot of rattle opportunities in the back as a result. The metal is very resonant, and a lot of treatment will be required prior to putting anything behind the B-pillar.


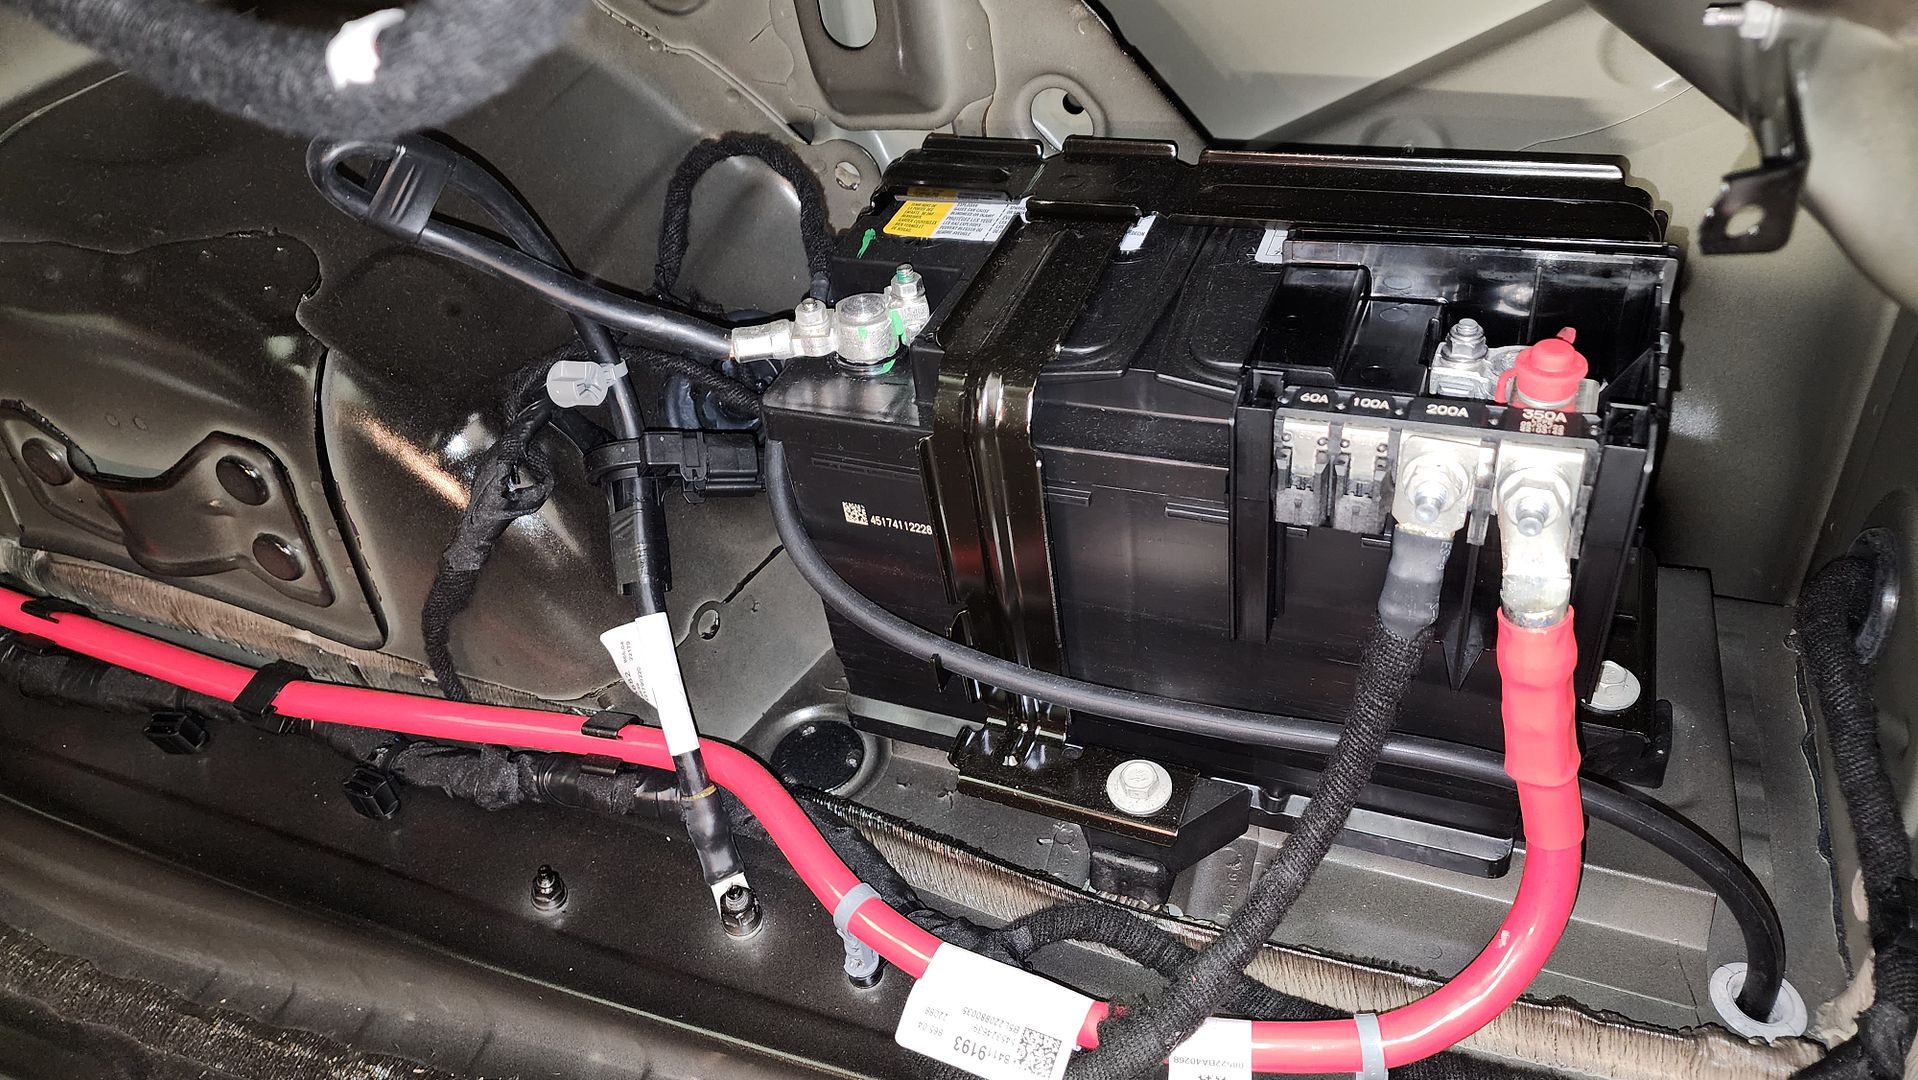
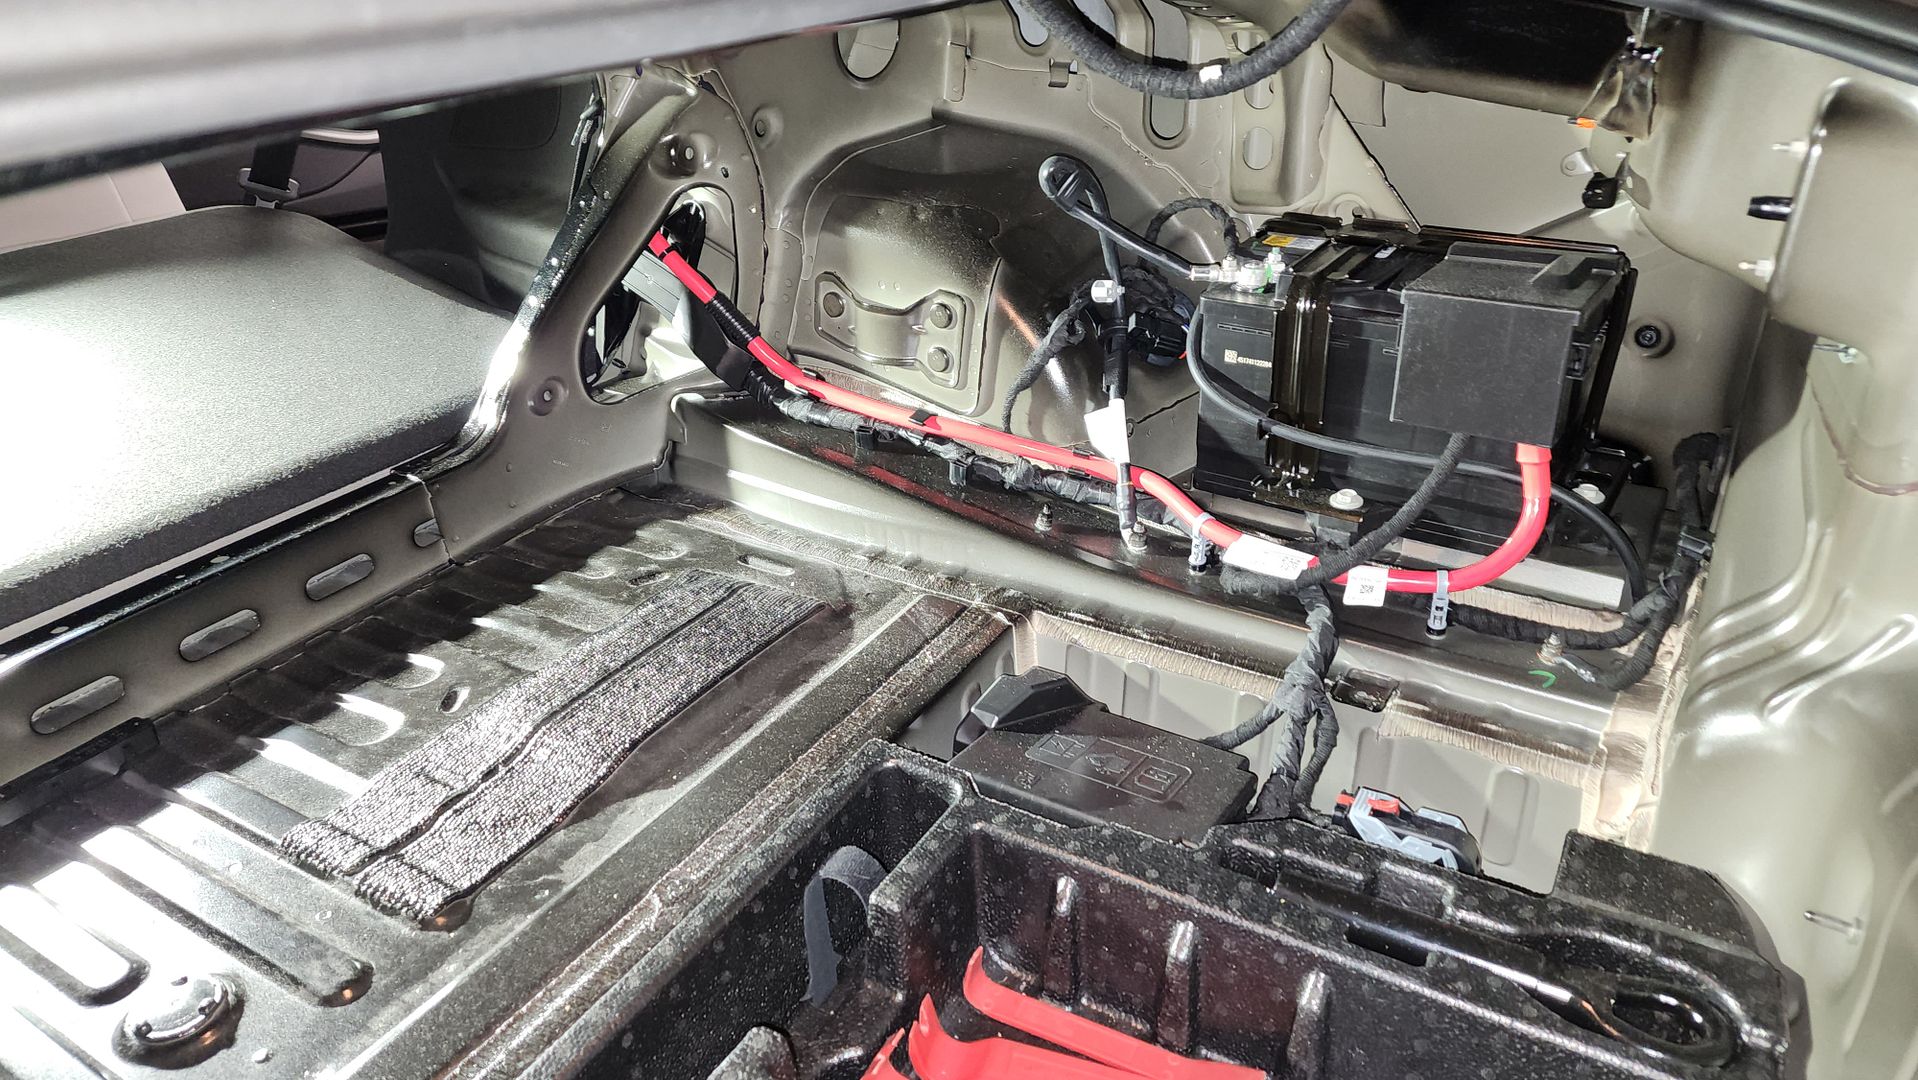
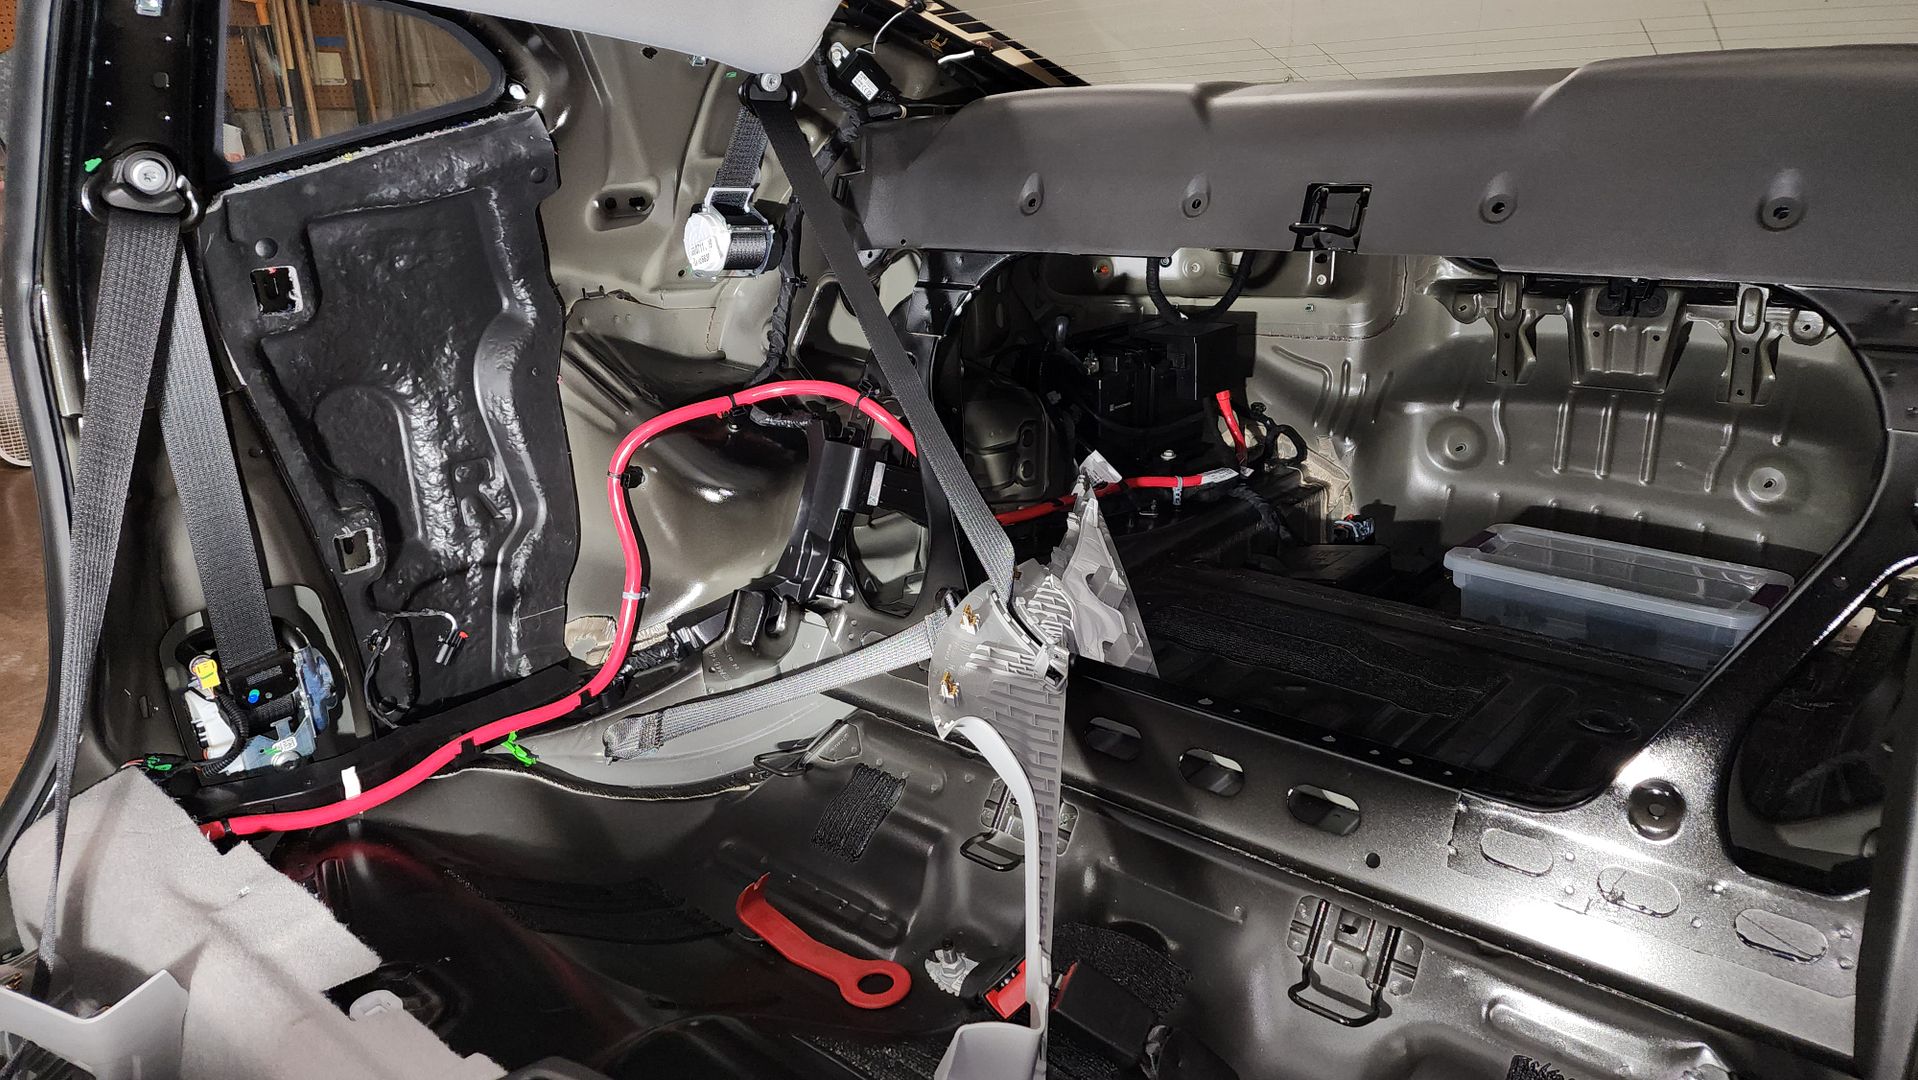
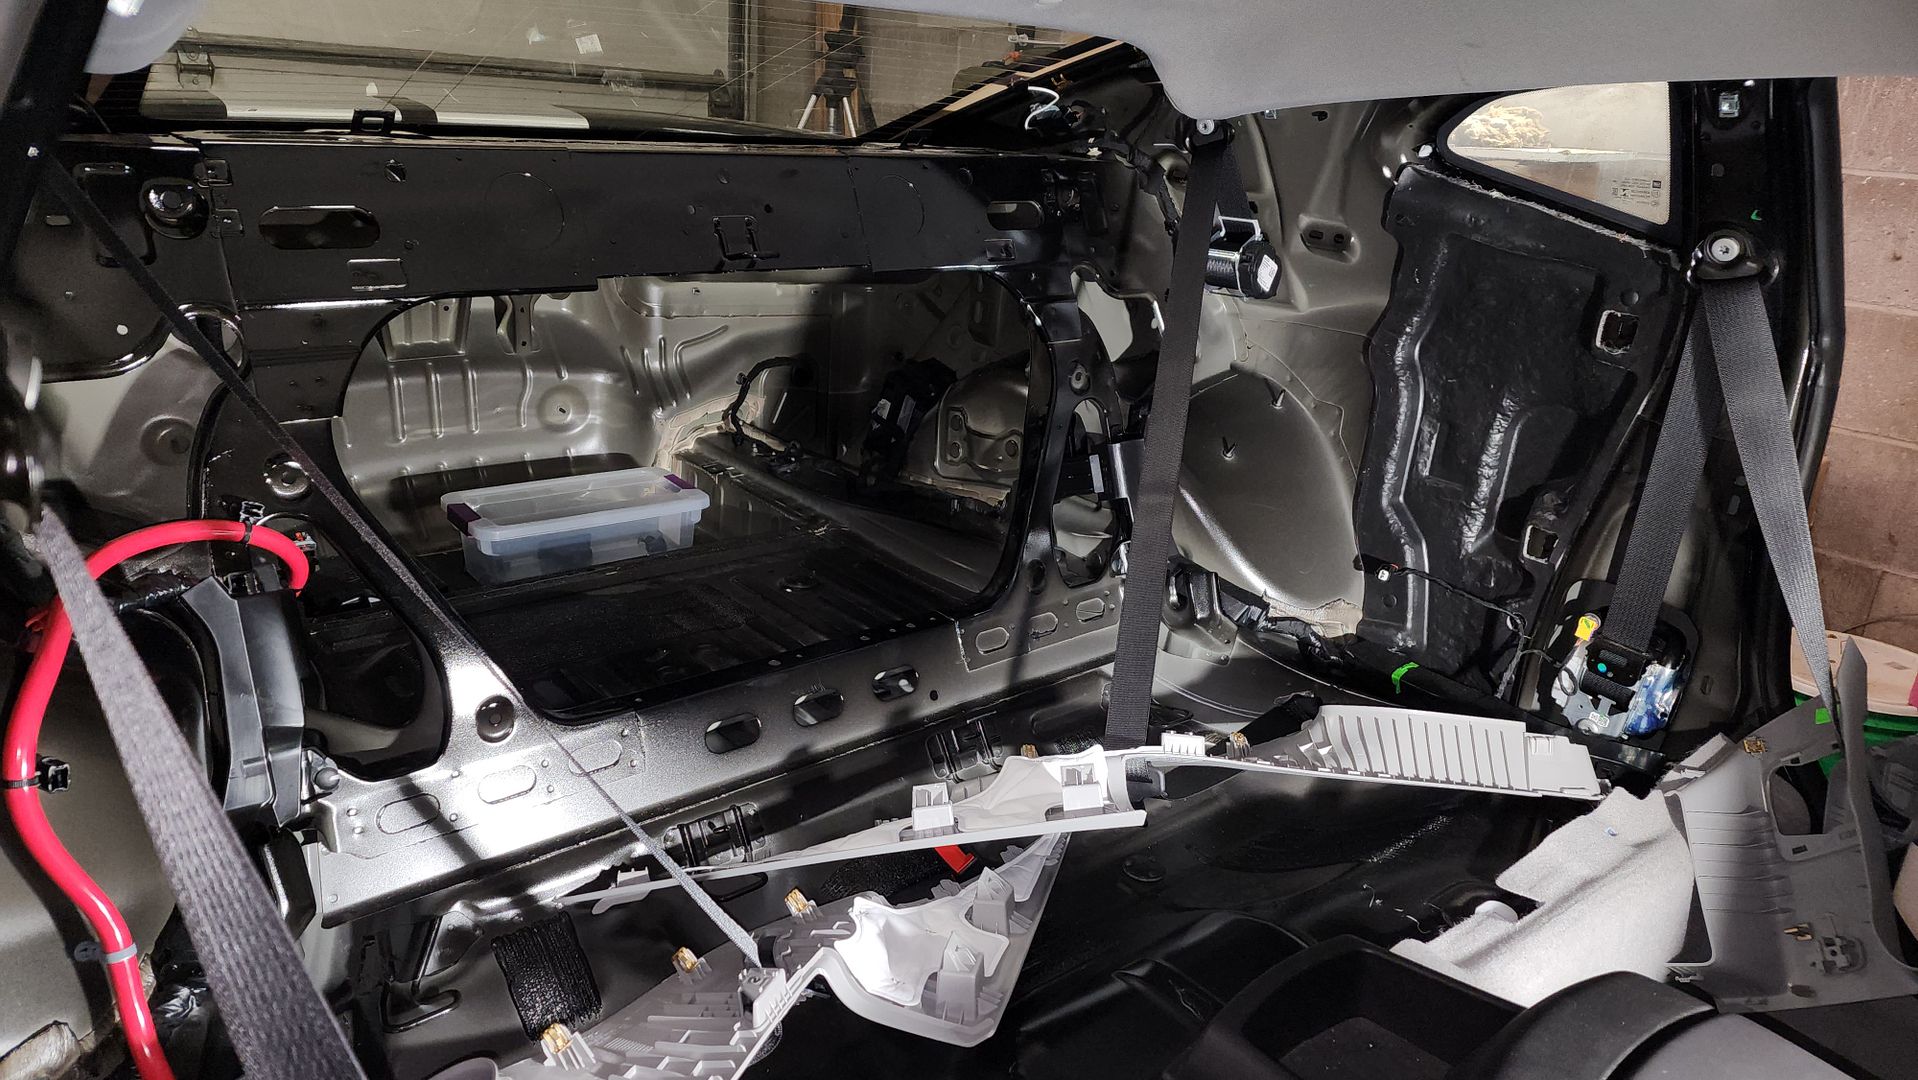
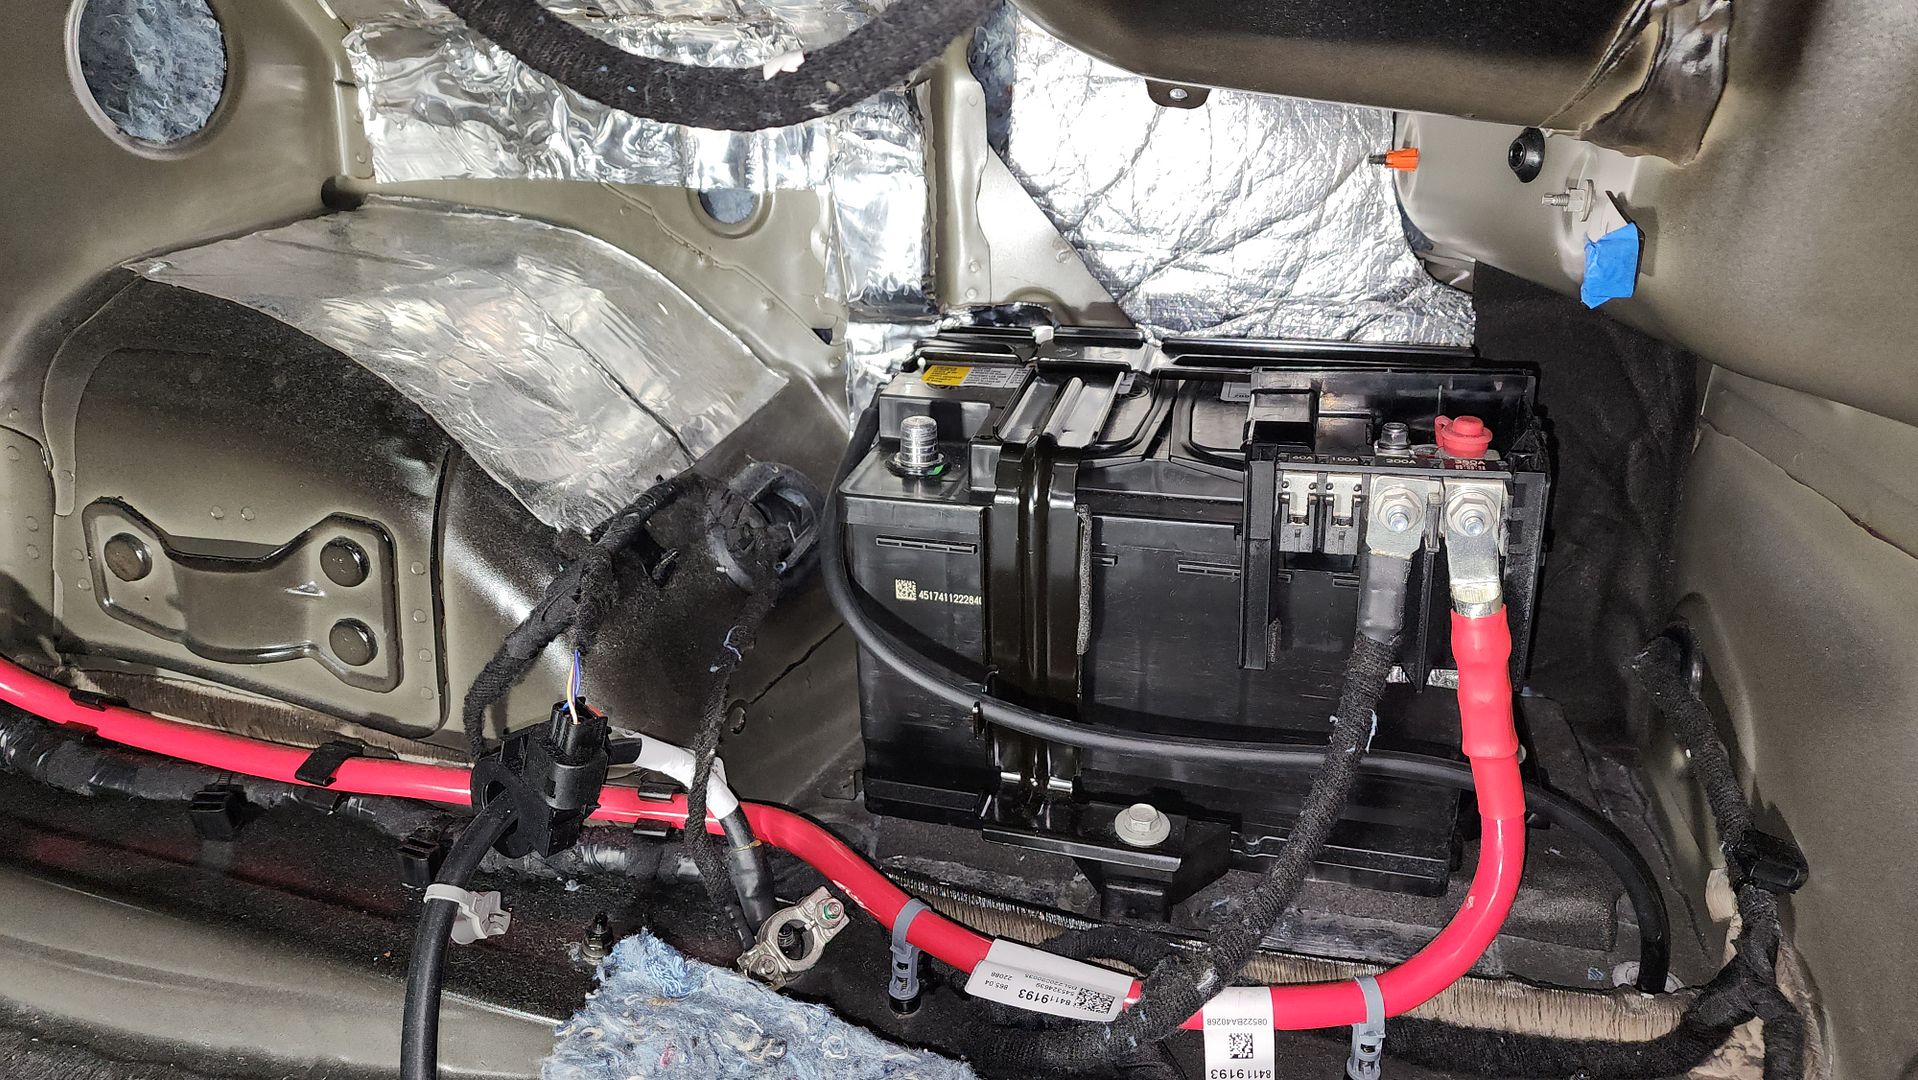
The battery is in the rear passenger corner, which is fairly handy. There are 60A and 100A outputs available, which will match the amplifier selections nicely. The driver’s side rear corner is mostly empty and JL makes a StealthBox for this location. I plan on using this space for the JL amplifiers, keeping them fully hidden behind the factory side panel.


20230828_221908.jpg


20230828_195157.jpg


20230828_195204.jpg


20230828_221427.jpg
 
Build Photo
  1. Okay

Attachments

  • 20220910_113648.jpg
    20220910_113648.jpg
    1.4 MB · Views: 21
Last edited:
The front doors have a decent amount of sound absorption on them, with an appropriate membrane to cover the opening into the door. The stock speaker is a 6x9 driver that had decent bass response in the factory configuration. There is some factory deadener applied to the outer door skin, but it is thin and able to be peeled back. The door panels are annoying to remove, but not terrible one you figure out the trick. I did not try to separate the panel from the weatherstripping due to the metal clips, instead, I lifted the combination off the door by removing three plastic push-in clips. Chevrolet wiring harnesses are removed by pulling the red tab backwards then depressing a small, recessed lever to disengage the clip. It is easy once you know the process.


20230828_212132.jpg


20230828_212317.jpg


20230828_212142.jpg


20230828_213113.jpg


20230828_213059.jpg


The rear seat comes out easily which allows the two side panels to come out once the B- and C-pillar trims are removed. These rear side panels have speakers mounted to them, but they are nearly inaudible in the factory system and will not be reused in this build. There is some decent padding bonded to an acoustic barrier in the cavity behind the speaker, but the rest of the rear quarter is hollow. The entire rear metal assembly is very resonant, and tinny. A lot of Resonix CLD will be needed in the rear of this car, along with a lot of Ultratouch insulation in all of the cavities.


20230828_220242.jpg


20230828_220256.jpg


Once the two side panels are removed, the rear deck cover can come off. You’d like to think that you would have a lot more room to access the window with the plastic cover off, but you don’t. The rear deck is very resonant and tinny, so I plan on top and bottom layers of Resonix CLD here. The rear deck has a bit of jute padding, but some Resonix Fibermat is planned in place of it. Because I do plan on putting Hertz HCX 3-way 6x9 back here, I need to make sure this assembly is acoustically “dead”. While I don’t plan on having these running most of the time, I do plan on having a tune available that makes use of them for windows-down jamming when a soundstage isn’t needed.


20230828_221056.jpg


20230828_221213.jpg


20230828_221154.jpg


Next up is removing the front seats, lower dash trim, center console, and then the carpet.
 
At this point, I have used about 6 sheets of CLD (deadener) and about 30 cu.ft. of insulation. If I stopped here, the result would be a much quieter car with road and tire noise from the rear being nearly inaudible, because noise from the doors/floor/front would dominate. That is how you perceive sound - you perceive the loudest source and once you eliminate that, you perceive the second loudest... then third... then fourth... and so on.

What makes the rear quarters so problematic is the surface area. It is also the more difficult area to access given how much disassembly is required. Because that volume is open to the trunk, we have the entire trunk/rear/quarter/floor/wheel well/etc. directed into the cabin with only plastic to contain it. Now, I do give GM some credit for the one barrier/pad that is behind the speaker. Without that, road noise would be MUCH louder in this car.

This is what I'm stuffing into the cavities:
20230831_205046.jpg


Had a shop buddy, he just wanted to hang out.
20230830_230212.jpg


This is a mostly complete driver's side - for the insulation. It still needs a lot of CLD and then CCF.
20230901_141701.jpg


The passenger side required removal of the battery, which is fairly easy at this point.

20230901_143613.jpg


20230901_150523.jpg


battery tray is stuffed below and then CLD is added.
20230901_145355.jpg


20230901_152726.jpg


Now it is ready for the battery. I have added a closed cell foam (CCF) to the top of the battery tray and where mounts connect to pad those contact surfaces. CCF is the next step during reassembly. I also have a thermal barrier covering the opening to the quarter panel to contain the insulation fibers. I don't want the battery area getting dusty from those fibers. The thermal barrier is just a dense layer of ultratouch insulation with a foil facing. This stuff is handy to use on the floor as well.

20230901_153839.jpg


Battery reinstalled. I may do a full layer of CCF behind it to fully encapsulate the area, and it will look nice too.
20230901_154923.jpg
 
The denim insulation, that is a great idea!

Thanks! It's very similar to what OEM uses, and very affordable. I stuff every cavity I can find, which is tedious. I did this on my 2014 Accord as well.

I will also be using the Resonix Fibermat behind the factory panels, where the UltraTouch isn't feasible. I used the radiant barrier product back before Fibermat was available.
The "cool" thing is, I bet the car will feel much nicer with the heat or air on.
 
Your builds are great. Very informative,in depth and well planned. I may have missed it, but are you putting resonix in the big cavities before the insulation or just insulation?
 
Your builds are great. Very informative,in depth and well planned. I may have missed it, but are you putting resonix in the big cavities before the insulation or just insulation?

Good question and I realized that I didn't include pictures of the CLD on the metal as the first step, before the insulation. I added patches of CLD on the exterior sheet metal until sufficient damping was observed. I don't worry about 100% coverage on the exterior panels when the void is fully stuffed with insulation. The interior metal surfaces will get close to 100% where they can be excited by speakers (i.e. the rear deck, doors, etc.). I knock on the metal surfaces to listen to resonance and add CLD until I'm happy with the resulting tone and duration.
 
My Resonix order has arrived. Contained within the order are the following:
(2) Boxes of CLD for 80sq.ft.
(1) Box of FiberMat 25
(2) Boxes of Fibermat 45
(2) Boxes of Guardian
(4) CCF Speaker Ring Stips
(1) Sheet of CCF Decoupler 3S
(1) Roll of Butyl Rope
(1) Roll of Harness Tape
(1) Sheet of Moldable Barrier

Step 1 is to clean the metal surfaces to remove grease/dust/dirt.
Step 2 is a full treatment of CLD, nearly 100% coverage, along the outer door skin.
Step 3 is a full treatment of Guardian, nearly 100% coverage, along the outer door skin (on top of CLD)
Step 4 is a full treatment of CLD, nearly 100% coverage, along the inner door skin, being careful not block clip/fastener holes.
Step 5 is to close up the holes with Moldable Barrier.
Step 6 is to prepare the speaker mount which will be a combination of CLD on the adapter, Butyl Rope between adapter and metal, and between speaker and adapter, and then CCF Strips to seal the speaker to the door panel.
Step 7 is treating the door panel itself with CLD.
Step 8 is covering the door panel with Fibermat.

20230908_165722.jpg


It’s great to finally have a viable alternative to loose insulation for sound absorption. This is a perfect product, it is the same as OEM but thicker and better, with a PSA.
20230908_171909.jpg


20230908_171917.jpg


Finally, a product that replaces my fiberglass panels wrapped in plastic. And this is better than a replacement as it offers superior features to anything I have made myself before.
20230908_171733.jpg


Driver’s door is ready to be closed up with Moldable Barrier. About 12 sq.ft. of CLD and almost one full box of Guardian is on this door so far.
20230909_144155.jpg


I need to treat and add the speaker mounting bracket next, making that adapter as “dead” as the doors.
20230909_144224.jpg


Passenger door is in-process, and you can see how thick Guardian is. I’ve even added strips in the wells of the “W” shaped brace.
20230909_173620.jpg


I have more to add, and the process of adding this is tedious. I’m taking videos of the process to share on my channel once I have the doors wrapped-up.
20230909_173628.jpg
 
The factory radio is comprised of two pieces – the screen that you see and the brains that you don’t see.

There is one harness to intercept these signals and it’s the PAC LPHGM72.

20230910_230226.jpg


The factory amp here is buried in the dash. We want connectors X1 and X2
20230910_223422.jpg


The adapter goes in-line and has removable bypass clips.
20230910_230153.jpg


Of course, we want to wrap the connectors and cabling with fabric coating, like OEM.
20230910_230801.jpg


20230910_231057.jpg


The floorboard will need some treatment as well.
20230910_231356.jpg
 
Finshed a layer of Resonix CLD on the inner door skin, and then used Resonix Moldable Barrier to close up the openings. Using the barrier was a joy compared to my traditional methods of aluminum sheets with CLD and CCF.

20230914_200747.jpg


20230914_200807.jpg


20230914_200827.jpg


20230914_205331.jpg


20230914_211645.jpg


20230914_213546.jpg
 
Almost done with the door speaker brackets, they weigh about 10x as much now and are acoustically dead. Just need fasteners, will be using 6-32 bolts. This is also a view of the drivers being used. Hertz is my go-to speaker manufacturer and what we have here is a ML28 tweeter, HL70 midrange, and ML165 woofer for a front 3-way. The HCX-690 will go in the rear deck but will be turned off for windows-up SQ listening with an excellent sound stage, and the rear 6x9 will be engaged for windows-down louder listening without a focus on a sound stage. I'm excited to hear what the rears can do when they are that close to the rear glass. The challenge is that I'll need to build enclosures for the rear deck speakers so the subwoofer doesn't manipulate them. It's a lot of work for something that will usually just be off.

20230917_235309_bPoXLeBW5jaYjysjwuQaVb.jpg


Ready to start treating the floor:
20230917_234121_iMn9dcBqGRCUR24UBpStiE.jpg


20230917_234131_oYXM28C4AeDqcmEzTShG2z.jpg
 
Activity
No one is currently typing a reply...

Similar threads

Could not tell you, but you may want to start by going to crutchfield and get a consensus on the 7 or so replacements they recommend. That average...
1
647
Ok so I started my install . I am doing it in stages so I am not without music for a week or two . I started by building and mounting the Amp...
2
955
Crutchfield can tell you what speaker will fit your car. for subs, Image Dynamics and Adire are still around. my last sub i bought was from...
3
796

About this thread

keep_hope_alive

Premium Member
Acoustics Engineer
Thread starter
keep_hope_alive
Joined
Location
Quad Cities, IL
Start date
Participants
Who Replied
Replies
40
Views
5,397
Last reply date
Last reply from
keep_hope_alive
pattern-wavelength.jpg

winkychevelle

    Apr 27, 2024
  • 0
  • 0
20221010_113336 (5).jpg

audiobaun

    Apr 27, 2024
  • 0
  • 0

Latest topics

Top