CertifiedHoodClassic
CarAudio.com Exclusive
Goals for this build:
Have a great sounding front stage that gets decently loud. Needs to have SQ and some power but it doesn't need to be pro audio loud.
A strong sub stage that plays down to 28 or 30 hz very well. I only play music on the subs and the lowest notes it needs to play are around there.
Only give up the trunk, and have everything else fit into the interior or be hidden away.
It's mostly done as I'm writing this so the equipment list and such are final unless I decide to redo some things later. I'll post progress pictures I took while building it in later messages.
Power:
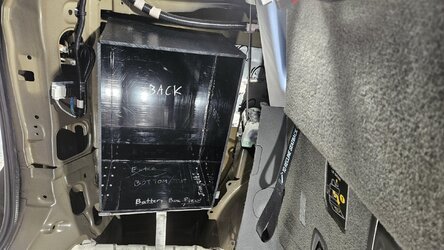
240ah Yinlong LTO (currently 160 installed)
14.8V 400A large case alt from AutoTech
GP car audio fuse blocks
Lots of Knuconceptz 4/0 cable
Front:
Hertz Mille Legend 280.3 Tweets
Hertz Mille Legend 700.3 Midrange
Hertz SV200L 8" midbass
3x Taramps TS800x4
MiniDSP C-DSP 8x12
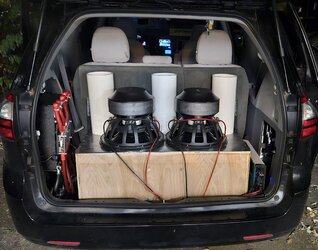
Rear:
2x Deaf Bonce DB4515R in around 7.5 cubes tuned to 28 hz
2x Taramps Smart 8 Bass (currently one installed)

Have a great sounding front stage that gets decently loud. Needs to have SQ and some power but it doesn't need to be pro audio loud.
A strong sub stage that plays down to 28 or 30 hz very well. I only play music on the subs and the lowest notes it needs to play are around there.
Only give up the trunk, and have everything else fit into the interior or be hidden away.
It's mostly done as I'm writing this so the equipment list and such are final unless I decide to redo some things later. I'll post progress pictures I took while building it in later messages.
Power:
240ah Yinlong LTO (currently 160 installed)
14.8V 400A large case alt from AutoTech
GP car audio fuse blocks
Lots of Knuconceptz 4/0 cable
Front:
Hertz Mille Legend 280.3 Tweets
Hertz Mille Legend 700.3 Midrange
Hertz SV200L 8" midbass
3x Taramps TS800x4
MiniDSP C-DSP 8x12
Rear:
2x Deaf Bonce DB4515R in around 7.5 cubes tuned to 28 hz
2x Taramps Smart 8 Bass (currently one installed)
- Build Photo
- Okay