I went balls-deep in some CDT poon and this is what birthed itself...

marleyskater420
5,000+ posts

Banned
Sup bishes? First off, mad props to Vertex Audio's Andrew for being hella cool. Dude blows hella L's on chick's T's man.

So I got bored a few weeks ago and thought I'd give fiberglassing a shot. These are my first panels I've ever made, so if they ****-go blow a donkey. But yeah, I figured there are probably other newbs like myself that would like to see someone struggle with the intricacies of fiberglassing.

My goal is to make two door panels, each holding a 6.5" and two 4" speakers, then cut out the plastic on my stock door panel so that these sit on the door with the stock panel next to it. It won't look perfect, but I might figure out something later on.

I plan on drilling through the back of these and into the door to secure them to it.

The system:

HU:

Clarion CZ702 active w/ TA

Tweets:

CDT drt-26S upstage system

Mids:

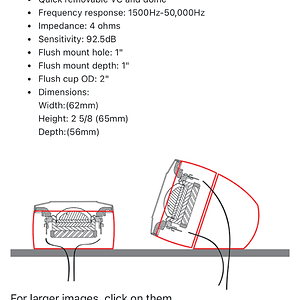
2 sets of ES-04 accent fill systems

More mids:

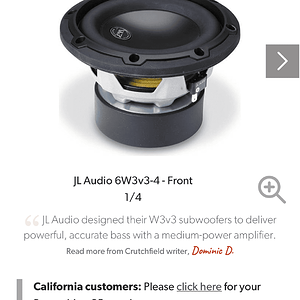
2 ES-06 woofers

Subs:

8 ES-06+ 6.8" woofers

Amp:

Leviathan once they are off backorder. For now I have an audio system X-ion 165.4 coming.

I'm also toying with keeping the X-ion and adding the leviathan just for the ES-06+'s and reg 06's... just cause two amps look way cooler, and chicks get wet looking at shizz they have no clue what it is.

I also plan on building an amp rack with the subs around it later on. That I'll add to when I get everything in.

But yea, for now here is the build so far.

Feel free to BS in here as well. Clearly I don't give a sheeit about being serious, so if you wanna post newds of your gf, or perhaps let me bust a load on her face, that's totally chill too.

(and yes, I'm the ****** coolest dude who ever was a mod ....kidding)

 
Oh so I figure I should tell you how I did this..

Well I made the cutouts for the rings using 1/4" MDF, then used a hot glue gun and cut dowels to fit the speaker's depth, and put the rings on the shape I wanted the board to be.

Then I wrapped it in fabric, and this is where the guy at Tap Plastics really came in handy..

So I used Vinyl Ester resin, not a polyester resin like most.

I also used a single-layer fiberglass mat, and then a second quill/twill (whatever you wanna call it) layer, which gives it that carbon fiber look.

So steps:

1)Mixed up some resin and put on my heavy metal mix

2)ingested copious amounts of drugs to keep me entertained for hours

3)wet the fabric with the resin, just enough for the resin to sit on top, then gently applied the single-layer mat on top. I did this all the way around the panel until the entire thing had a layer of single-ply matting on it.

*Tip*= if you use scissors, like I do, to cut the mat, take your fingers and run it along the freshly cut edge of the mat to separate the edges of it. The cloth is more absorbent this way. Really helps a lot. Especially with small pieces.

4)While it was all still wet (this resin takes a long time to cure) I took my quill and laid it down over the single-ply matting. The cool stuff about this is that you can do huge cuts of it because it moves and bends to contours really well. So the whole panel took maybe 5 pieces, whereas the single ply matting took like 15 or so.

5)I let this stuff cure last night, and today when I get home I'll sand it with some 80 grit (if it has cured..its outside and 50 degrees so it isn't ideal conditions) and report back.

 
**** my balls, I'm a honkey!

I'll steal my ex g/fs and send them to you...afterall I did buy them for the bish... and she has my PPI Art AX400 too...and a bunch of really nice 4awg wire.. why didn't I take it when I left!!

 
Thanks man!

I wanted to clarify that in some of the pics you see a panel with what looks like a bunch of white all over it/air bubbles. That is actually microspheres that I mixed into the resin to help smooth it out and create an easier surface to sand (even though I still put the quill over it).

I'll take pics of what I mean tonight if the panel dries out, as I'll be applying a layer with the microspheres as a finishing layer to smooth it out. No need for bondo with this stuff.

Also I think I'll be using the paint from Dip Your Car on these panels and see how that looks. Maybe a matte-black look.

Thoughts?

 
Thanks man!
I wanted to clarify that in some of the pics you see a panel with what looks like a bunch of white all over it/air bubbles. That is actually microspheres that I mixed into the resin to help smooth it out and create an easier surface to sand (even though I still put the quill over it).

I'll take pics of what I mean tonight if the panel dries out, as I'll be applying a layer with the microspheres as a finishing layer to smooth it out. No need for bondo with this stuff.

Also I think I'll be using the paint from Dip Your Car on these panels and see how that looks. Maybe a matte-black look.

Thoughts?
Yeah I'm interested in the microspheres. Might wanna use them in the future

And are you talking about plasti-dip? When you first spray it it looks like ****!!! Just FYI, but it actually dries somewhat smooth

 
Yeah I'm interested in the microspheres. Might wanna use them in the future
And are you talking about plasti-dip? When you first spray it it looks like ****!!! Just FYI, but it actually dries somewhat smooth
Yeah dude I'm all about using quill fabric from now on. The microspheres are looking pretty cool. They're 20-200 micron sized balls of glass that you mix in the resin to help keep it viscous and create a finishing layer over your matting. Basically if you can "lay it down"(with your girl and fiberglass..don't mix both, it hurts) smooth enough to begin with you won't have giant crevices to work around, and simple sanding will get you quite close with the single-ply and quill. Then you finish it with the microspheres and paint!

Of course I've never done this, but the dude who told me all this was an old-school rat-rodder who happened to work at Tap Plastics and I brought in my panel and told me what's up.

Also he told me to stay away from Knytex unless I absolutely needed it. The quill is strong enough along with some single ply layers that I wouldn't need anything more. He was telling me how a 1 gallon can that could do 100sq feet of normal matting would do more like 25ft with knytex.

I only mention this cause I also bought some knytex..but now I'm not using it hahaha.

I'll take pics tonight of all the different materials I have, and try to show some pics of the speakers n **** too. Maybe post some scandalous pics of my ex gfs that pissed me off (Timmy13091 can vouch for that)... who knows..

I do have a funny pic of me passed out (literally) on my garage floor after I pulled an all nighter glassing.

Also: The knives you see on the 4" speaker rings are to hold the matting down to the mdf rings. This is because the fabric was being pulled off the rings as it got wet, and the 3m77 glue was not sticking. It only seems to happen on drastic curves where lots of tension sits on the fabric. The little holes left over are easily sealed up with a bit of resin and smoothed over.

 
Yeah dude I'm all about using quill fabric from now on. The microspheres are looking pretty cool. They're 20-200 micron sized balls of glass that you mix in the resin to help keep it viscous and create a finishing layer over your matting. Basically if you can "lay it down"(with your girl and fiberglass..don't mix both, it hurts) smooth enough to begin with you won't have giant crevices to work around, and simple sanding will get you quite close with the single-ply and quill. Then you finish it with the microspheres and paint!
Of course I've never done this, but the dude who told me all this was an old-school rat-rodder who happened to work at Tap Plastics and I brought in my panel and told me what's up.

Also he told me to stay away from Knytex unless I absolutely needed it. The quill is strong enough along with some single ply layers that I wouldn't need anything more. He was telling me how a 1 gallon can that could do 100sq feet of normal matting would do more like 25ft with knytex.

I only mention this cause I also bought some knytex..but now I'm not using it hahaha.

I'll take pics tonight of all the different materials I have, and try to show some pics of the speakers n **** too. Maybe post some scandalous pics of my ex gfs that pissed me off (Timmy13091 can vouch for that)... who knows..

I do have a funny pic of me passed out (literally) on my garage floor after I pulled an all nighter glassing.

Also: The knives you see on the 4" speaker rings are to hold the matting down to the mdf rings. This is because the fabric was being pulled off the rings as it got wet, and the 3m77 glue was not sticking. It only seems to happen on drastic curves where lots of tension sits on the fabric. The little holes left over are easily sealed up with a bit of resin and smoothed over.
100 sq feet.... Holy ****. Lol

N4pics!//content.invisioncic.com/y282845/emoticons/eyebrow.gif.fe2c18d8720fe8c7eaed347b21ea05a5.gif//content.invisioncic.com/y282845/emoticons/laugh.gif.48439b2acf2cfca21620f01e7f77d1e4.gif

 
Yea the two panels were drying last night and hopefully finished drying today.

The thing with this stuff is that it really needs to be in the optimal temp to dry. With the home depot resin it was freezing out but it would still dry.

The nice thing though about it taking a long time to cure, is that if you need to cut more fabric or grab some food, you aren't pressed for time. I never mixed more than 4oz at a time and I have yet to waste any.

Depending on how ready they are tonight I'll try and take a few pics of the microspheres and show you how they mix in. The spheres are also good if you have really thin resin and you need something to "weigh" it up so it doesn't roll off the panel. Like on a vertical surface or something. I'll be using them when I make my big amp rack. I plan on doing 8 cdt es-06+'s in a V A (for vertex audio) configuration. 2 will be like this \ two like / then the amp in the center, then / and the last two \

So it'll look like \/ amp /\ however if I keep this xion (it does do 4x300 @1ohm and 2x605@2ohm bridged) I might need to figure a new way to do things. Maybe take out the rear seats?

I plan on having each 06+ in its own box (if possible) in .5cu tuned to roughly 28hz via CDT's recommendations. Should get crazy low for some little dudes.

 
looks good...I would of done the rings a little different, going to be hard to get that area around the speakers looking smooth and cleaned up
Which area of the rings? I knew that on the interior area (where all three converge) it would be difficult to get it smooth. Thats why I want to go with that textured paint to kinda hide it. However I think the quill cloth and the mircospheres will help...hopefully..

What would you recommend? Totally open to input maistro. Afterall this is my first gig.

 
Activity
No one is currently typing a reply...
Old Thread: Please note, there have been no replies in this thread for over 3 years!
Content in this thread may no longer be relevant.
Perhaps it would be better to start a new thread instead.

Similar threads

Your amp may have failed. A competent shop should be able to diagnose the issue in under 5 minutes either way. You didn't necessarily do...
6
2K
Anything worth getting is always worth it more at a steep discount. Not familiar with that unit, but the brand is great.
1
722
Thanks for your response guys! I'm not so much involved to justify an LTO,car is a daily driven and batteries will be installed when needed.Maybe...
4
1K

About this thread

marleyskater420

5,000+ posts
Banned
Thread starter
marleyskater420
Joined
Location
In the medium of life
Start date
Participants
Who Replied
Replies
65
Views
7,796
Last reply date
Last reply from
marleyskater420
IMG_1154.png

GoldCountryCA

    May 5, 2024
  • 0
  • 0
IMG_1153.png

GoldCountryCA

    May 5, 2024
  • 0
  • 0

Latest topics

Top