Here is the
Dynamat XTREME treatment I did on the doors of my 1994 Jeep Grand Cherokee. I am the original owner who special-ordered this vehicle over 22 years ago.
The speaker cone suspension ring on the original Infinity Gold full range speakers crumbled away, so almost all the sound was coming from just the factory dash tweeters. While I had the doors apart to swap to the
Infinity Kappa 60.11cs Component Speakers I decided to also add the Dynamat XTREME.
Given that service after Dynamat covers all the openings will be difficult I lubricated the latch mechanism and the window mechanism for smooth operation.
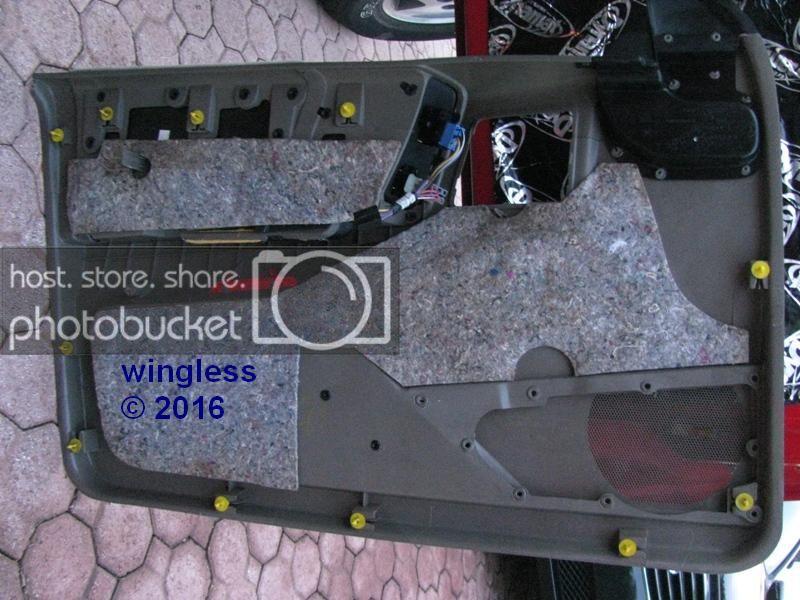
The factory installed a clear LDPE sheet, glued using a specific pattern, to the painted door sheet metal, hidden by the door card. This was a full-coverage sheet, covering the openings, pierced only by fasteners, wires, handles and the speakers. There was also a thin black sheet, lightly stuck to the LDPE sheet. The thin black sheet crumbled away onto the ground shortly after the door card was removed.
The "temporary" adhesive used to retain the clear LDPE sheet to the door sheet metal transitioned to "permanent" adhesive over the years and refused to let go. The LDPE sheet was destroyed during removal.
The old adhesive was removed from the painted sheet metal. I used WD-40 to soften the rock-hard adhesive to expose the factory paint job. The WD-40 residue was then removed to provide a clean-clean-clean surface for the Dynamat.
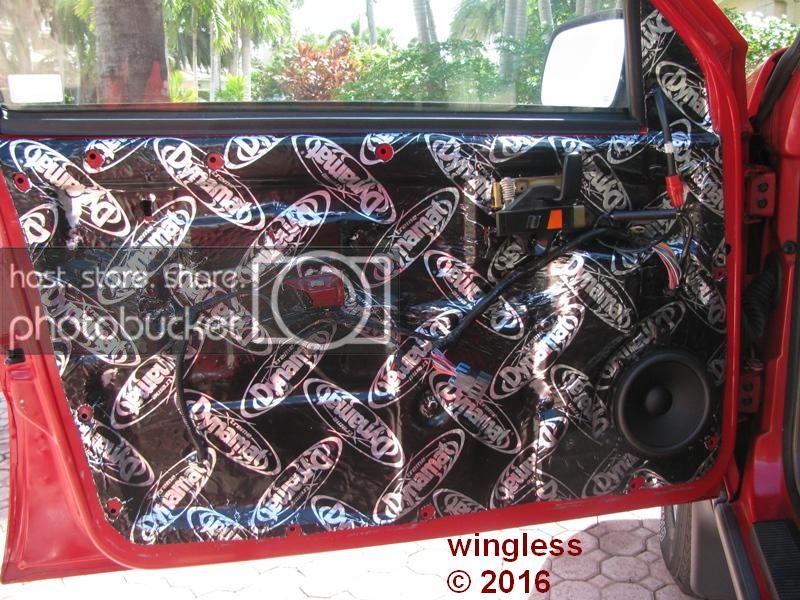
The new Infinity Kappa 60.11cs full range speaker has a mounting ring that was required to mate up w/ the door speaker fasteners. The mounting ring has three slotted tabs at 180° spacing that match up to the nylon inserts that had been used to accept screws for the factory speakers. The mounting ring also has four holes at 90° spacing to accept self-tapping screws to retain the speakers to the ring. Fortunately the bolt circle diameter of those four holes is larger than the speaker hole so I was able to have those four self tapping screws also bite into the door sheet metal.
There was a dry fit w/ the new speaker, on top of the mounting ring to ensure everything would fit w/o issues. All of the yellow quick fasteners were removed from the door card perimeter for the quick fit. There was plenty of clearance for the components under the door card.
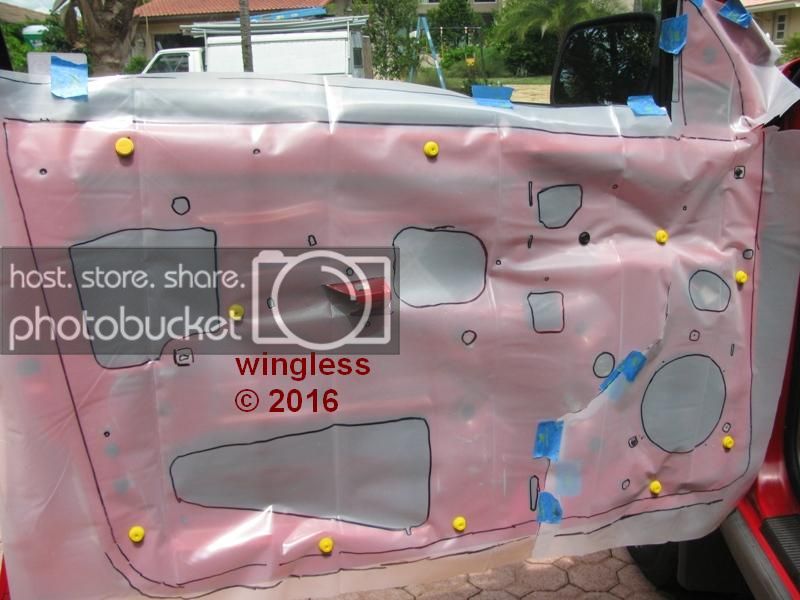
A pattern was created for the Dynamat. A sheet of clear, thick plastic and a Sharpie were used to make the pattern. The surface contour required cutting a dart in the large sheet so the excess material would overlap, to lay flat when installed. All the wires were unplugged and were tucked into the door interior while the pattern was being created. The door handle and rods were also removed while the pattern was created. It was good news when I discovered that the driver's door pattern and the passenger's door pattern are mirror images.
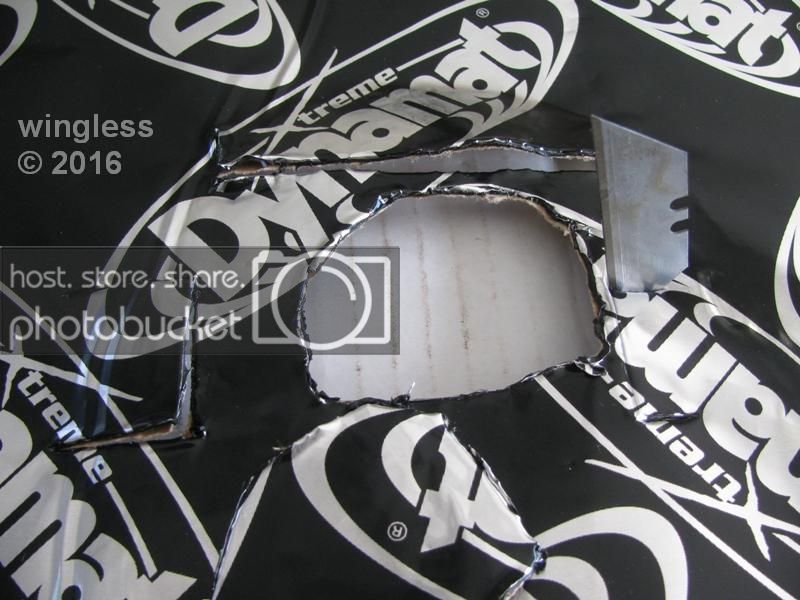
My plan was to maximize coverage and minimize openings. My pattern has a hole where the door handle pulls the rods for the latch and lock. There are flaps cut in the Dynamat where the handle mechanism bolts to the door, then the flaps go over the top of the bolted mechanism frame. There are holes w/ clearance for all the quick push fasteners. There are holes for the wiring harness push fasteners.
The door cabling goes in and out of the door cavity. I maintained that routing, w/ holes cut in the Dynamat for those wires.
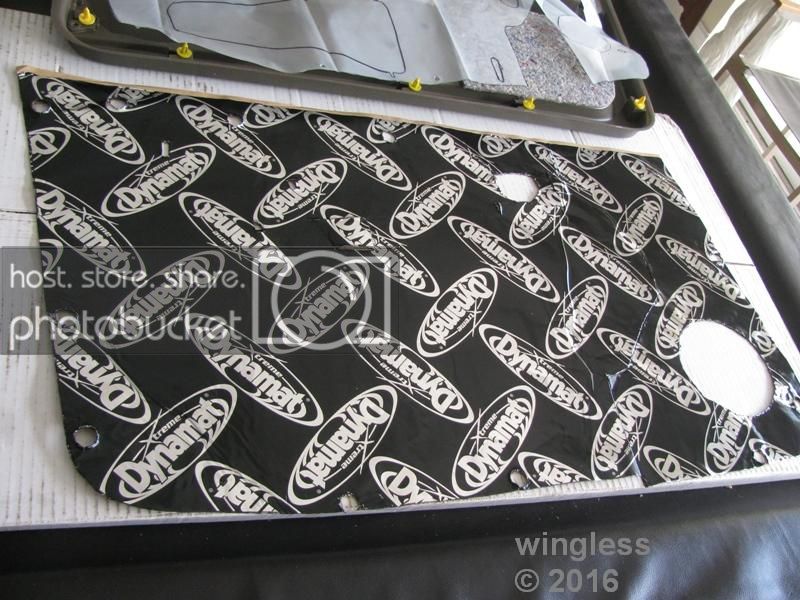
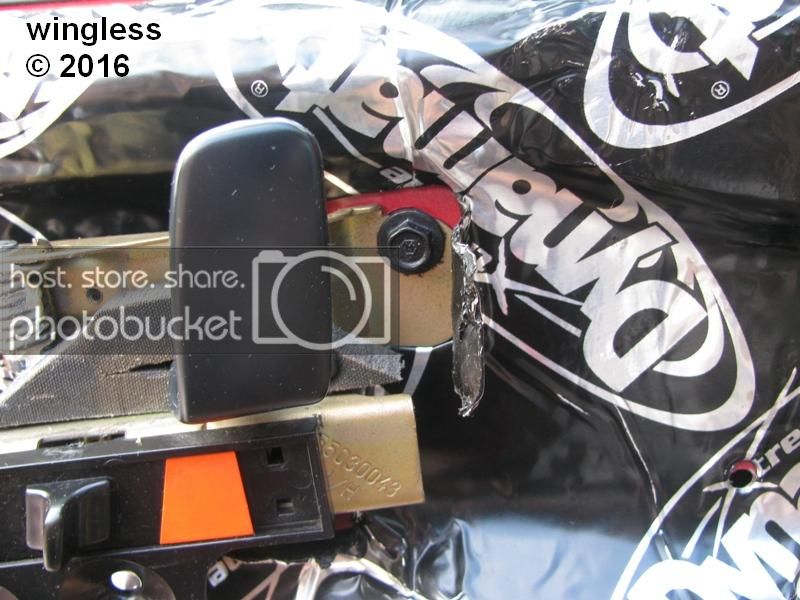
The assembly w/ the large single Dynamat sheet was a sequential process to ensure everything would be reconnected as-required. The starting point was the door handle opening. There is Dynamat under the door handle (but not between the mechanism frame and the door sheet metal) so the Dynamat had to be placed before the door handle and rods could be installed. There were similar sequences required for it all to work.
The latch and lock rods are very close to a large opening. I used UL plenum tape on the interior of that opening so the Dynamat could not grab onto the rod fabric.
The mfg recommends using a roller, or using
their roller, but I found my two thumbs worked best to stretch the material so it followed and bonded to the irregular contours on the door sheet metal.
The dart cut is visible to the left and above the Infinity Kappa 60.11cs 6-3/4" Component Speaker. The dart cut was required to permit the material to follow the door contours, by making a small overlap. Also note the bottom edge of the fresh material is not straight, to provide extra material to permit it to fill the pocket near the bottom.
The process took some effort, reaching to the door interior while progressing to get the desired results.
The Dynamat is an outstanding product. This was my first project w/ this material. I do not hesitate to recommend Dynamat.
The Dynamat provides lots of acoustic dampening and some thermal attenuation. Their other products Dynaliner and Dynapad provides lots of thermal attenuation and some acoustic dampening. When using both, apply the Dynamat first.