Apicella Auto Sound Demo Vehicle - 2019 Volvo S60 R Design

Many wires have been run. What a pain in the ass..

Also, made my order today for the other system.

3 Mosconi Pro 4|10
3 Mosconi Pro 1|10
2 pairs of Focal TBM tweeters
2 pairs of Focal 3.5WM
1 pair of Focal 8WM
3 Illusion C12 slim subs

2 Focal 3.5WM and one TBM will go in the center channel. One TBM will be extra.

This system is going to be ******* nuts.

Finishing up a batch of stuff on the laser and heading home to do pictures.
2688a17e30877f4503412faf0b304036.jpg


Sent from my SM-G975U using Tapatalk
 
This build is starting to look like getting the "OEM Style" system installed first is the most important thing, which makes sense. Itll be much quicker, much easier, and still provide a demo vehicle to anyone who might stop by. First part to this was getting the front door speakers installed. This consists of the Audiofrog GB10, GB25, and GB60. The 2019 S60 has oem speaker locations that are pretty damn good, and partially what initially caught my eye about the car. The midbass location is standard, located in the lower corner of the doors. The midrange and tweeter are located in the top part of the door and are unobstructed. Pretty damn good speaker in most cars location regardless if OEM or not. We can go into the whats and whys once everything is installed and tuning begins. That way, i can actually show why.


Side note: It also seems like this entire build is mostly being done after hours at the shop. I was at the shop until nearly 5am I think 3 nights out of the past 5. Hell, its 4am right now. No wonder my hair is already turning gray.


That said, heres the speakers all wired up, baffles installed, deadening applied, etc.. Midrange baffles were made out of 1/4" acrylic. I took the OEM speakers and drew them up in a cad software and added the GB25 cutout and bolt pattern.Stainless steel M4 machine screws secure the GB25s to the baffle. Before the GB25 was secured, i used some ResoNix CCF Decoupler 7 to seal the driver to the baffle. ResoNix CCF Decoupler 7 was also used to seal the baffle to the door panel. The GB10 got the same treatment. OEM tweeter bracket was replicated out of acrylic. The gb10 got a light coat of black paint so you dont see the chrome ring behind the grill. Midbass drivers, same deal. OEM speakers coppied into the software and converted into baffles for the GB60's. ResoNix CCF Decoupler 7 used to seal the baffle to the door, and the GB60 to the baffle. XT30's were used on the GB10's and 25's, XT60's were used on the GB60s, which were all pulled out of my previous car. GB25 and GB10 installed into the oem locations on the door panels using all of the oem hardware. 2 layers of ResoNix CCF Decoupler 7 was used to seal the GB25 to the grill to prevent unwanted interference from all other areas in the door panel.


KTjnosn.jpg


b1rWMcf.jpg


v2vzlff.jpg


Ronog4H.jpg


zoxP9Ah.jpg


KsamXtV.jpg


gaKlGQF.jpg


FH1cHLv.jpg


oMh1BgS.jpg


nhvMRKe.jpg


tWTNCHl.jpg
 
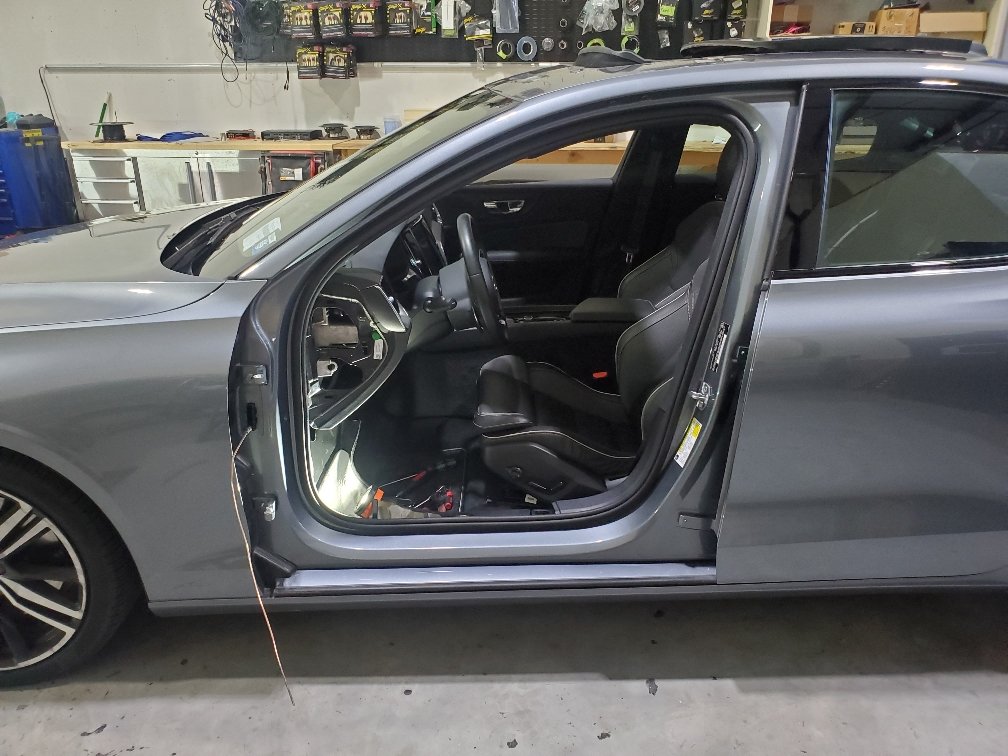
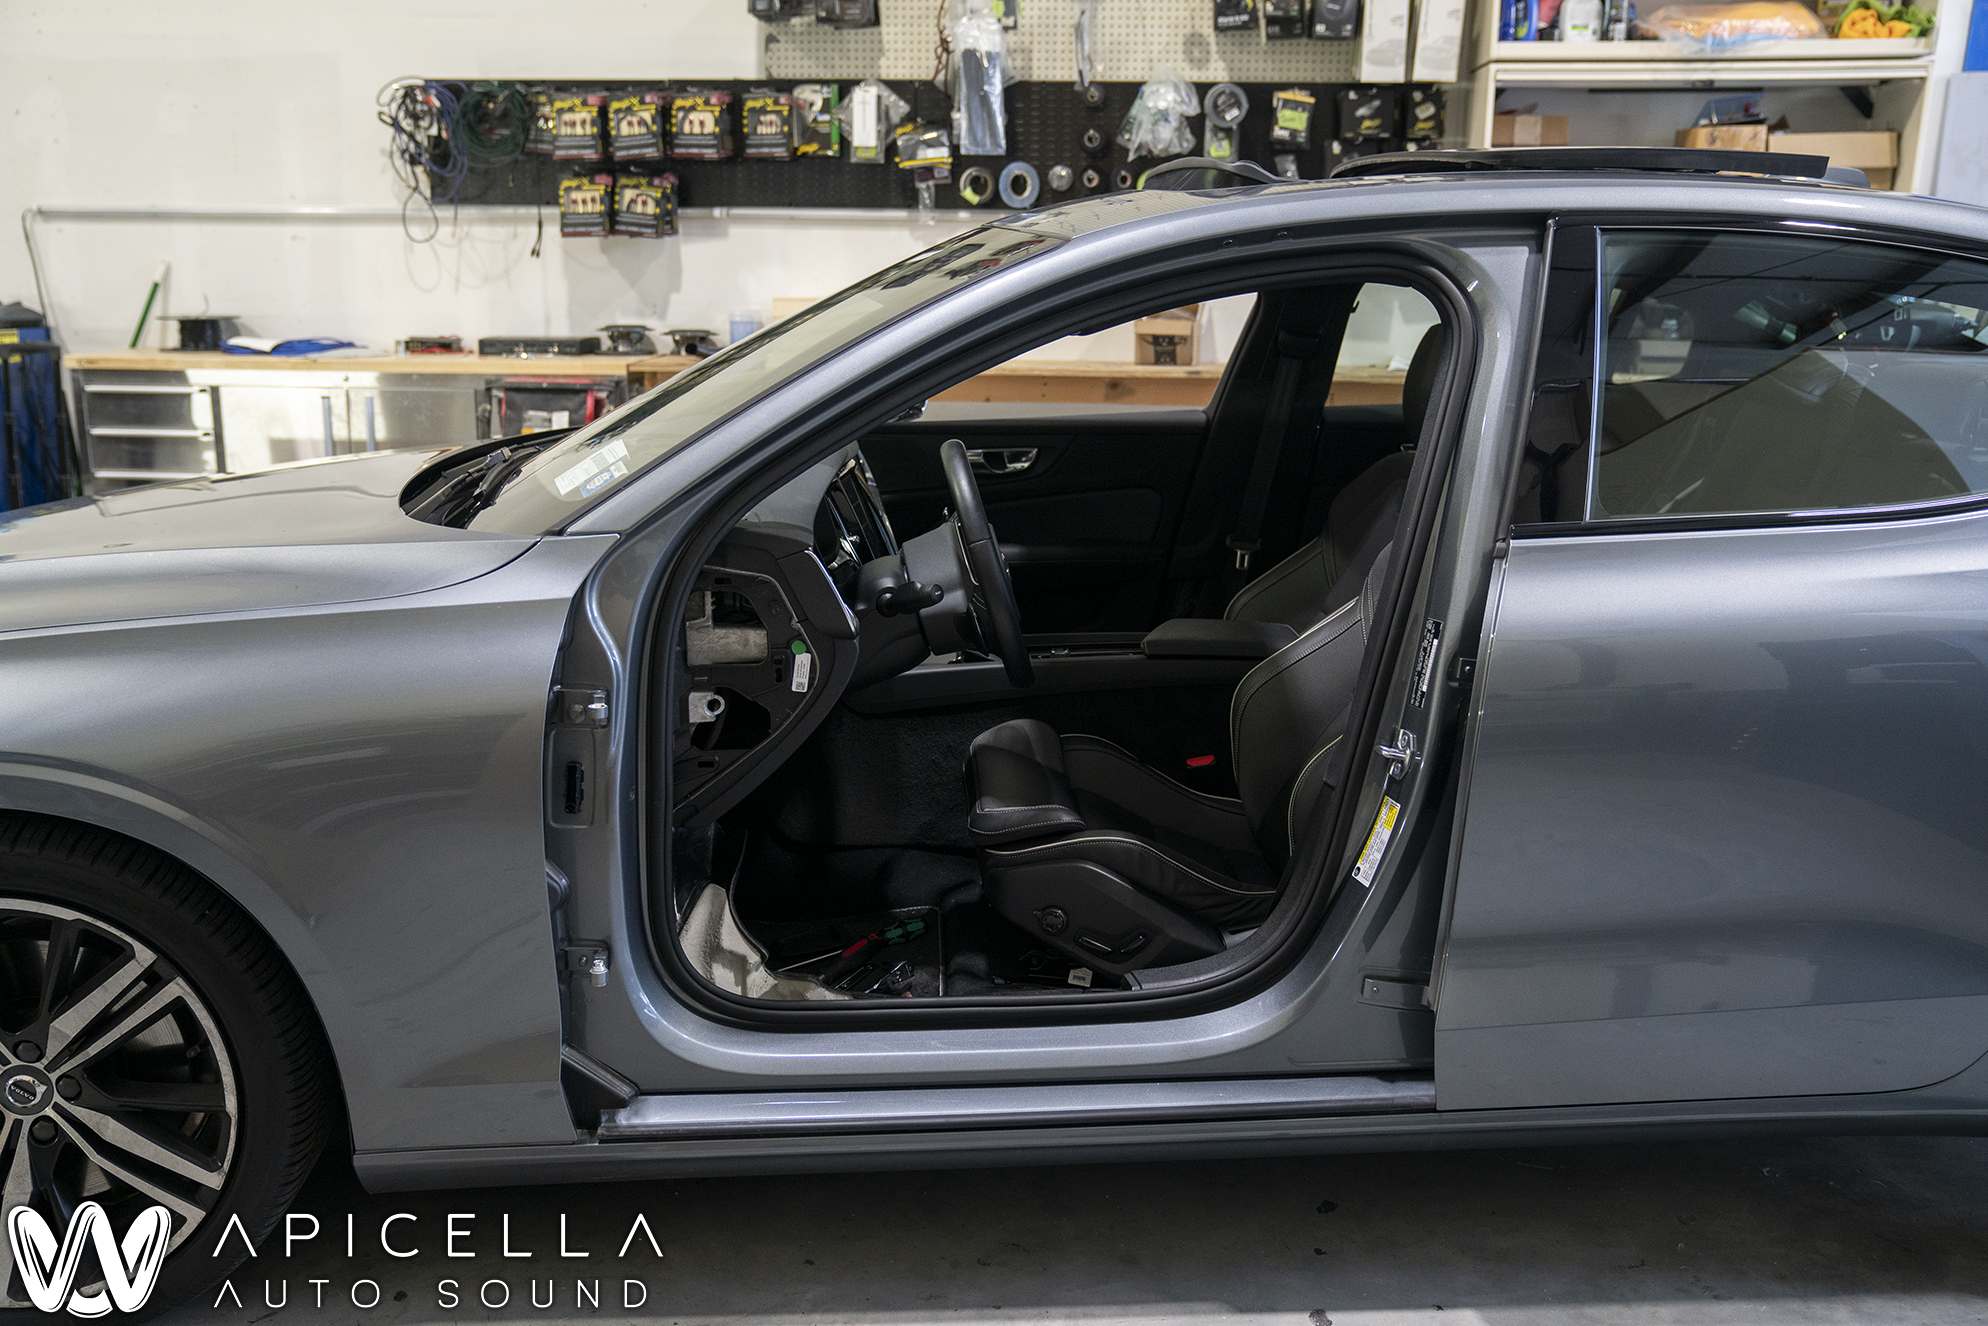
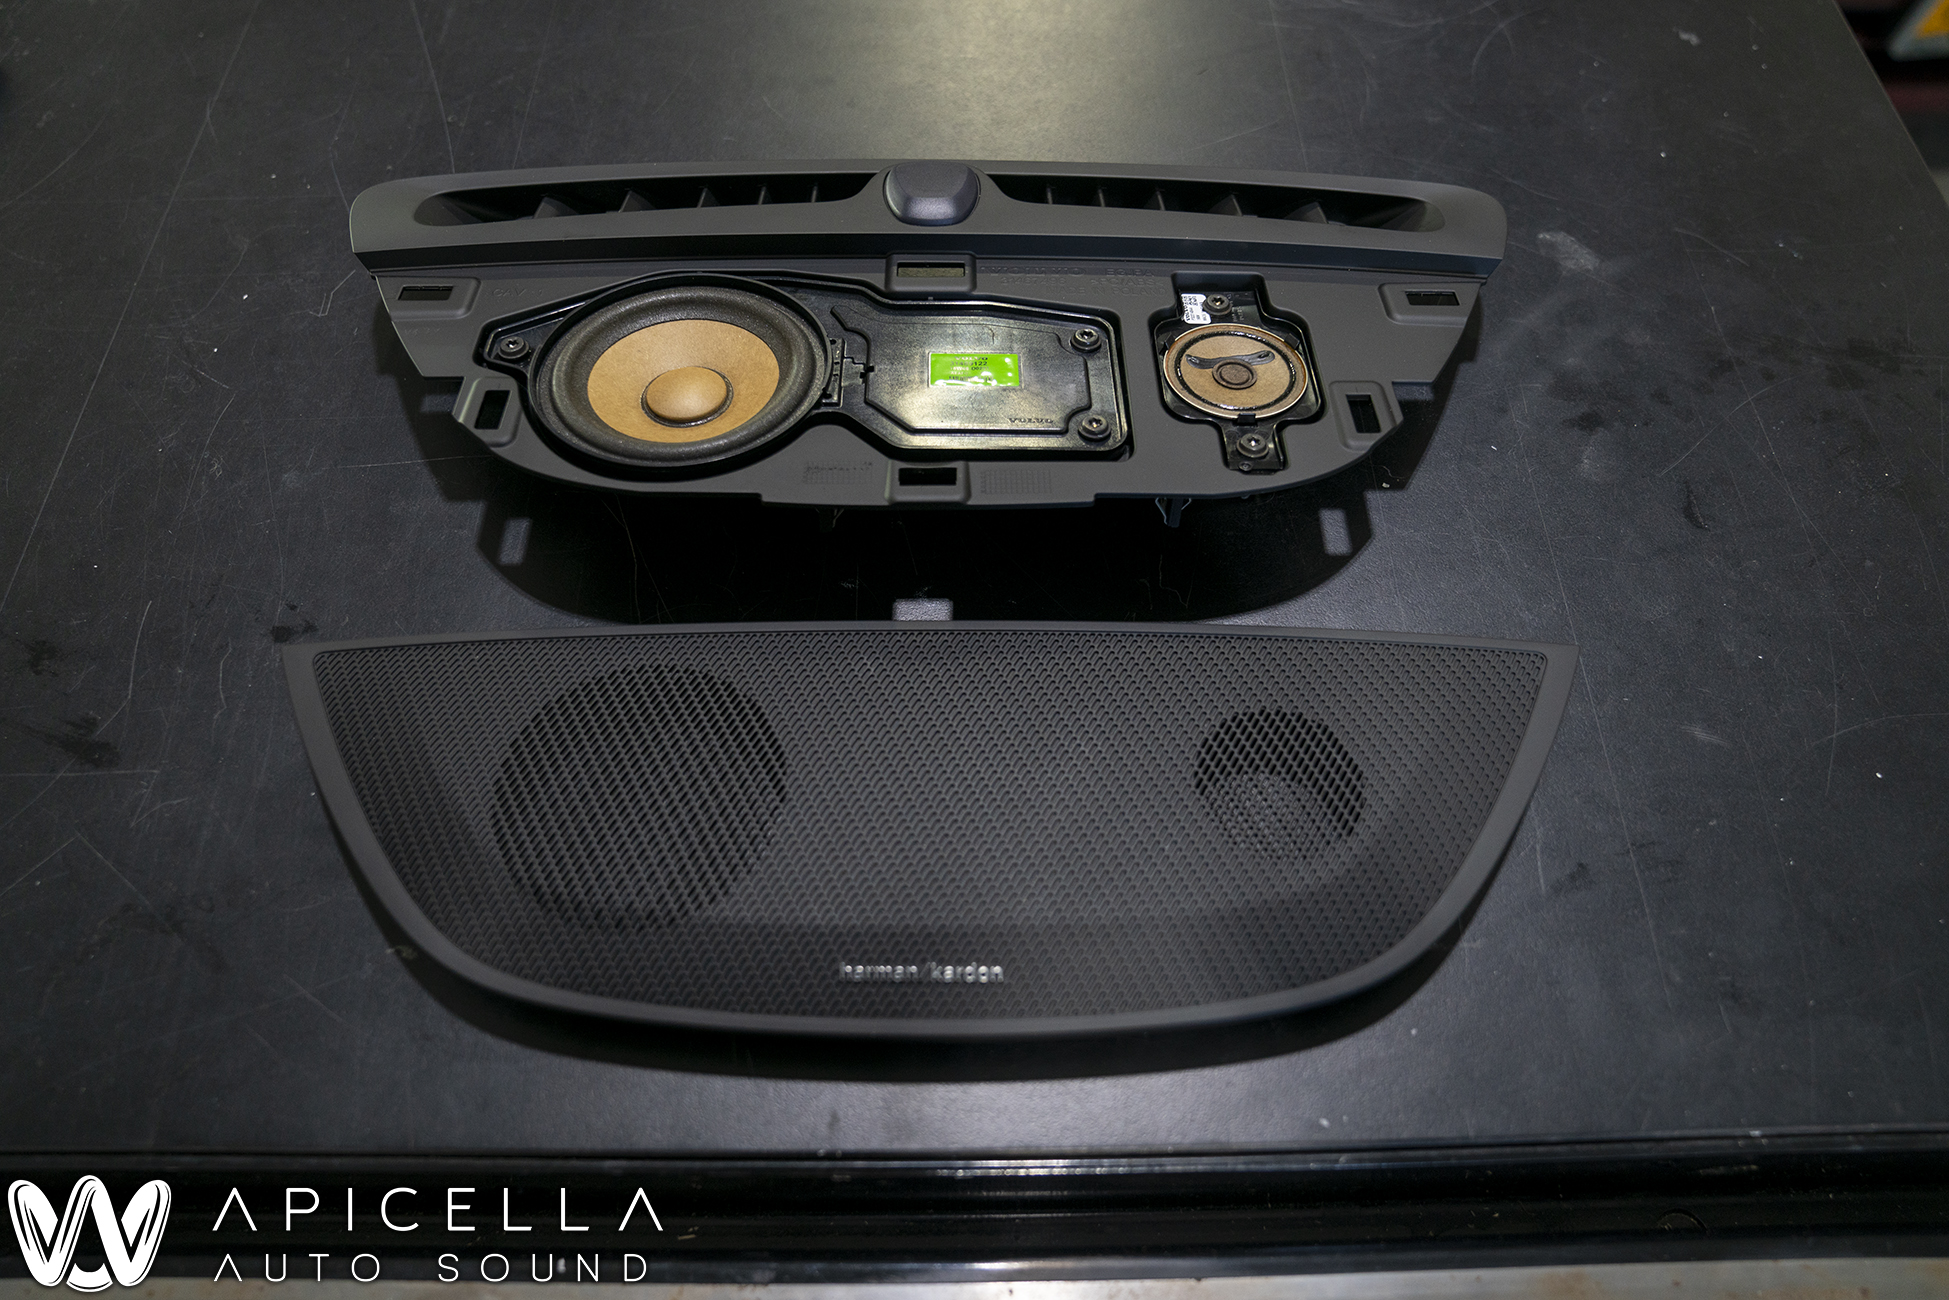
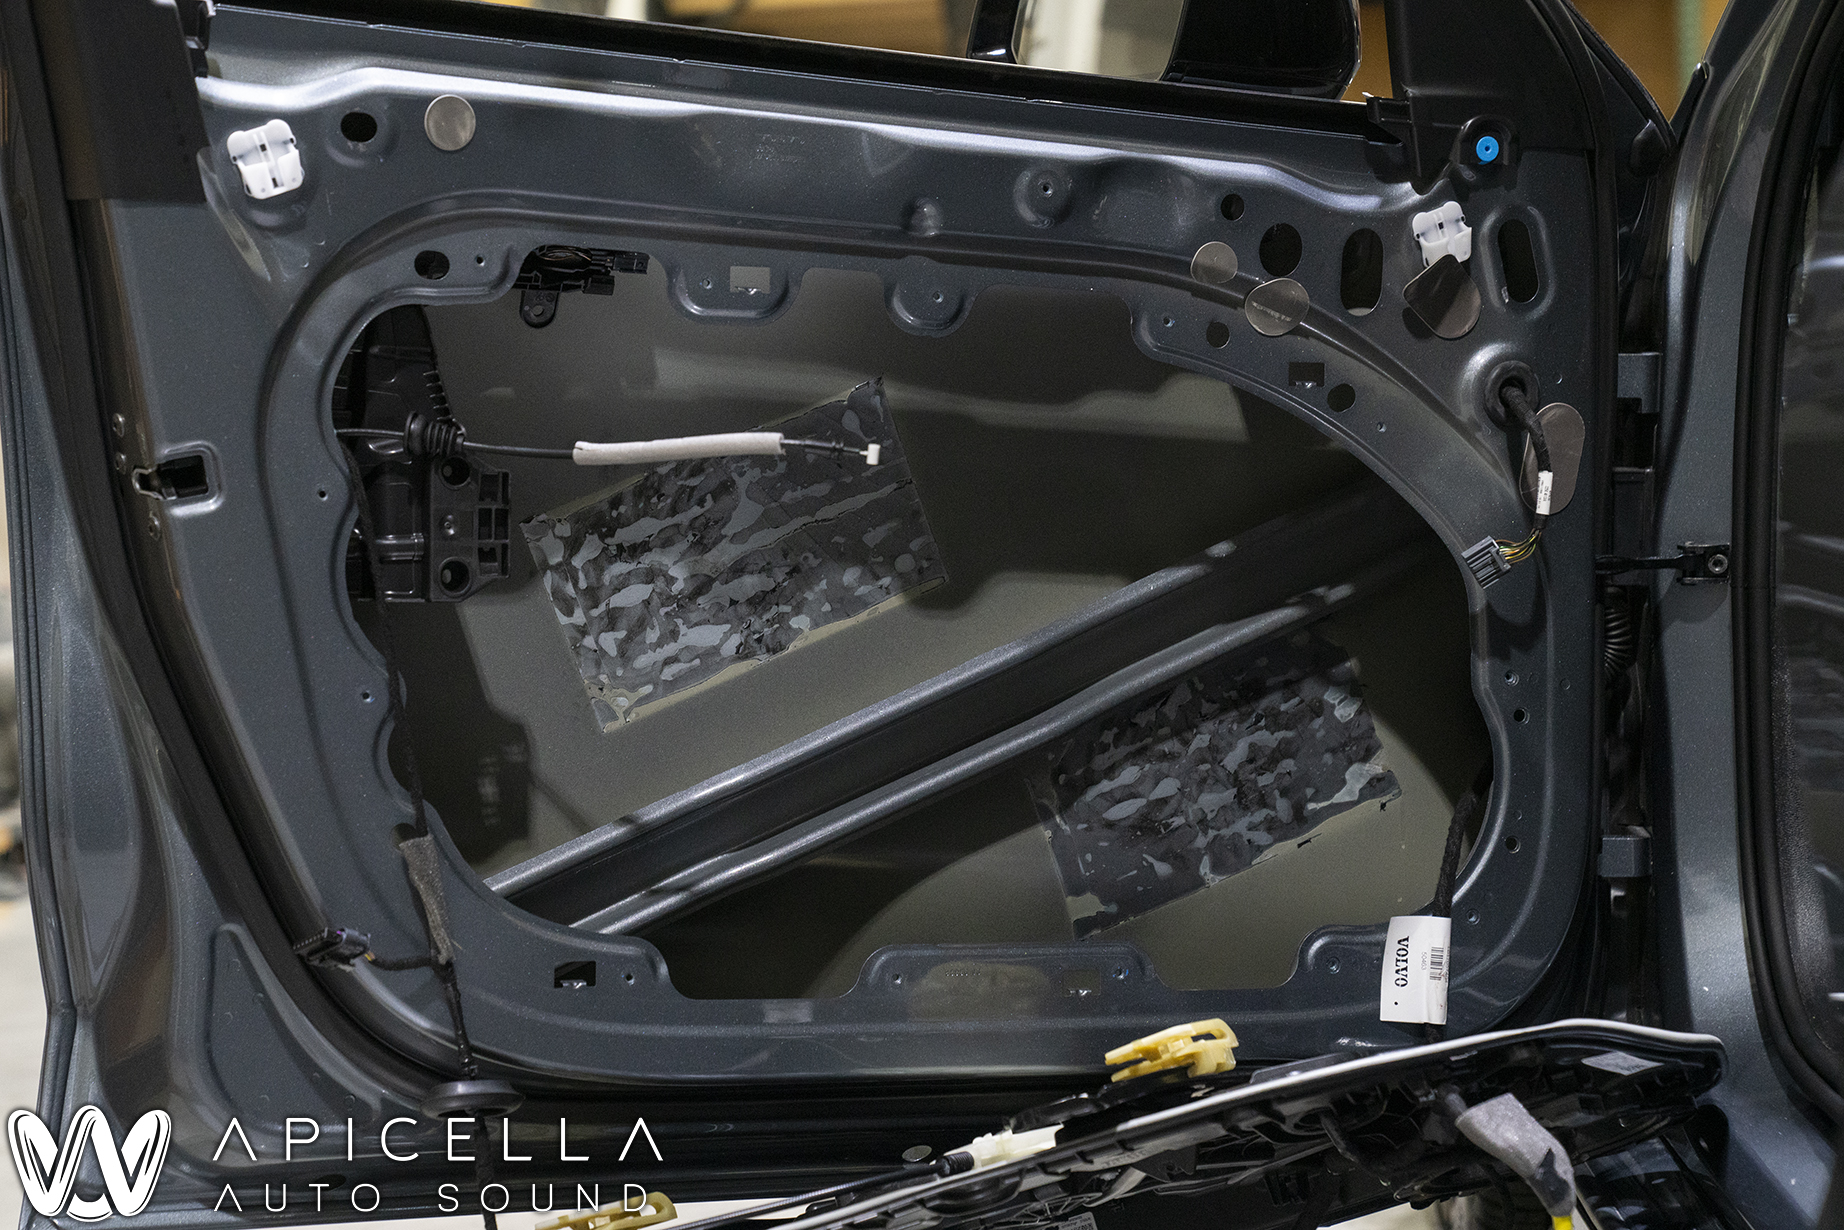
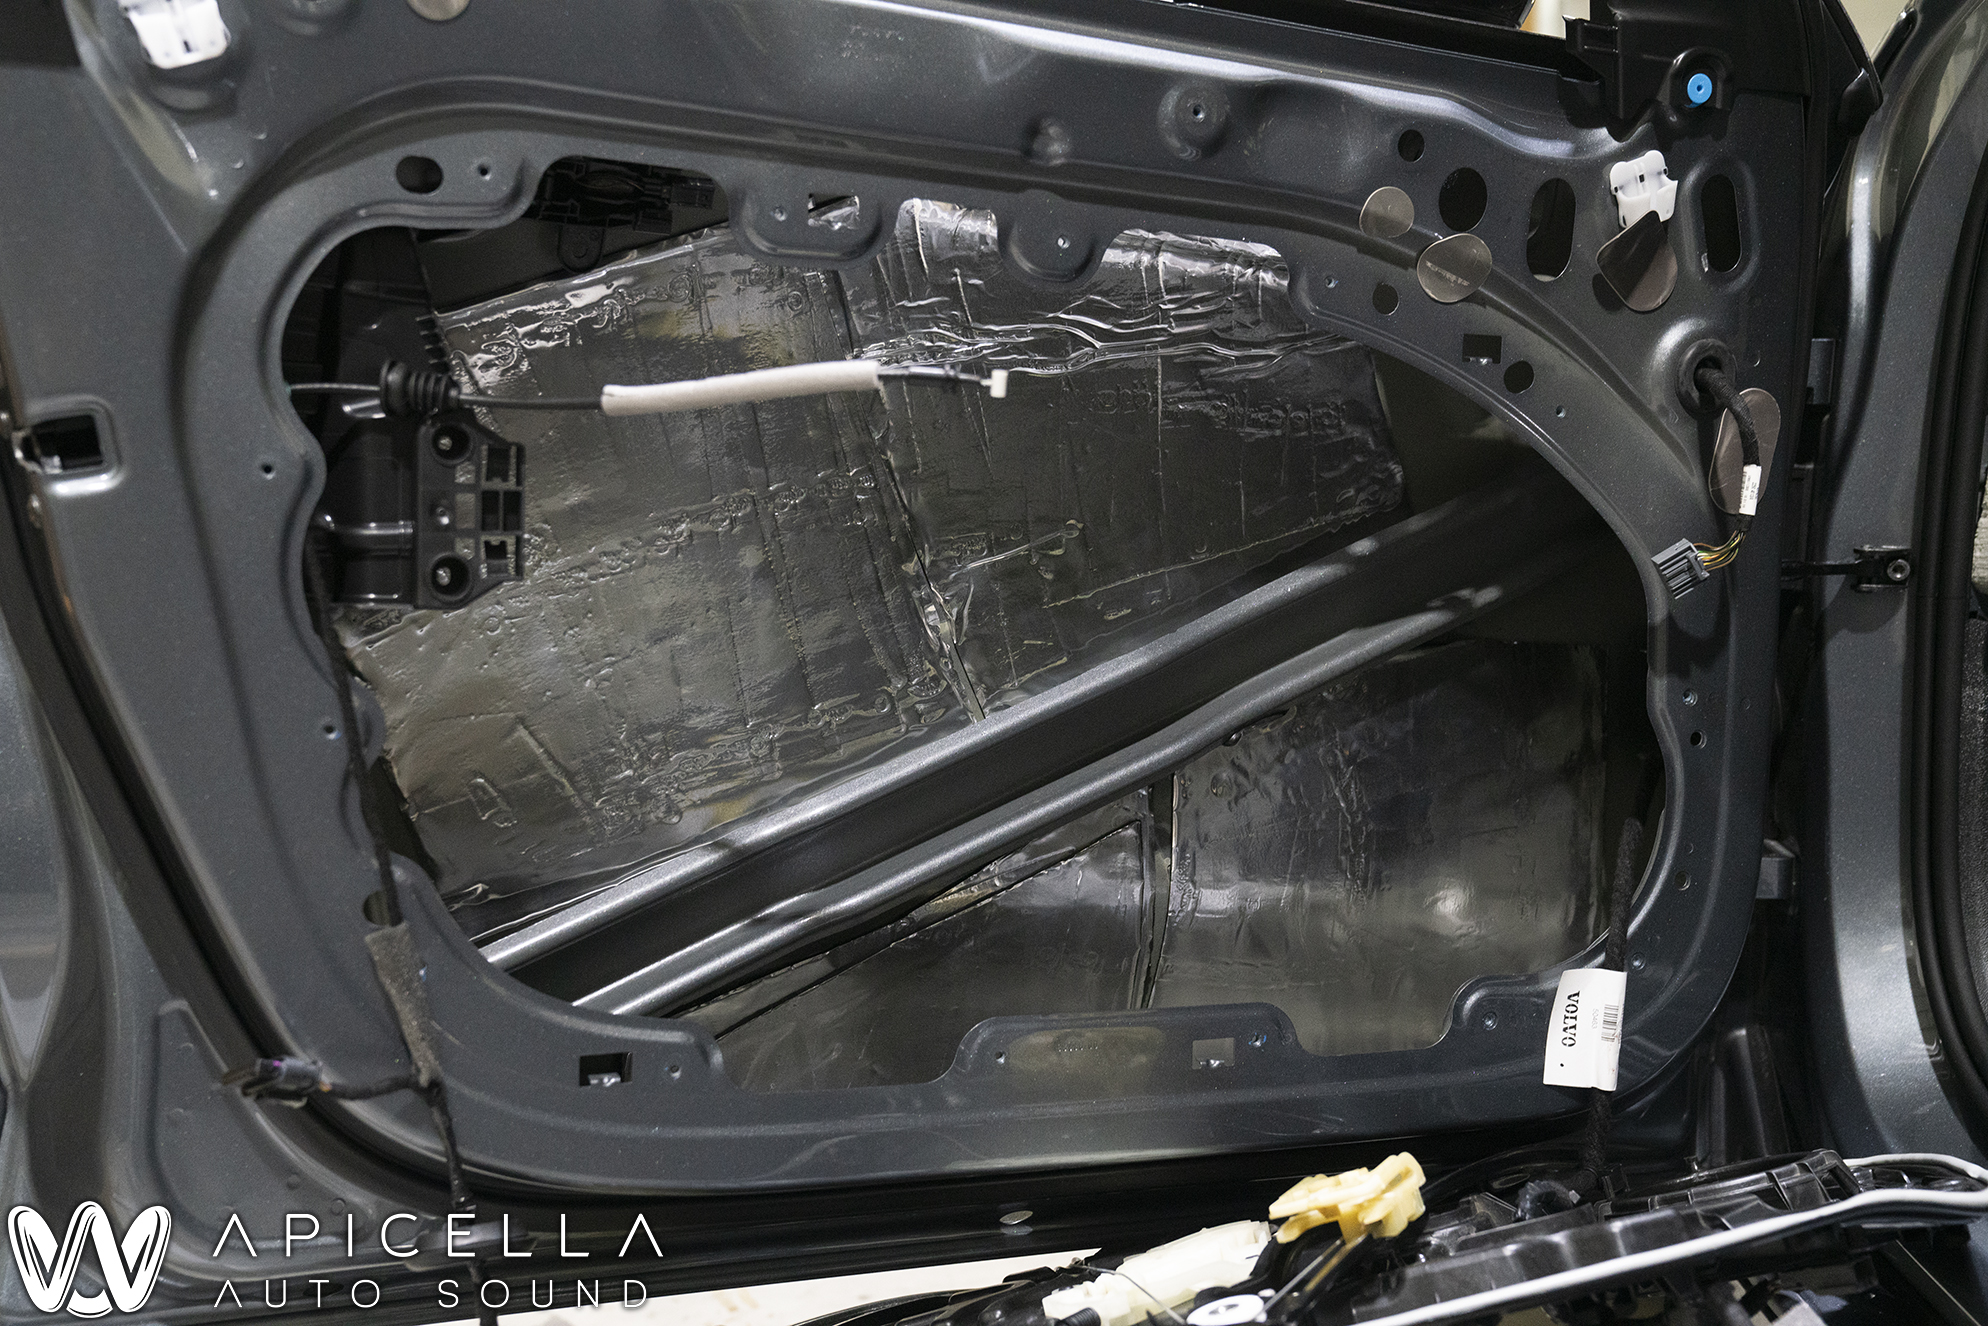
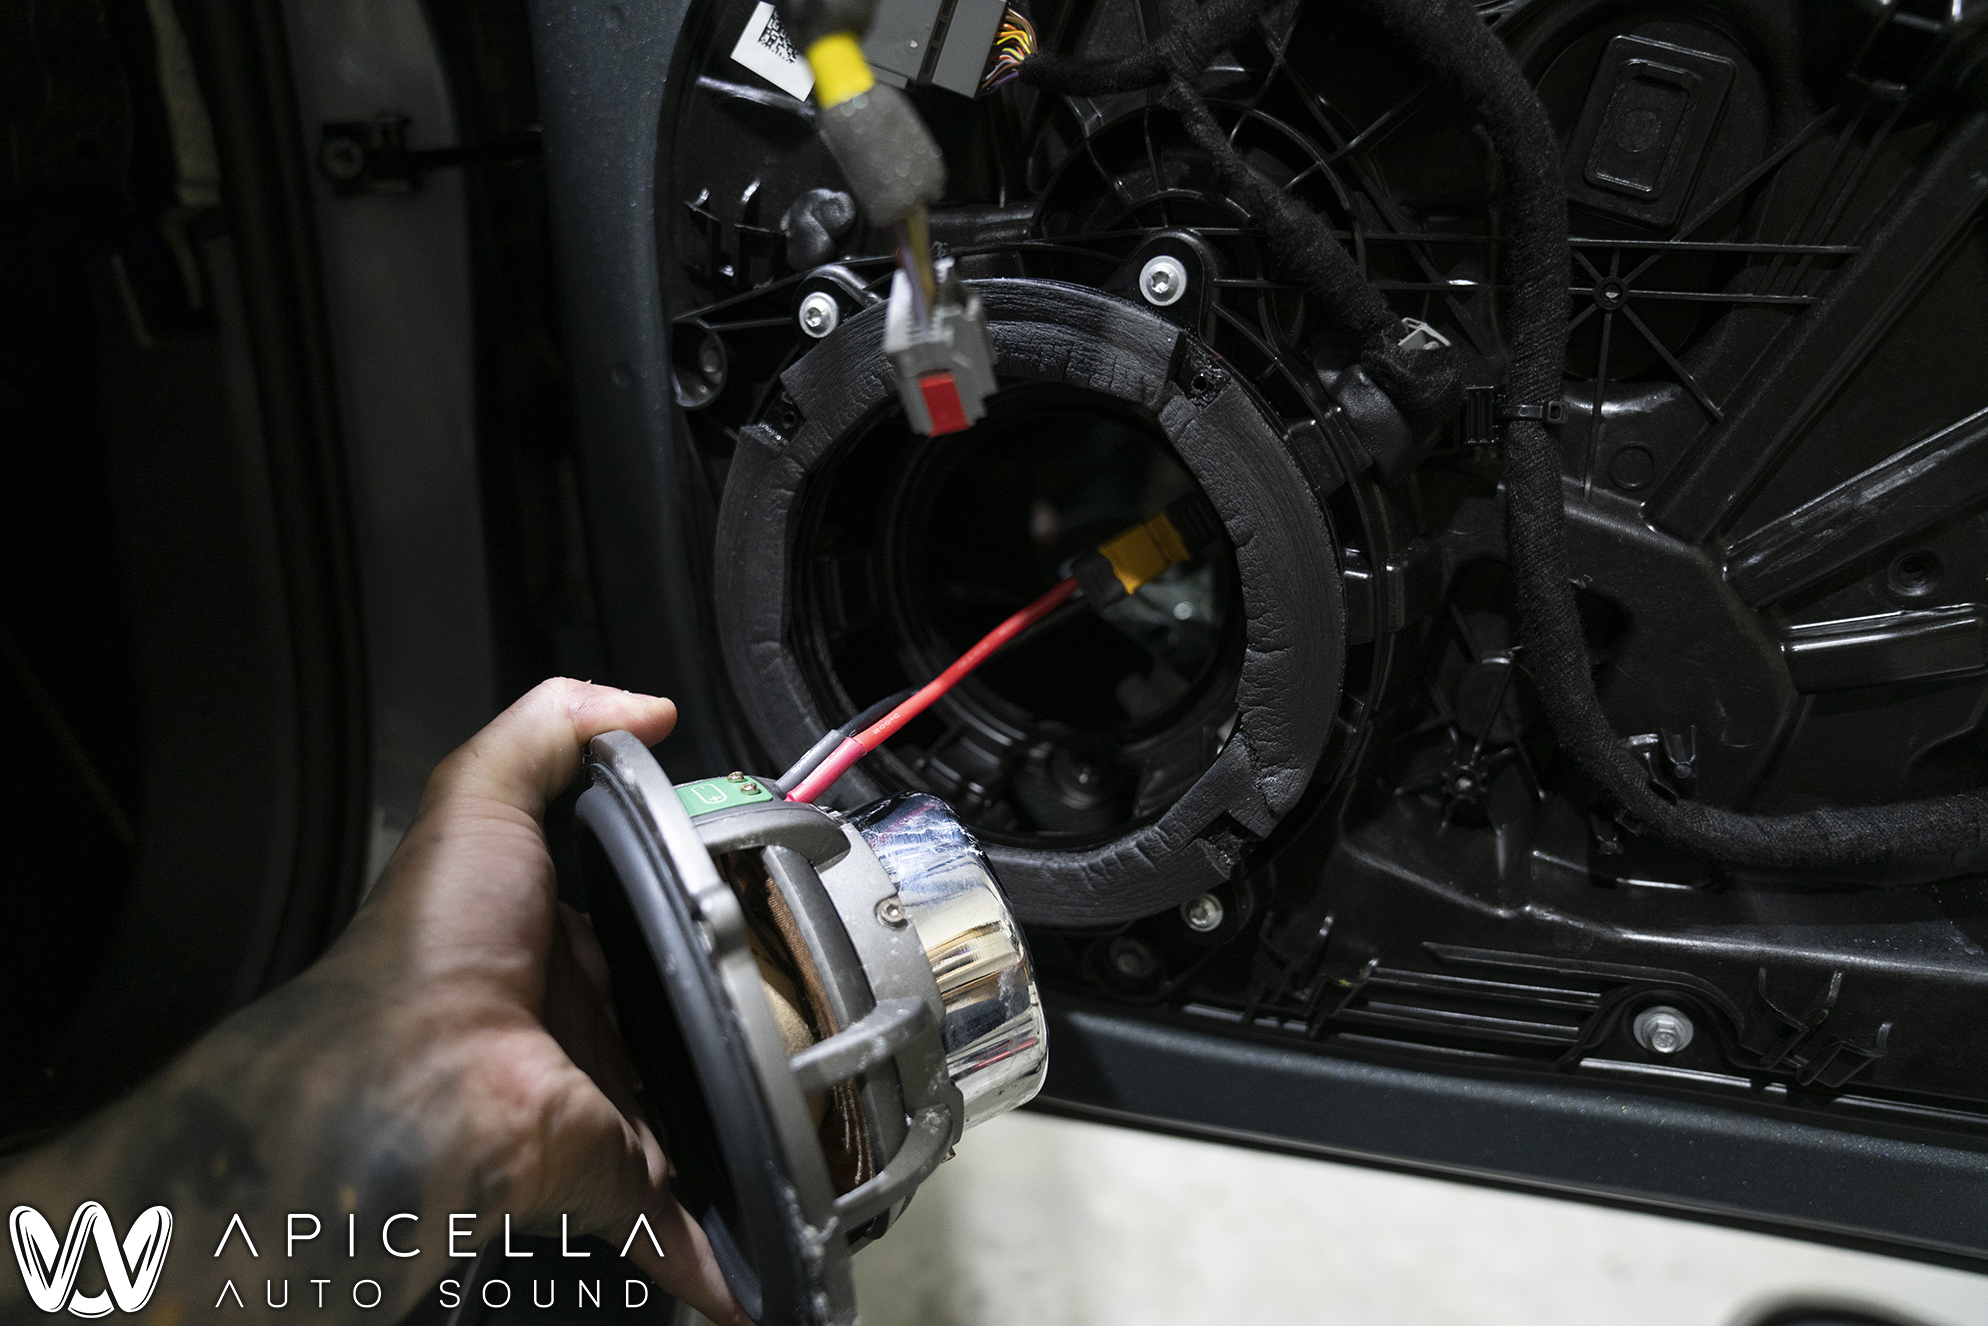
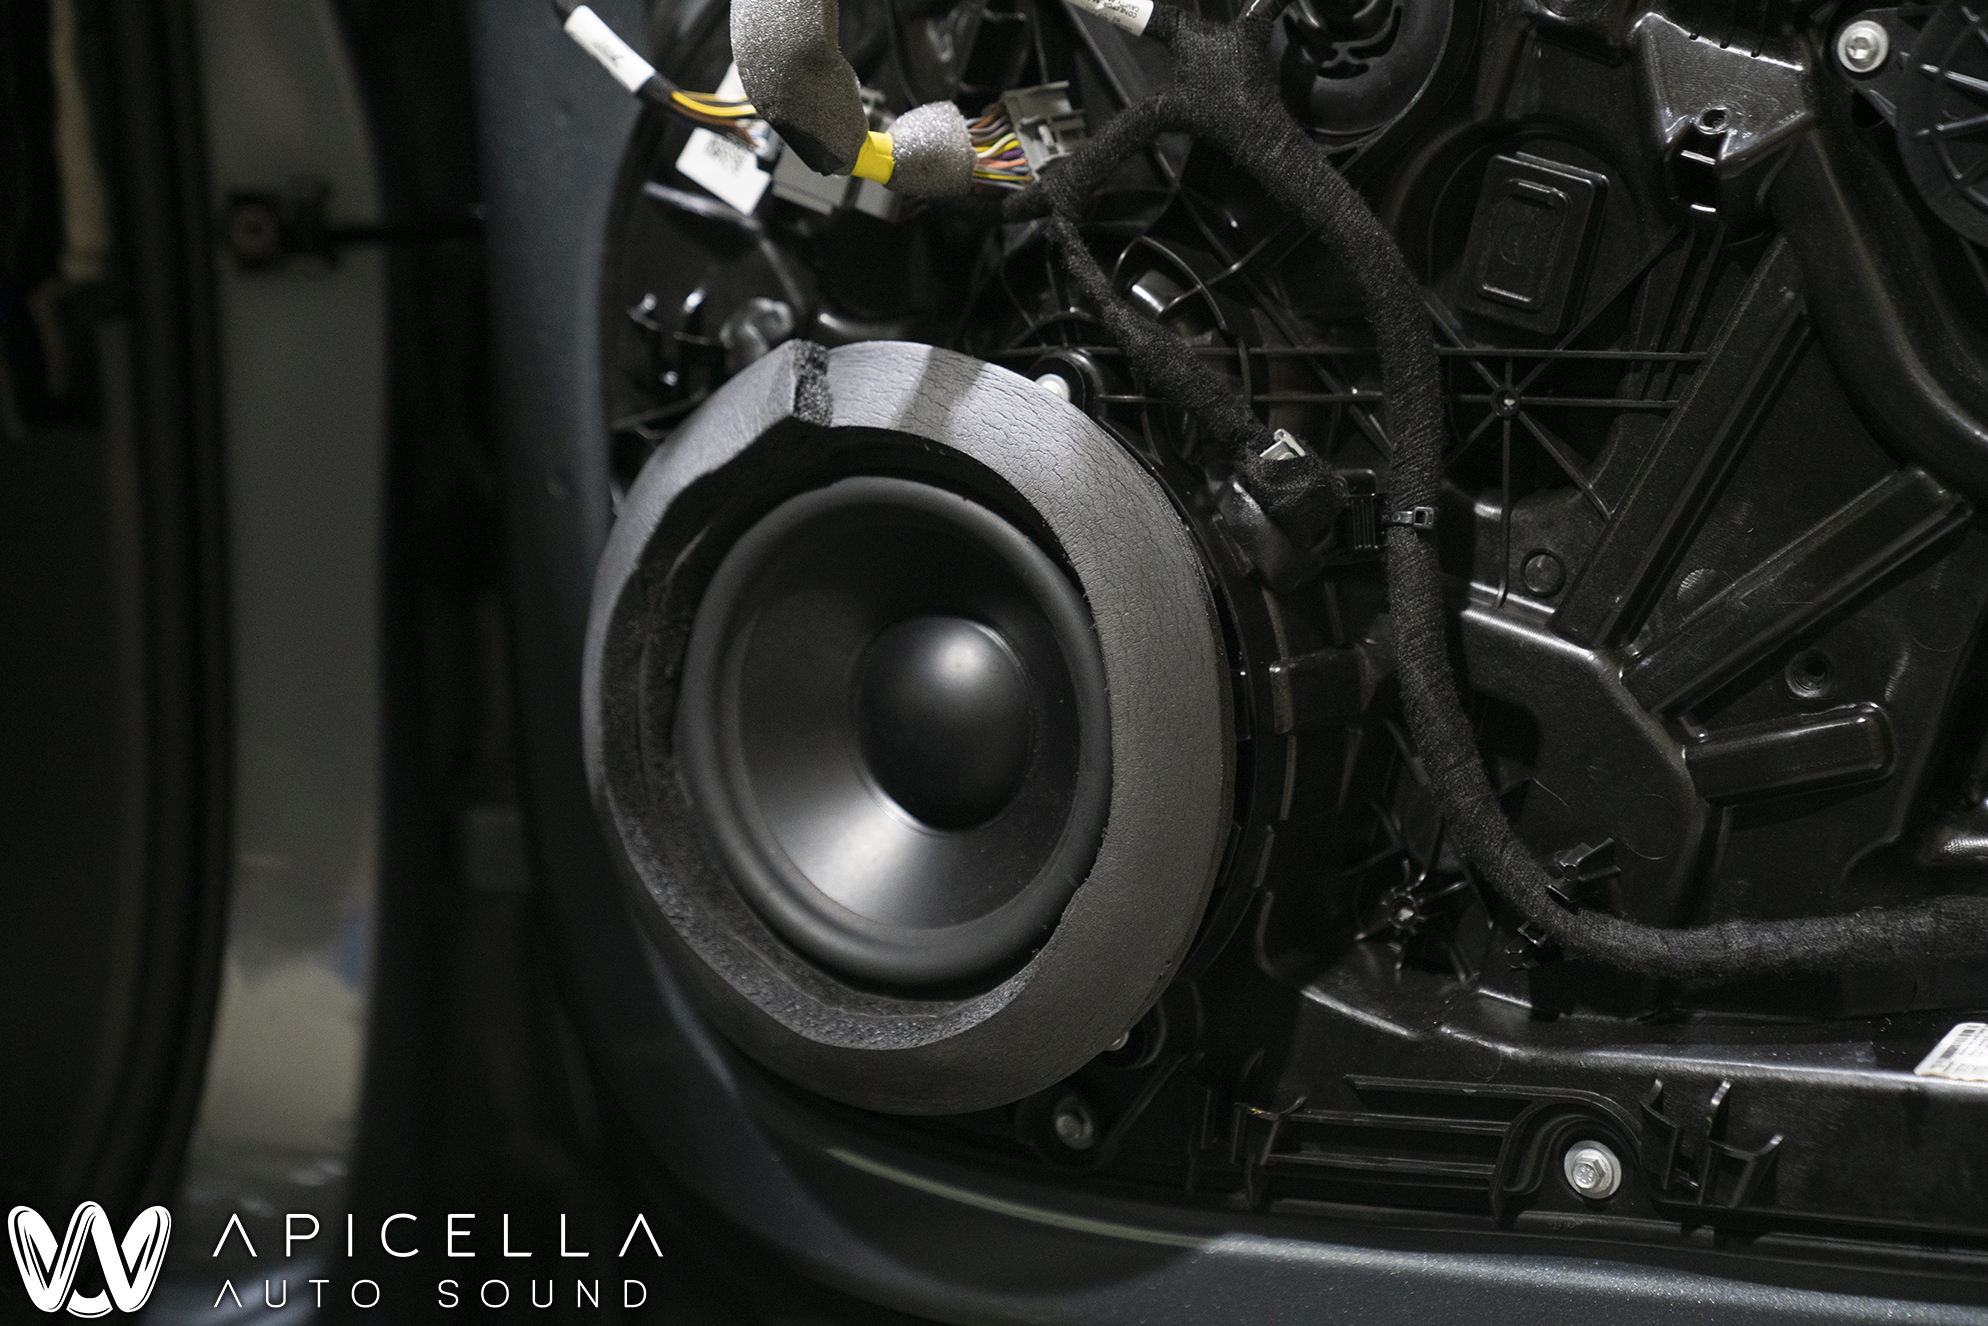
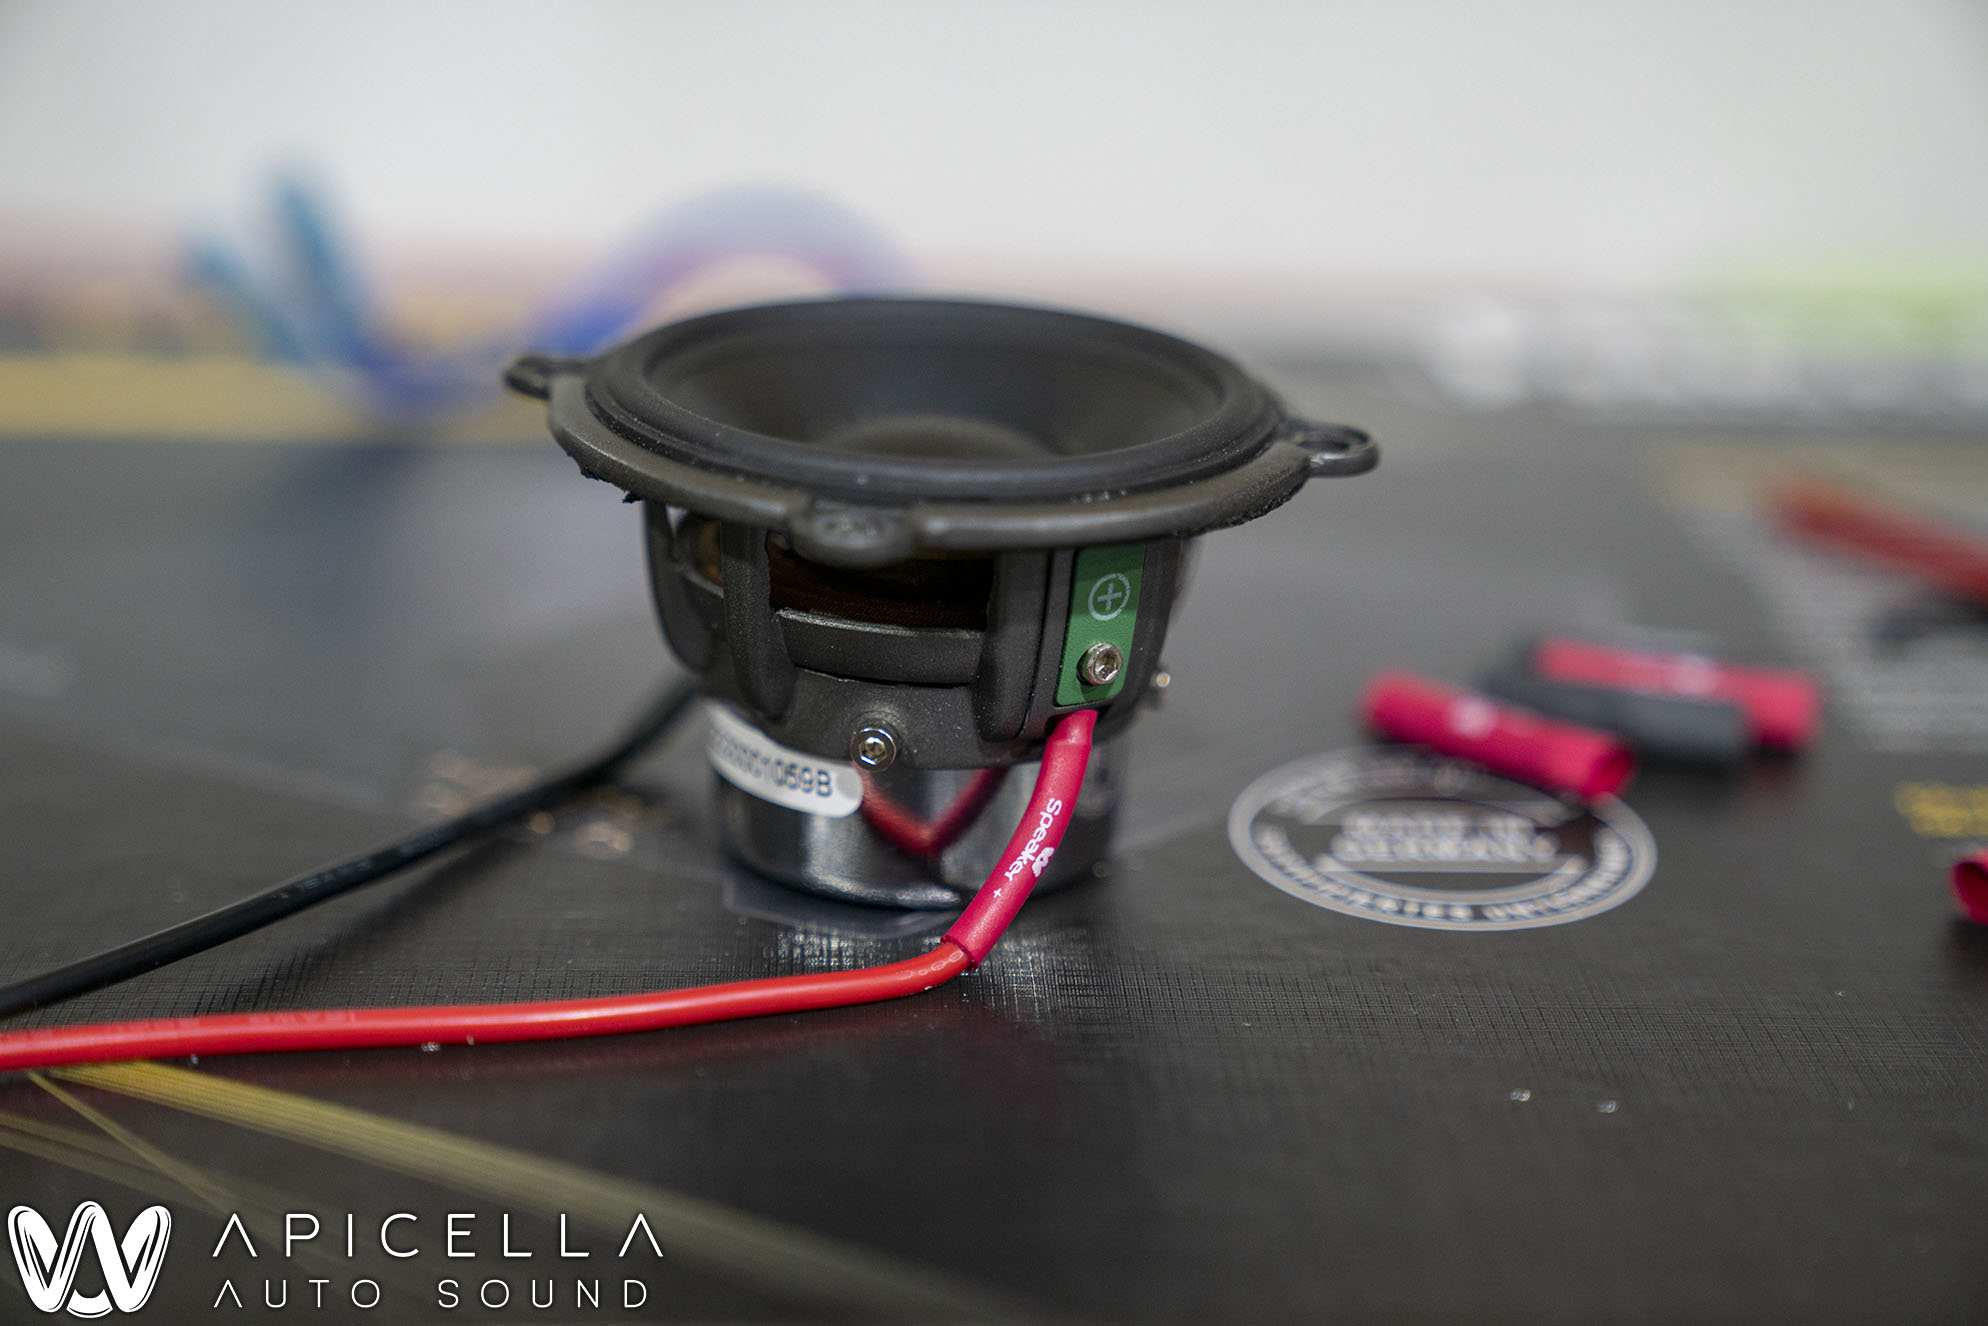
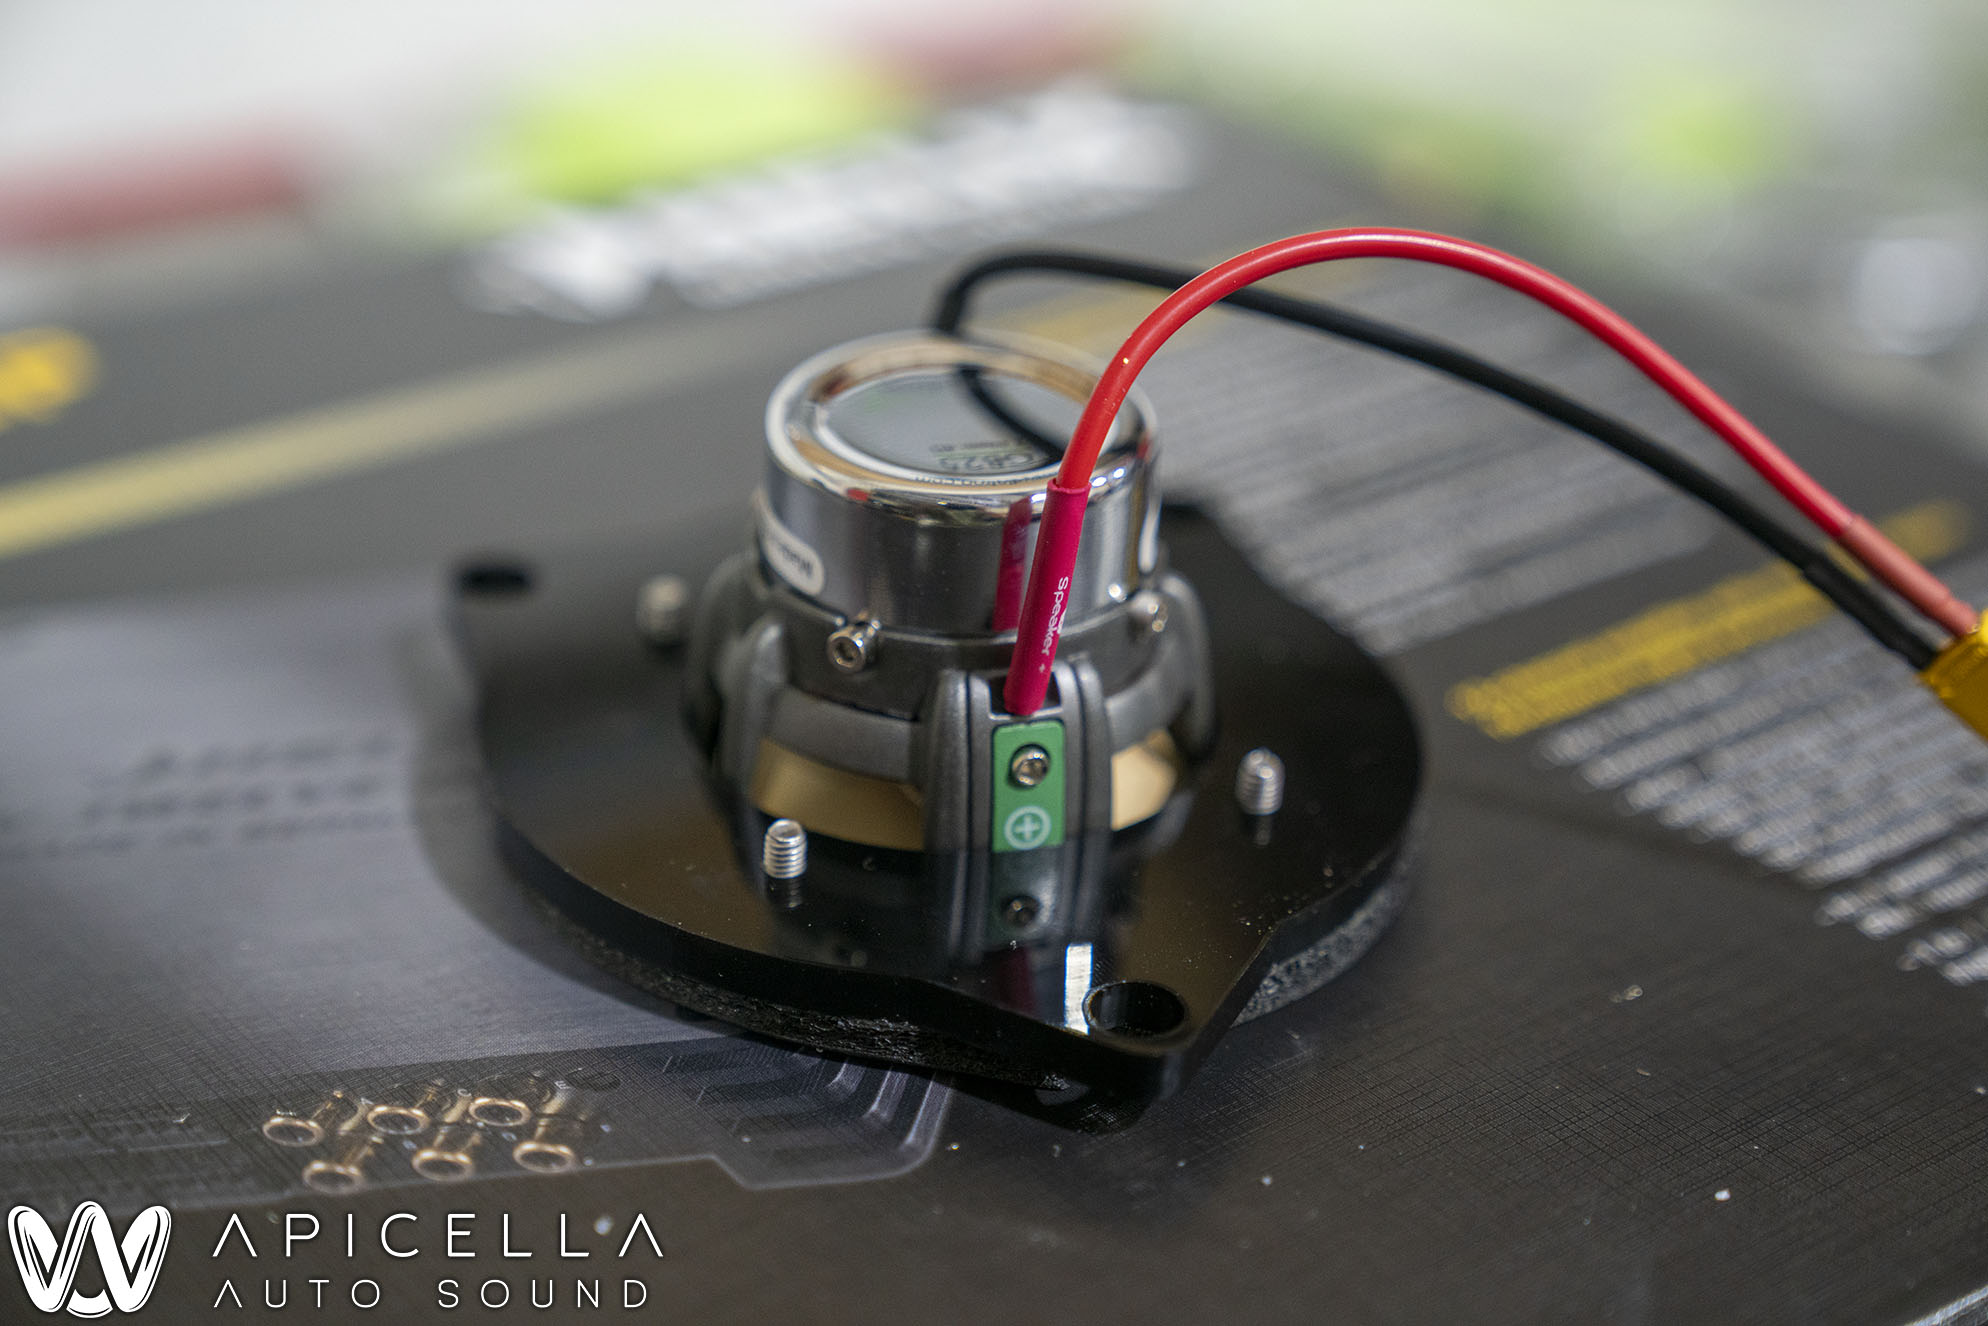
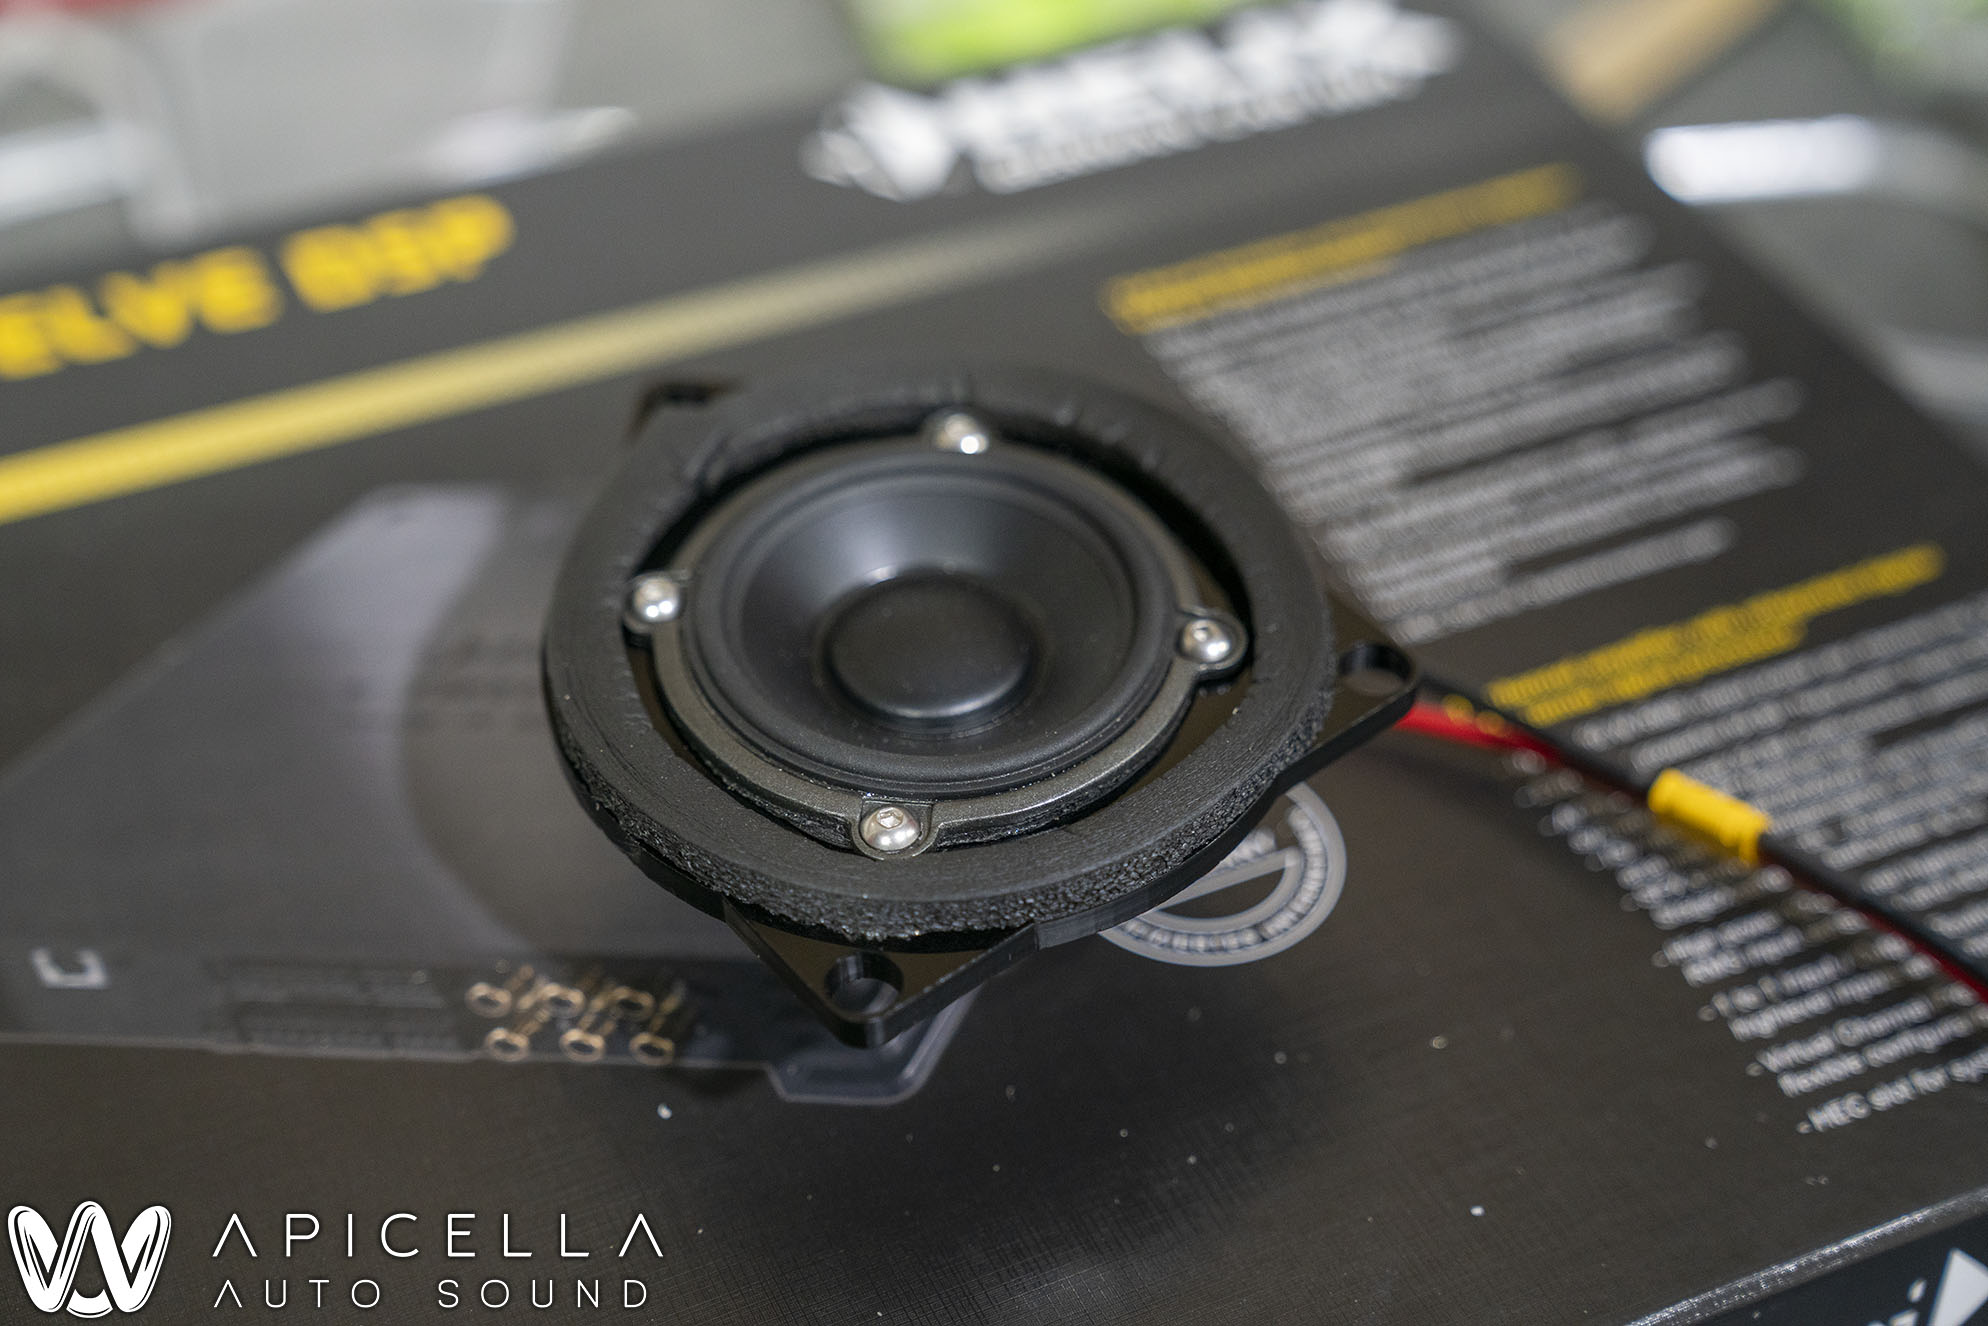
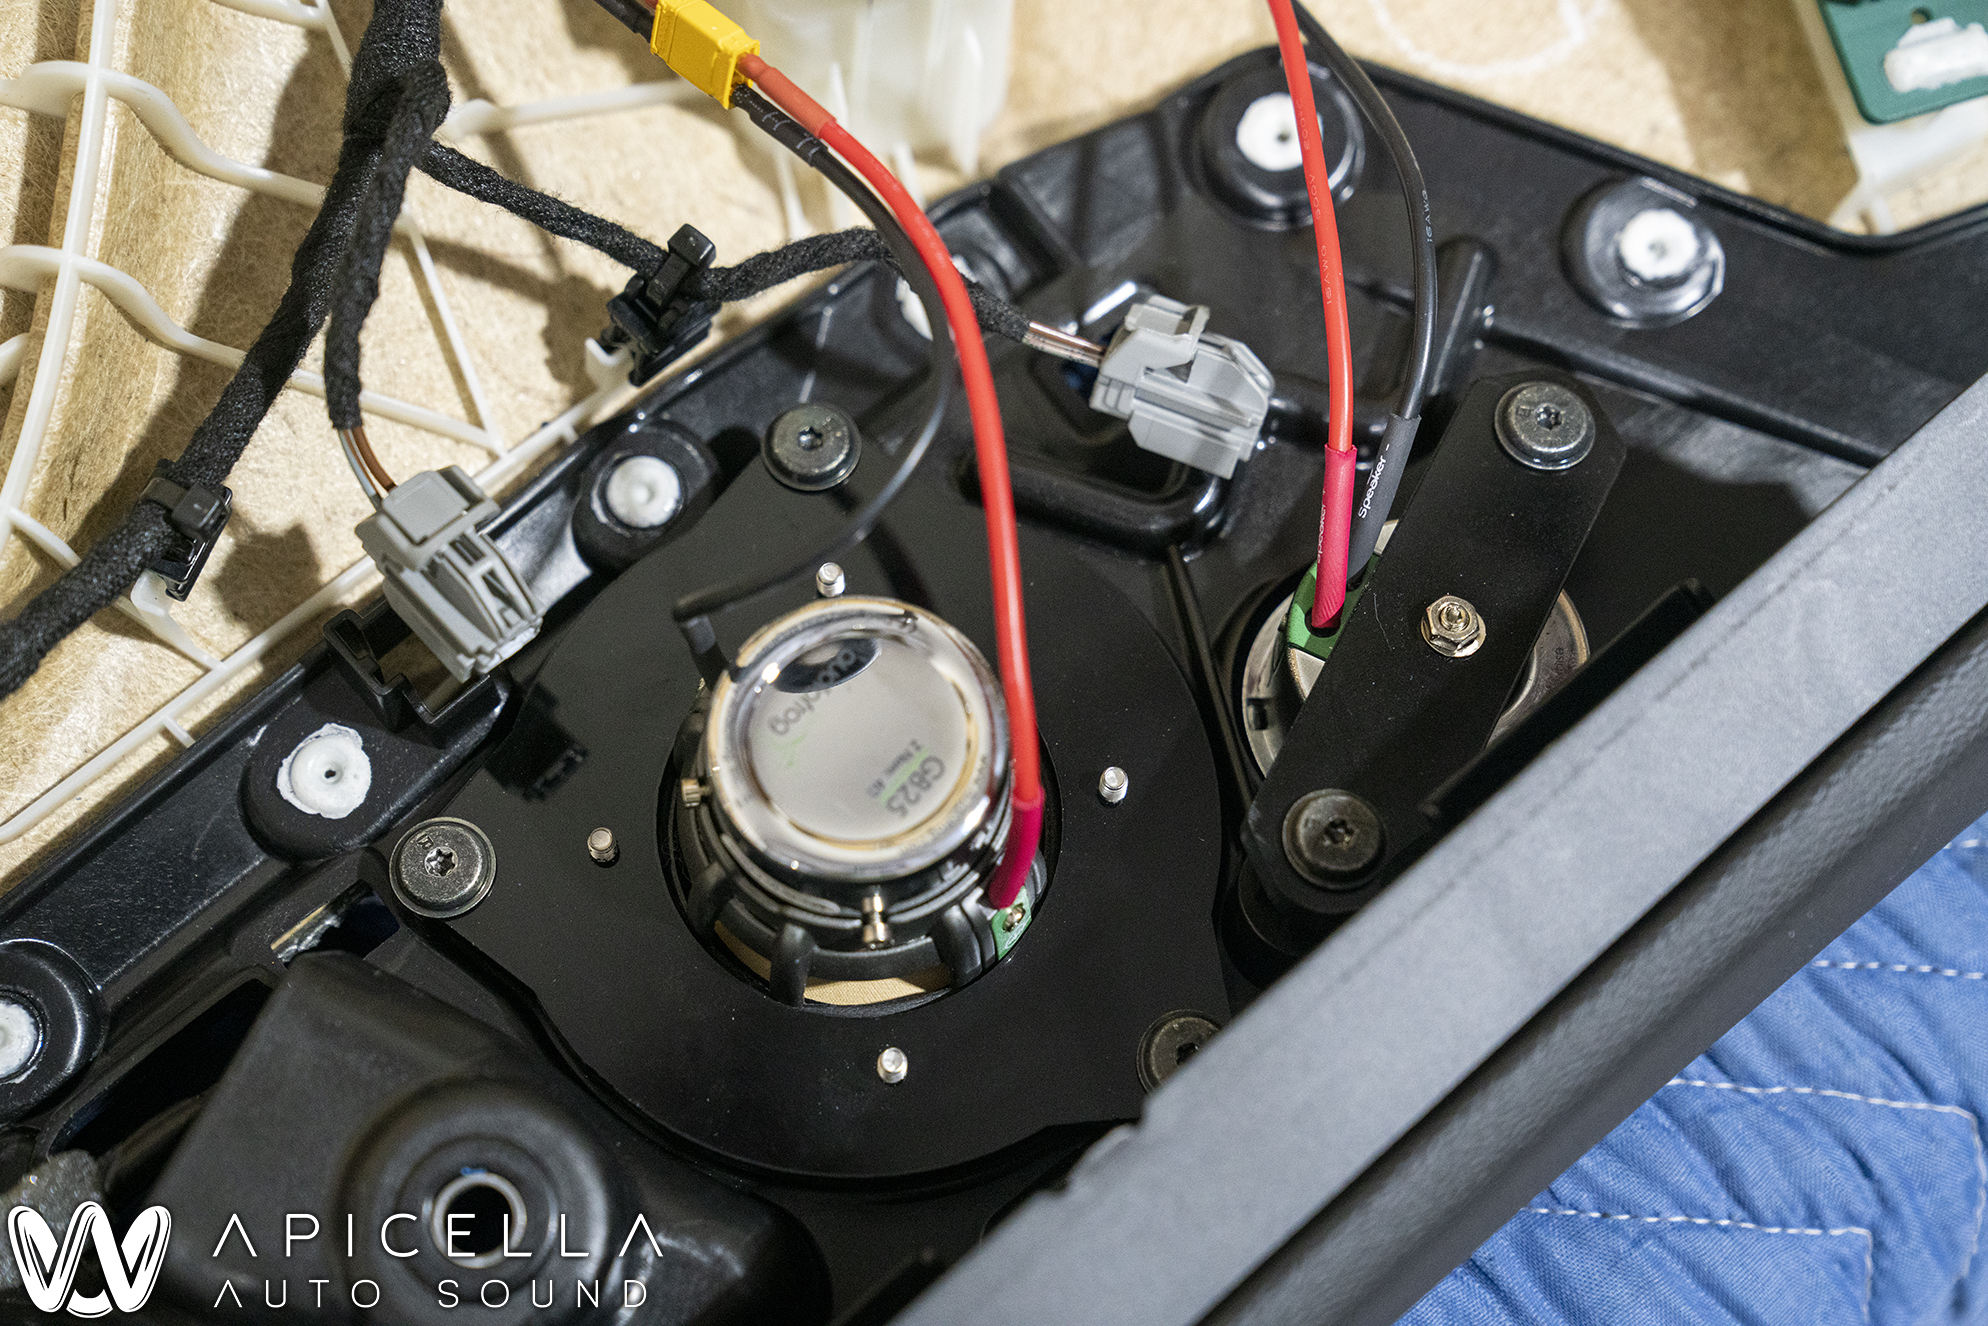
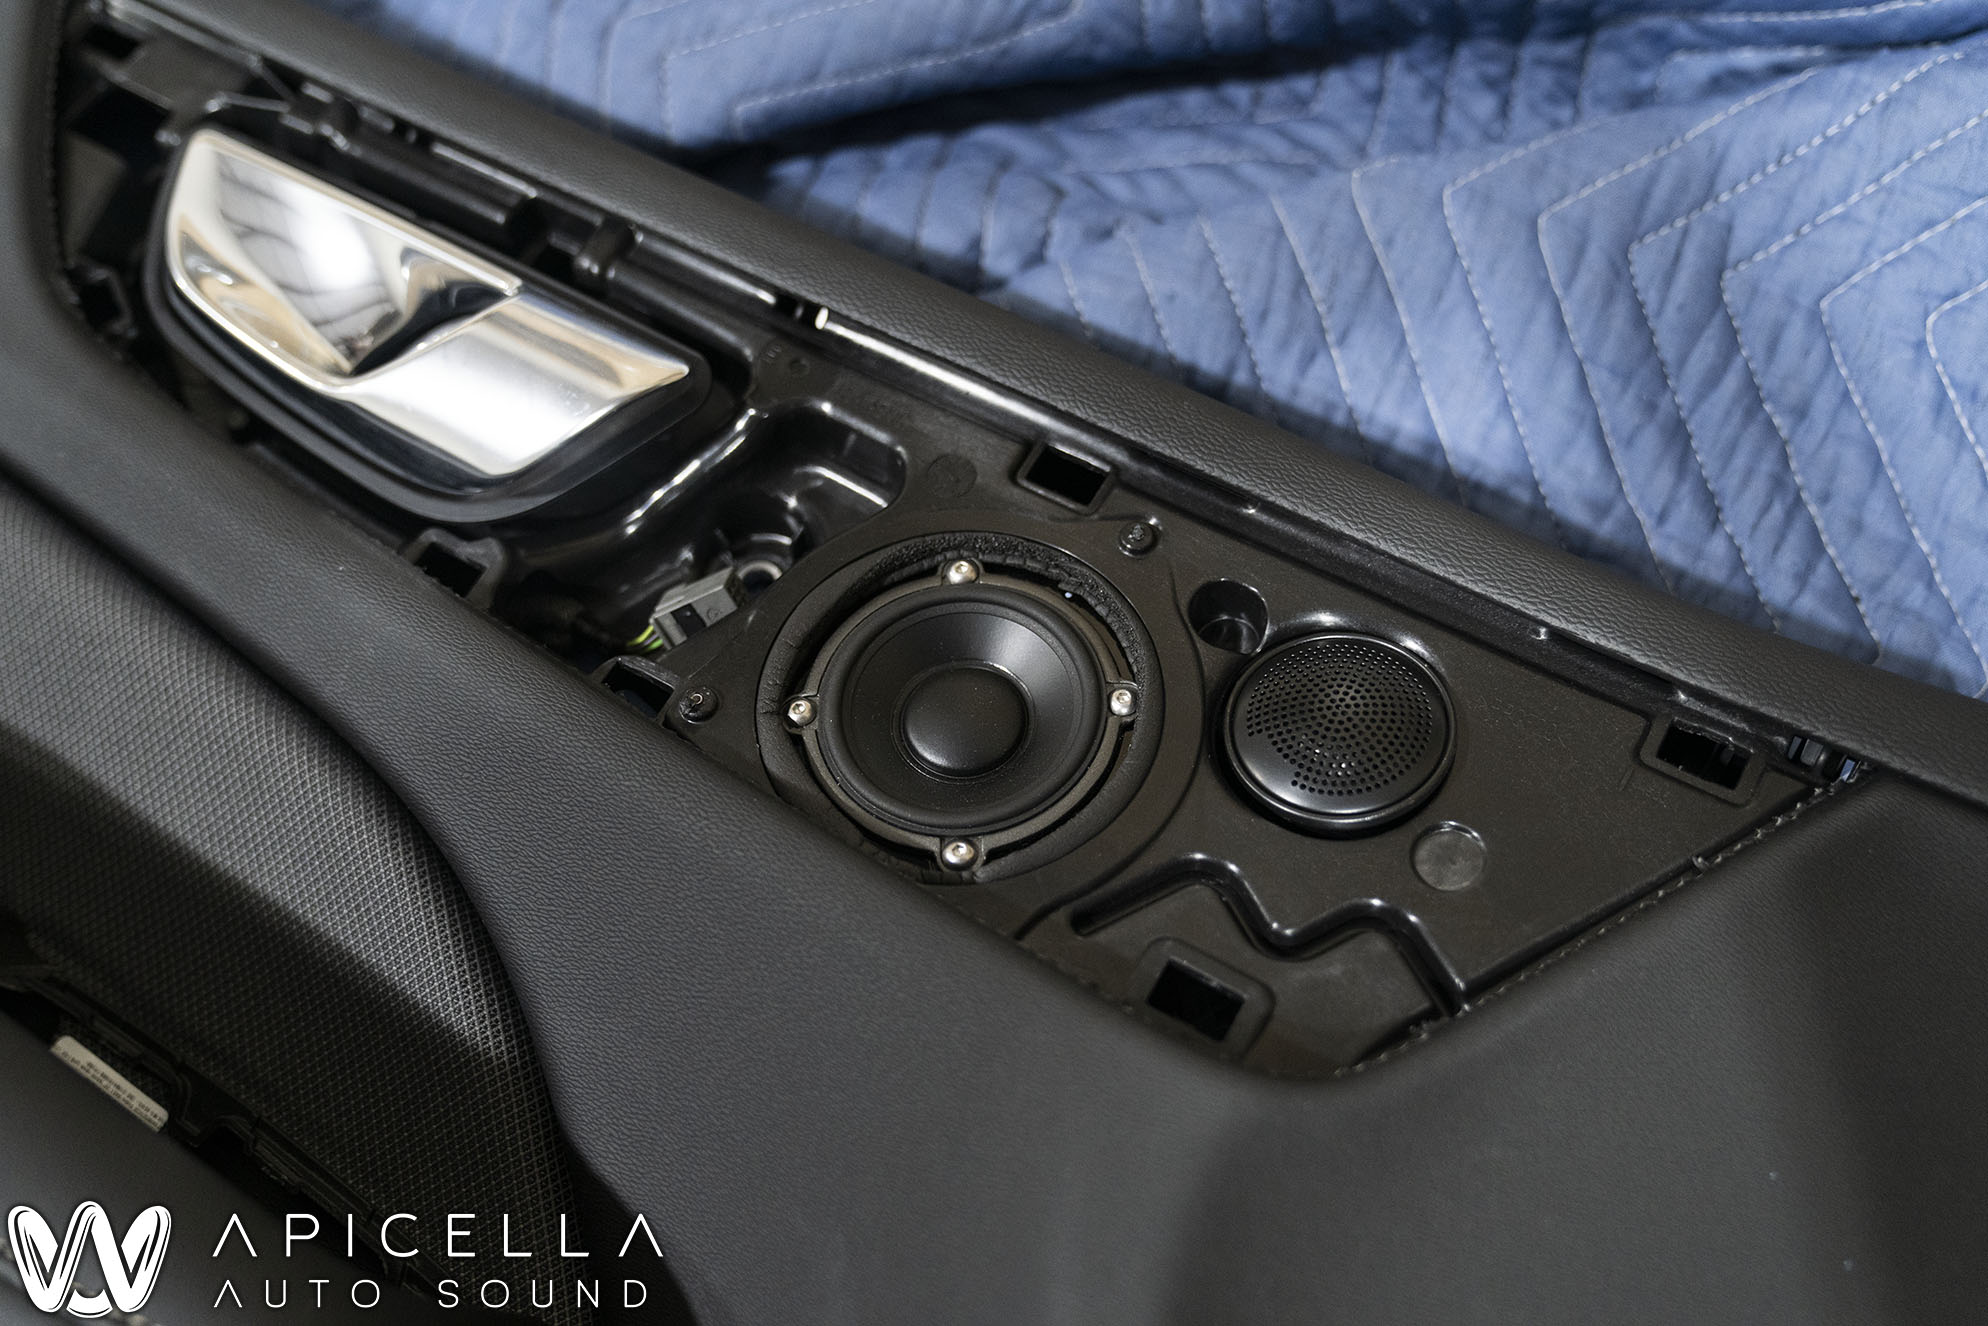
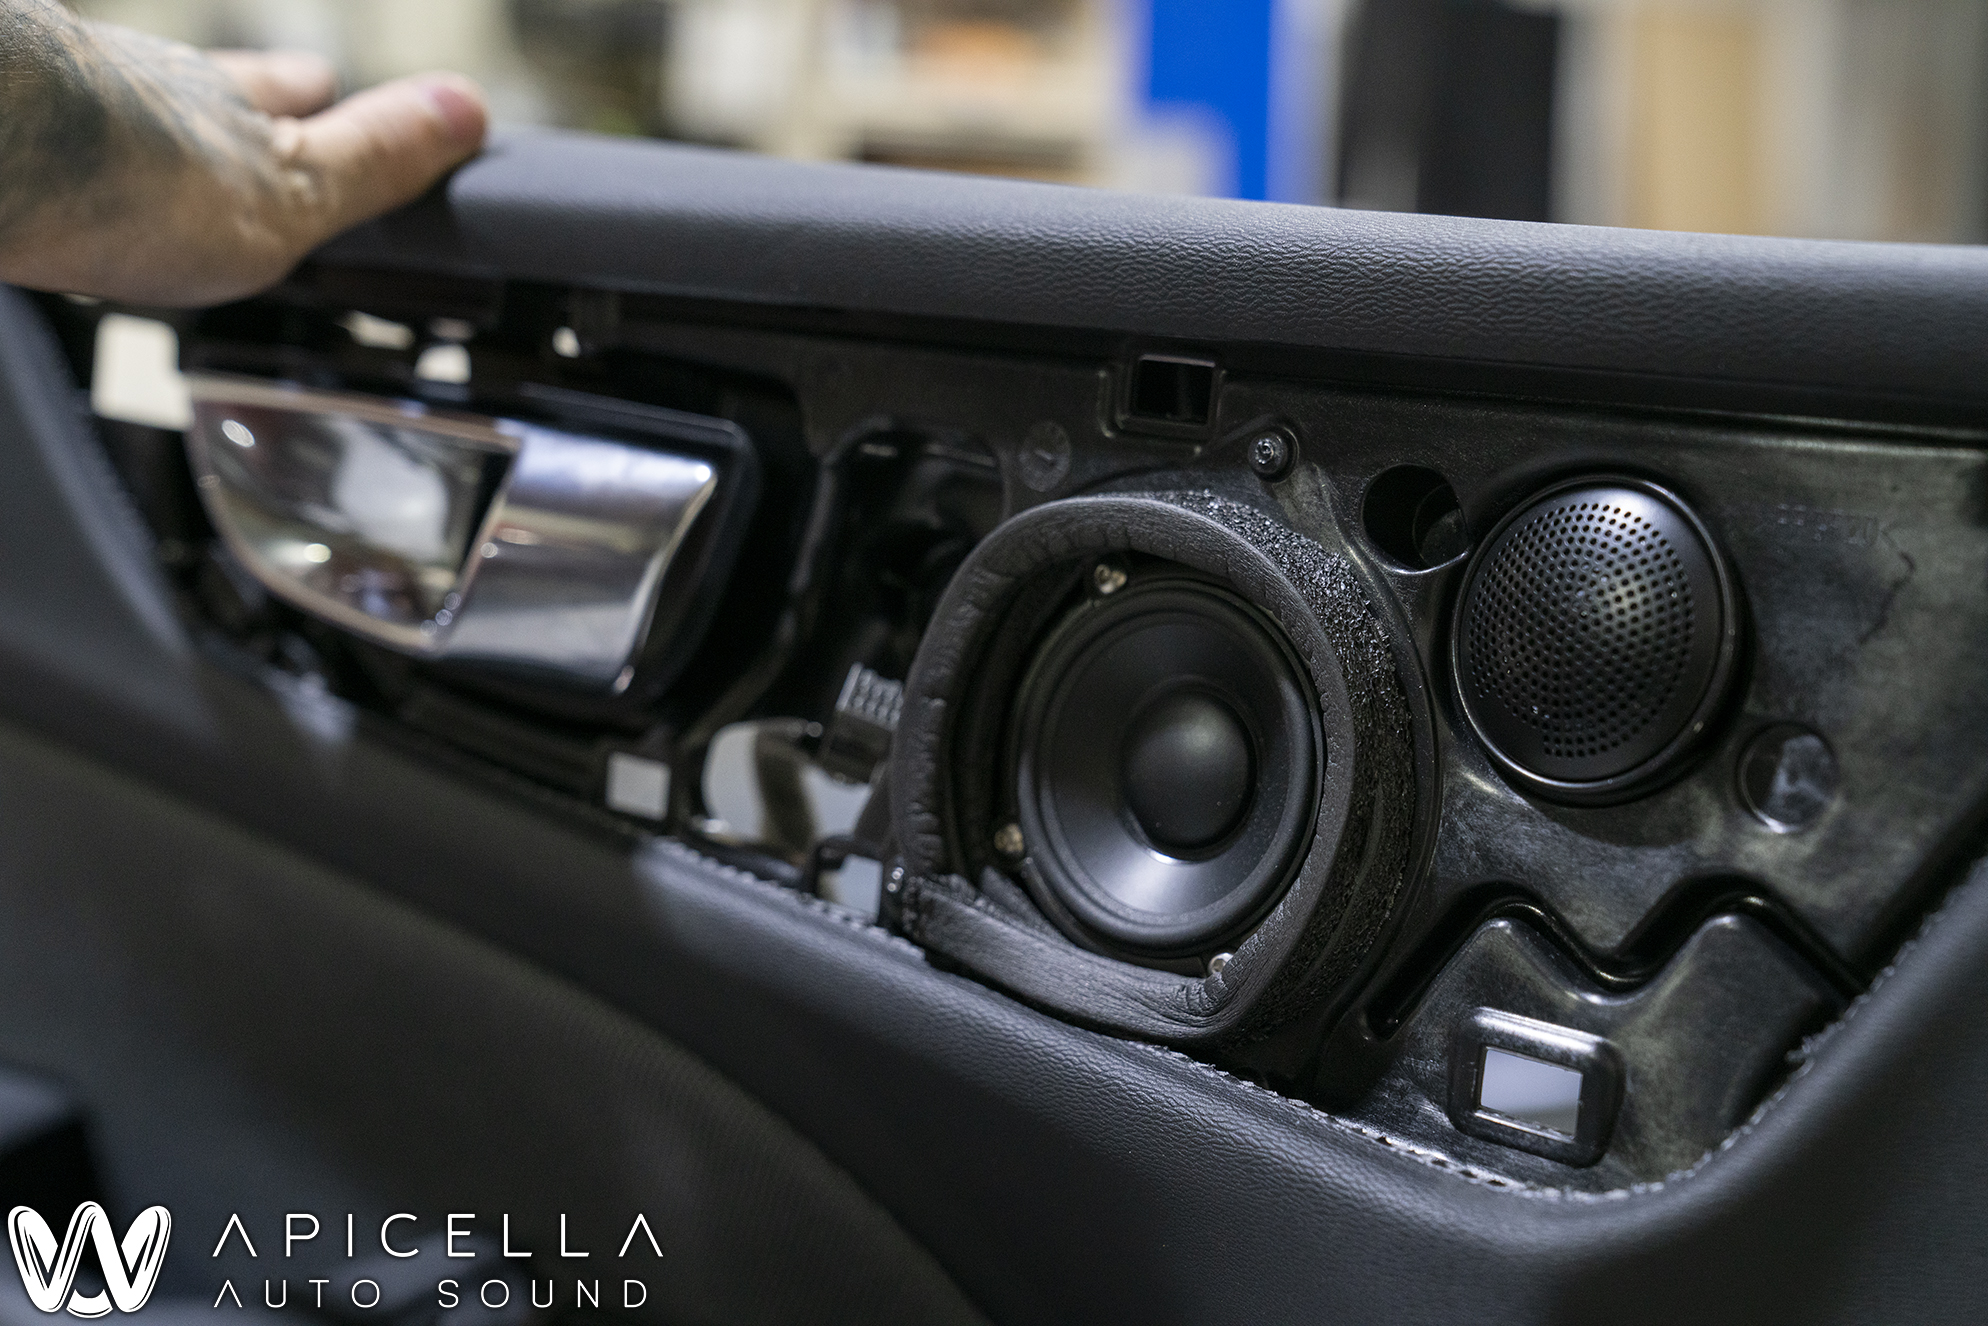
**** volvo for how they designed the inner skin and how it has to be removed. What you dont see in this photo is the fact that the window has to be removed in order to get the plastic inner door skin out to access the outer skin. I was looking into this and taking peeks at it over the course of the entire day. It was clear that the window needed to be removed, but removing it was not obvious. Not a single one of the access holes in the top of the door allow you to access the clips that hold the window in. It wasnt until kevin came in and we both looked at it hard until he figured out how to do it. Once he figured it out, it wasnt bad. But figuring it out ******. I should probably do it again and take detailed pictures for anyone else with this car who might want to do this. Once we got the window and inner skin out, the OEM deadener was removed, and ResoNix Squares were applied. I think i used 4.5 per door (which is 4.5 square feet). Butyl rope was added to the gap between the outer skin and crash bar to help even further. 25 Blackhole tiles were added to each door before the inner skin was reinstalled (not pictured). Once that was done, the inner skin (which didnt receive any deadening since it is strong enough on its own and shaped in a way that would make it very difficult to apply effectively) was reinstalled and the GB60 baffles were installed. 2 layers of ResoNix FD2 were added around the GB60 to seal it to the door card to "couple" it to the cabin and funnel all acoustic energy through the grill and outside of the door panel instead of allowing a lot of it to get "lost" and cause problems behind the door panel.


YxgXhj4.jpg


vohd0fk.jpg


Tbf28yx.jpg


8W99LVq.jpg


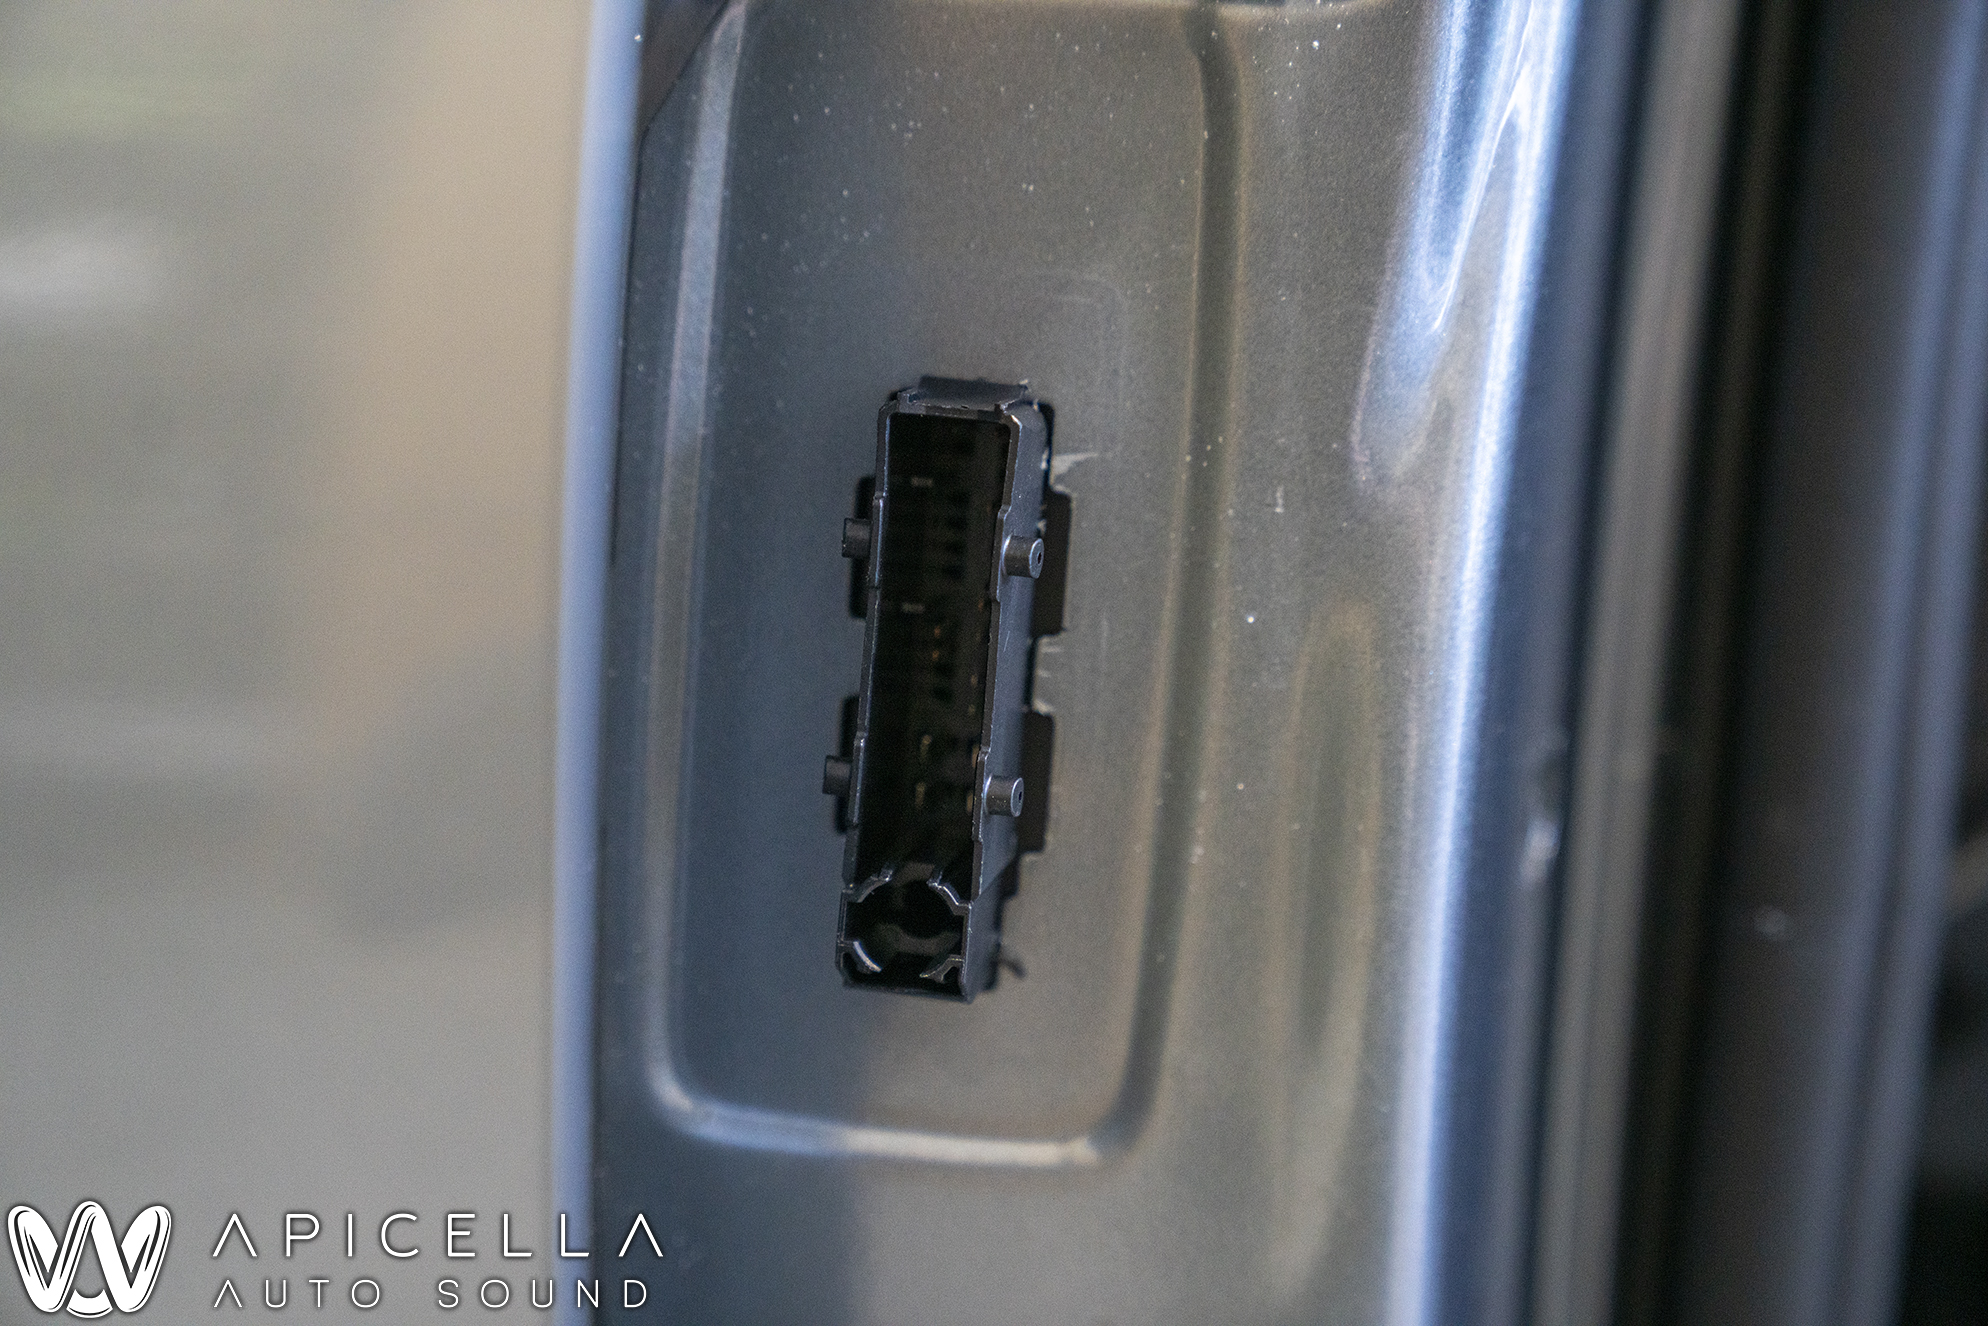
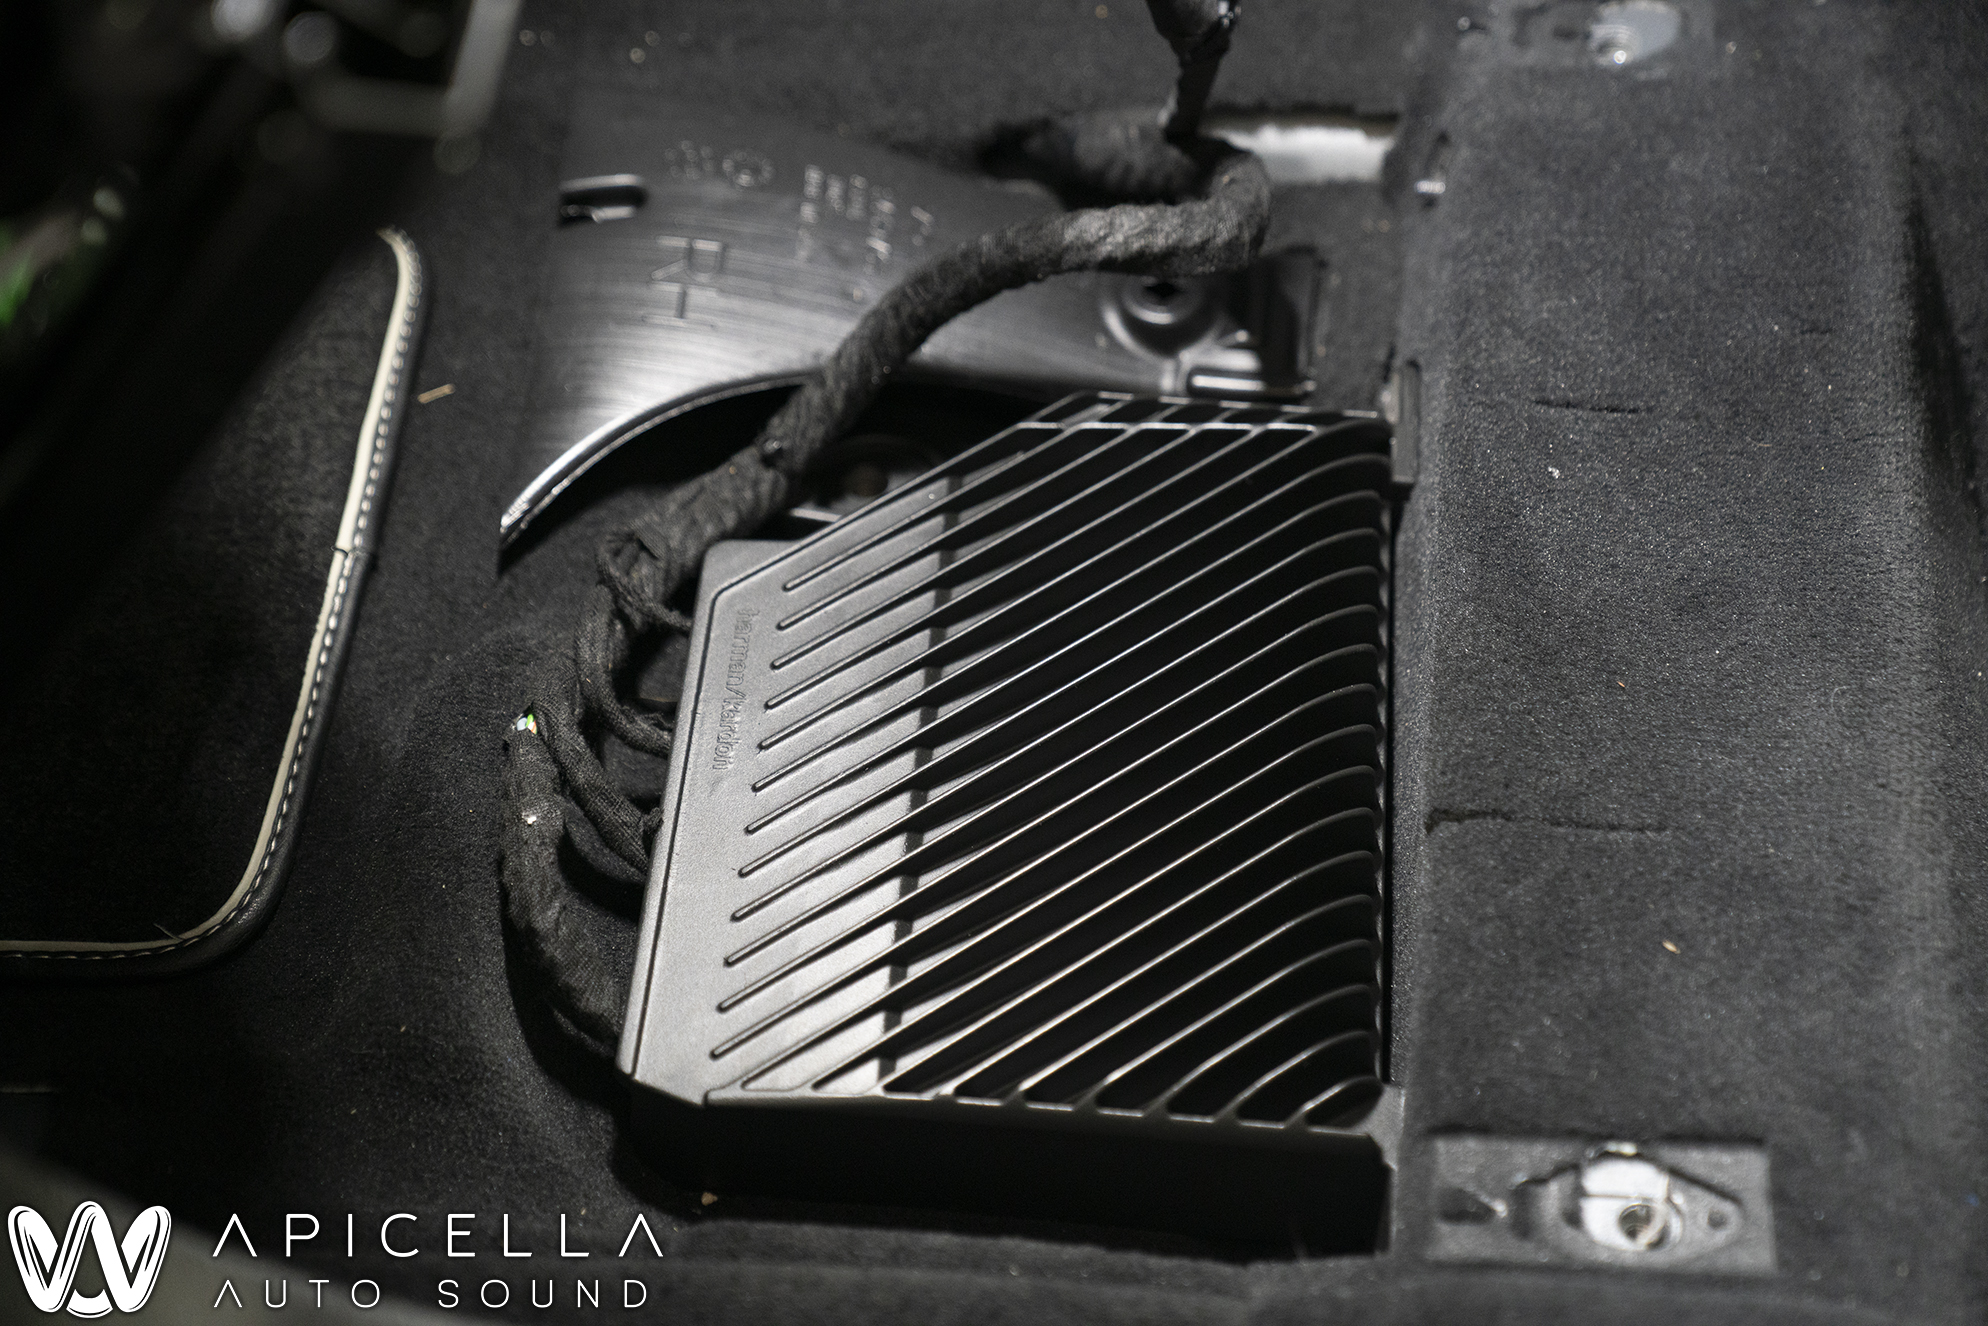
The OEM Hardon Kardon amp is located under the passanger seat. This amp and the processing inside of it may be essential into some of the tuning i do for the 2 seat tune/setup. Regardless of what you think, Harmon has more advanced processing and upmixing going on in here than anything that is offered in the aftermarket. Might as well utilize it, while also giving me access to all speaker wires since the molex plugs on these door specifically make it seemingly impossible to run new wire. These make Mazda door molex plugs look like a walk in the park. I will most likely have to drill a hole and make another boot to get a wire to the tweeter since the oem midrange and tweeter are on the same channel with a basic passive crossover at the tweeter. At the end of the day, i have to grab 10 speaker signals from this amp. Front left and right midbass, front left and right highs (midrange and tweeter), front center channel (2 mids and a tweeter on a passive crossover), rear left and right doors (passive 2 way set up in the door), left and right rear deck speakers, and sub. The reason im deciding to grab ALL of these signals isnt because its necessary. Its because i want to, again, utilize the Harman processing to its full potential and have the option to use or not use whatever signal may or may not work. I have a reason to believe that the rear door signal and the rear deck signal are not the same. I will be evaluating the signal soon enough and post my findings. Unfortunately the Helix DSP Ultra only has 8 channels of analog inputs, so i will probably put the rear deck signal into the V Twelve so long as it is a clearly different signal than the rear door speakers. I will not only have to test for response, timing, phase, and input mixing on that channel, but also signals unrelated to music, such as back up beeps, etc.


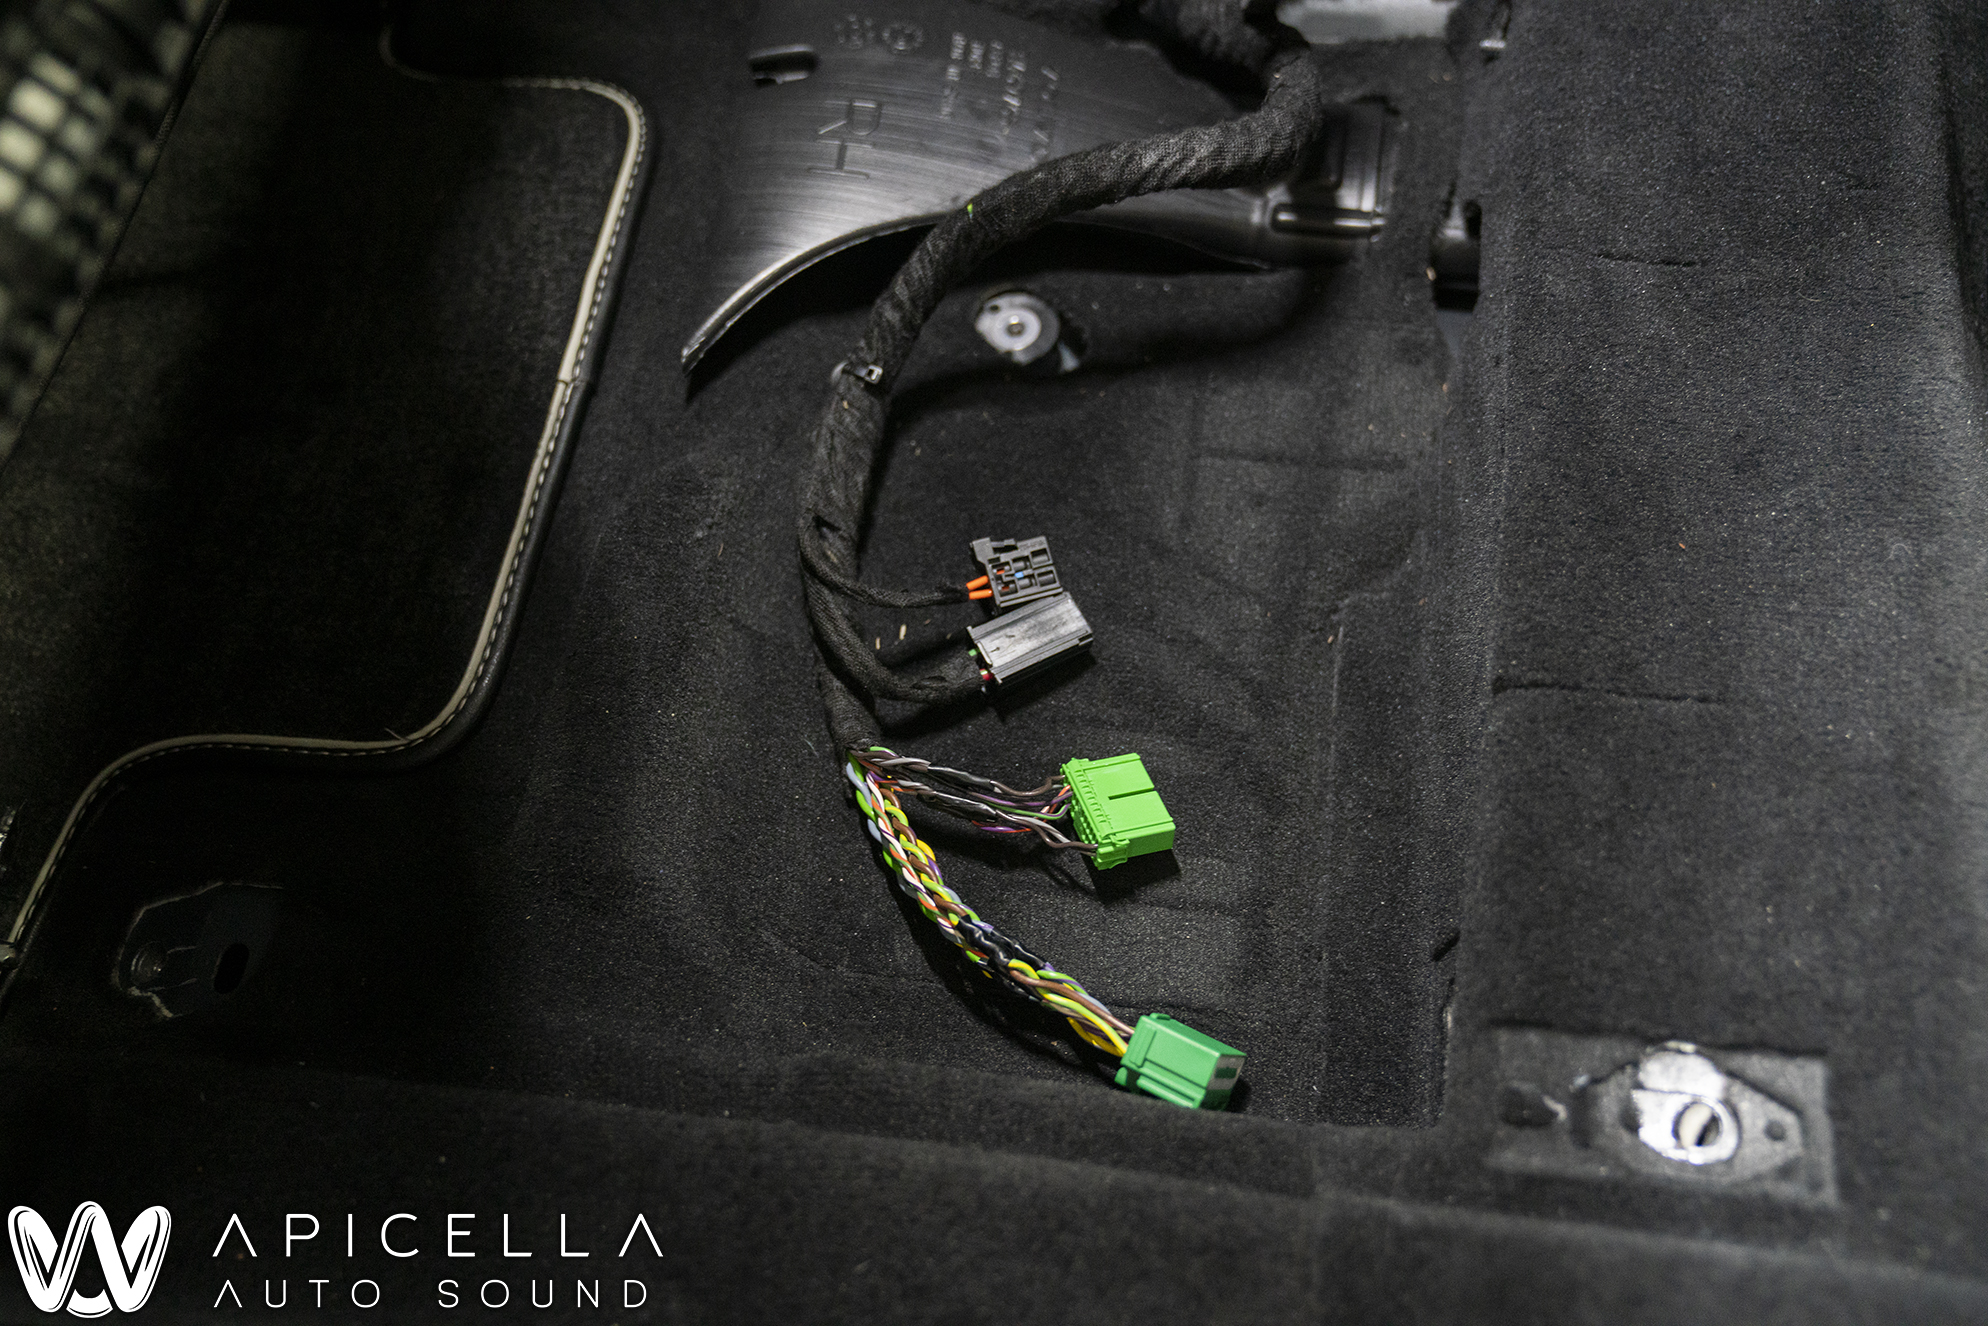
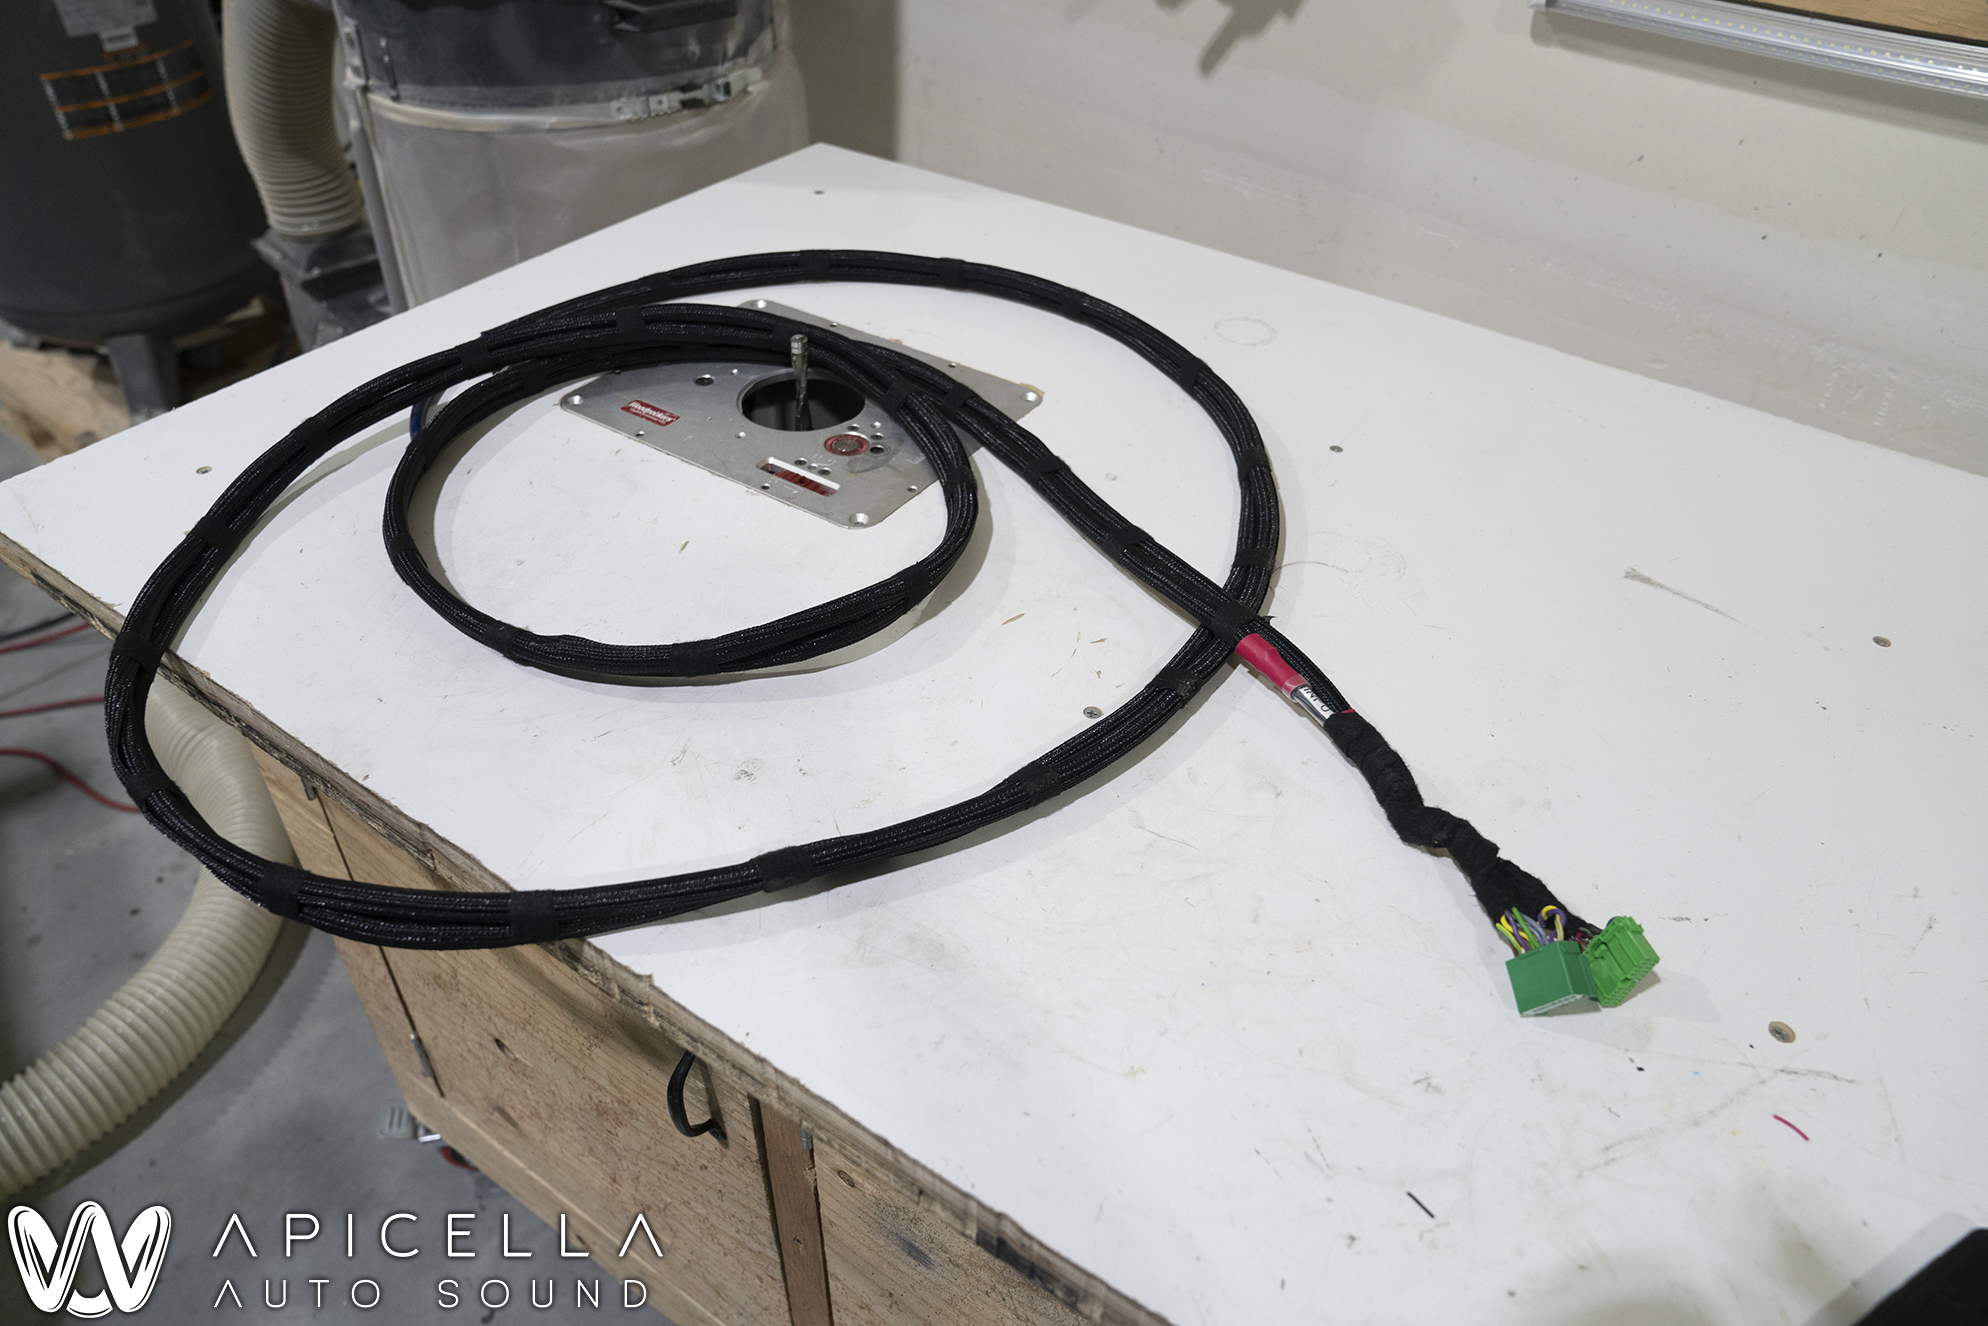
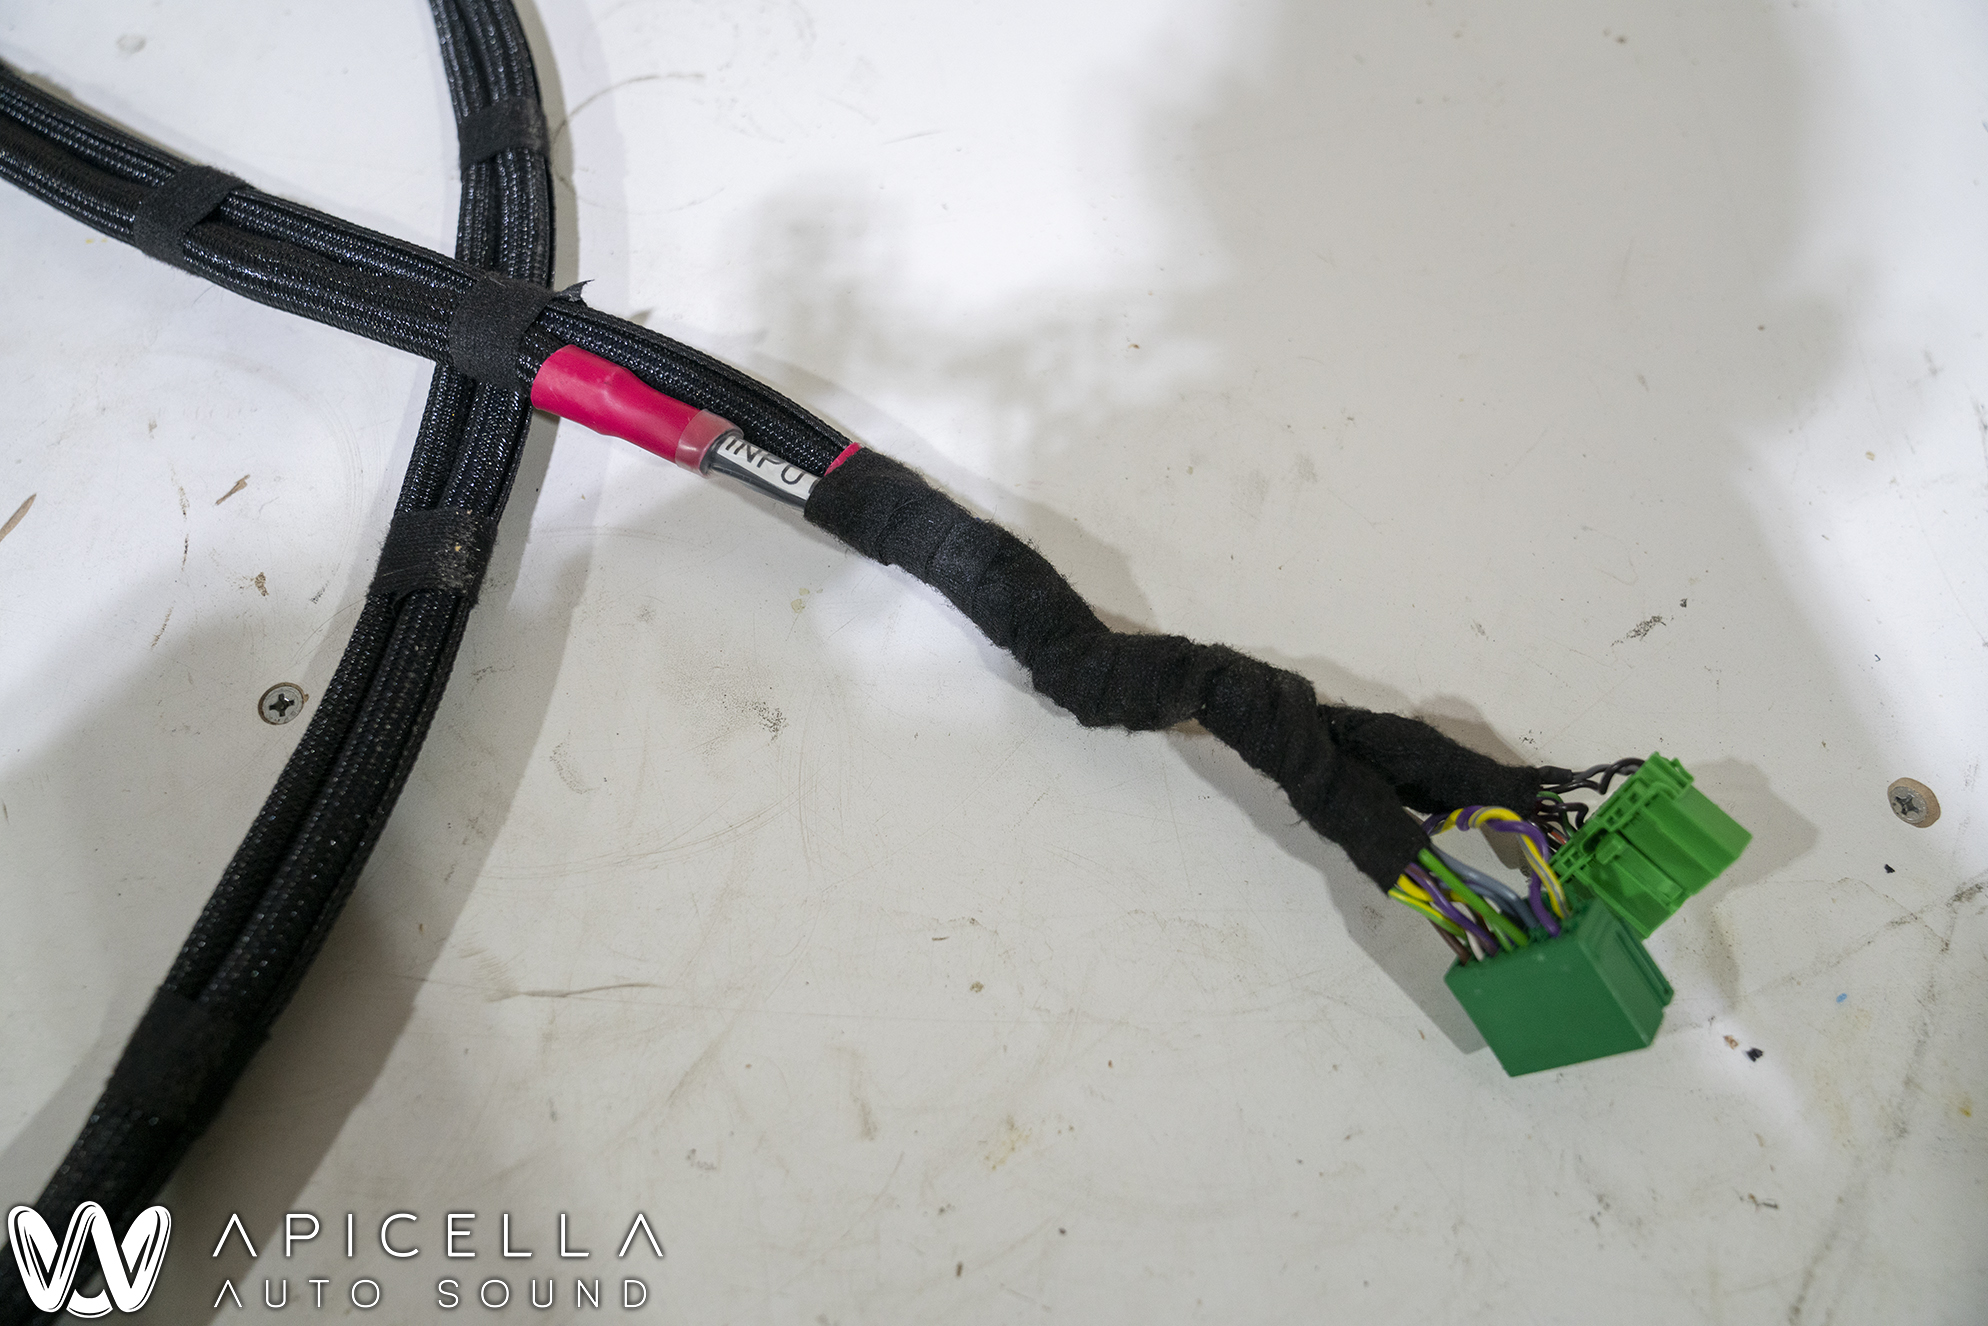
OEM amp removed. The harness doesnt look like much.. but it will when 23 pairs of speaker wire are run to/from here, as well as 5 extra pairs of accessory power/ground wire and a single turn on wire just in case. 57 wires total. im not even sure how i fit it all, especially considering i ran out of Stinger speaker wire and had to borrow some home audio style wire from another installer i know locally (Thanks Chris). This stuff was stiff as hell, had an extra external jacket, and was a pain to work with since it was so stiff.


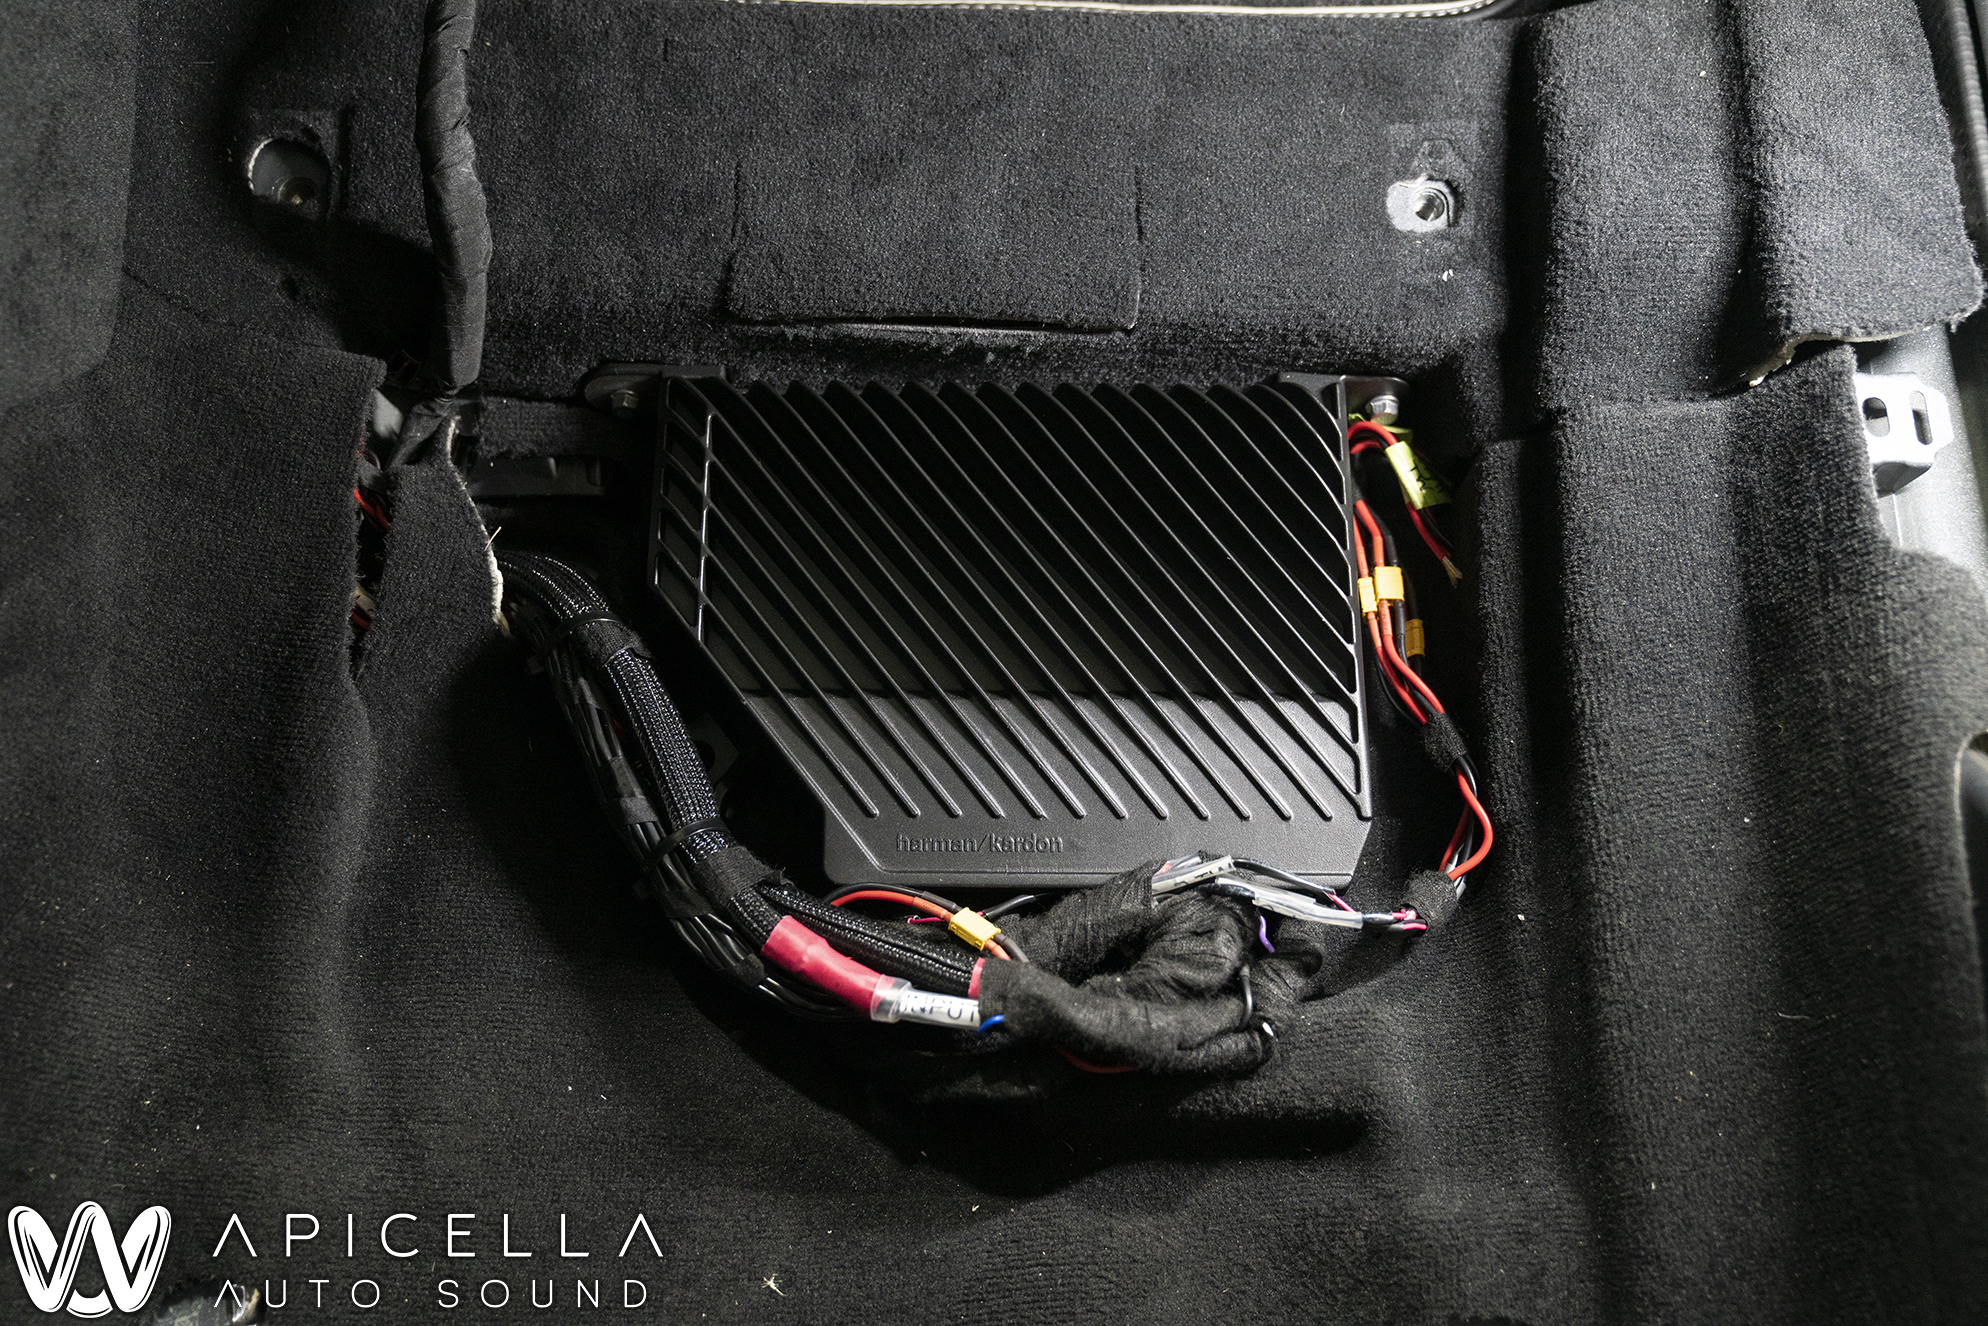
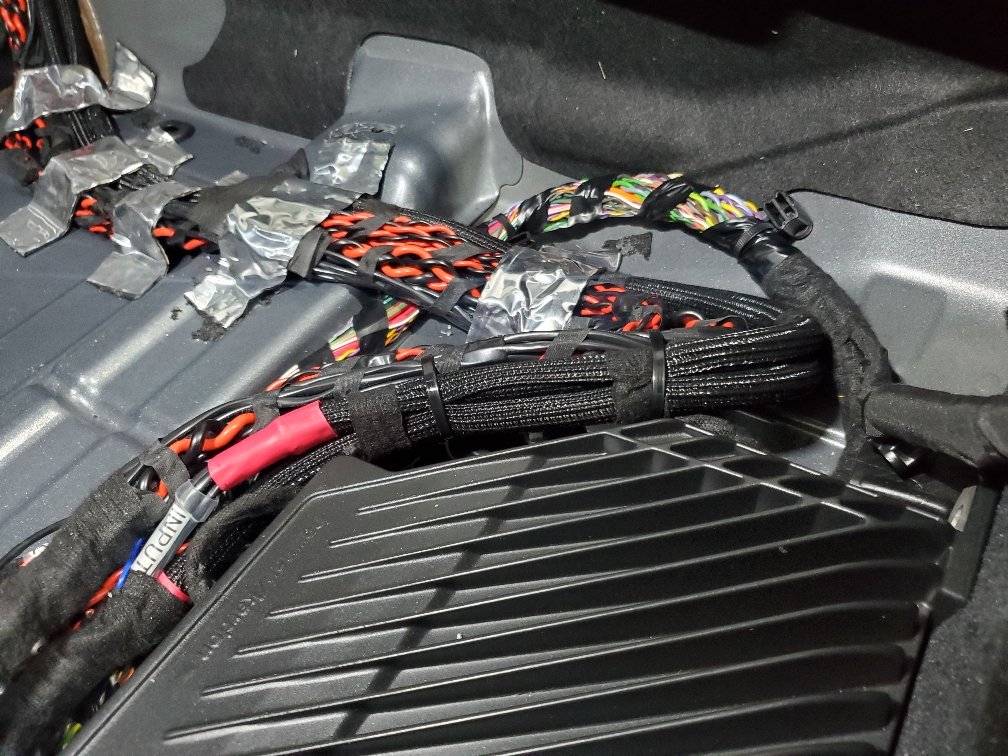
So, the green plugs with the harnesses shown above are the outputs of the amp that feed into the processors/amps. The amplifier outputs were then wired to the oem speaker wire harness. The 5 pairs of extra power/ground are under the carpet on the left in this picture, and the 3 extra pairs on the right are to run extra wire for the side tweeters, and the center midrange. Its not as pretty as i'd usually do it and would like it to be, but I cannot stress enough how hard that wire was to work with, let alone when there are over 20 runs of it in one bundle underneath a molded foam backed carpet.


sHdG92i.jpg


xxOynU4.jpg


2ehwQFG.jpg


3h7dcqh.jpg


vzo360w.jpg


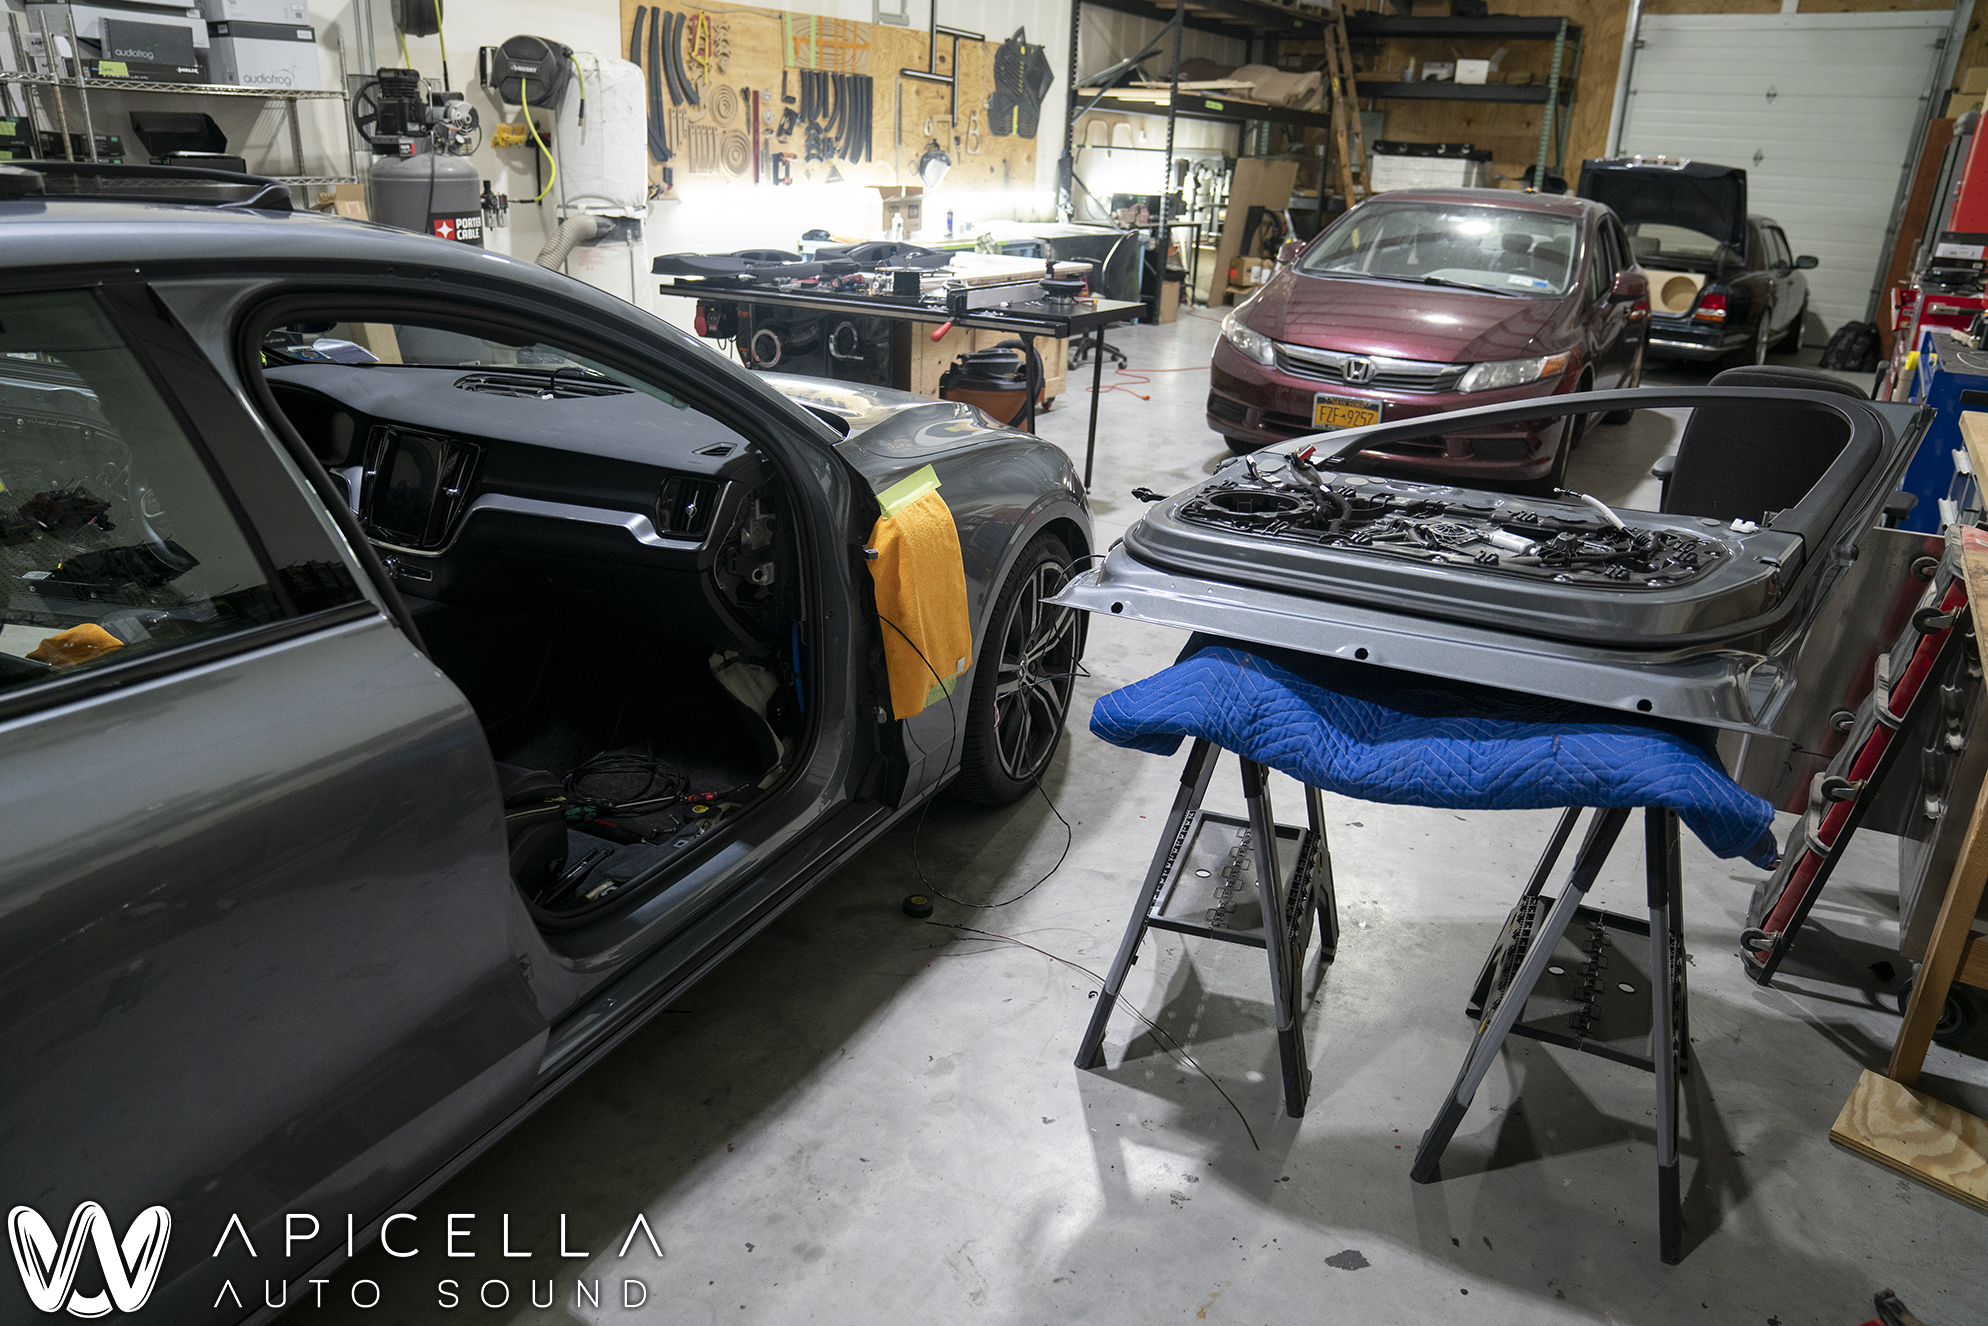
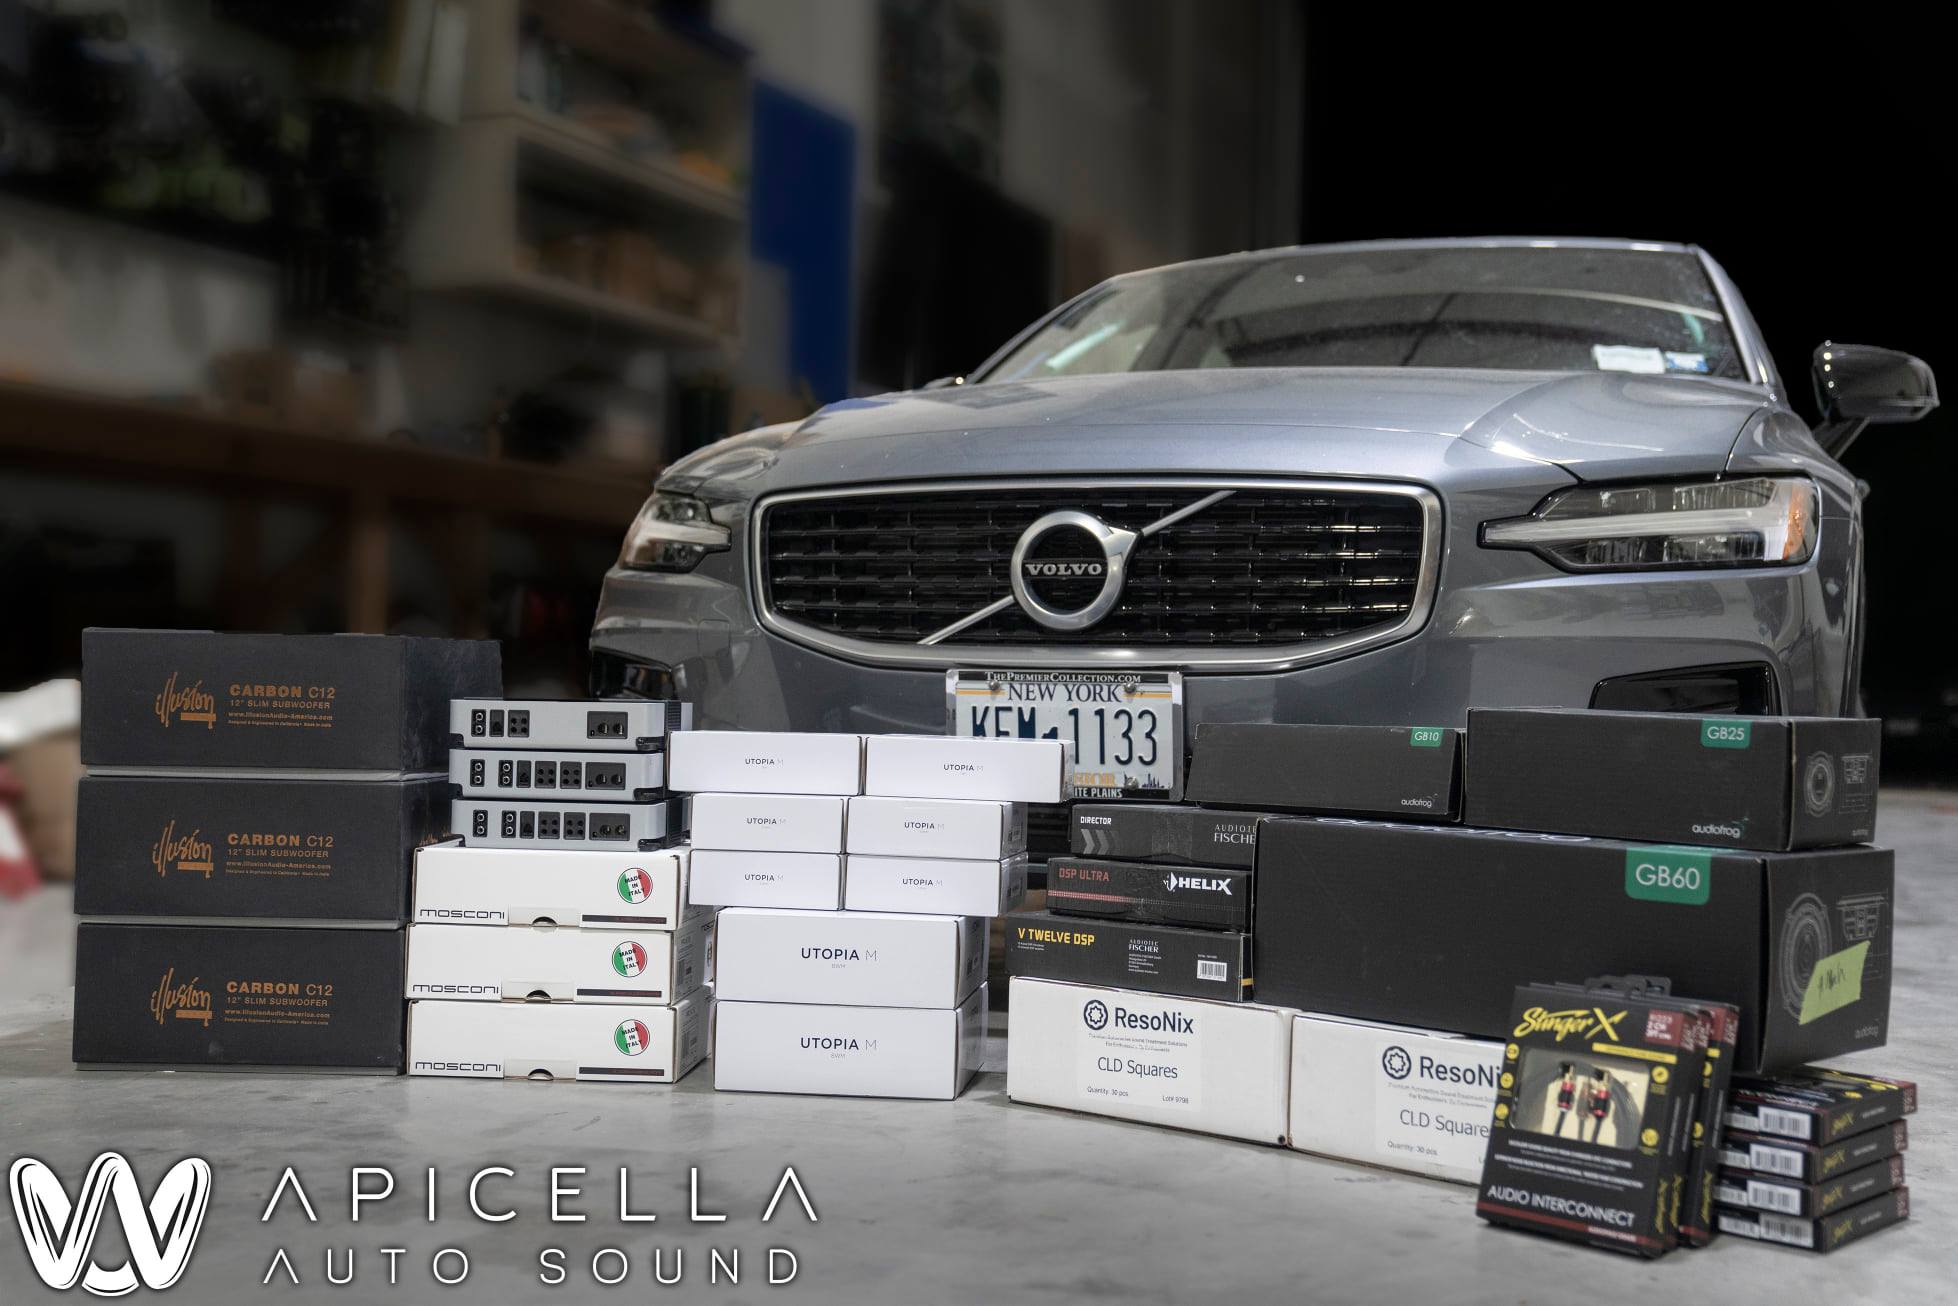
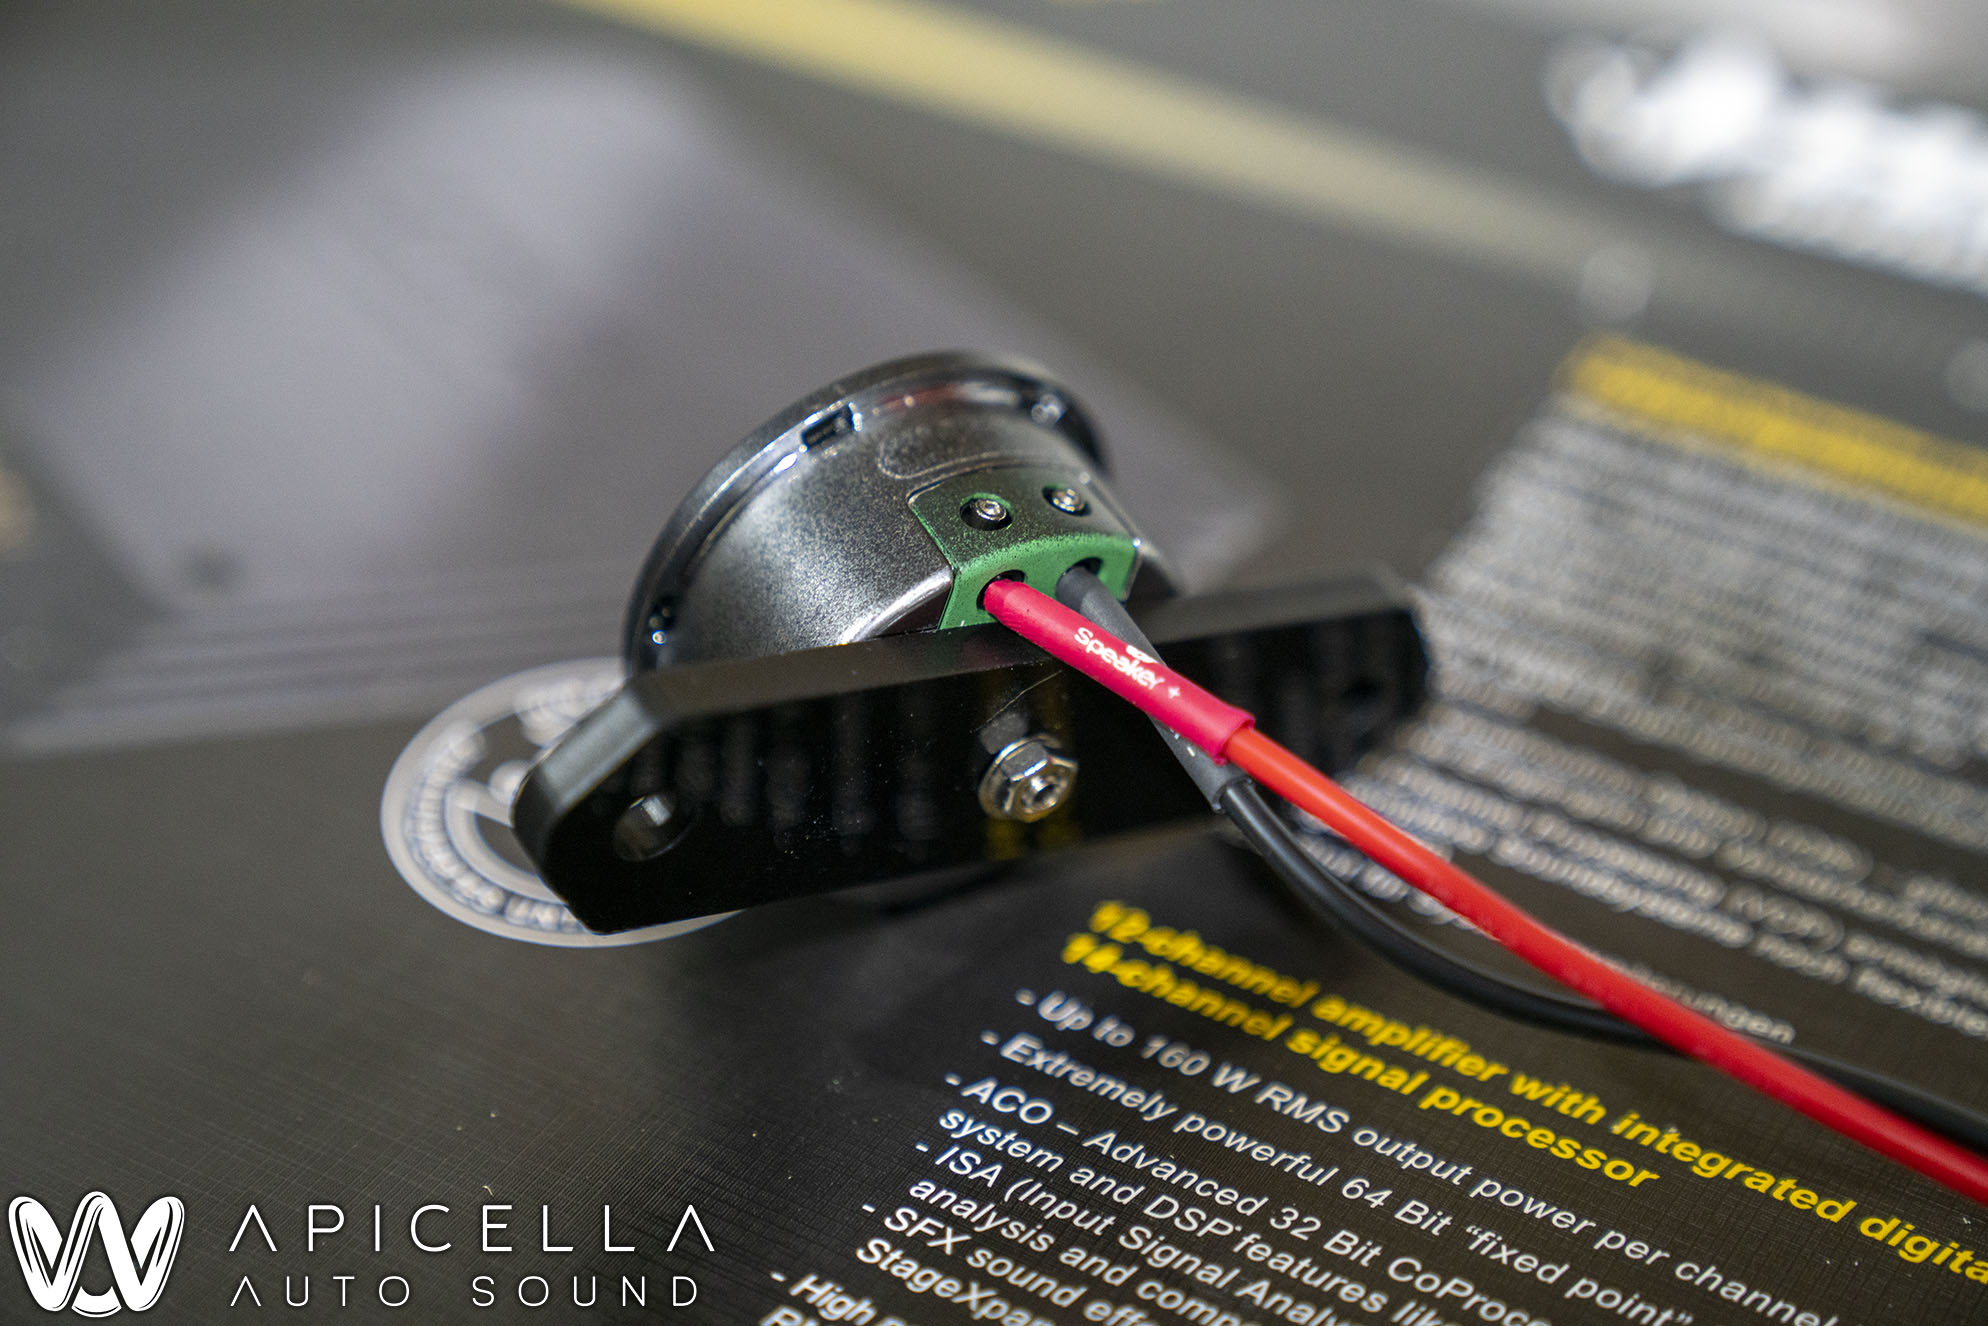
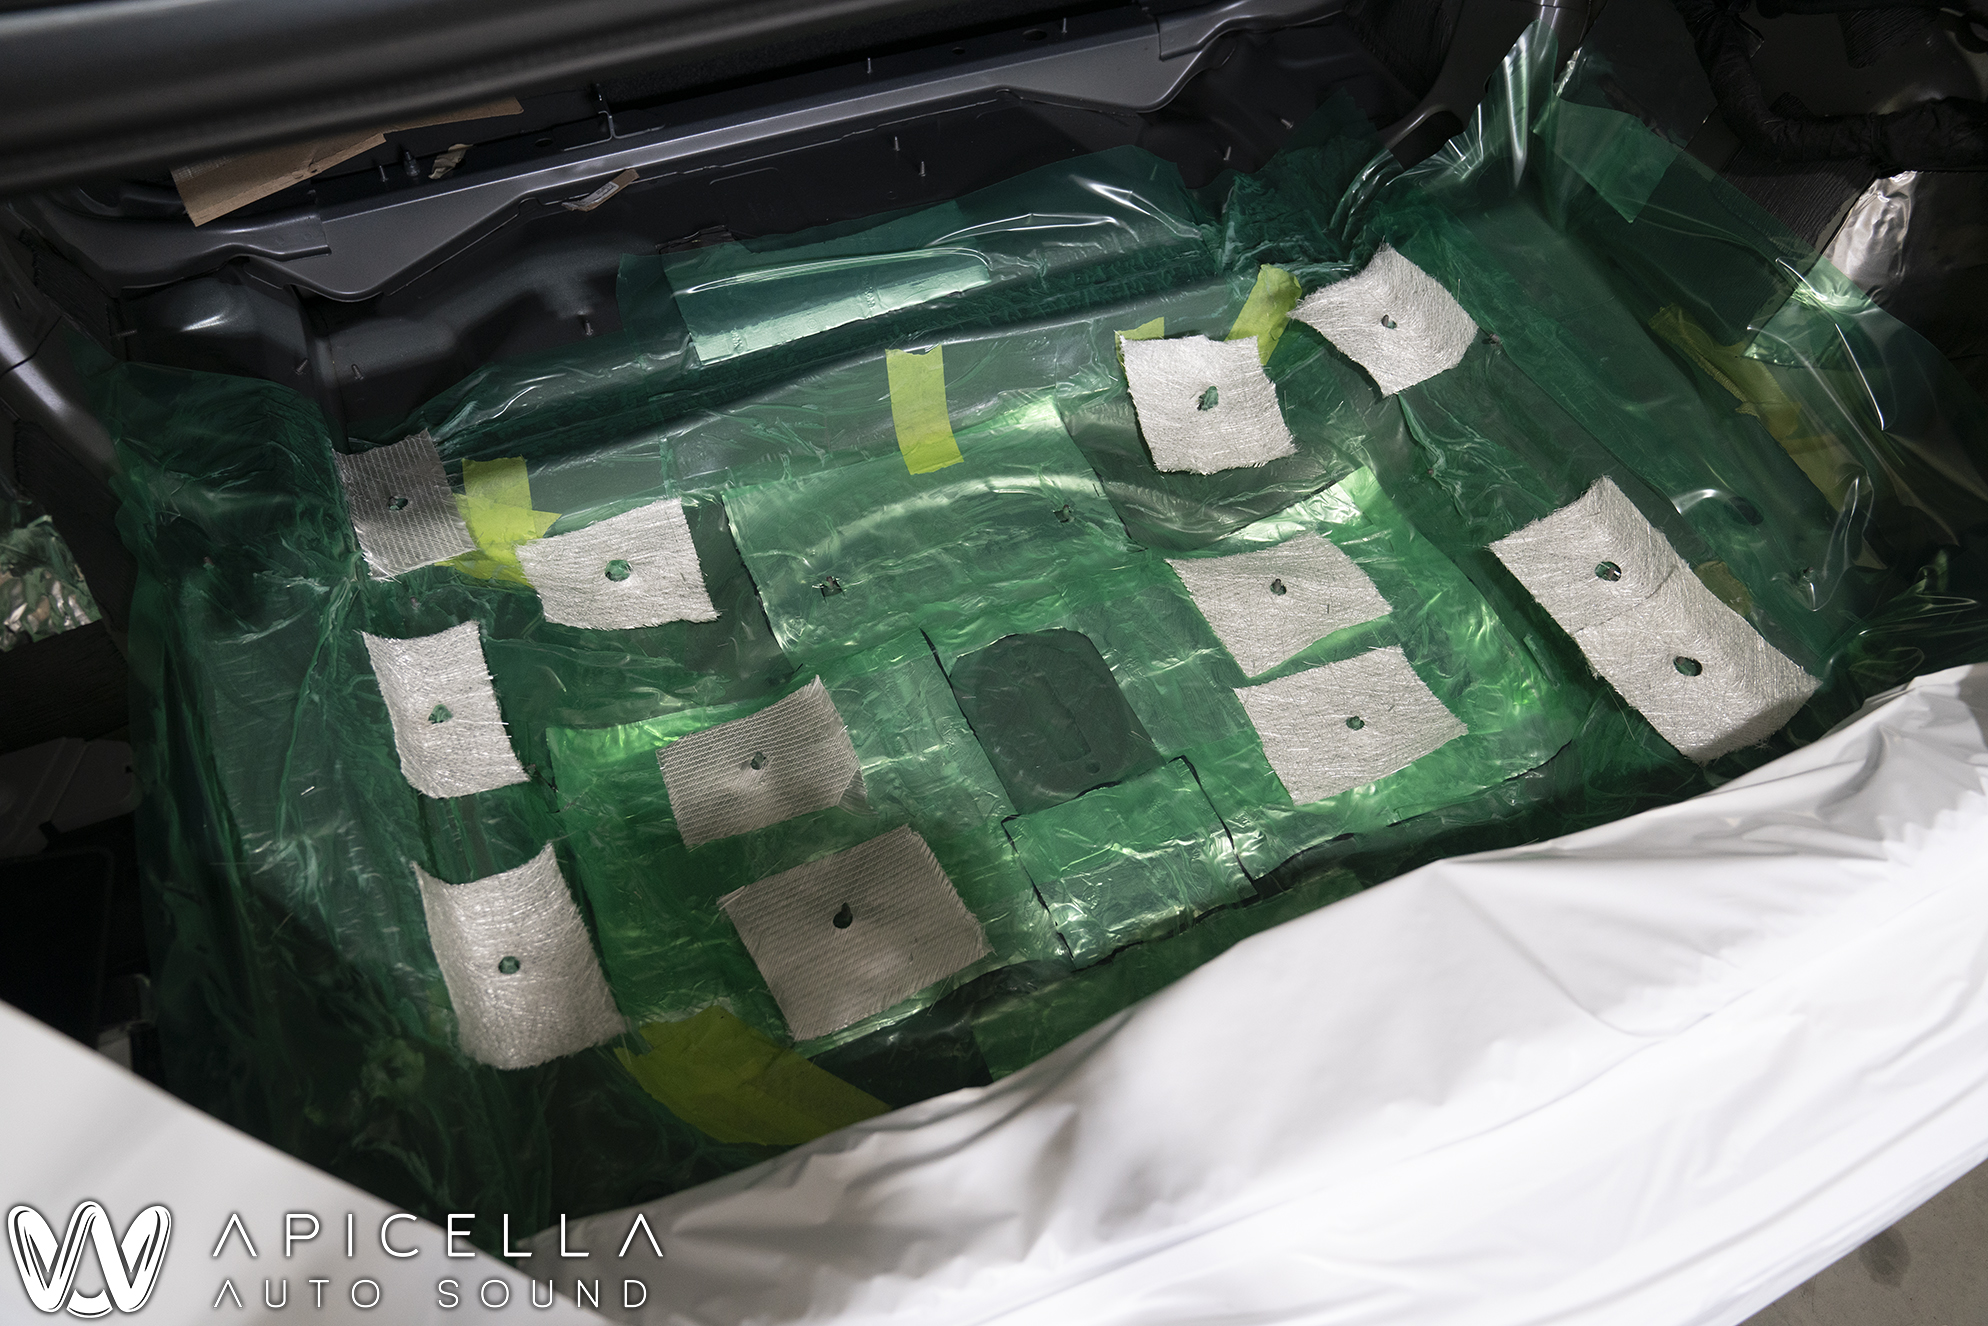
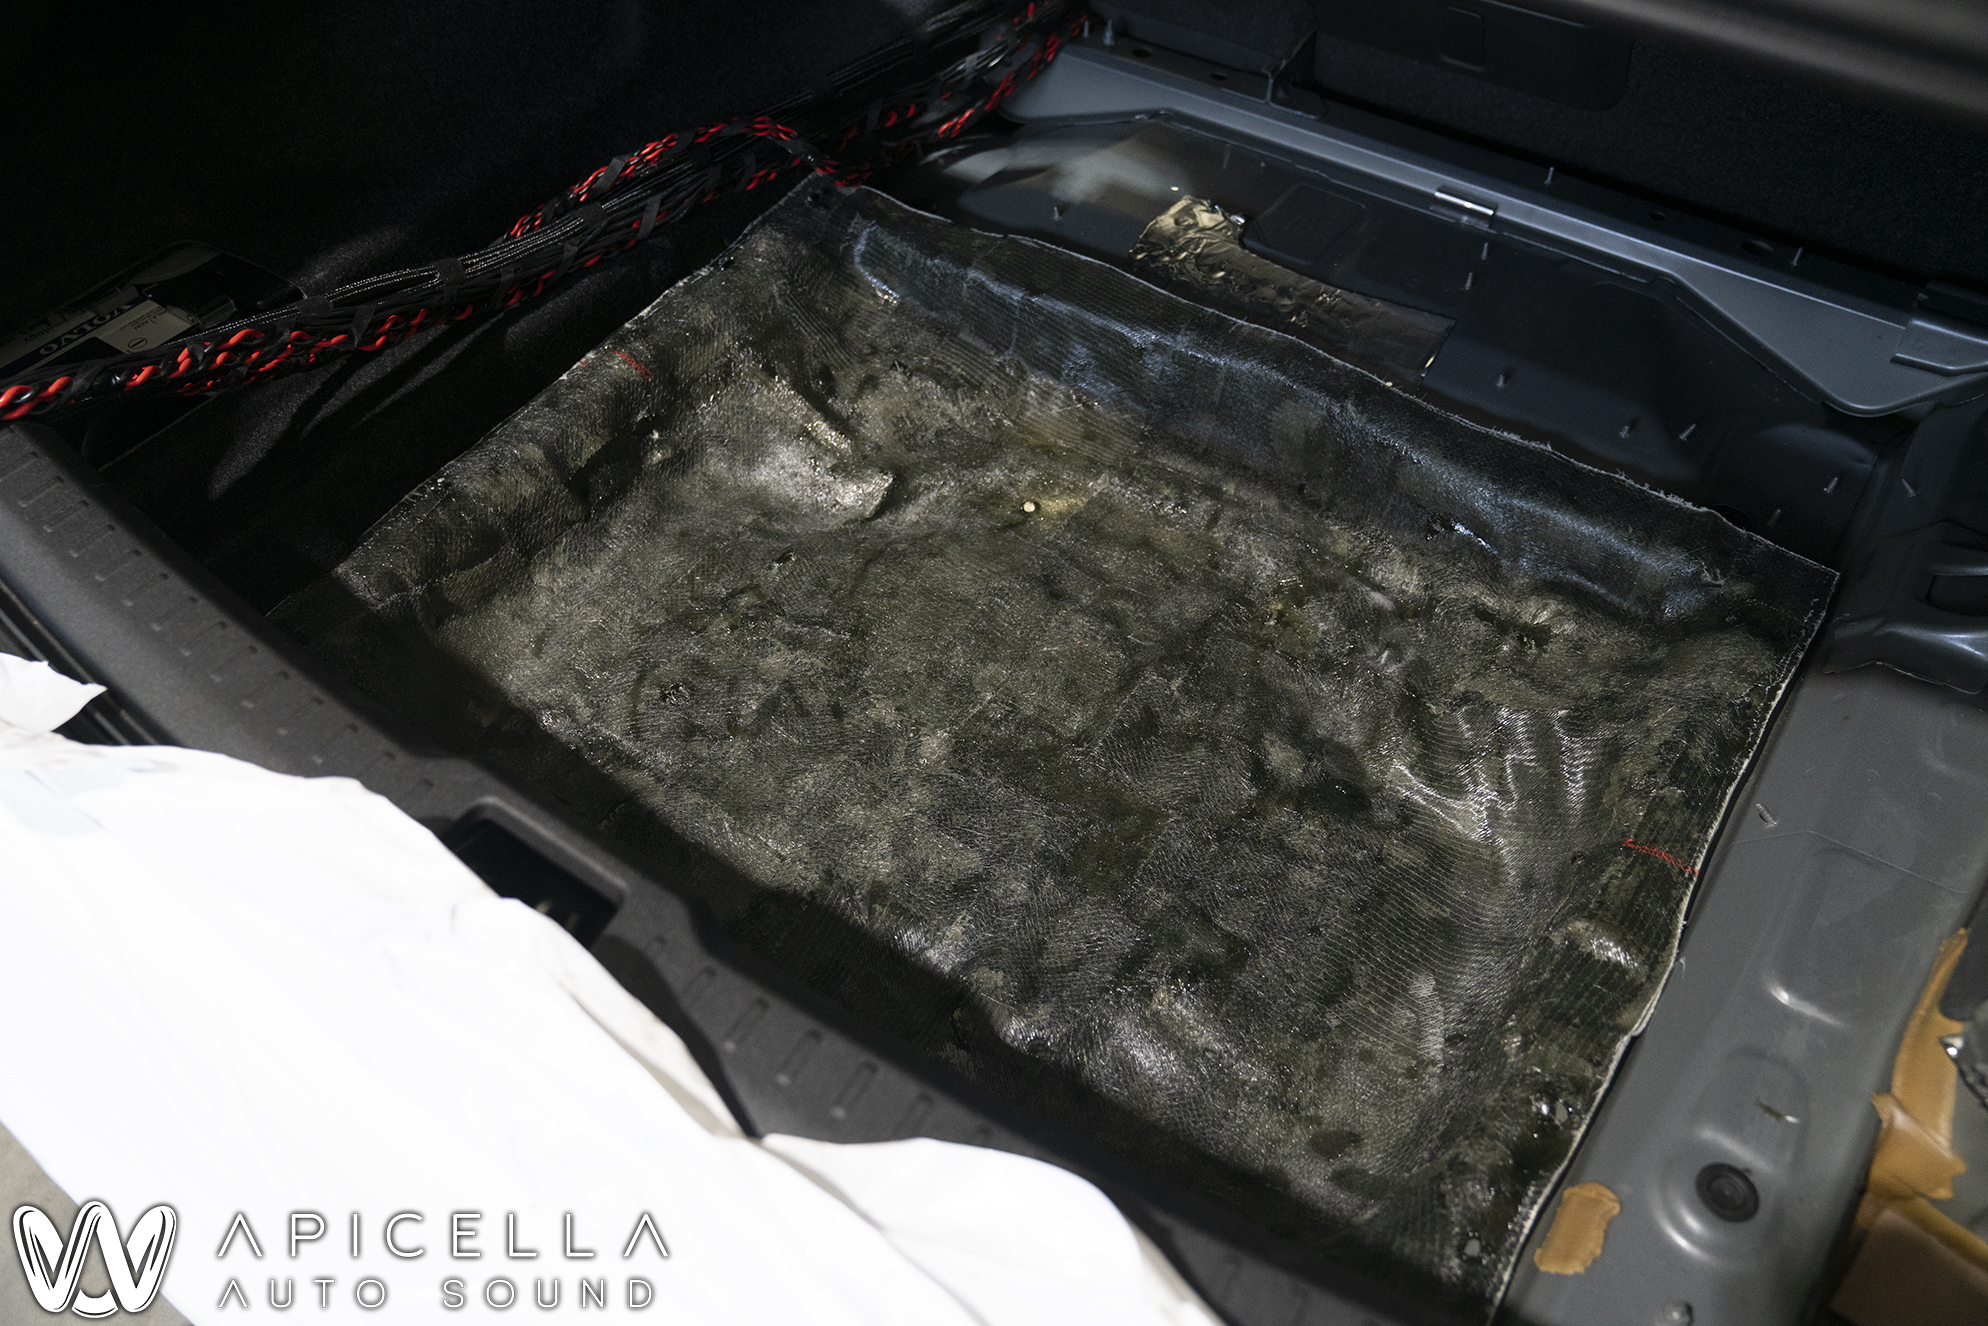
Spare tire lasted like 5 days lol. Fiberglassing started for the enclosure to house the 3 Illusion C12's. There were a lot of random studs protruding from the trunk floor, that's why some of the pieces of Biaxial fiberglass has holes punched in them. 2 layers of biaxial were set to cure. You can see the red lines i drew with a grease pen to mark where i am cutting the top section off. Yeah, i glassed a much larger area than i needed. Once this mold is trimmed, the sharp bits will be grinded down and many more layers of biaxial will be added. Im honestly looking at a sealed enclosure that is a bit too small for the subs, but i am still confident that they will still play down to 20hz. I have done these subs in very small enclosures before and had good luck. Great luck actually. Hopefully my own car is no different. Next up is getting the Helix V Twelve bracket installed and the amp wired up and actually have some music again.


aLfoFKY.jpg


0ZIVkI0.jpg
 
Next up was getting the wires run into the door for the tweeters. Since the OEM midrange and tweeter were tied into each other passively inside of the door, we needed to run a wire through the doors molex connector. From the outside, this one really looked like it was going to be a disaster and i would have had to make a second boot. Thankfully, the molex is easily removable, the door is easily removable, and the molex even has a hole on the bottom that can fit a run or two of thin speaker wire through.. perfect for midrange and tweeter. I used the OEM wire for the midrange and ran 18 gauge speaker wire through for the tweeter

Hts4klm.jpg


Said molex connector. The hole in the bottom is large enough to run some thinner speaker wire (16, maybe 14 gauge max) through with ease. I used 18 gauge

oW7WVv2.jpg


Door off and running wire through

FI4vDYG.jpg


Also got the center channel removed to start the planning and design. The plan is, as mentioned before, to mount a pair of Focal 3.5WM and a single Focal TBM. Unfortunately, this is going to be a bit trickier than i thought due to depth. An Hvac vent protrudes a bit on the passanger side of the grill and is going to make doing this how i wanted to a bit tricky without cutting the vent and patching it, which i'd prefer to not do. But at the same time, i'd much prefer to keep the grill completely flush with the dash as the OEM grill is vs keeping that vent fully unmolested. The plan with the grill is to keep the mids hidden under the grill, and fabricate and B&W style mount for the tweeter. Below that is the B&W trim center channel for this car..

I98bzVD.jpg

PLDfnW7.jpg


Aside from the plans and what is in photos, this weekend after doing some other side work, i got the "part 1" system pretty much fully buttoned up and wired, rear seats re-installed, and all trim panels re-installed. From here, i need to finish the pillars, finish the center channel (hardly started besides cad files made), finish the sub enclosure, start the amp rack, and get all of the subs and amps and DSP Ultra installed, along with a controller with it, whether its the Director or URC.3 and wifi adapter, im not sure. This trunk will not be a quick process though. Im going to try to push myself. I'm going to have to constantly remind myself to just do it once and do it right. I tend to not do that on my own cars since i have so much other stuff going on and i just want it at least functional. Once its functional, it tends to get a backseat. I cannot do that.
 
Man, you guys sure are chatty.. lol. Hopefully the last bit of this info will get ya talking :)


All the gear is heeeeere :)


. OEM Radio and DAP (not sure which model yet)

. Helix DSP Ultra with Director OR URC.3/Wifi Adapter (most likely a Wifi Adapter in each Helix piece to have total control)

. (3x) Illusion C12

. (2) Focal 3.5WM & Focal TBM center channel

. Audiofrog GS60 & GS10 (rear door, not pictured)

. Audiofrog GS42 (rear deck, not pictured)


System 1: Stage 2 OEM-Style System


. Helix V Twelve

. Audiofrog GB10

. Audiofrog GB25

. Audiofrog GB60


System 2: Stage 4 Fully Custom System


. (3) Mosconi Pro 4|10

. (3) Mosconi Pro 1|10

. Focal TBM

. Focal 3.5WM

. Focal 8WM


. Both systems will share center channels and subs. Center channel will be powered from a Mosconi 4|10

. The Helix V Twelve will get signal from either 2 or 4 outputs of the Helix Ultra, so the Ultra will essentially have total control of the system once the V Twelve is set

. I will be able to change presets to play any combination of the aforementioned systems in any way i could possibly fathom. My ultimate goal is to somehow utilize all speakers at once in a way that is probably unheard of in aftermarket car audio. The features of the Helix DSP's will be key in doing this properly in essentially creating my own upmixer with the virtual channels and Real Center feature. The hopeful end result is a soundstage that exists clear as day beyond the boundaries of the car in every way possible.


LDuIcRR.jpg
 
Last edited:
Activity
No one is currently typing a reply...
Old Thread: Please note, there have been no replies in this thread for over 3 years!
Content in this thread may no longer be relevant.
Perhaps it would be better to start a new thread instead.

Similar threads

you did. https://www.caraudio.com/threads/double-din-cd-player-with-screen-mirroring-a-link-android-auto-budget.614240/#post-8864499 OP:
3
892
AGAIN sonic does the same install stuff for free as well! Get a head unit with 4v preouts and 6 rca preouts as well they will be setup as front...
19
1K
Ugh yeah it can use Android Auto and Google Maps says so right in the manual. Alpine is good about that stuff with integrating not only ugh Apple...
3
1K

About this thread

SkizeR

10+ year member
Member
Thread starter
SkizeR
Joined
Location
New York
Start date
Participants
Who Replied
Replies
26
Views
3,790
Last reply date
Last reply from
SkizeR
1000006564.jpg

Mr FaceCaser

    Mar 28, 2024
  • 0
  • 0
1000006569.jpg

Mr FaceCaser

    Mar 28, 2024
  • 0
  • 0

Latest topics

Top