2002 Toyota Tundra Access Cab - center console sub

  • 3
    Participant count
  • Participant list

keep_hope_alive
Premium Member

Acoustics Engineer
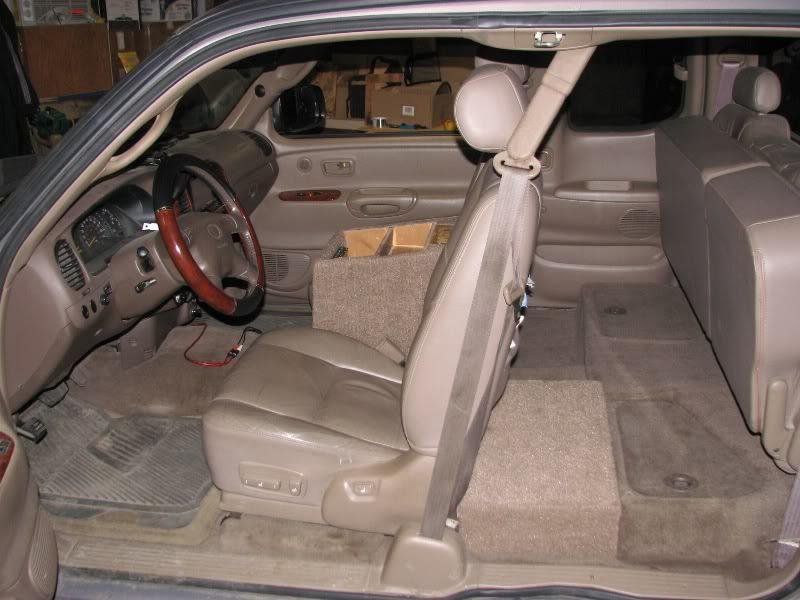
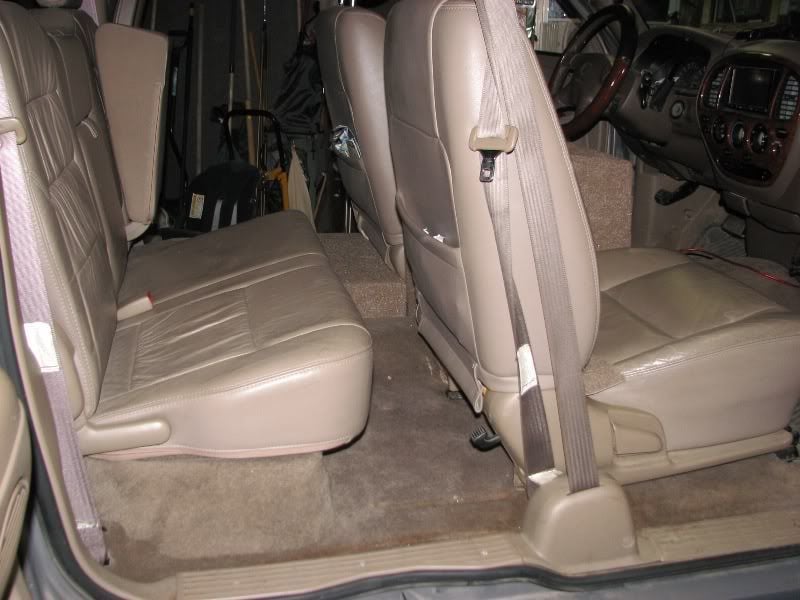
I've been building a system for my brother in-law for a while now. working on it when he brings it over. family is free - beer is usually provided.

this one has been interesting and a fun challenge.

Equipment:

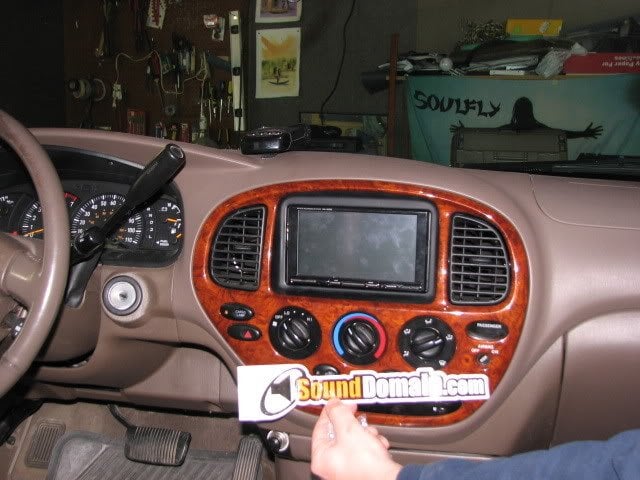
Alpine IVA-W200 head unit

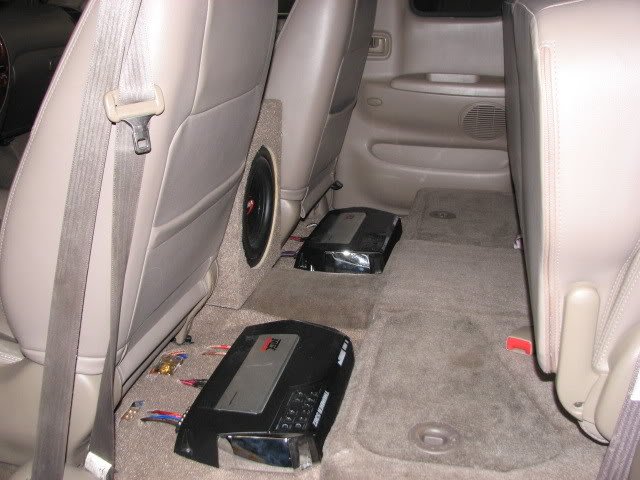
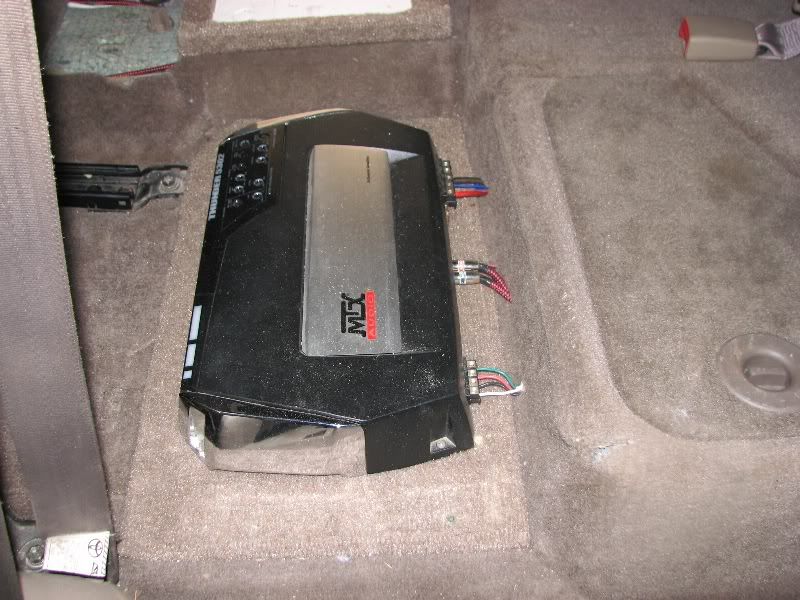
MTX TA5302 at 2 ohm stereo

MTX TA5302 at 4 ohm bridged
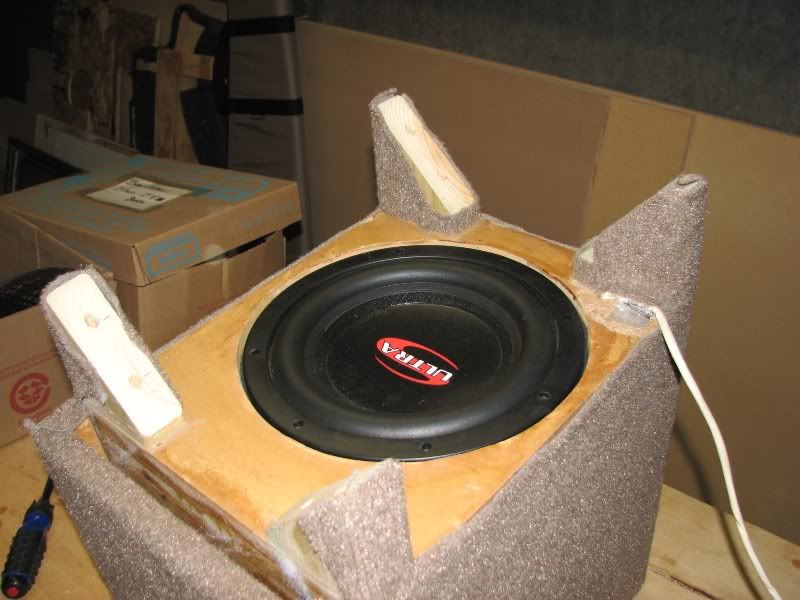
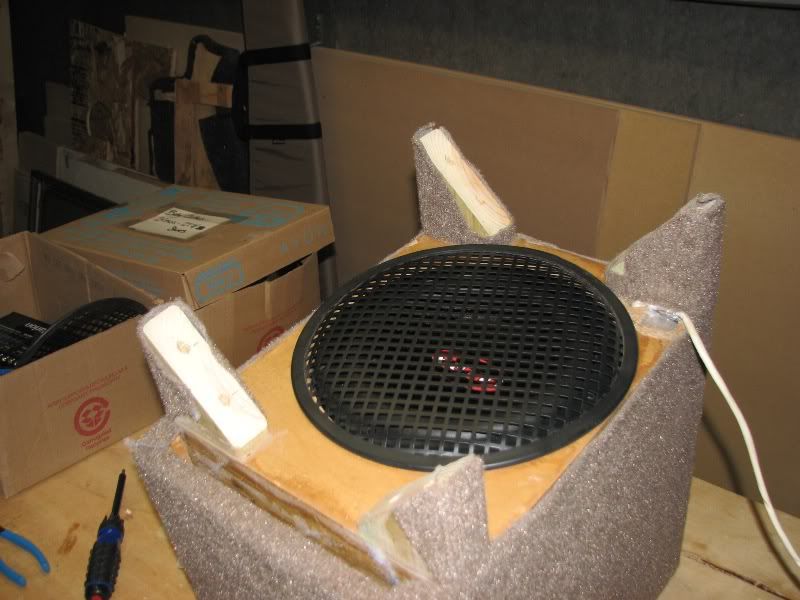
Ultra 10" sub

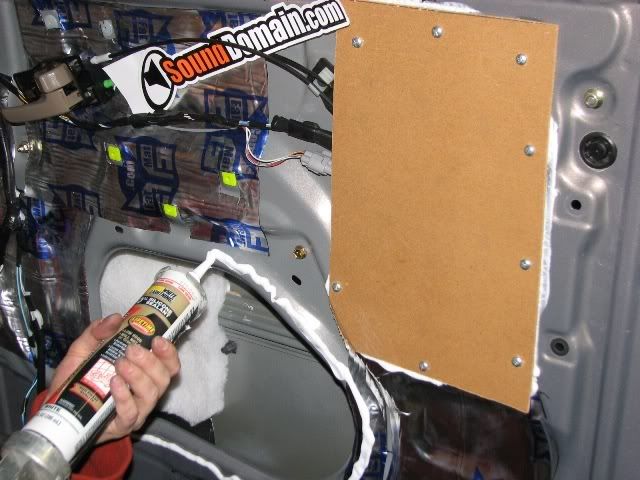
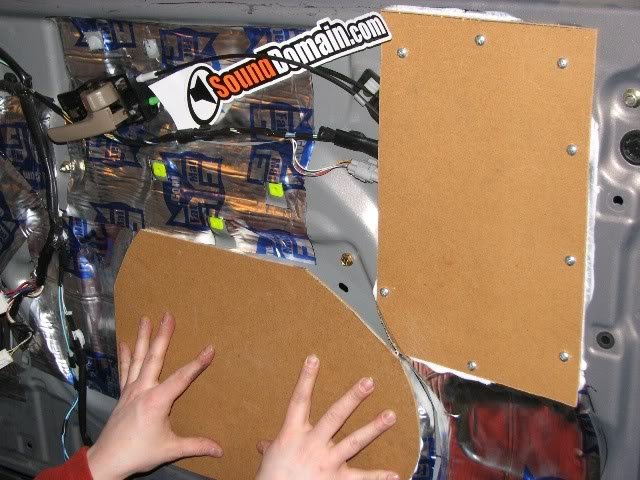
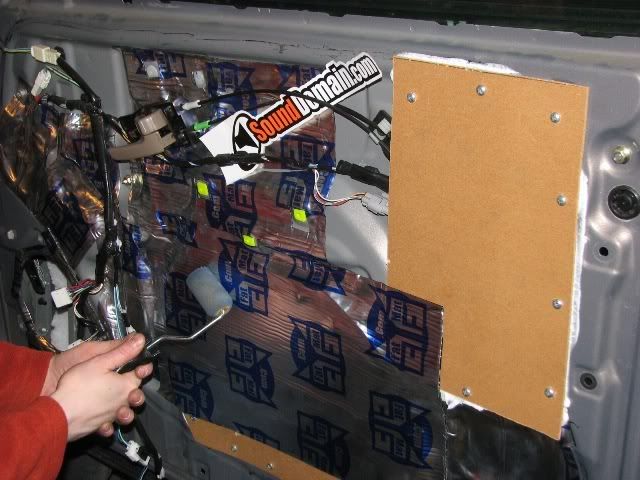
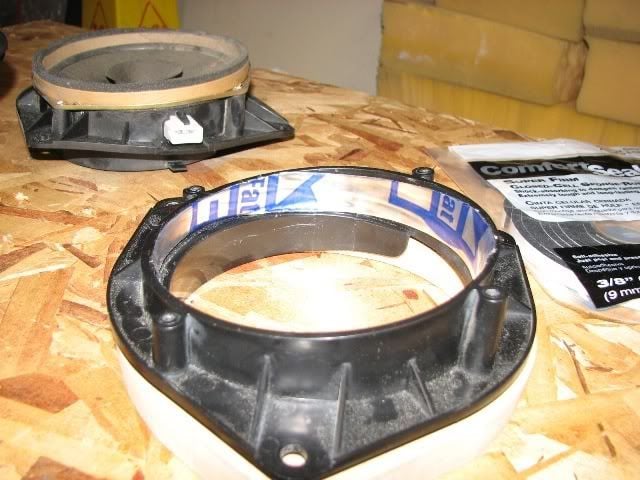
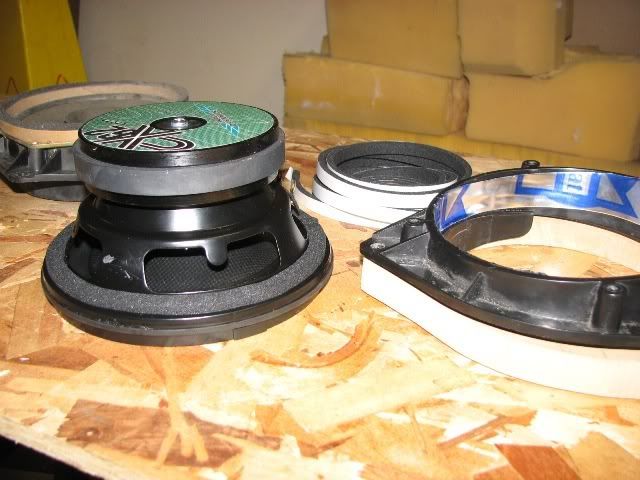
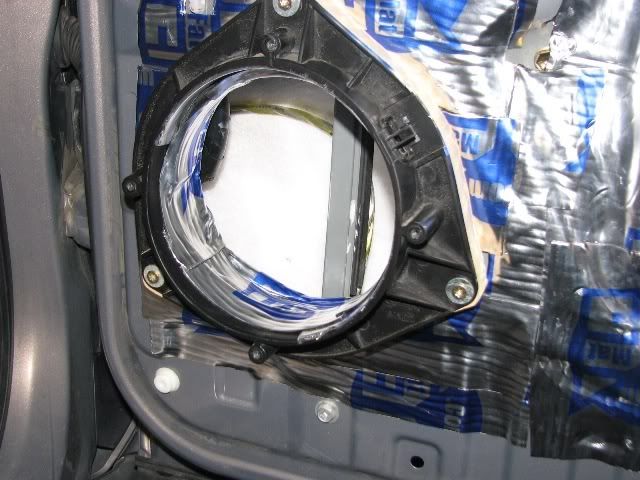
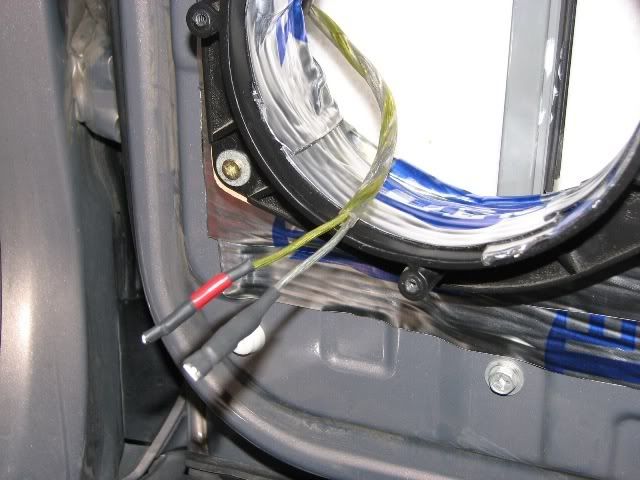
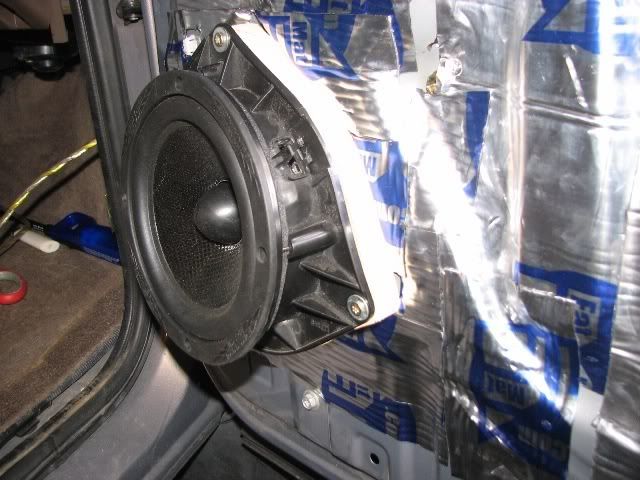
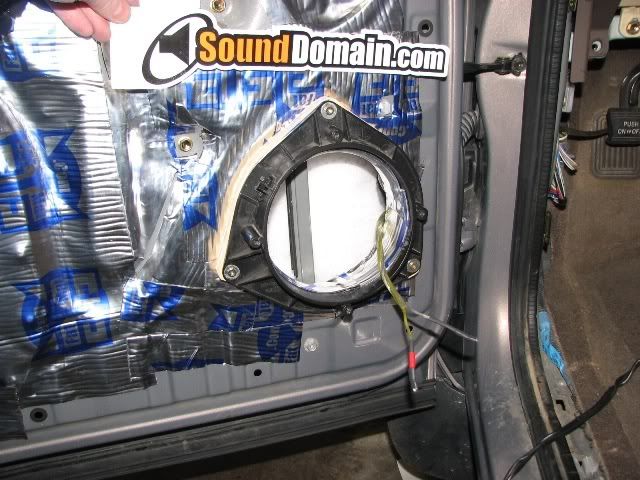
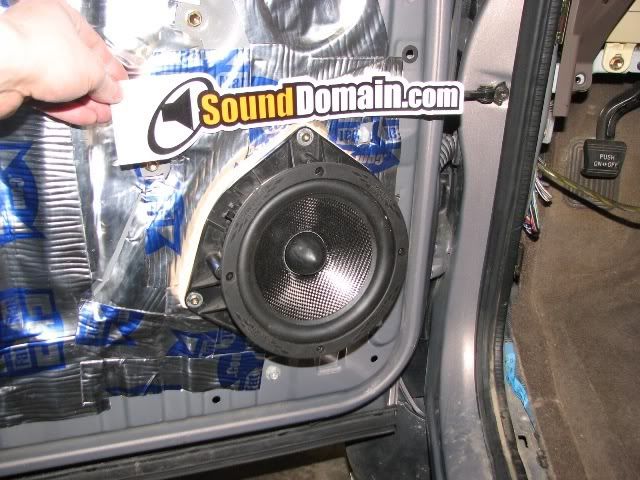
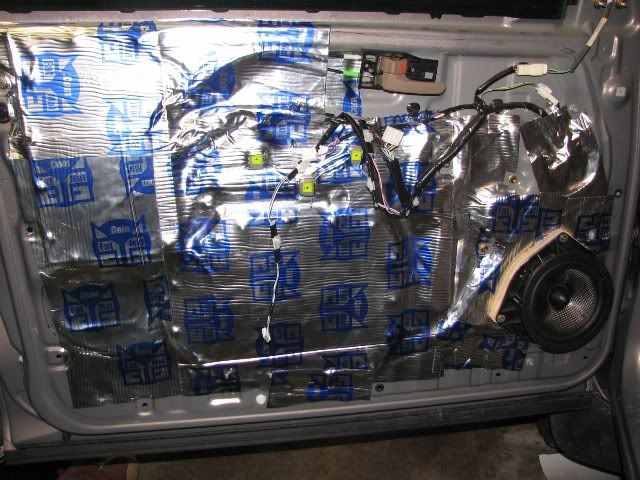
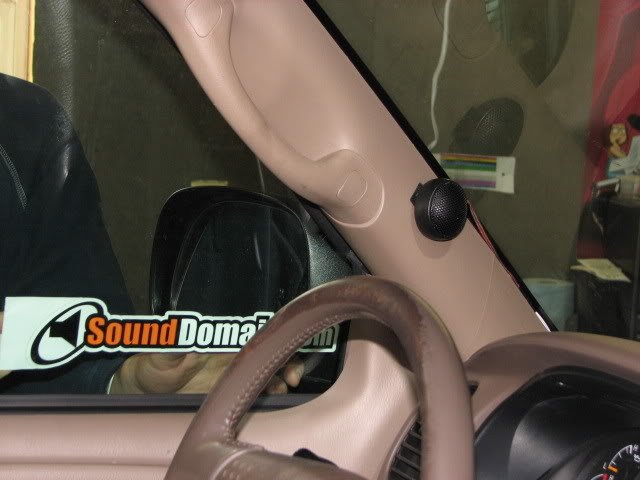
Image Dynamics CX62 NX30 component set

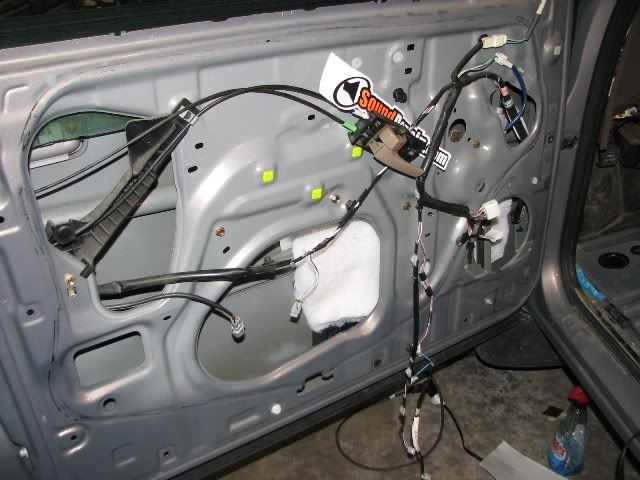
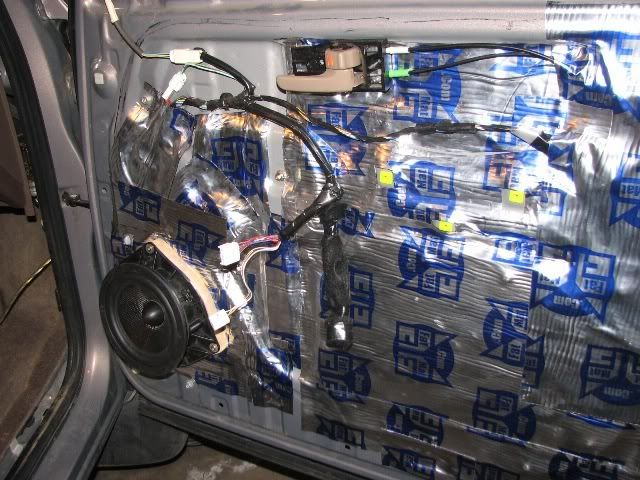
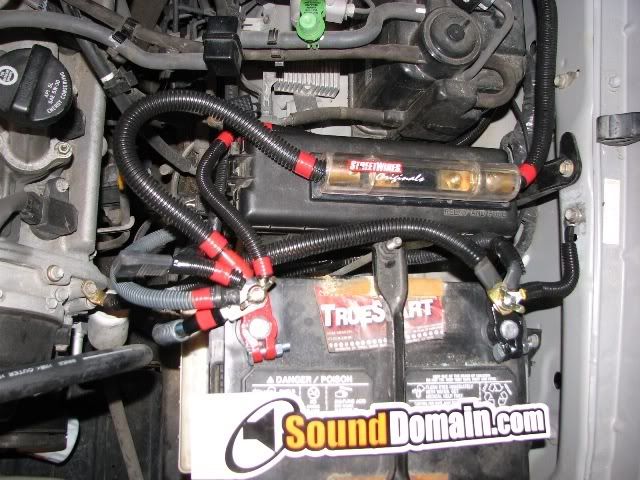
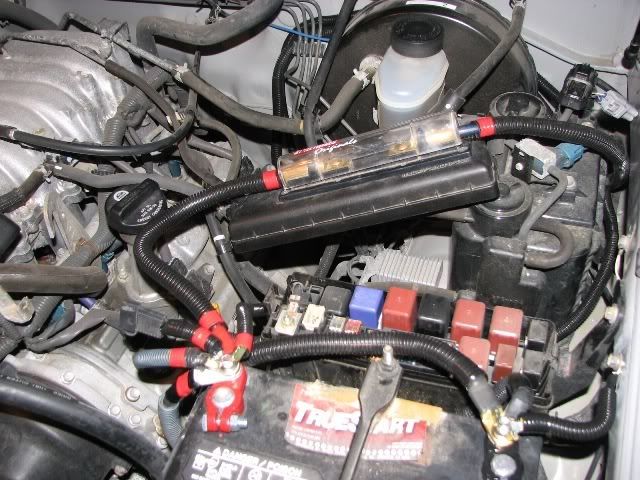
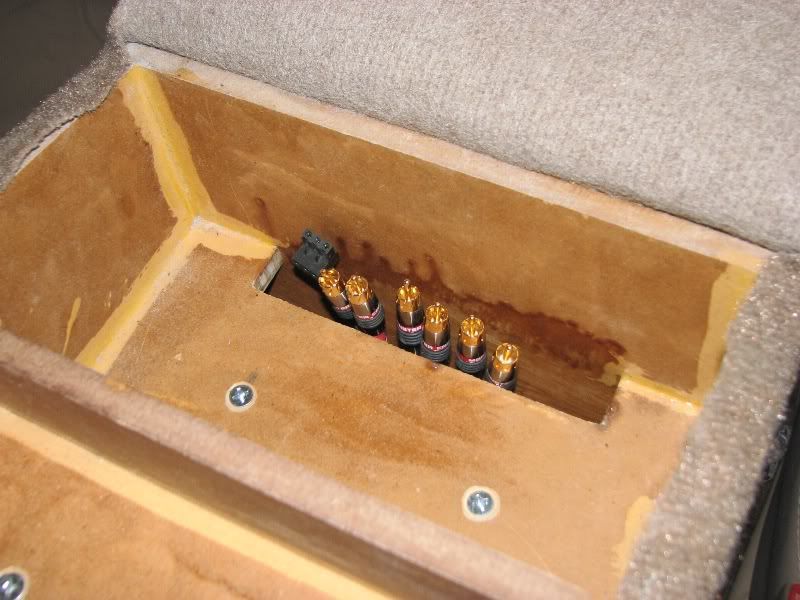
Wiring - Streetwires, AudioQuest, Monster Cable

Security - Viper (no pictures will reveal any aspect of the alarm system, just know that you won't find what you need in time to disable it.)

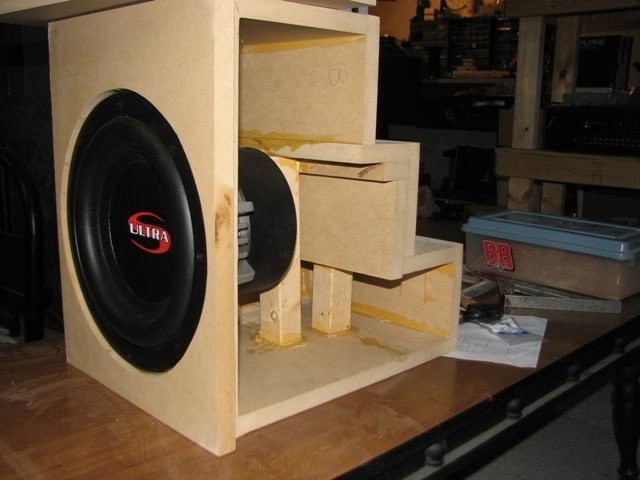
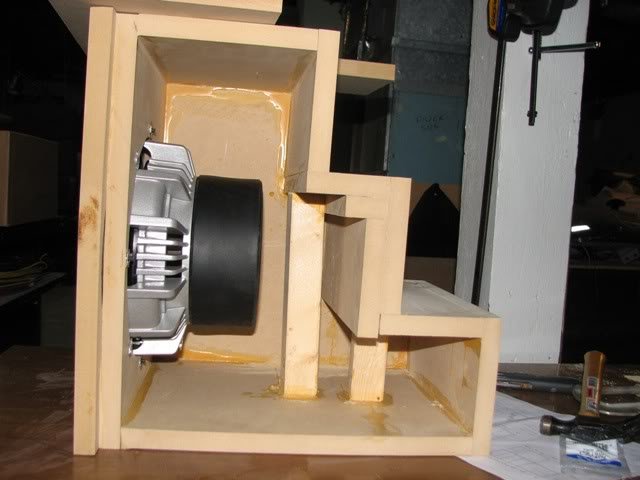
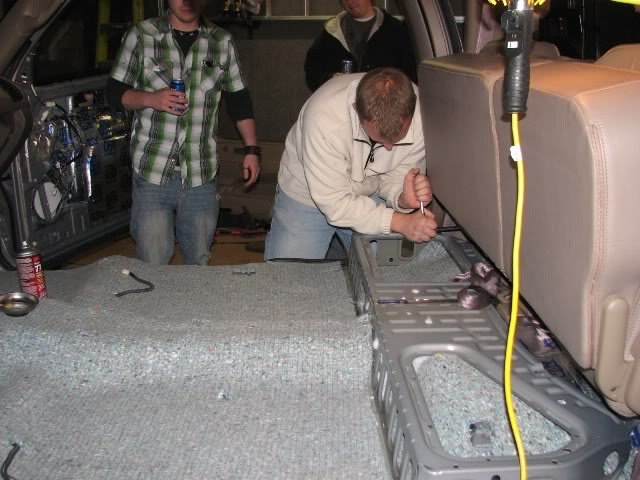
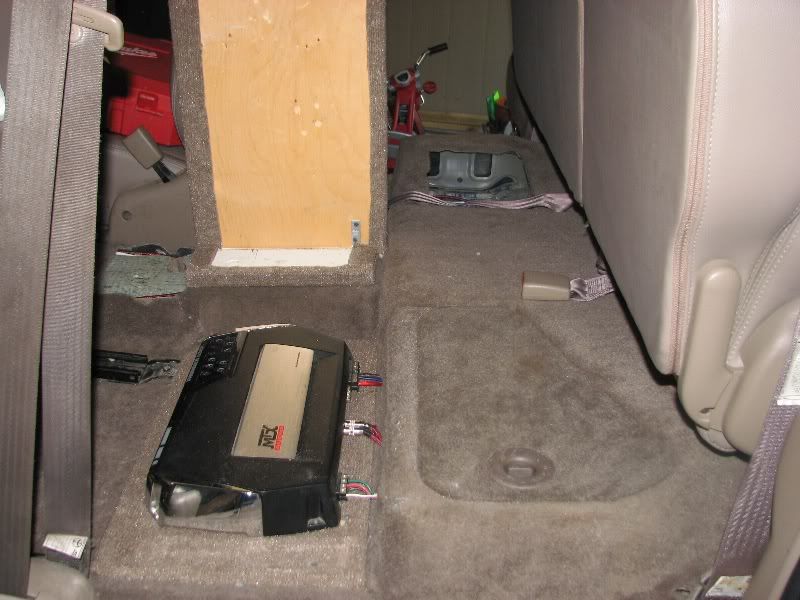
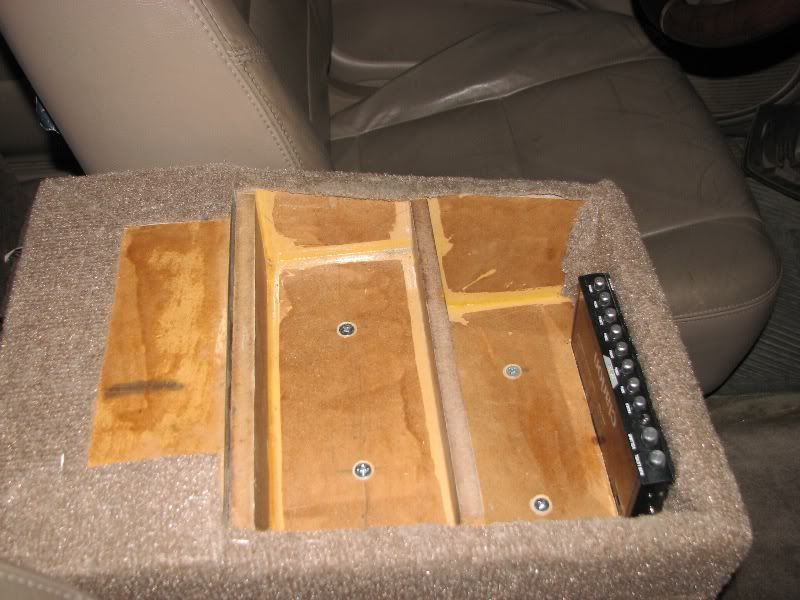
we started with the center console sub enclosure

Tacomaplans.jpg


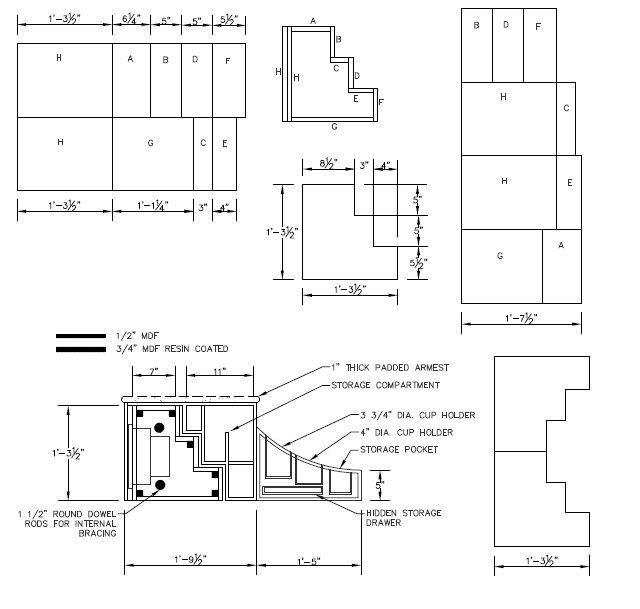
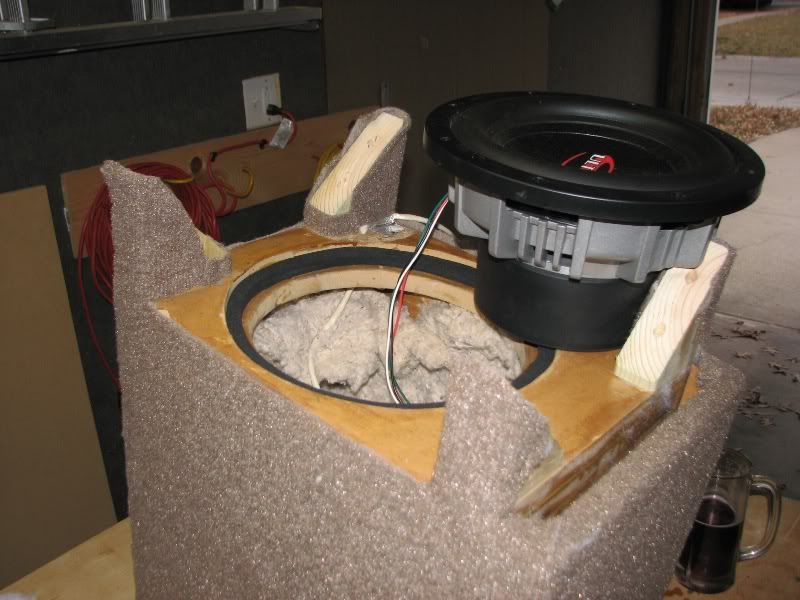
3/4" MDF was used for the entire enclosure. A double thick front baffle was used to recess the Ultra 10" and provide additional strength. The enclosure was sealed with wood glue and clamped. then, i mixed MDF sawdust with wood glue to make a paste that i spread on every internal seam.

Tacomacenterconsole0209subboxcla-1.jpg


Tacomacenterconsole0209subboxclampi.jpg


two internal braces were added to prevent any settling over time and add additional strength. the end result inside the enclosure isn't beautiful, but it sure is strong.

ozaudioCSset010.jpg


ozaudioCSset009.jpg


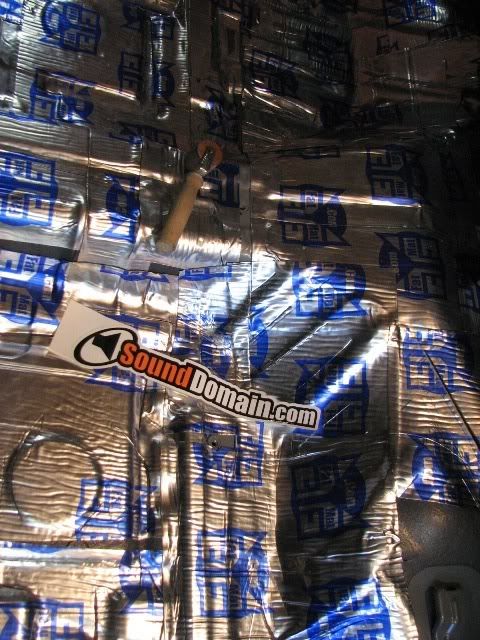
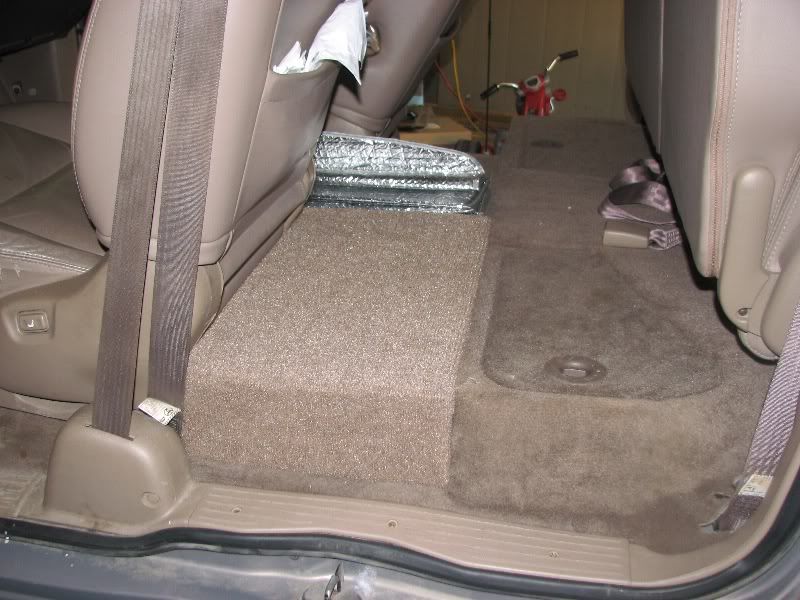
the truck was pretty resonant, so a layer of the cheap stuff (Fatmat) was an inexpensive way to help add some mass to the floor and tranny hump where the sub would play. we did three layers on the top and sides of the tranny hump, and one layer over the entire rear floor. this pic is about 30% complete.

Tundradeadening001.jpg


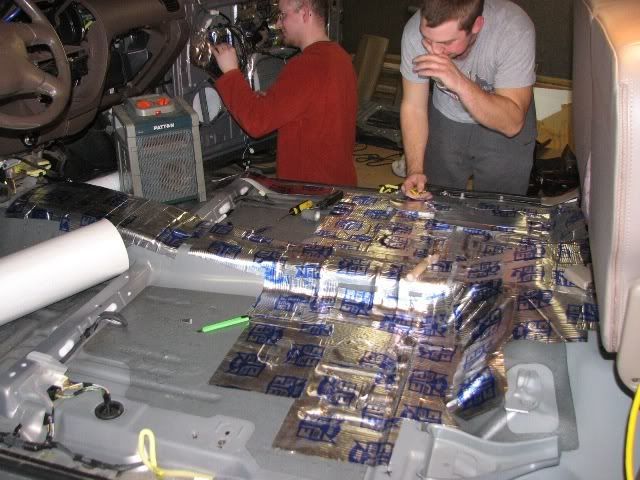
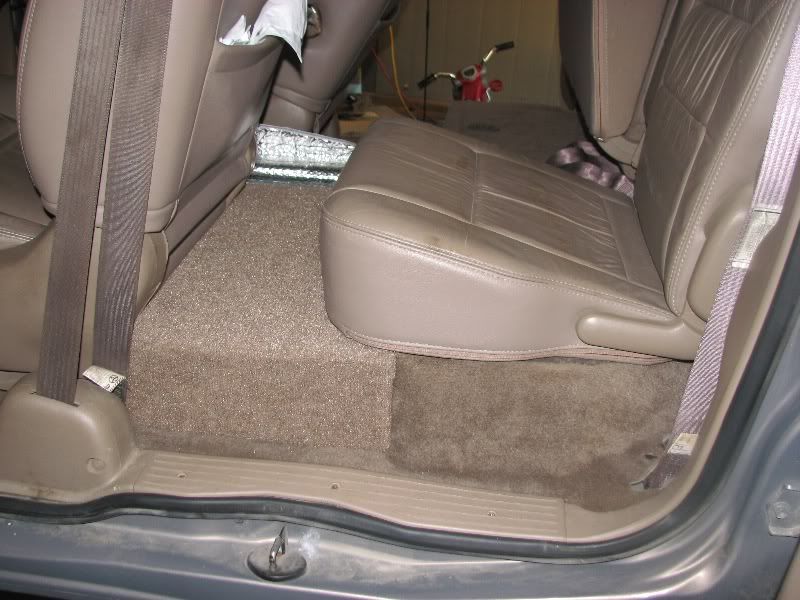
this was a typical end result

Tundradeadening005.jpg


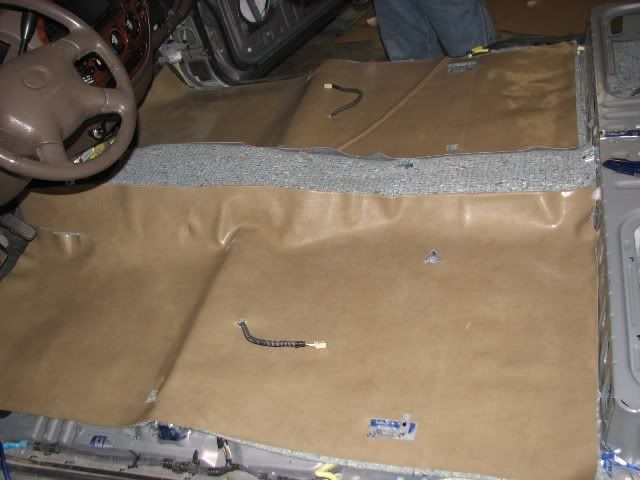
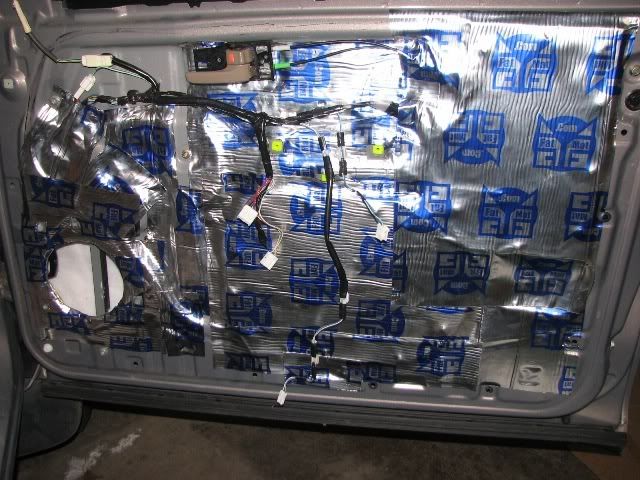
a layer of carpet padding went down to help decouple a layer of thick vinyl to block road noise. we ended up removing some of the vinyl and padding where the seat mounts go.

Tundradeadening028.jpg


Tundradeadening029.jpg


The factory doors have massive openings. covering and sealing these was a decent amount of effort.

Tundradeadening009.jpg


outer door skin was deadened around and behind the speaker and some polyfill padding was siliconed to the outer door skin behind the driver. i've done this in several other vehicles with no issues of water retention and great midrange benefits.

Tundradeadening011.jpg


Melamine panels were siliconed and screwed to cover the openings. then deadener sealed over them.

Tundradeadening011.jpg


Tundradeadening012.jpg


Tundradeadening013.jpg


Tundradeadening014.jpg


the Image Dynamics CX62 midbass drivers were very deep. I modified the factory mount to maintain the correct angle with the door, then used 3/4" MDF spacer and rubberized foam to help isolate each surface from the other. finally, deadener was used to seal it all up from the inside.

Tundradoors006.jpg


Tundradoors007.jpg


Tundradoors008.jpg


Tundradoors012.jpg


Tundradoors015.jpg


Tundradoors016.jpg


Tundradoors030.jpg


driver side door is done the same way.

Tundradoors025.jpg


Tundradoors027.jpg


Tundradoors029.jpg


we also used carpet, foam, and polyfill to fill any gaps between the door panel and deadened skin. the result is ZERO rattles or buzzes.

battery also received initial attention. it will soon be replaced with a new AGM battery and better posts used. we upgraded battery-chassis and engine-chassis grounds.

Tundradoors033.jpg


Tundradoors035.jpg


used grommets through the firewall for both 4awg and 10awg.

Tundradoors034.jpg


head unit installed, we used some "special tricks" to make removing this a complex process.

Tundracarpeting018.jpg


here we were testing tweeter locations with trusty velcro until we finalize a placement. there are now flush mounted in this location, but i realized i don't have pics of them.... doh!

Tundracarpeting016.jpg


this was a temporary location for testing. we ended up with a down firing orientation and the performance was MUCH improved

Tundracarpeting029.jpg


everything had functioned great for a year or so, but I wanted to take a second look at the amps. turns out, one will fit in the rear seat storage (passenger side). this allowed us to move the fuse holder and ground distro block to the driver storage compartment, and this in turn, eliminated wiring under the seat. should have done this in the first place.

anyway, i made a new false floor for the single amp. now at least one back seat passenger gets more leg room. //content.invisioncic.com/y282845/emoticons/smile.gif.1ebc41e1811405b213edfc4622c41e27.gif it is held in place with the driver's seat - works great and has been nice for my bro to have a larger flat surface for his tools. no one sits behind him anyway - he's a tall bastard.

fiberglass center console coming soon!

TundraAmps003.jpg


TundraAmps002.jpg


TundraAmps004.jpg


TundraAmps005.jpg


revised center console was installed.

the storage compartment was mounted and combined with the enclosure.

the loading board was removed and angled feet installed to hug the tranny hump.

a grill was added for general protection. an EQ was added in the storage compartment.

the sub amp was installed in the rear passenger storage compartment.

tundrabox001.jpg


tundrabox003.jpg


tundrabox004.jpg


tundrabox009.jpg


tundrabox010.jpg


tundrabox012.jpg


tundrabox014.jpg


thanks.

this is a budget setup. gear was purchased used except for teh sub. the sub was the same cost of the HU, speakers, and amps! it sounds **** good.

i realized you can see the apillar tweeters in the second to last picture.

you may notice the original plans had the sub facing back. after testing back vs. down, down was the hands down winner. and down without a dedicated loading board was also a winning configuration. luckily, the stair-step design worked in both orientations. i have many more pics of this build on my PC - especially pics of teh sub enclosure. i now notice quite a bit is missing.

it should look pretty good when done. the factory center console was the same size as one for a Camry. WTH?

 
could you elucidate on this?
sure.

Tundradoors012.jpg


adding an inch or two of absorption behind the speaker won't do much for low frequencies, but you get some break-up of the rear wave and some absorption (minimal) of upper midrange frequencies. how much absorption depends on the material used, its density, and it's thickness. just as polyfill provides some benefit in a sub enclosure, the stuff i used in the pic above is much dense than the stuff you buy in bags (and was in a large sheet). midrange frequencies are what suffer when you have a hard reflecting plane right behind the driver (concave) since the distance from driver to wall and back causes phase cancellation in midrange frequencies. you want to weaken the rear wave reflection, break it up, so it doesn't come back to the cone. adding absorption in the corners of the door cavity would provide some low frequency absorption, but behind the woofer is a minimalistic approach. with vs without is noticeable and with is preferred. it's an easy test to try for yourself. it's similar to the premise of deflex pads.

my next experiment will be replacing that with PVC encased fiberglass batt that is compressed. in architectural acoustics, we use pvc encased fiberglass (around 1pcf) in banners to add absorption in pools and gyms.

 
sure.
adding an inch or two of absorption behind the speaker won't do much for low frequencies, but you get some break-up of the rear wave and some absorption (minimal) of upper midrange frequencies. how much absorption depends on the material used, its density, and it's thickness. just as polyfill provides some benefit in a sub enclosure, the stuff i used in the pic above is much dense than the stuff you buy in bags (and was in a large sheet). midrange frequencies are what suffer when you have a hard reflecting plane right behind the driver (concave) since the distance from driver to wall and back causes phase cancellation in midrange frequencies. you want to weaken the rear wave reflection, break it up, so it doesn't come back to the cone. adding absorption in the corners of the door cavity would provide some low frequency absorption, but behind the woofer is a minimalistic approach. with vs without is noticeable and with is preferred. it's an easy test to try for yourself. it's similar to the premise of deflex pads.

my next experiment will be replacing that with PVC encased fiberglass batt that is compressed. in architectural acoustics, we use pvc encased fiberglass (around 1pcf) in banners to add absorption in pools and gyms.


i was actually aware of all that, the reason i asked was because i was under the impression that polyfill was not a material that would really offer any of those reflection dampening benefits in the mid frequency range. In the past when ive built cabinets for the home i use owens corning 703 (i think) which is not too easy to find or very cheap. Where do you find this denser polyester material you use? because i just finished some pillars that have a 3" midrange driver IB, and would like to put something behind it but the owens corning is too rigid.

 
also, while we're on the subject of reflection dampening, ive been looking at purchasing a dash mat because the design of my dash panel is such that its pretty obstructive and likely causing alot of reflections. I was looking at buying a dash designs sedona suede mat, but on their website it says:

Quote:Do Dash Designs® Dashcovers have openings for the speakers on my dashboard?

No, all of our dashcovers are constructed from porous fabrics that allow sound to transmit freely through the material.
This makes it sound as though the mat will have no effect on reflections. Am I misunderstanding something?

 
the stuff i used was actually salvaged from some pillowtop cushions i had - so the actual makeup/source is not known. it was a fairly dense sheet that was sewed on the ends.

in the future, pvc encased fiberglass will be what i use.

i wouldn't say it provides "sound damping" but sound absorption. water causes "dampening" - common misuse of the term. absorption comes from causing air molecules to generate friction or rapid increase/decrease in speed as it works through smaller openings. energy is lost in the process. even polyfill provides some absorption, though much less than fiberglass.

 
also, while we're on the subject of reflection dampening, ive been looking at purchasing a dash mat because the design of my dash panel is such that its pretty obstructive and likely causing alot of reflections. I was looking at buying a dash designs sedona suede mat, but on their website it says:

This makes it sound as though the mat will have no effect on reflections. Am I misunderstanding something?
open weave fabrics are mostly acoustically transparent - with some high frequency attenuation. you can RTA with and without the fabric covering to see for yourself.

so the answer to your question about absorbing reflections (the main reason we would want a dash mat) is: it depends on frequency. when a glancing reflection is caused (like apillar tweeters) the material seems thicker and some scattering at very high frequencies may be seen. but at 1k? nada. 4k? nada. maybe 10k and up.

maybe if the dash mat had a layer of SoundTex on top of an inch or so of open cell foam or compressed fiberglass...

 
Activity
No one is currently typing a reply...
Old Thread: Please note, there have been no replies in this thread for over 3 years!
Content in this thread may no longer be relevant.
Perhaps it would be better to start a new thread instead.

Similar threads

Nice, well I think they will blow away anything you have running on your puter for sure. I've had good luck with the NVX components, hard to beat...
16
2K
I have a 2001 Nissan Sentra GXE and I've never found one. The loc is the next best option
3
988
Check out Sonic Electronix as well. They have some great deals usually and excellent Customer Service also. I like to buy my HUs /Head Units from...
6
258
If your bypassing the infotainment stuff in the original HU setup, then the LCi7PRO should handle the rest. If you want to retain the handsfree...
1
289
If you want 5 channels of amplification you just need 5 channels of amplification. You can do this with 5 amps or 1, depends on budget and space...
1
633

About this thread

keep_hope_alive

Premium Member
Acoustics Engineer
Thread starter
keep_hope_alive
Joined
Location
Quad Cities, IL
Start date
Participants
Who Replied
Replies
13
Views
15,629
Last reply date
Last reply from
keep_hope_alive
IMG_5860.jpeg

Brendon Jenness

    May 8, 2024
  • 0
  • 0
Screenshot 2023-12-02 161309.png

Doxquzme

    May 8, 2024
  • 0
  • 0

Latest topics

Top