peedrah
CarAudio.com Newbie
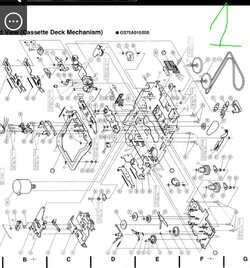
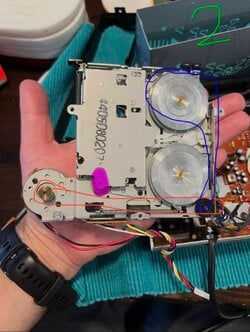
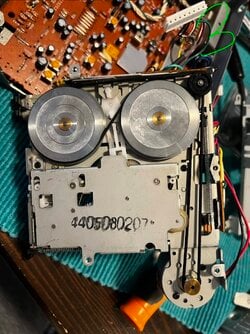
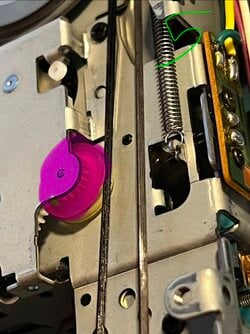
Need some advice on belt diagram for alpine 7511 cassette deck. I can’t seem to track down any belt diagrams so any help with the belt diagram is appreciated. The old belt was all gummed up wrapped around the motor and I can’t tell where to place the belts. The way I have the belts can be completely wrong too-just took my best guess. The first pic is the exploded diagram, 2nd and 3rd pics are how I have the two belts set up. In it’s current set up, the tape get eaten and only the green spindle spins (see 4th pic). Pink spindle doesn’t move. Also FF and REW don’t do anything. In the 5th pick, there is a gear (think it may be the gear selector) that when you spin manually, the pink spindle spins (compare pic 2, 4and 5). It makes me think the band should go around that gear as well but not sure how.
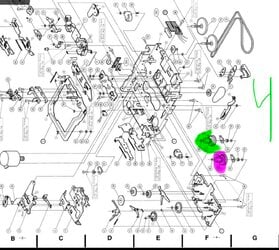
I did find the belt diagram for another alpine cassette deck and think that may be correct (pic6)
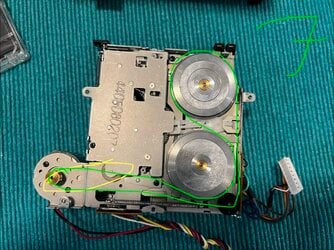
Here what I’m thinking I need to do (pic 7). The motor cog has two notches at two different levels -the bottom notch that lines up with the gear selector and the top that lines up with the black corner pulley. I’m just not sure how to take the top piece off with the stamped numbers without having everything underneath it fall out. Also not sure of the large band size.
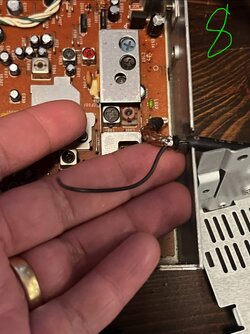
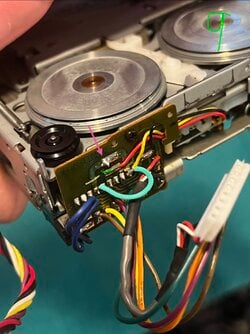
Separately, I accidentally pulling this ground wire off (pic 8&9). I think that’s were I need to resolder, right?
I did find the belt diagram for another alpine cassette deck and think that may be correct (pic6)
Here what I’m thinking I need to do (pic 7). The motor cog has two notches at two different levels -the bottom notch that lines up with the gear selector and the top that lines up with the black corner pulley. I’m just not sure how to take the top piece off with the stamped numbers without having everything underneath it fall out. Also not sure of the large band size.
Separately, I accidentally pulling this ground wire off (pic 8&9). I think that’s were I need to resolder, right?
Attachments
-
 IMG_4828.jpeg212.6 KB · Views: 17
 -
 IMG_4829.jpeg181.4 KB · Views: 17
 -
 IMG_4830.jpeg414.2 KB · Views: 20
 -
 IMG_4833.jpeg187.3 KB · Views: 13
 -
 IMG_4831.jpeg278.6 KB · Views: 22
 -
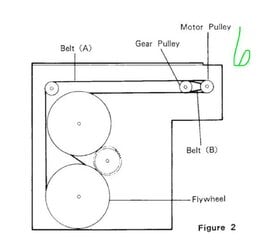 Image 1-18-26 at 10.07 AM.jpeg36.9 KB · Views: 21
 -
 IMG_4845.jpeg484.5 KB · Views: 17
 -
 IMG_4884.jpeg266.8 KB · Views: 14
 -
 IMG_4885.jpeg249.8 KB · Views: 20

