01 Explorer Tiny DD setup to (2) 18 AT Stratos in a 4th

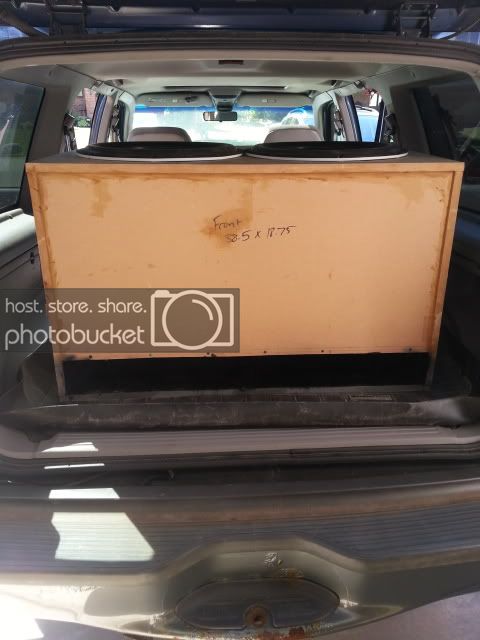
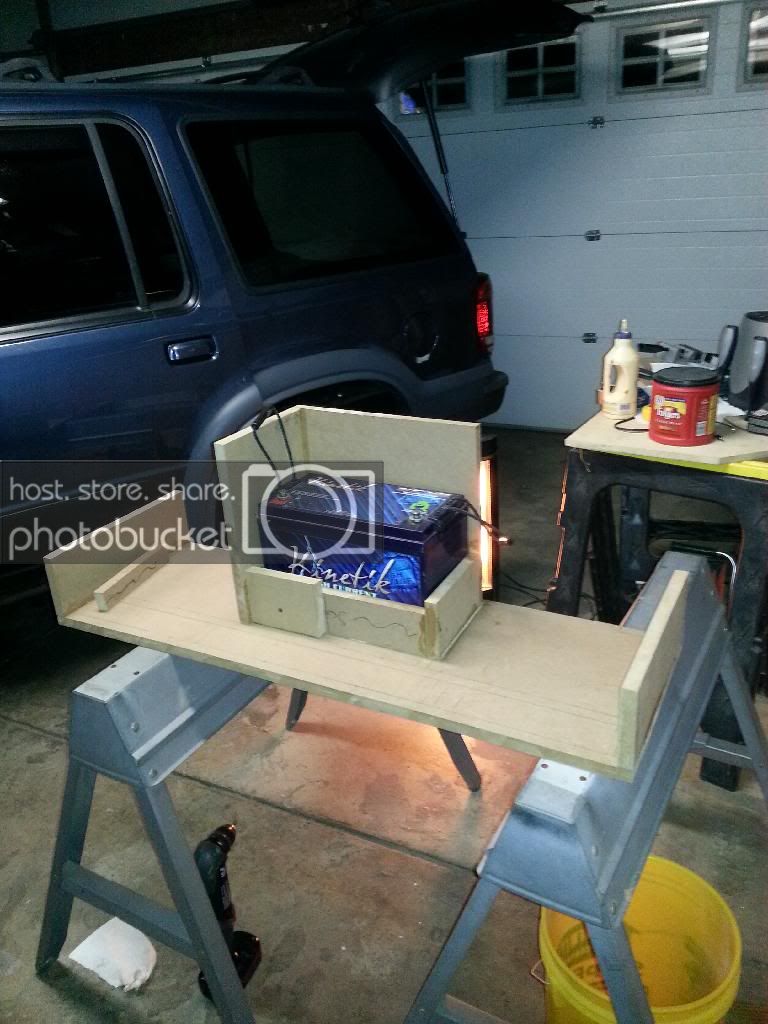
Another small update- got this done earlier today, unsure if I'll get more time to work on it later.

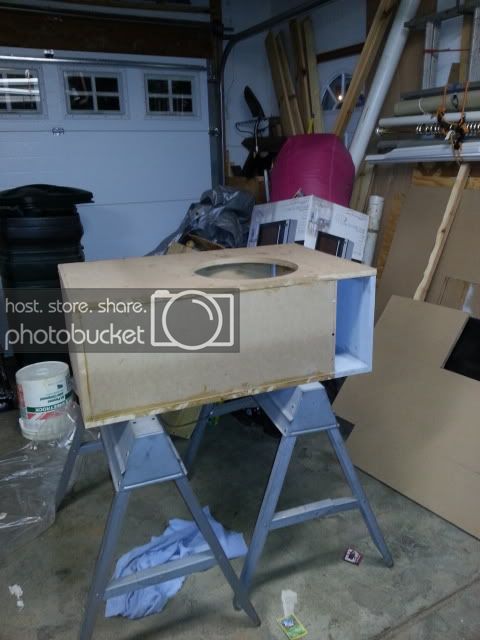
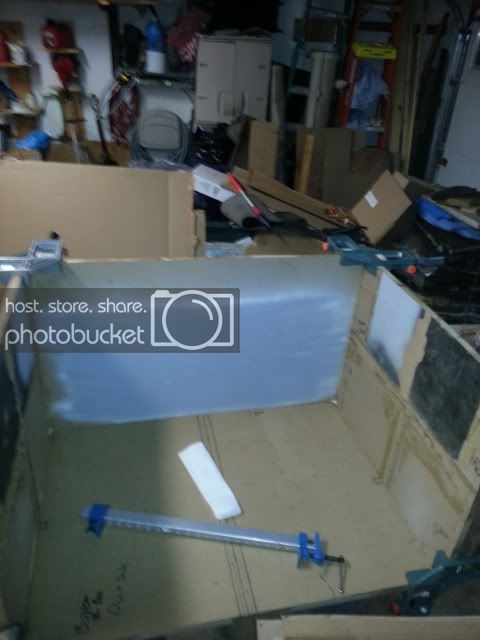
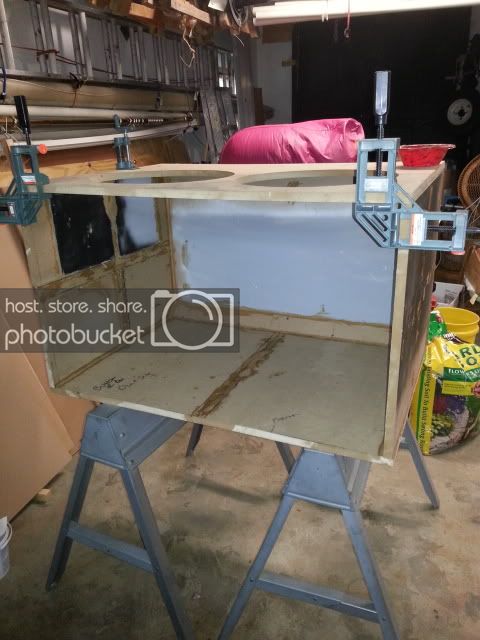
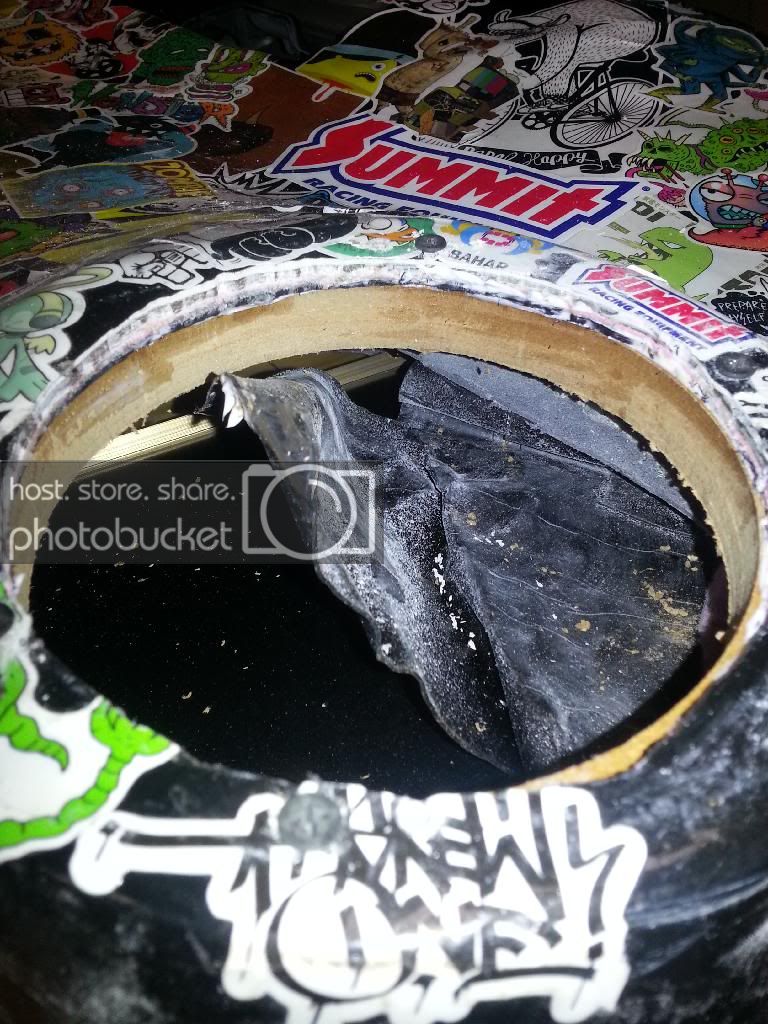
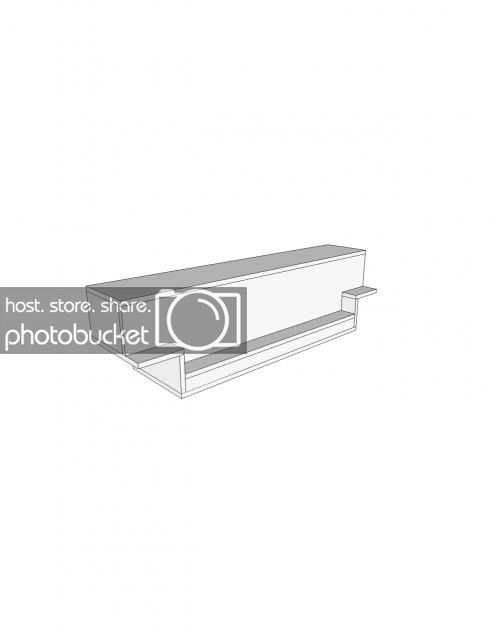
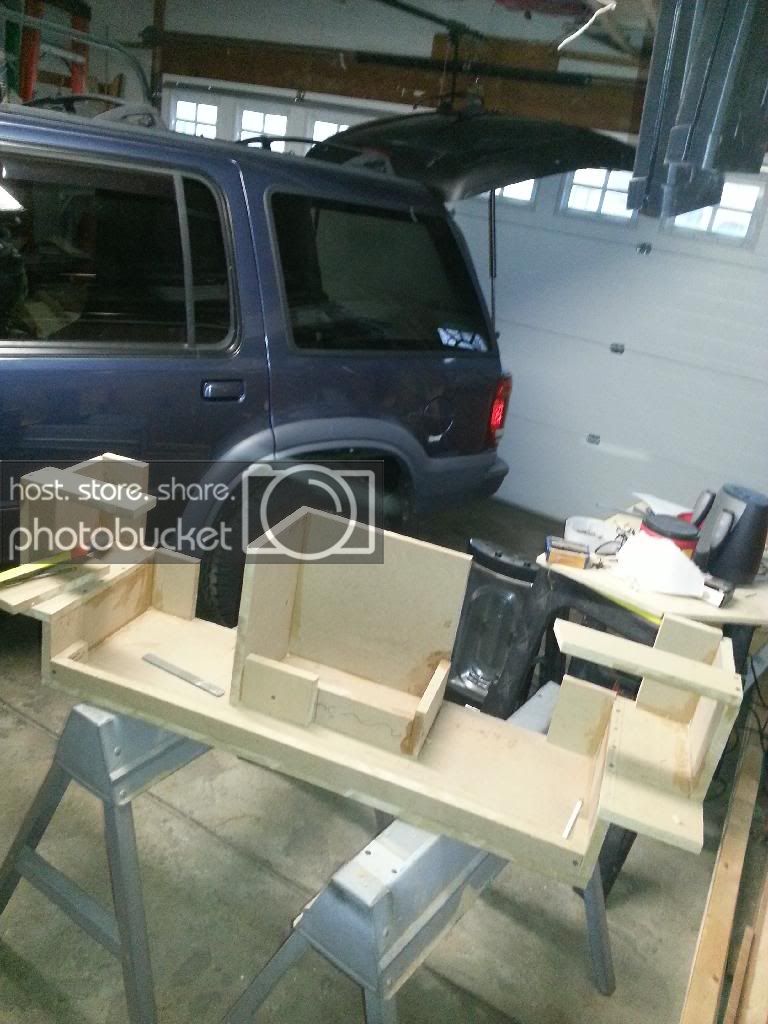
Got the port altogether

20130807_000008_zps63df8765.jpg


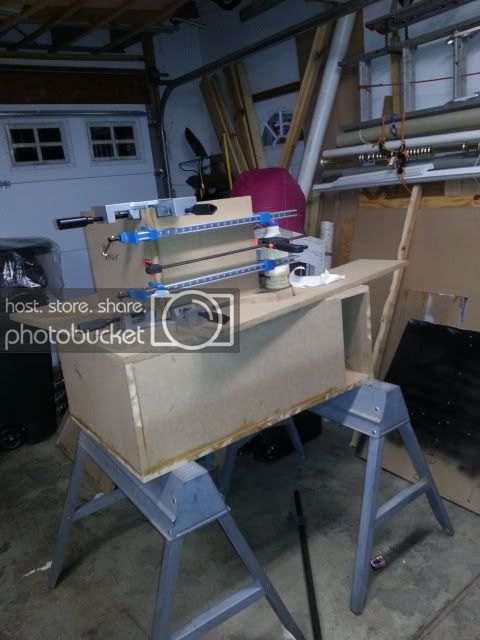
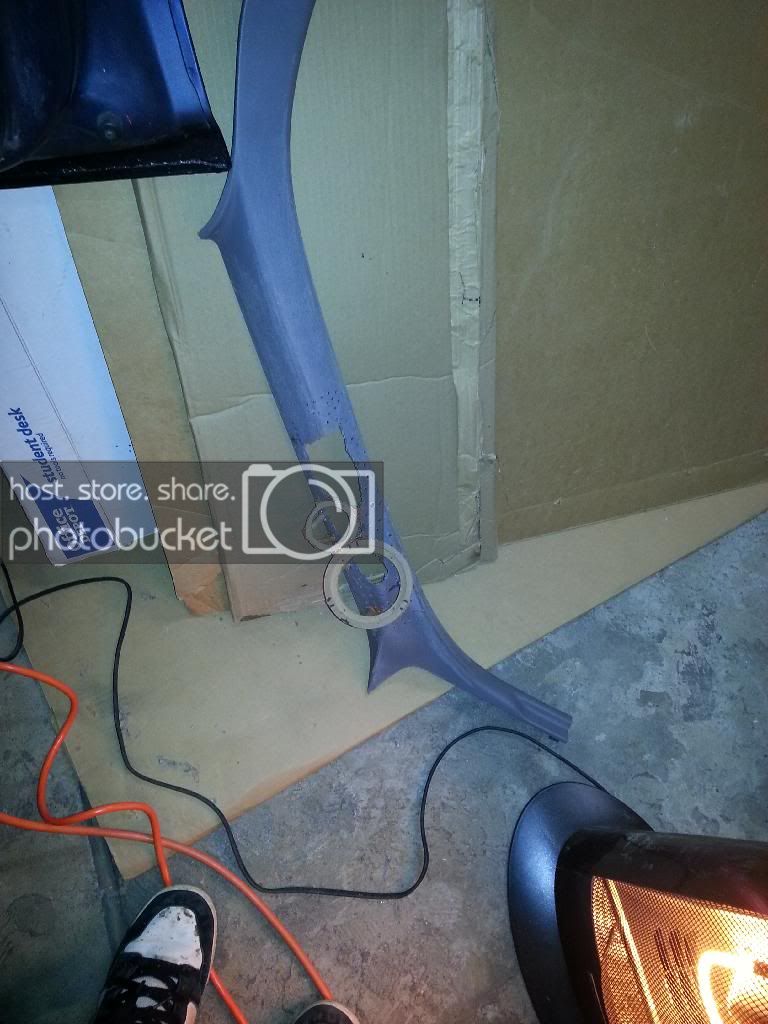
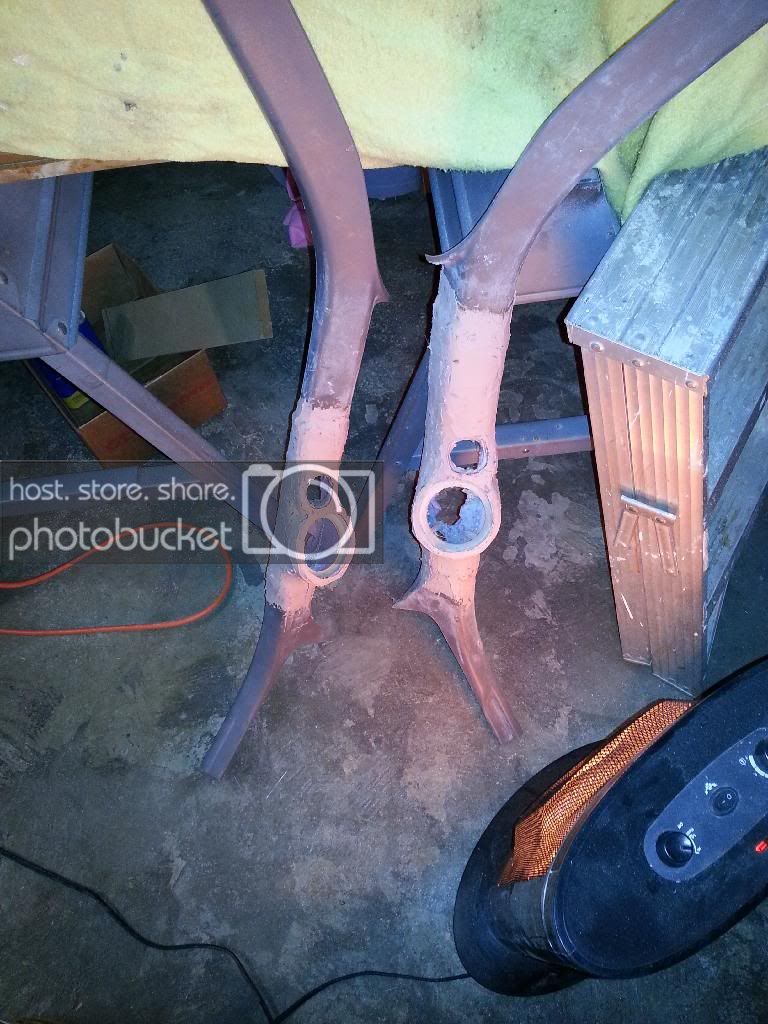
Sprayed the port with primer- not sure if I want to leave it this way, spray it black, or spray it silver (truck interior is grey, equipment is black, and accent on all of it is silver, so it's a tough decision).

20130807_193207_zps01e687f1.jpg


20130807_202143_zpsa804c8a4.jpg


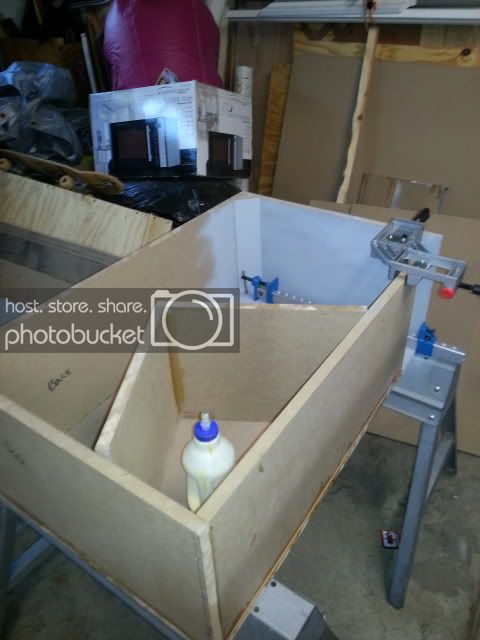
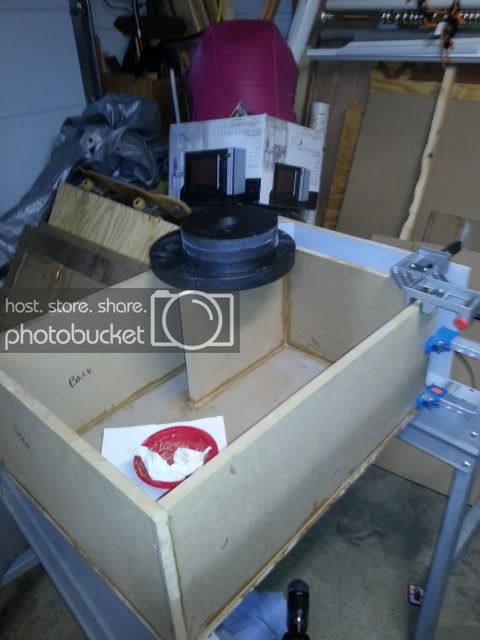
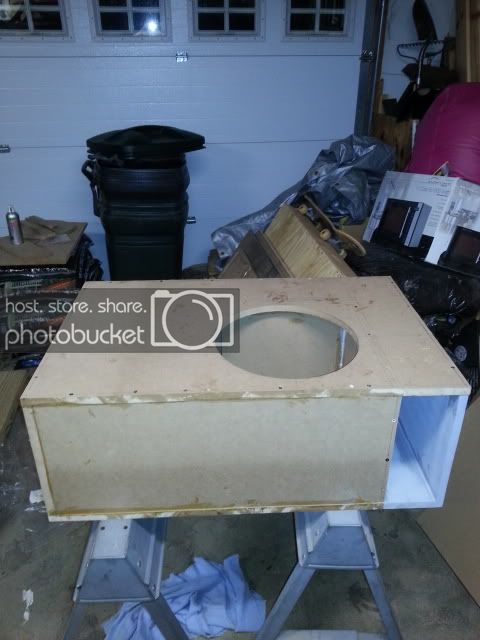
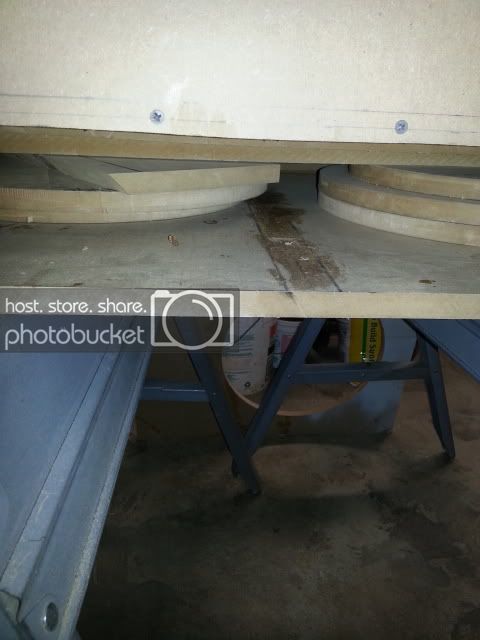
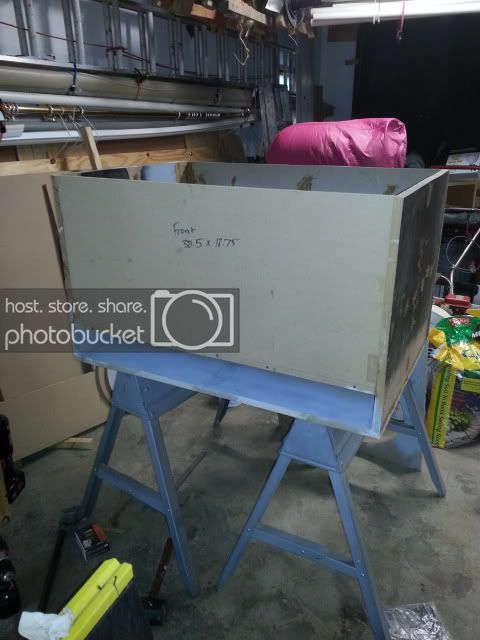
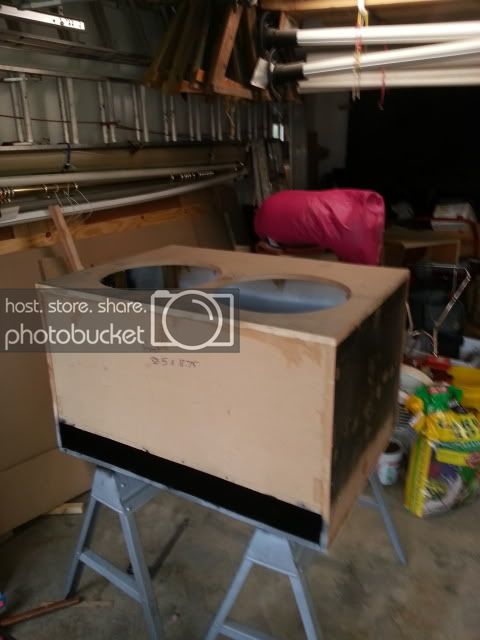
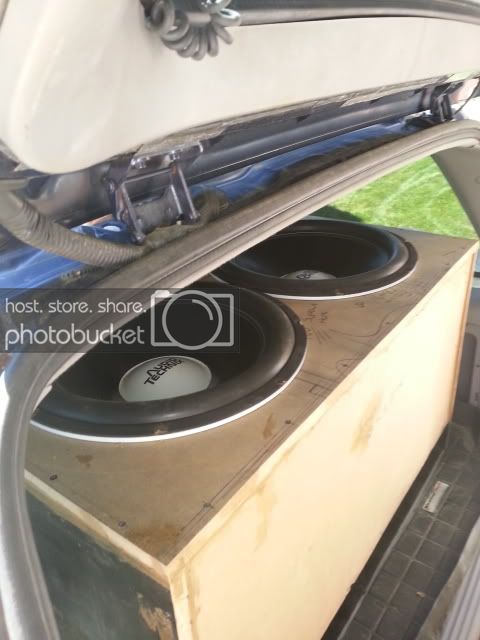
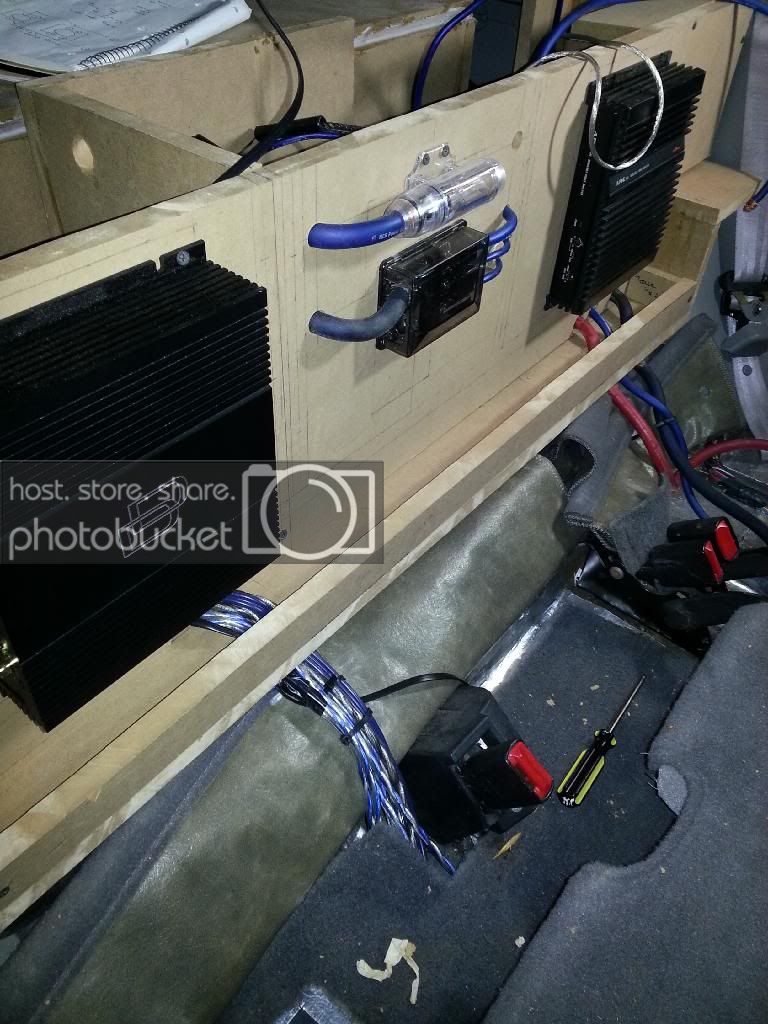
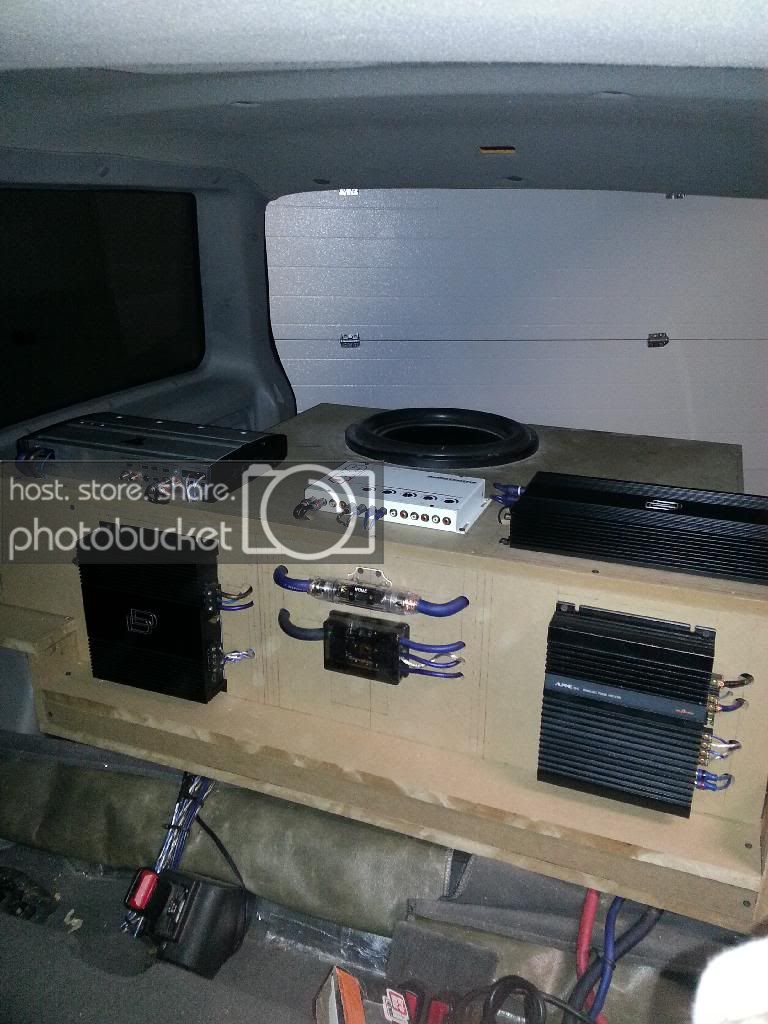
And port is in and lifting. Put some saw dust and glue between everything for now and will add caulking over it once it dries. Only things left: glue the 45 in the port, glue and screw the top baffle, and caulk the whole box up. Then I can do some testing and get started on the beauty panels

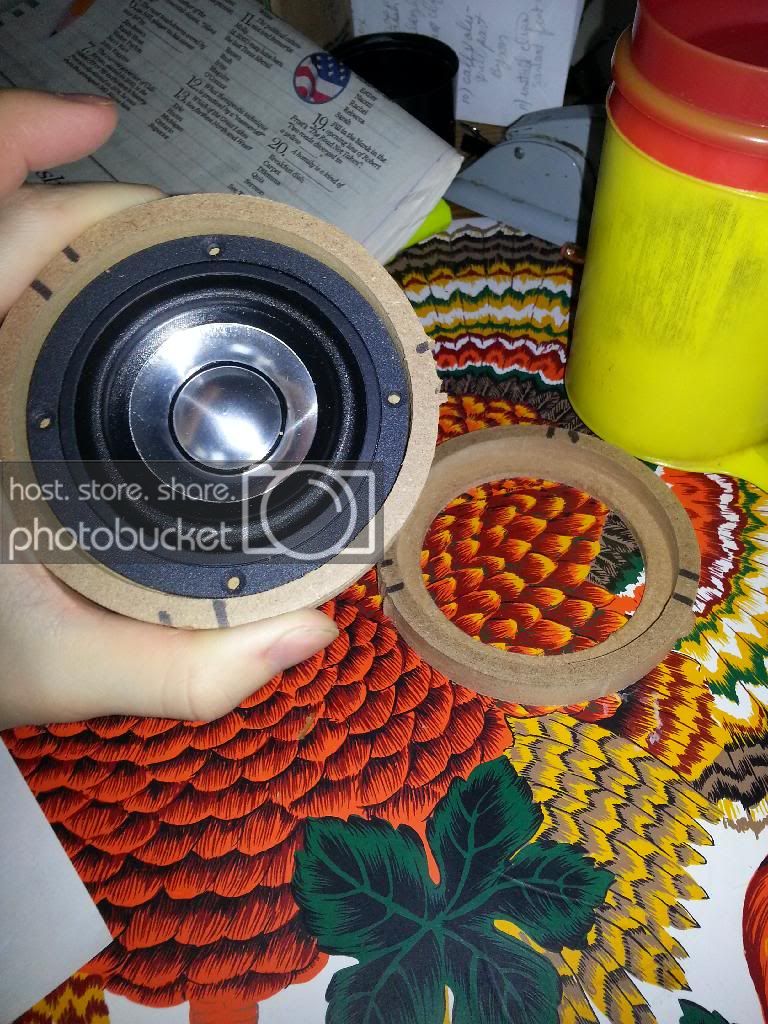
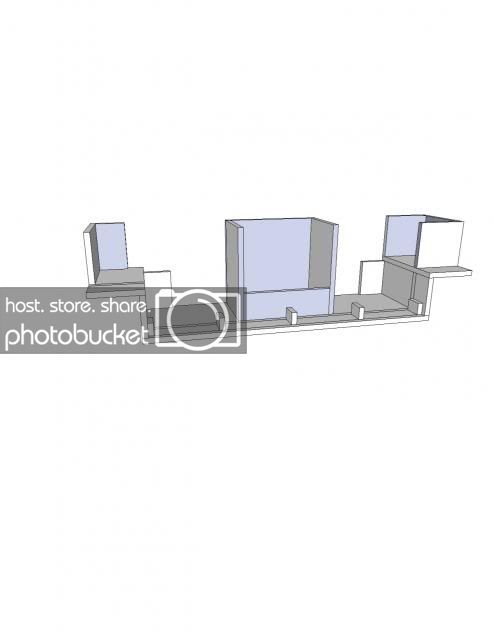
Also update on the stratos: got the design in today for the new box on those- going a little smaller than most ported boxes with them to see how they do, but it's still within what AT recommends for them. Trying to decide if I'm going to keep them or sell them. Guess I'll figure that out after I get some play time on the 5.

 
Threw in a couple extra man hours tonight to get this thing done. Mostly just 20-30 minutes of work followed by an hour of rest time to let things dry aka not a lot of work that was left to do, just time consuming:

20130808_020511_zpse3dc1ffd.jpg


20130808_020557_zpscee855cd.jpg


I typically give the caulk about 12+ hours of dry time (that's what she said)- I absolutely hate the smell of it- it's like vinegar mixed with the feeling of burning nostril hairs when I get a whiff of it from sticking my head in the box trying to make sure it's applied evenly. Should have some testing done by tomorrow night/Friday morning. If she passes the approval checklist, then it's onward to the beauty panels or off to cl and the start of another build...hoping it's not the latter.

 
Got the box and sub into the explorer today, but by the time I got everything in and the amp all set, I ha to jet. Tomorrow I'll get some testing in. From the few moments I had with it, it seemed to be decently loud. Nowhere near flexing the crap out of it with the M1c hooked up, but still enjoyable and louder than the stratos off 500watts in the 4th/9012 setup. I'll try and get some videos up if my flip is charged or I can find another one of my old video cameras.

For now, here's a pic of the box. Put some body filler on the screw holes in the front and THINK I finally have an idea of what I'm going to be doing with the cosmetics and beauty panels.

20130809_183854_zpsc93cae52.jpg


Had a little time to work on the build today. Pretty much at this point, I'm just trying to get everything in and playing and then worrying about the fine tuned stuff later i.e. beauty panels and cleaning up all my wires.

So anyone who owns an 01 explorer or some other stupid cars has the **** wiring harness issue when trying to run new speaker wire...

thedarnwiringharness_zps5f2002ab.jpg


this is literally the only thing that runs into the door sooo

had to drill into it- got a little sloppy, but I've been "advised" by the geezers in my neighborhood to not take the door off the hinge/unbolt anything, etc. That being said, nobody will help me pull the door off and I don't have any room to work in the garage atm. So attempting to drill at an angle and hope for the best is my best option right now. Got the door fine:

20130813_194929_zpsbf871469.jpg


20130811_165259_zps93cb61b6.jpg


And now I need to get the inside of the door jam done, but my drill batteries died...so I'll be working on that tomorrow. For the remainder of the time I had to work, I pretty much stuck to deadening the doors I have yet to deaden with my meh deadener (but it was cheap, so yolo still).

20130813_194850_zps635c8014.jpg


I got really hungry half way in, so I still have a lot to go tomorrow.

Started to play around with the port loading by accident as well. I had this cool idea for the amp rack, but it's going to require me to move the box up about 6 inches. I really like where it sits right now- height it perfectly aligned with below the seats and window line once I get the flush baffle on.

Anyways I originally had the start of the port 16 inches from the hatch and I came up with another idea for where the amps will go and how they'll be mounted that won't require me to lift the box. So just to test fit everything, I moved the box towards the hatch and gave the port a little over 7 inches from the hatch. Wanted to check to see if it made any difference in output or cause any issues with it being closer to the hatch. Fired her up and BOOM- output was like night and day in terms of how loud she was playing. She sounds A Lot louder with the port unloading closer to the hatch. I was happy with where I had it to start, but I was Impressed with the amount of output I'm getting off of the M1c.

It makes me wonder about how the Stratos would be in the ported enclosure I have sitting here waiting to be built, but I only want to build it if I'm selling them to someone local/I still don't like how warm my amp runs at .5 even after all the rise. We'll see though, maybe I'll get bored in a few weeks, build it, and check out how it does at 2ohms. Any who, here's a picture of the box and where the M1c is now/ WIRE SPAGHETTI.

20130813_195000_zpscee9a949.jpg


20130813_195018_zps474c4b6c.jpg


More updates to follow.

 
I have had a ridiculously terrible past few days with the build. Just bad luck after bad luck after bad luck...

so I took a break from beauty panels, finished up deadening the doors and started getting to the door speakers.

so first issue of the week- the DD CS 6.5s

20130815_155042_zps6a19d310.jpg


the xovers I have for the set are only for the tweeters...

Run the mids active? NP. I have the perfect amp to pair them with. But the tweets...Only option is to run them off the hu power ("50watts" per channel)

So while I'm trying to sleep on thurs night, I decided I wanted to use something else in the doors- something that I have passive xovers for because I don't want to run active without a good active hu (my 80prs is in the maliboom and I need to have the double din in the explorer- it's just too convenient)

Wake up on thursday and it was time to get busy on my trunk lid

20130816_153306_zps49c4c0c7.jpg


Anybody recognize dat comp se? Yup it's my HSK 165s from way back when. Super pumped to get them installed. I power up the hu, test the side I have everything drilled into and it sounds like it's going to be great! So I go to get the other mid down from the lid to test on the other side and guess what?

20130816_194329_zpsb37f8aa3.jpg


23889972.jpg


I was legit so upset. I have no idea what happened to it. The only thing I can conjure up what happened was that when the xbox was originally installed, it blew the mid. When we put it in, there was no way to control the volume and when it turned out it was ridiculously too loud. This was god knows how long ago- showing you how much I really use that xbox in my trunk. Eventually I put an rca volume knob on it, but it must have gone before then and I just never noticed.

I decided there's no use crying over spilled milk and decided I'm going to have to send it in to see how much it's going to cost to get fixed once I have another job.

So then I scraped the idea of doing a passive setup and went back to the idea of active mids. I'm to the point of putting the last screw in the mid to the door and BAM, my hand slips, screw driver punctures right through the surround in my brand new cs 6.5 mid. I started yelling and shouting and pretty much throwing a tantrum/kicking myself for allowing it to happen. Mid plays fine, but this it the first time I've EVER been careless enough to puncture a surround. I don't have pcitrues of it, just because I'm trying to forget it happened...

So finally, I'm here:

20130817_151914_zps434255b9.jpg


20130817_151802_zpsbb8e2835.jpg


And now I'm just trying to decide what I'm doing. I HAD everything hooked up and working, but I feel like the tweeters are barely audible (they aren't, but I hate the idea of HU power.) I contemplated using the crescendo 1000c4 for the mids on ch 1 and 2 and tweets on ch 3 and 4, but the hpf doesn't go past 1khz...so that's a no. The C1B goes to 5khz, but I feel like the crescendo is just going to waste in the install/I don't really have room for it in the build's amp rack.

~~~Expect to see the Crescendo 1000c4 up for sale this week/PM me if you're interested in it~~~

Tomorrow I SHOULD just put the tweets back on hu power, but instead, I'm going to grab one of my 2 channel old school amps out of another car and see how it sounds on the tweets. If it sounds good, I'm just a set of rca's and a fuse holder short of powering them.

Hopefully good news to follow in the next two days...

 
It's been a while since i last updated this thread soo0o0o let's see

Found an amp for my tweets, decided to go with my OS alpine 3542 (60x2)

Haven't built an amp rack still because I've been trying to figure out what I'm going to do for my substage. The lvl5 is nice and all, but I still just want to see what the Stratos will do in a regular slot ported box. I tried selling them locally, but either nobody wanted them without an enclosure, the 4th was too big (before I tore it down), or the person who wanted them didn't want to pay for 2 sheets of MDF for me to build a box for them (this one was the most frustrating of all)

So I said fohgettabout it and had Antonio aka Catman design me up a quick box for them. Ended up going with 9.6 net ft^3 tuned to 32hz for the box- went a little smaller because Coleman in one of the caco threads said that the 18s would do nice in 4.5-5 ft^3, so fuggit I'll try it.

Because nobody would pay for me to build the box and also because I'm not about to go spend money on 2 sheets of wood when I'm not even certain IF I'm going to keep the subs, I decided to make a "Recycled box." By that I mean I took all the pieces I could still somewhat use from the 4th order build, cut them down ,and reused whatever I could from it. The only real semi-raggity pieces were the sides- they were pretty torn up, but still useable. any extra holes from screws have been filled in with titebond/saw dust paste.

20130906_223622_zps9b3a976e.jpg


Got all the wood cut yesterday and picked up a buttload of glue

Started tossing the box together today. I've been working for the past 5-6 hours on it

20130907_003011_zps181870bf.jpg


20130907_150229_zpse7f8dfdd.jpg


Test fitting the top baffle- I should have gone about .25" more towards the ends with the baffle cutout, but I'm not going to waste any wood I don't need to for a box that I'm not sure if I'm keeping. The subs fit in there, they're just super close/baskets basically touch.

20130907_165849_zpscf14d17d.jpg


Used 4" worth of stacked wood to get the port and front level and even for 4 inches of port throughout

20130907_171223_zps54d1e9ba.jpg


20130907_184907_zps9a91c27b.jpg


anddd she's done. Just need to get some titedust paste on the inside corners, drill out holes for the bolts to wire the subs up, and then toss in the subs. I should be testing them tomorrow. Decided that I'm going to just wire them up to a 2ohm load on the m1c and give them rated power- they should do decent between the power and enclosure, so I guess we'll see tomorrow. If I decide to keep them, then I'll probably carpet and stickerbomb the box. Stay tuned for testing tomorrow.

 
Got up early before all the football and got the subs in the explorer and wired up

20130908_114816_zps63f66ce0.jpg


20130908_123341_zps51825d28.jpg


Got about 10 minutes of play time on them and here are my impressions off of 780ish watts:

-The subs sound A Lot better to me in a slot ported enclosure compared to all the space and weight I gave up for the 4th order. It just isn't worth it to me.

-The subs sound great in anywhere from 4-5ft^3 per sub for the 18" versions. Yet again a nice space saver for someone with stock suspension that doesn't want to sag. The enclosure and subs seem to weigh a little bit less than the lvl5 with the enclosure which is another plus.

-Tried to get a variety of music going on them. Tested them on some dub (nero's remix of ghosts and stuff), rap (a$ap rockie wild for the night), pop-ish (bruno mars gorilla), and older stuff (the eagles witchy woman). Everything sounded pretty good throughout the whole setup minus the alt wine I have in the tweets that I need to fix -_- I'm gonna try and throw some more music at it later including some country, trap, os rap, etc

Overall feeling about the Stratos is that I think I'm going to end up keeping them and possibly wiring them down to .5 and giving them ~1000-1100watts. For someone looking to do a low power and low budget build, these are great subs. I'm not saying they're the loudest subs I've ever heard, but for a daily daily vehicle to get me through the winter months, they get decently loud and sound great doing so in the right enclosure (4-5ft^3 per sub; I'd say probably 4.5-4.7 is around a good place to have them). Not to mention that there aren't a lot of low power 18s in the market. I'd love to eventually test out some of the 12 and 15 inch versions to see how they compare, but for now these will do it.

Now I just need to figure out what I'm going to be doing as far as the amp rack and then I should be pretty set for winter. Stay tuned.

 
Finally moved my build log over to MAF, so figured I'd update this as well...

CURRENT UPDATES

So last time I updated this was in September. Since then:

Got an offer I couldn't refuse on the AT Stratos. Had to sell because I already have too many subs. Kid claims he shattered the rear glass on his explorer, but I still highly doubt that's the case, taking into consideration that he couldn't even figure out how to wire them to a 2 ohm load.

My stock alt started taking a dump right after I sold the stratos (we're talking chilling between 11.9 and 11.5 without any audio hooked up). Immediately made this purchase:

20131118_170220_zps6bonwghx.jpg


20131118_172438_zpsqfpq8kxc.jpg


It's dope. Here's what it looks like installed. Cleanest thing under that hood.

20131125_161628_zpsljgneufs.jpg


I also upgraded all the wire under the hood finally to the DIYMA oversized 1/0 wire I purchased wayyyy back when they had that sale.

20131125_161619_zpskjqvoarg.jpg


Always chilling at 14.2 now and it's amazing.

Before I update this on what's inside the explorer now, I think it's time to update this on things that HELD UP my build. I've had A LOT of issues with this vehicle and dry rot. it has not been my friend. At some point during its previous ownership to my parents, my dad tried to fix things on it with globs and globs of Body Filler (anyone who's friends with me on FB knows about this and there's been some great jokes at his automobile fixing techniques expense). Any who, here's the super fudged tailgate I've had to deal with (literally the whole bottom is straight body filler):

20131023_182646_zps8cgouzei.jpg


Truck then got to the point where it was rotting right through and wouldn't even lock (yep can even unlock the window with ease and possibly some tetanus)

20131216_082645_zpstkmmksdc.jpg


The Ford way to fix it

20131222_153642_zpspzup7w2v.jpg


The other major issue was the rear driver's side fender. completely rotted away thanks to the winters we have here and the salt. Here's after I removed my dad's mess of straight bondo.

20131105_155843_zps3rlvw1ni.jpg


I've got pictures of what it used to look like, and it was BAD. Didn't even look like a fender at all. There's also some more dry rot in that picture...

20131105_192431_zpsgjclg91m.jpg


Yum. So me being me, I Wanted to have everything fixed the correct way with torching off all the bad and welding on some new sheet metal, but I don't have the tools, nor is the truck worth that kind of money at this point to fix it that way, so I fixed it as best I could with a ton of fiberglassing and cleaning it up with a small amount of bondo. My dad saw what I was doing and Tried to help, but he doesn't understand the concept of "a little bit of bondo goes a long way" SO here's what it looked like AFTER I sanded off all the bondo he slapped on it when I was out running errands one day.

20131119_203738_zpsytvsuc0t.jpg


At some point in time I got it to a finished quality, primed it and dipped it and never took any pictures of all the rust i had taken off the rest of the truck.

 
Bottom of the doors were beginning to accumulate some rust at the bottom, so I sanded it off, bondo'd, primed, and dipped:

20131128_042544_zps97a2h2hu.jpg


End result:

20131203_154345_zpsa6hcoght.jpg


I dipped a bunch of other things on the explorer, but I don't have any pictures of it atm. Will have to take some pictures once the temp goes to 32 again aka not until later this week.

I also purchased a new tailgate back in November that has been sitting in the garage. Kind of pissed because I bought it off ebay, was told by the yard I bought it from that it was in AA condition aka best of the best with no minor defects and fully functional, but it arrived with a huge scratch/dent combo on one side and the rear wiper motor is broken. It looks better than what I had on there thought:

20131229_164431_zpsek1campa.jpg


Have the whole tailgate dipped blacked, not because it looks good, but because it keep all the salt and moisture off the paint aka no rusted away tailgate. Need to get pictures of this as well.

I'll update this in the afternoon tomorrow with all the audio stuff when I wake up. Need to get some food and sleep for now. Also have the hiccups.

 
AD: NEW Audioz/Current Build As of 1/21/14

Audio Update:

So still haven't had the M3 8s fixed, which means...

20131027_173100_zps0a7n7mrv.jpg


Lvl 5 went back in.

Also decided I really wasn't feeling the CS 6.5s. I was having some major issues with alt whine because I didn't have a nice single speaker wire that could be ran into a passive crossover that would splice the frequencies for the woofer and the tweet (aka one +/- line in to wf +/- and tw +/-) and as you know about the previous run in with the doors, I couldn't fit another run of it in. So I had to basically cut into the factory speaker wire between the door and the HU to get the tweets amped.

Any-who, it ****** and I couldn't stand the amount of feedback I was getting from the way I had things.

Decided to get these:

20131016_163903_zpsrv4zbwty.jpg


They're ****

20131016_192525_zpsrxebycbi.jpg


I also got some more power for them too...

20131017_132151_zpsvajtkuvd.jpg


150x2 @ 1-4ohms is a beautiful thing. I love this amp and would totally switch over to more JL slash or HD series given the chance to.

Wasn't even going to attempt to screw these into the doors (which I will be redoing come spring) without added support. originally I had some ghetto pieces of mdf blocks holding them in, but they ****** and the holes also needed to be cut a little bigger

20131020_155231_zpspri3qtsj.jpg


20131020_173208_zpsjl2kc0ap.jpg


Made these, which I should have done from the beginning, but didn't have a proper router and jig setup to do so, but it's fixed so it's all good for now.

SO originally the plan was to do a direct swap from the DD comps to the JBLs. Of course nothing is that easy though. The mids fit in the door with a little cutting, but the mounts for the tweeters were another story. the T2 mounts were larger than the JBL's aka they just fell right through the panel's cutout when I went to test fit them. So no go there. Have to leave the tweets in the door to keep them sealed up too.

Decided to just leave the T2s in and run them, figure something out with the JBLs later on down the line and just get everything back to playing.

HATED the passive crossovers. Compared to how I had the DDs ran active (minus the alt whine), the crossovers felt like they were extremely limiting in the bandwidth freq.

On top of that, the T2 tweets were also distorting on higher frequencies due to being able to handle the power they were getting. I didn't want them in there regardless, so this was just getting to the straw that broke the camels back point...

 
At this point, I decided to just say forget it- going back to to active with a vengeance. Plan was to move the tweets because A) I couldn't get a nice run into the door and B) there's better place to put them.

Thought it might also be a good idea, considering the surplus on 2 channel amps I had and an AudioControl 4XS that I bought back in 2011 that i've never used, to buy some mid range drivers for that added bandwidth (first time having dedicated midrange speakers in a car). After reading a ton of reviews on diyma, I decided to buy a pair of Fountek fr88ex drivers- they had great reviews and were within my price range.

Onto the pictures:

The very FIRST thing I did was test out that all the amps worked and that my plan would work.

20131211_213450_zpsoctfgyiz.jpg


Plan was:

JBL Mids > JL 300/2

JBL Tweets > DD C1b

Fountek Full Range drivers > Alpine 3542

20131212_143820_zpstwlvfxfz.jpg


Here are the founteks and the mdf flush mounted rings I made for them

Here's the crappy a pillars I have to work with- they're super limited in size/space (especially on the driver's side) and I wanted to mount them in a way where I wouldn't block any of my vision

20131214_224541_zpszzqp1ju2.jpg


Also should mention due to the limited amount of space, the drivers would be best mounted on axis. It was a good choice.

A LOT OF FRUSTRATION went into this part of the build. Trying to angle, hot glue, test to see if the FR driver was going to fit between the pillar and this stupid piece of metal that was in the way, and make sure that everything was Goldie Locks took FOREVER. I spent about 4 hours trying to get everything right, then tearing everything down, redoing, cutting more of the pillar away, rinse and repeat. Eventually I got the angles down correctly and decided they were as good as they could get.

20131214_223604_zpsvsjrytga.jpg


Originally started them up high and then gradually made them go lower. also had to cut away some of the pillar so that they would look alright once they were wrapped up and glassed.

20131214_223744_zpsinucd1wm.jpg


Believe they were too close to the windshield here, so I had to pull them off and redo things AGAIN.

Frustration made me skip a lot of the next few steps (i.e. the finished angles, wrapping and so on). So here's what they looked liek after a coat of resin and hardener

Looked like loose B-hole. I know. Speaking of which, new Workaholics tonight. Don't forget to watch that ish.

20131216_223242_zpsr7t38in9.jpg


20131216_223328_zpsucw9i9hx.jpg


Went back after this, chopped into them. Made some cuts to glass over and basically give them a better shape. Idk why I only have pictures of the driver's side unfinished. Though I took some of the passeneger side, but I guess not....

After some more layers of glass and stuff, I got to the filler stage...once again, thought I took more pictures than I did, but I didn't. Here's the first coat on them

20131222_035645_zpsqqdn2ujl.jpg


and here's after a few hours of sanding...

20131225_033252_zpsohtcvewr.jpg


Decided that I Wanted to wrap these in some nice vinyl, but that funds are tight on supplies and I want to buy an upholstery pneumatic stapler before I wrap them. Until then, it's plasti dip and stickers with A LOT of clear this time around. Went with matte clear this time and used a ton of it (2.5 cans I believe). one sticker on the driver's side didn't go down all the way, but other than that, they aren't going anywhere until I wrap them.

Finished-ish product

20140103_200158_zpssniu975k.jpg


20140103_202346_zps4bbaaqmc.jpg


20140103_202406_zpsfifhhepg.jpg


20140103_202537_zpszl4encac.jpg


They look like they're mounted awkwardly with angles, but I assure you that they are on axis, aimed correctly, and sound Amazing. By far the largest difference in everything that I've done to the explorer was doing this. All my music sounds rich and full now instead of bland. Makes me appreciate the country and dub a little more (yeah opposite ends of the spectrum, but I listen to both in my explorer every day I drive it).

I love it so much that I take it out in blizzards to drive slow and listen to my tunes. I think this is where I'm moving more to an SQ based system 4lyfe build and I'm going to be moving out of trying to just be loud aka I'm probably going to have the Malibu when I pull it out of storage.

Next update is pretty recent: Getting everything tidy and getting rid of Spaghetti that is my backseat/trunk.

 
So let's see...have a ton of spaghetti in the back of explorer now..so many wires that have yet to be sized down for the final install...

Made this all up in sketchup- took the dimensions out so that it's easier to look at. If anyone has an explorer and wants to do the exact same setup or mock up the old one hit me up and I can email you the .skp's with all the dimensions.

Here's the inside where the HC2400 has a place to stay instead of lounging in the cargo area

insidenodimensions_zpsaedf1c8f.jpg


and the outside

Amprackfullnodimensions_zps180745fa.jpg


that front part that protrudes keeps all the wires hidden when the seats are folded down. also keeps everything nice and neat.

Changed a few things brace wise and added in more bracing in a few spots from the images as well

Onward to building:

20140113_000653_zpsm6m0wvvm.jpg


Never trust the dimensions of a battery without measuring it. had to use a few scrap pieces of wood to fix this problem, but was actually a good thing so that getting to the battery was a lot easier.

20140113_162306_zpsotfuzn1n.jpg


Sides are on. Stopped taking pictures until I had the DD, Alpine and fuse holders mounted. That part slides in and out (after I loosen 4 screws) to make life easy if I need to take it apart:

20140114_021202_zpsopcof1th.jpg


Next thing was drilling a ton of holes so I could run all the wires through it

20140115_020834_zpsyjqcmblz.jpg


Dem wires

20140115_020854_zpsfffwug0c.jpg


I've got more pictures of all this, but I don't think they have any point and I'm trying to keep it to ~10 pics per post so I can fit them on the sites that limit it to that...I'm at 7 so far i believe.

Anndddddd the tops on, amps mounted. this took FOREVER to do. Mostly because I didn't bother to remove the lvl5 to wire things up:

20140115_060931_zpsdrzlipwi.jpg


20140115_061037_zpsfxqgj9b5.jpg


I HAZ REAR SEATING IN A VEHICLE AGAIN

20140115_145238_zpsi9fvicnn.jpg


Activity
No one is currently typing a reply...
Old Thread: Please note, there have been no replies in this thread for over 3 years!
Content in this thread may no longer be relevant.
Perhaps it would be better to start a new thread instead.

Similar threads

Right outside of Southern Highlands. Decatur and Blue Diamond road.
10
2K
This would go a long way to alleviating the dimming issue, up to around 4000 watts. It can handle 100A continuous and up to 285A 7 second burst...
6
470
I had some 9500 series 12s by MTX that were some slamming subs!! Should have kept those along with those torpedo RE XXX 12s
15
800

About this thread

slammedincouch

10+ year member
CarAudio.com Elite
Thread starter
slammedincouch
Joined
Location
Buffalo, NY
Start date
Participants
Who Replied
Replies
82
Views
22,318
Last reply date
Last reply from
slammedincouch
audio3.jpg

pfft

    May 1, 2024
  • 0
  • 0
audio2.jpg

pfft

    May 1, 2024
  • 0
  • 0

Latest topics

Top