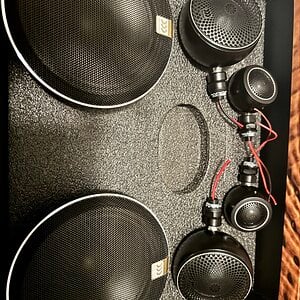
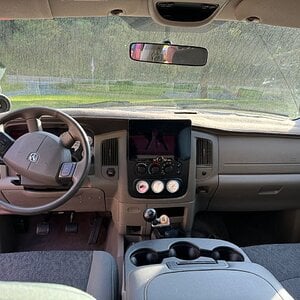
My 07 build, enjoy :D

SPL140.2
5,000+ posts

Team DefJ
5,344
0
NY
The car:

1991 Honda CRX HF I purchased on Ebay. It is a show car. It is slammed to the pavement and has shaved door handles, shaved gas tank, shaved rain drains on the top. It has a door poppers and the gas tank is in the inside, you can see it in the pics. The rims are 17's.

These pics are the way the car was when I purchased it.


My 1st step was replacing the factory head unit with my pioneer


Since i bought the rex and they shaved off everything even the attenna I had to put one on but still keep the clean outside, so I purchased this amplified attena and installed it inside :rock:


So since the head unit was replaced and attena the next step was to order the wiring/batt/alternator. Some of the wiring im using is out of my neon also.

All wiring, ring terminals all KNUKONCEPTZ the quality and customer service just cant be beat for the $$$$


Know for the batt, i had 1 kinetik 2400 in the neon so im using that plus i ordered another one for IASCA, TNESPL orgs.


For the alternator, Im a huge fan of Dom Iraggi, his work is just kick @ss!!

This is a direct bolt on 200amp alternator to stay within the rules for the 2 orgs mentioned above. Its 200amps @ 2krpm and 120amps @ idle


Almost forgot, in order to compete in all 3 sanctions i needed something so i could remove the 2nd battery easily, the solution is a buss bar in the back. So I ordered a large 1/4" flat stock copper bar off of ebay really, really cheap (was lucky). It is weathered but with a little sand paper itll look new. I asked the seller to cut it in half for me so thats just a tad more time it saved me. My friend Tyler aka Sutterkain went in on halves so he gets the other half.


since I ordered a bunch for the spl setup it was time todo the front end, I ordered a kit off of ebay including ball joints, tie rods, control arms, and stabalizer bushing kit.

While installing those, I noticed the cv boot was torn and was on its last leg, so I ended up replacing the drivers half main shaft //content.invisioncic.com/y282845/emoticons/frown.gif.a3531fa0534503350665a1e957861287.gif

All done and what a pain some bolts and nuts were siezed up but after using torches and breaker bars and cursin and swearing and a few 12 packs later we finished it up //content.invisioncic.com/y282845/emoticons/woot.gif.aaa6090e619a97b6090d16dd863c5a69.gif


//content.invisioncic.com/y282845/emoticons/woot.gif.aaa6090e619a97b6090d16dd863c5a69.gif :bananapowerslide:

Well since i had the tires off i noticed a huge tire wear on the inside front of the tires all 4 of them. So I had to get new tires //content.invisioncic.com/y282845/emoticons/frown.gif.a3531fa0534503350665a1e957861287.gif These are 205-40-r17 tires //content.invisioncic.com/y282845/emoticons/biggrin.gif.d71a5d36fcbab170f2364c9f2e3946cb.gif

Heres the tire thats on the rims now, cheap wanli's


Heres the new tires, lexani 3000 made by nexen they have a thick agressive tread desing on them //content.invisioncic.com/y282845/emoticons/biggrin.gif.d71a5d36fcbab170f2364c9f2e3946cb.gif


The reason it was wearing so bad on the inside edge of the tire is because when the original owner slammed it, they never purchased any camber kits for the front and rear of the car, so I just ordered camber kits for the front and rear of the car.

 
The alternator was one of the biggest pains ive had in a long time //content.invisioncic.com/y282845/emoticons/frown.gif.a3531fa0534503350665a1e957861287.gif At first i took the alternator bracket off, and what do you know? the bracket was broke //content.invisioncic.com/y282845/emoticons/frown.gif.a3531fa0534503350665a1e957861287.gif so again I luckily found one off of ebay cheap, saved me from going to the junkyard in the snow //content.invisioncic.com/y282845/emoticons/biggrin.gif.d71a5d36fcbab170f2364c9f2e3946cb.gif So I got the bracket off and took off all the wires and yep it wont come out //content.invisioncic.com/y282845/emoticons/frown.gif.a3531fa0534503350665a1e957861287.gif The new half main shaft is bigger than the stock and it took up the clearance that the alternator needed to slide out.

So I had to take the nuckle assembly off again and pulled up the lower ball joint with a pickle fork and yep ripped the rubber which holds the grease on the brand new ball joint(yep have to replace yet again). Yep a 20 min job turns into 5 hrs. //content.invisioncic.com/y282845/emoticons/frown.gif.a3531fa0534503350665a1e957861287.gif So after more swearing and cursing the alternator is out, slid the new up and used the new bracket got the new belt and went to tighten the belt... Yep the bolt broke inside the alternator //content.invisioncic.com/y282845/emoticons/frown.gif.a3531fa0534503350665a1e957861287.gif so i grabbed the drill and just started to drill and it popped out which was the best thing that happend that day. I went to advanced auto got some new bolts and FINALLY got it in and tightend down. //content.invisioncic.com/y282845/emoticons/woot.gif.aaa6090e619a97b6090d16dd863c5a69.gif

Broken bracket


//content.invisioncic.com/y282845/emoticons/fyi.gif.9f1f679348da7204ce960cfc74bca8e0.gif I hate it when the easy jobs turn into a nightmare!!

 
So I after that whole alternator mess, i needed a break!! so the ol lady ordered me some alteeza tailights so i put those on and started tinting the windows with 2.5% extreme limo tint. //content.invisioncic.com/y282845/emoticons/biggrin.gif.d71a5d36fcbab170f2364c9f2e3946cb.gif


heres a pic of the tint, I did the rear window and the two side rear windows, plus a strip on the front windsheild, ill take a pic of that later on.


while ive been doing all these projects ive been making my enclosure which is a slow procedure, i just like to take my time on it, im in no big hurry. So when im tired of messin with the car i spend time on my enclosure. I cant take all the credit on this enclosure idea, DJ and Jermiah Ledgerwood has been helping me out, and I give them major props and thanks!!!

I purchased 2 12" concrete pillar forms from home depot, these are the forms for my enclosure.


So I got the forms and needed wood pieces for the top and bottom, so I cut out 12.5" diameter circles and took a router bit to them and came up with these


Than its time for fiberglassin


this is the 5th layer


I noticed i had air pockets so I took the grinder out and grinded till the pocket were exposed, im gonna fill them in with resin and strands thats where I'm at with the enclosure thus far, than put 2 more layers on it sand it out smooth and apply body filler, sand that nice and paint them black, i'll show pics as the progress goes.

Im using 2- 6" precision ports externally 1 port per tube, the can of filler almost fits in it //content.invisioncic.com/y282845/emoticons/biggrin.gif.d71a5d36fcbab170f2364c9f2e3946cb.gif


The ol lady took the kids for a saturday trip so I had some time in the garage to start some of the runs of wire.


//content.invisioncic.com/y282845/emoticons/fyi.gif.9f1f679348da7204ce960cfc74bca8e0.gif I vice is the best way to crimp 1/0 ring terminals, Ive used hand crimpers, hammer crimpers.... My opinnion the vice just kicks @ss. So i have 5 runs of power right now, when the weather warms up i have 2 more runs to take out of the neon to put in. I had to drill a few holes thru that bracket that the seat holds, I used wire loom to protect the wire. Thats where im at right now. Its gettin there slowly but surely //content.invisioncic.com/y282845/emoticons/biggrin.gif.d71a5d36fcbab170f2364c9f2e3946cb.gif

 
heres a pic of the enclosure after i grinded all the air pockets out


This is what i accomplished a couple of weeks ago //content.invisioncic.com/y282845/emoticons/biggrin.gif.d71a5d36fcbab170f2364c9f2e3946cb.gif I had to replace the radiator cause well look at the old one lol


and the new //content.invisioncic.com/y282845/emoticons/biggrin.gif.d71a5d36fcbab170f2364c9f2e3946cb.gif


thanks to jermey smithers aka Defj165 and tyler galanda aka Sutterkain for stoppin in and getting there hands dirty //content.invisioncic.com/y282845/emoticons/biggrin.gif.d71a5d36fcbab170f2364c9f2e3946cb.gif

more to come....

 
3-10-07

well got the 2 runs of ground wire ran, put back the seat/carpet/plastic hatch pieces, ran the rca and remote wire. A few friends showed up with some beer so it was a good time to put some of the stickers up on the rex and finally grinded out both of the spare tire brackets. Now I just need the big skull on the rear window //content.invisioncic.com/y282845/emoticons/biggrin.gif.d71a5d36fcbab170f2364c9f2e3946cb.gif:rock:


3-13-07

2 pics of the things I accomplished today. Finally the last 2 tires mounted and balanced //content.invisioncic.com/y282845/emoticons/woot.gif.aaa6090e619a97b6090d16dd863c5a69.gif


when I had the passanger tire off I changed the manual tranny fluid and noticed the boot for the cv joint had no clamp and grease was comin out so i threw a hose clamp on her //content.invisioncic.com/y282845/emoticons/biggrin.gif.d71a5d36fcbab170f2364c9f2e3946cb.gif


I was hopin the camber kit was here today but nope not yet //content.invisioncic.com/y282845/emoticons/frown.gif.a3531fa0534503350665a1e957861287.gif

 
Finally got the camber kit in today //content.invisioncic.com/y282845/emoticons/woot.gif.aaa6090e619a97b6090d16dd863c5a69.gif


3-16-07

well ups just came, yep fast shipping by knukonceptz, ordered 40ft of 1/0 kollosus silver to finish the wiring, now I will have equal # of runs both positive and negative //content.invisioncic.com/y282845/emoticons/woot.gif.aaa6090e619a97b6090d16dd863c5a69.gif Also there was a surprise in the box //content.invisioncic.com/y282845/emoticons/biggrin.gif.d71a5d36fcbab170f2364c9f2e3946cb.gif


Again id like to thank Bill for the great product and fast shippin and the T-shirt //content.invisioncic.com/y282845/emoticons/woot.gif.aaa6090e619a97b6090d16dd863c5a69.gif Looks like the weekend will be a busy one //content.invisioncic.com/y282845/emoticons/biggrin.gif.d71a5d36fcbab170f2364c9f2e3946cb.gif I have to install the camber kit, drain the manual tranny fluid, take out the seats once more and run 3 more runs of ground to the back, Im gonna take Jermiah25 and Bills advice, i was only gonna keep the 2 runs of ground and use the chassis to finish the grounds up, but decided to take there wisdom and run 3 more runs, cant wait to get started //content.invisioncic.com/y282845/emoticons/biggrin.gif.d71a5d36fcbab170f2364c9f2e3946cb.gif

 
3-17-07

Got the manual transmission fluid changed //content.invisioncic.com/y282845/emoticons/woot.gif.aaa6090e619a97b6090d16dd863c5a69.gif

installed the front camber kit which wasnt that bad to install. The rear camber kit well thats another story lol. Its basically the rear upper control arm which attaches to the body and the other to wheel housing. Well the bolt which attaches the wheel housing, both sides were seized up, tried torches, wd40 everything i could think of. On the left rear side i used a breaker bar and yep bolt head snapped off //content.invisioncic.com/y282845/emoticons/frown.gif.a3531fa0534503350665a1e957861287.gif so than i had to take the grinder out and grind the other end off and shimmy the control arm end off. I had to run to home depot to get another bolt, washers. Got that all installed. Than on the right rear side, yep same fn thing happend //content.invisioncic.com/y282845/emoticons/frown.gif.a3531fa0534503350665a1e957861287.gif grinded everything again now i have to wait till tomorrow to get another bolt... This car is starting to be a real big pain in the @ss. No wiring today //content.invisioncic.com/y282845/emoticons/frown.gif.a3531fa0534503350665a1e957861287.gif

Heres some pic of the front camber kit


Here is the grinded out wheel housing


Here is the driver side rear arm, need to pick up the bolt tommorow


Here is the passanger side rear all installed


3-18-07

Well Im sick and dont feel good so all I did today was went and got another bolt,nut and washers for the last rear drivers side camber kit. Thats all I felt like doing today //content.invisioncic.com/y282845/emoticons/frown.gif.a3531fa0534503350665a1e957861287.gif I hate being sick.

All installed, FINALLY //content.invisioncic.com/y282845/emoticons/woot.gif.aaa6090e619a97b6090d16dd863c5a69.gif


Heres my other problem //content.invisioncic.com/y282845/emoticons/frown.gif.a3531fa0534503350665a1e957861287.gif

drivers side the wheels are straight but look at the passangers side //content.invisioncic.com/y282845/emoticons/frown.gif.a3531fa0534503350665a1e957861287.gif


Im gonna have to set the toe as close as I can so both tires are straight, I just got to find an alignment shop thats close so i dont chew up the new tires. Hopefully next weekend I can finish up the negative wiring, put the other kinetik batt in and start working on the enclosures again. :rock:

 
Activity
No one is currently typing a reply...
Old Thread: Please note, there have been no replies in this thread for over 3 years!
Content in this thread may no longer be relevant.
Perhaps it would be better to start a new thread instead.

Similar threads

Well, I've owned probably over 100 different drivers in the last 40 years and almost every single speaker in the NVX line-up over the last 8...
16
662
https://www.youtube.com/@therealmatty_s/videos
0
395
I think you're gonna have to get good with fiberglass or something, or find someone with a 3d laser scanner that can 3d print or mold you some...
7
853
I got to message a DD woofer builder a decent bit my last stent of box designing; they would send me designs to do for or with individual...
5
735
Currently Audison amps 500.1 and 4.300 with kappa 90csx 6x9 component set. Pair of morel 6.5 rear and a single 10” alpine type R.
7
805

About this thread

SPL140.2

5,000+ posts
Team DefJ
Thread starter
SPL140.2
Joined
Location
NY
Start date
Participants
Who Replied
Replies
207
Views
19,694
Last reply date
Last reply from
SPL140.2
IMG_1685.jpeg

chipss36

    Apr 26, 2024
  • 0
  • 0
IMG_0925.jpeg

GoldCountryCA

    Apr 26, 2024
  • 0
  • 0

Latest topics

Top