VW Caddy for SPL from Ukraine !

Bratishev_Artem

CarAudio.com Newbie
23
13
Ukraine
Hi, i'm from Ukraine and my english so-so....
but I want to share my project that we are doing by our AAC team, I would like to hear your comments.
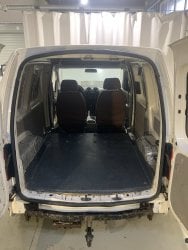
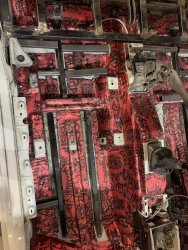
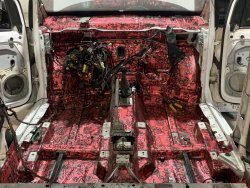
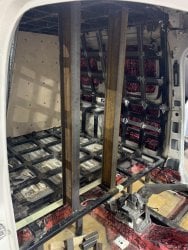
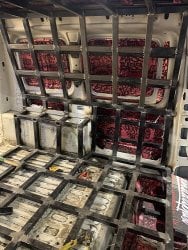
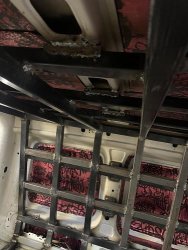
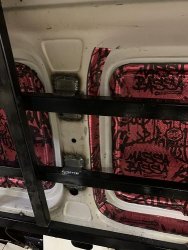
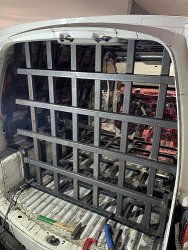
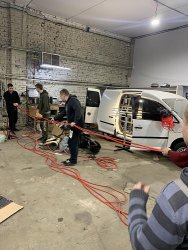
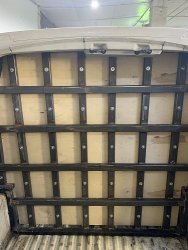
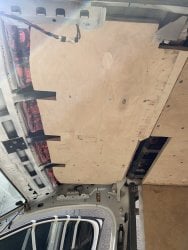
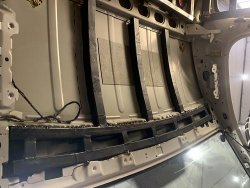
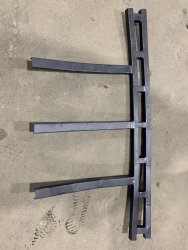
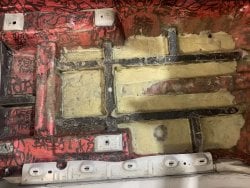
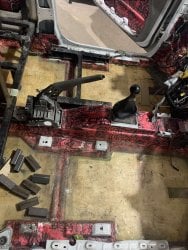
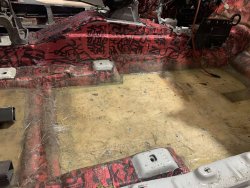
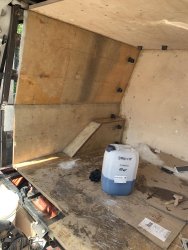
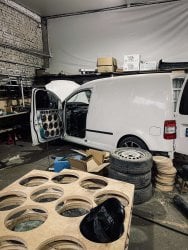
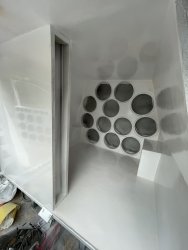
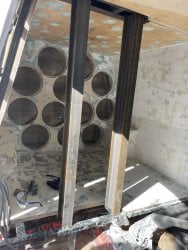
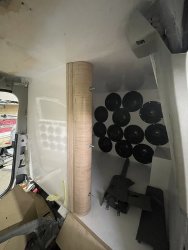
The first stage of work is the dismantling of the entire cabin, the removal of the old Soundproofing, which is not suitable for our tasks. Along with this, the removal of the bumpers will be replaced, the car will not only be interesting inside but also outside.
 

Attachments

  • изображение_viber_2021-09-03_14-10-36.jpg
    изображение_viber_2021-09-03_14-10-36.jpg
    222.6 KB · Views: 55
  • 1235.jpg
    1235.jpg
    231.2 KB · Views: 87
  • 7235.jpg
    7235.jpg
    227.5 KB · Views: 81
In the car, the design was chosen BP-4. 4th order bandpass.
What is BP4 - one side of the speaker is closed in a sealed volume, the other side plays into the camera - after the camera is a port.
Despite the fact that there will be a cage in the caddy, the whole machine is subject to the terrible influence of parasitic resonances, so all the panels to which it will be difficult to get to after welding - we use the best material for these purposes.
STP Massa Bassa is a sandwich of polymer (mastic) and bitumen layer. EATH, the material works both as additional stiffness and quenching due to viscosity. + layer of aluminum foil. It is difficult to work with it, the application of the material implies heating the material and the knowledge of the installer (what to do with it) and labor-intensive rolling, but efficiency is above all! the effectiveness of the material, especially after a day, is above all praise
We rolled it up where we saw a need for it, let's go for the metal!
PURCHASED:
Profile 30 * 40, thickness 2mm + I-beams and a huge amount of cutting wheels, wires for welding, consumables and other trifles ...
After that, we invite a "welding engineer" for a consultation on rigidity and a discussion of the importance of applying knowledge from strength materials .....
 

Attachments

  • изображение_viber_2021-03-02_17-39-26.jpg
    изображение_viber_2021-03-02_17-39-26.jpg
    246.4 KB · Views: 70
  • 1611230479125092.jpg
    1611230479125092.jpg
    598.7 KB · Views: 106
  • изображение_viber_2021-03-02_17-38-37.jpg
    изображение_viber_2021-03-02_17-38-37.jpg
    227.4 KB · Views: 64
  • изображение_viber_2021-05-17_11-58-02.jpg
    изображение_viber_2021-05-17_11-58-02.jpg
    238.4 KB · Views: 65
  • 1611230459152261.jpg
    1611230459152261.jpg
    55.4 KB · Views: 98
  • 1611230459549821.jpg
    1611230459549821.jpg
    36.1 KB · Views: 91
  • 1611230467871872.jpg
    1611230467871872.jpg
    33.6 KB · Views: 94
  • 161123090383582.jpg
    161123090383582.jpg
    31.2 KB · Views: 94
work has begun on the back wall .... special attention to it, it will be part of our closed box, the load on which will be very large. We overlap the frame to achieve maximum rigidity ...
A picture of understanding the exact volume of the camera is already emerging.

Simultaneously with the welding, they began to prepare the power wiring, or rather the connection between the generators and the battery. And they will be connected by 8 cable broaches of 50 squares, 4 on + and, accordingly, 4 broaches on "-". The entire cable (Audiobeat) is hidden in a protective braid and is being prepared for installation ...
 

Attachments

  • 34632.jpg
    34632.jpg
    51.1 KB · Views: 88
  • 7123.jpg
    7123.jpg
    48.2 KB · Views: 92
  • 12357.jpg
    12357.jpg
    43.5 KB · Views: 99
We assembled the back wall, 24mm plywood, m6 bolts, this is the back of our sealed box. Here is such a beauty ... she was given a lot of attention, made as hard as possible. It must be sealed, and this is important.
 

Attachments

  • 1612343429154726.jpg
    1612343429154726.jpg
    35.2 KB · Views: 87
  • 1612343428634549.jpg
    1612343428634549.jpg
    33.2 KB · Views: 87
The ceiling, an important part .... vibration isolation even in 10 layers does not solve the problem .... so we work radically. Frame, metal bonding, plywood stitching ...

This work took a full two days to understand, to bend and weld the metal in three planes for the largest possible contact area with the ceiling.
 

Attachments

  • 55.jpg
    55.jpg
    232 KB · Views: 88
  • yy (1).jpg
    yy (1).jpg
    35 KB · Views: 94
  • изображение_viber_2021-05-17_11-58-02.jpg
    изображение_viber_2021-05-17_11-58-02.jpg
    238.4 KB · Views: 61
Port - will be located behind the driver, one of the most vibro-loaded parts will be the right front quarter and in particular the floor. Therefore, not without easy paths, we make a frame on the floor, a frame, squatting at the control points. Next, fill all cavities with resin with crumbs and a little secret recipe, for maximum rigidity and exclusion of all air cavities. Then we cover all this with 24 plywood and carefully tie everything together while shedding all the cracks and joints. After we get the effect of a "marble slab" knocking, and it is like "peas against the wall" ....
 

Attachments

  • изображение_viber_2021-05-17_11-44-16.jpg
    изображение_viber_2021-05-17_11-44-16.jpg
    208.3 KB · Views: 64
  • изображение_viber_2021-03-02_17-38-36.jpg
    изображение_viber_2021-03-02_17-38-36.jpg
    193.8 KB · Views: 81
  • изображение_viber_2021-03-02_17-38-32.jpg
    изображение_viber_2021-03-02_17-38-32.jpg
    189.4 KB · Views: 60
  • изображение_viber_2021-05-17_11-42-15.jpg
    изображение_viber_2021-05-17_11-42-15.jpg
    246.4 KB · Views: 70
The power reserve is always only a plus, the larger the capacity of the batteries - the better, and the generators that will power them - must be appropriate. Therefore, two AZ13 generators - 370A each - are exactly what will suit us.
the batteries themselves are an interesting solution, these are the batteries from the leaf car. Lithium manganate
total capacity about 700A
 

Attachments

  • 8.jpg
    8.jpg
    217.8 KB · Views: 88
  • 44.jpg
    44.jpg
    186.9 KB · Views: 87
  • 77.jpg
    77.jpg
    210.3 KB · Views: 82
  • 567.jpg
    567.jpg
    220.2 KB · Views: 95
  • изображение_viber_2021-06-15_09-13-51.jpg
    изображение_viber_2021-06-15_09-13-51.jpg
    224.4 KB · Views: 65
  • изображение_viber_2021-06-15_09-13-52.jpg
    изображение_viber_2021-06-15_09-13-52.jpg
    186 KB · Views: 65
  • изображение_viber_2021-06-15_09-13-53.jpg
    изображение_viber_2021-06-15_09-13-53.jpg
    210.6 KB · Views: 53
rigidity, rigidity, rigidity .... the wall on which the subwoofers are mounted. plywood - 4 layers, + metal base on hairpins connected to the back wall. for 12 subwoofers about 170 liters of closed volume.
 

Attachments

  • 24.jpg
    24.jpg
    210.4 KB · Views: 83
  • 71.jpg
    71.jpg
    211.3 KB · Views: 88
  • 3467.jpg
    3467.jpg
    200.4 KB · Views: 88
  • 7243.jpg
    7243.jpg
    180.8 KB · Views: 81
  • изображение_viber_2021-06-25_10-09-55.jpg
    изображение_viber_2021-06-25_10-09-55.jpg
    178.7 KB · Views: 59
  • 890.jpg
    890.jpg
    237.9 KB · Views: 81
further, a very long, difficult stage. Make all the walls as smooth as possible ... all the corners are rounded, later there will be tests with smoke, where we will see where the air flows are laminar or turbulent.
 

Attachments

  • 786.jpg
    786.jpg
    209.7 KB · Views: 95
  • 0-4.jpg
    0-4.jpg
    210.4 KB · Views: 89
  • 12346.jpg
    12346.jpg
    218.6 KB · Views: 91
the exit of the load wall should be rounded, this is taught at school))) Moreover, in the process we will have to play with the port, so we make it removable.
You are interested ? should I continue?)) And again, sorry for the bad English
 

Attachments

  • изображение_viber_2021-08-30_09-28-52.jpg
    изображение_viber_2021-08-30_09-28-52.jpg
    219.5 KB · Views: 83
  • изображение_viber_2021-09-14_17-00-42.jpg
    изображение_viber_2021-09-14_17-00-42.jpg
    179.2 KB · Views: 65
This is a serious SPL build here. Thank you for sharing and please continue with the pictures.

Yes, the translation seems a little strange but we can understand your meaning.
 
Activity
No one is currently typing a reply...

Similar threads

I mean if your wanting to go cheap and you like making things i guess you could always make your own , is all you really need is a DMM a...
3
1K
Excellent place to get a Tuned enclosure with everything Precut and ready to put together with a Diagram of each sheet Marked. $190 bucks. All you...
15
2K
You're not going to know until you test with a meter. Typically even carpeting a box as opposed to painting is going to lose a few tenths.
3
1K
Highest my car has done is a 156. I have 1200w on highs and recently swapped the mids to pro audio mids. This was a challenge as I find many of...
6
973
im not looking to seal off im trying to stay out of wall classes and plan on staying in trunk classes
15
3K

About this thread

Bratishev_Artem

CarAudio.com Newbie
Thread starter
Bratishev_Artem
Joined
Location
Ukraine
Start date
Participants
Who Replied
Replies
41
Views
9,464
Last reply date
Last reply from
Bratishev_Artem
Screenshot_20240422_221646_Facebook.jpg

Bobbytwonames

    Apr 23, 2024
  • 0
  • 0
1713846388212.png

Random4thGuy

    Apr 23, 2024
  • 0
  • 0

Latest topics

Top