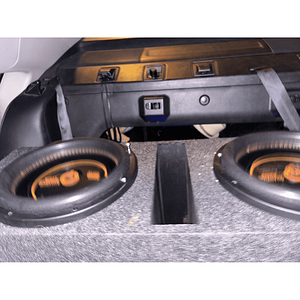
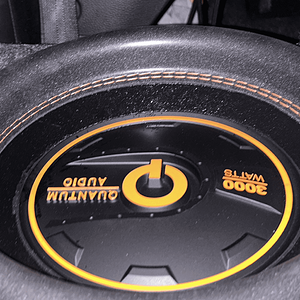
Good Morning All,
I have been talking to Jeep picking his brain and he's agreed to let me post up his step by step of the above process. Thanks again for letting me pick your brain Jeep. So without further ado.
Re: box paint
Rustoleum 11 oz. All Surface Metallic Dark Steel Spray Paint and Primer in One this is the paint I used but you have to use COMPLETE 13-oz. White Oil-Based Interior/Exterior Primer, Sealer and Stain-Blocker Aerosol first on bare wood, you can get it at home depot as well, and run a skim coat of bondo over all the edges where the wood meets. kilz, you can get it in spray or in gallons. I have linked the spray but there's several types the Oil based is most recommended for MDF. For clear recommended is Rustoleum Painter's Touch 12 oz. Gloss Clear Spray Paint and build it up so I can wet sand all the orange peal out of it with 1500 - 2500.... they have it in gloss clear, they also have matte and satin depending on the look you want. if you get 3 cans of ea. that should be enough, the key is the kilz primer, as long as it has a nice smooth coat and seals up the wood from absorbing it won't use too much paint, and the reason for a lot of clear is for the wetsand and buff, but by running a skim coat of bondo over the edges will hide the seam where the wood meets and also the edge of the mdf absorbs a lot . I probably said this stuff already so sorry if I am repeating lol. I use regular bondo body filler, not the fiberglass, I used 2 cans of primer but my box is a little smaller, I also primer the inside which doesn't really need to be done, so it was sort of a waste since I did the inside flat black due to the window.....so here is a run down of how the process should be done.
1. Sand the edges of the box with a sanding block to get a slightly soft rounded corner.
3M 4.875 in. x 2.875 in. x 1 in. Fine/Medium Grit Drywall Sanding Sponge-9095 - The Home Depot if you have an electric sander that would be great, just use 120 grit. the reason is that a sharp square corner will chip easily and a rounded corner won't.
2. Clean off the dust and bondo skim coat every edge where the pieces of wood meet, you can use bondo brand putty knifes or a regular putty knife, metal or plastic, just make sure the edge of the putty knife is smooth and free of nicks or it will transfer to the bondo and be a pain to sand out. I like to build the bondo so it is not see thru so the it fills properly, to achieve this you drag the bondo with very light pressure so that it is only see thru at the high spots and the low spot are filled. I personally hate bondo just because it is an art I have yet to master lol but I normally build it up more and spend the time sanding, one of these days I will get it down lol.
3. After it is all sanded and you are happy with the finish then apply the kilz, I would do thin coats for the first 2, so basically dust it on so it is mostly white with a little see thru, then on the second coat it should be white with no see thru, then let it dry good and apply a nice thick coat where it
looks glossy when you are painting but no runs, you will have to let this dry for a while, maybe 24 hrs unless you can put it somewhere warm to help it dry fast. then sand it with 320 grit just to remove the dust that might settle on it, you know like the little bumps that look like pimples lol. if it is not dry enough it will gum up the sand paper and those spot on the sand paper will leave deeper marks which will show thru on the paint.
4. Once you are done sanding the primer and no wood is showing thru then you can paint, on metallic paint you want to spray 2 or 3 light coats until it is covered with color then apply slightly heavier coats until you have a nice uniformed metallic finish, if you have dark spots where it looks like there is no metallic then you have the can too close to you piece you are painting, grab a scrap piece of wood or metal and test to see how far away you need to be to get that nice finish, and don't worry about the metallic feeling like it is on the surface of the paint because you will be clearing over it, plus it gives a deeper look to the paint........
5. Once you are happy with the paint then clear it the same way, a couple light coats then go heavier, on the clear it is important to start top to bottom or left to right, whatever you decide but you need to start at one end and go to the other end with a nice overlap so it blends together, if it looks dull in one spot and you spray that one spot you will see the edge of that spot is now dull, so it needs to be one clean sweep from one end to the other. make sure the paint it dry or the clear will move the metallic in the paint and give you an uneven look(hard to explain but basically if the paint is not dry then the clear will make it wet again and try to mix with the paint and it will move the metallic, kinda weird looking)
6. Once you are happy with the clear and you have a few good coats on, then get some 1500 grit wet sanding paper and fill a bucket half way with water and put some car wash soap or dish soap in it, just enough to get some decent suds, almost the same amount as you would use to wash the car, soak the sandpaper for about 20 min. or so to soften it, then wrap it around some type of flat smooth block of wood or plastic, anything comparable, then lightly sand it with the paper wet, you can use your other hand to bring water from the bucket onto the paint to keep it wet, once it gets milky you will want to either wipe it with a rag or with some water and clean the paper in the bucket and keep sanding, use light pressure and don't spend too much time in the same spot or you
will sand thru the clear, best thing is test a spot you won't see that much and sand it using about 15 or 18 strokes in the same spot then wipe it clean and you can see if there is any glossy indents or if it is all dull, just to get a feel for how much you might need to sand. lol I hope I am explaining this good enough, I never really was a good teacher, I more of a, get out of my way and let me do it kinda guy lol.
7. After you are happy with the wet sanding then get some polishing compound (I like plain ol turtle wax liquid polishing compound cuz it is inexpensive and you won't have to rub forever), and rub lightly, the paint is softer then car paint so it won't take hardly any pressure or time to rub it out, then you use a swirl remover after the polishing compound to remove the haziness, the last step will be mothers Brazilian carnauba wax, this stuff is awesome, it will give it a nice shine and keep moisture from penetrating, best of all you will gain 7 db lol . know this seems like a lot of work but believe me it is well worth it and everyone will be like whoo, they will want you to paint their cars next lol. Just make sure you give the paint primer and clear enough time to dry in between so they won't gum up when you sand and wet sand.......... actually I would let the box sit for a few days to a week before you wet sand and buff so it is nice and hard, if you can. this is what I did, it took me a few days to do everything but the wet sanding and buffing, but I only spent half days on it, so if you had a weekend you could probably do it in a couple days then let it dry real good then do the last step, not sure what the weather is like but that will play a roll in the drying time, if you don't mind the smell of fresh paint you can bring it in the house so it can dry faster, me I have a heater and air conditioned garage so I just turn on the heat and let things sit overnight to dry.


