Volvo S60 build resurrected! Old School!

Good suggestion. Vinyl or carpet has definitely been the two coverings I've been considering. I'm not so confident in my skills with this being the first time I've done fiberglass for it to come out smooth enough for vinyl. But we shall see how it goes... It sure would be a nicer finished look with vinyl. Hmmmmm...

 
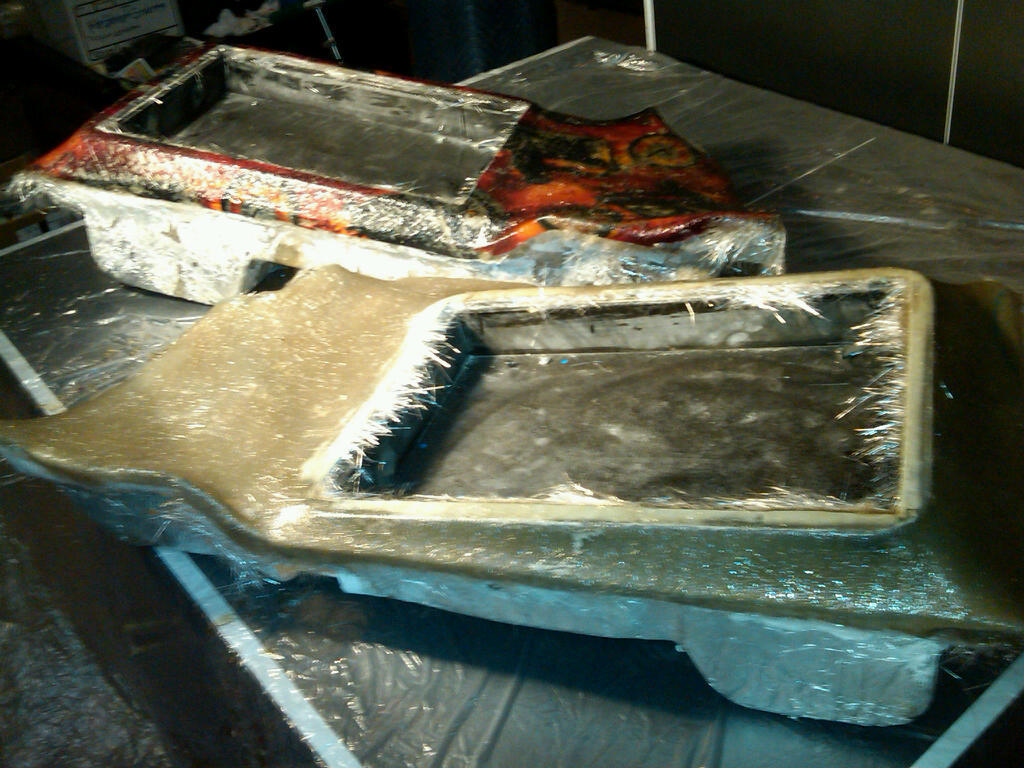
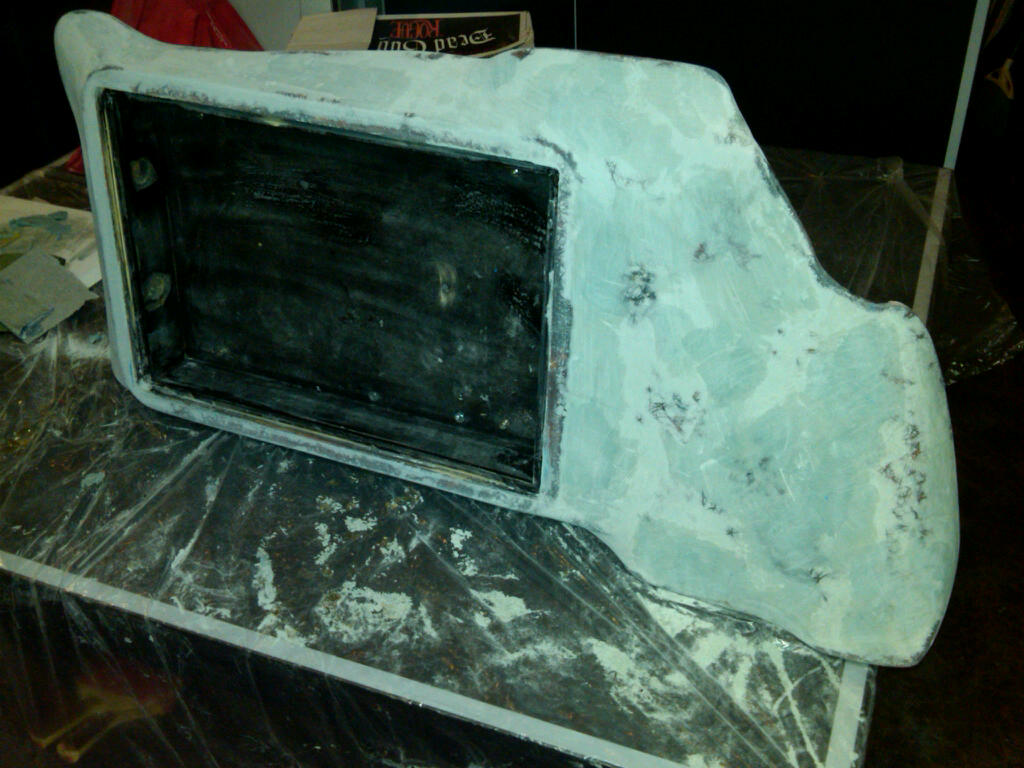
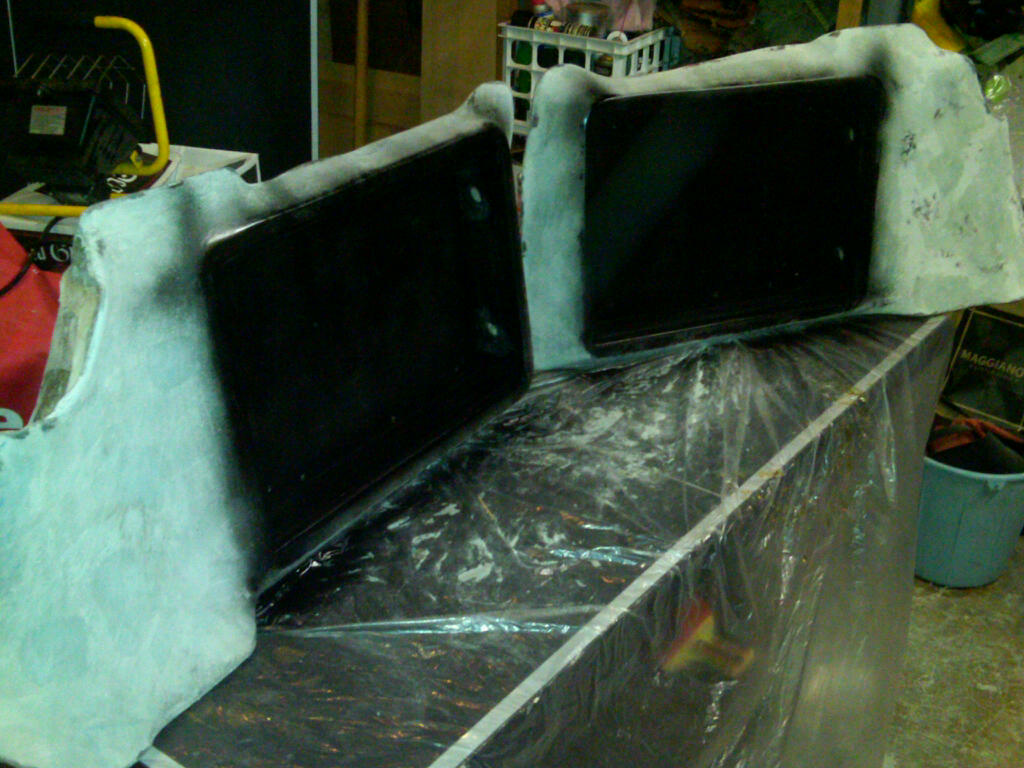
Here's a picture of both trunk panels fitting in for the first time along with the factory trunk floor. It may not look like it, but this was a major step with lots of tedious sanding and body filler work needed to get them fitted the way I want. I am going to have a piece of acrylic cut to frame each amp so it will have a flushed in look. Leaning towards black acrylic.

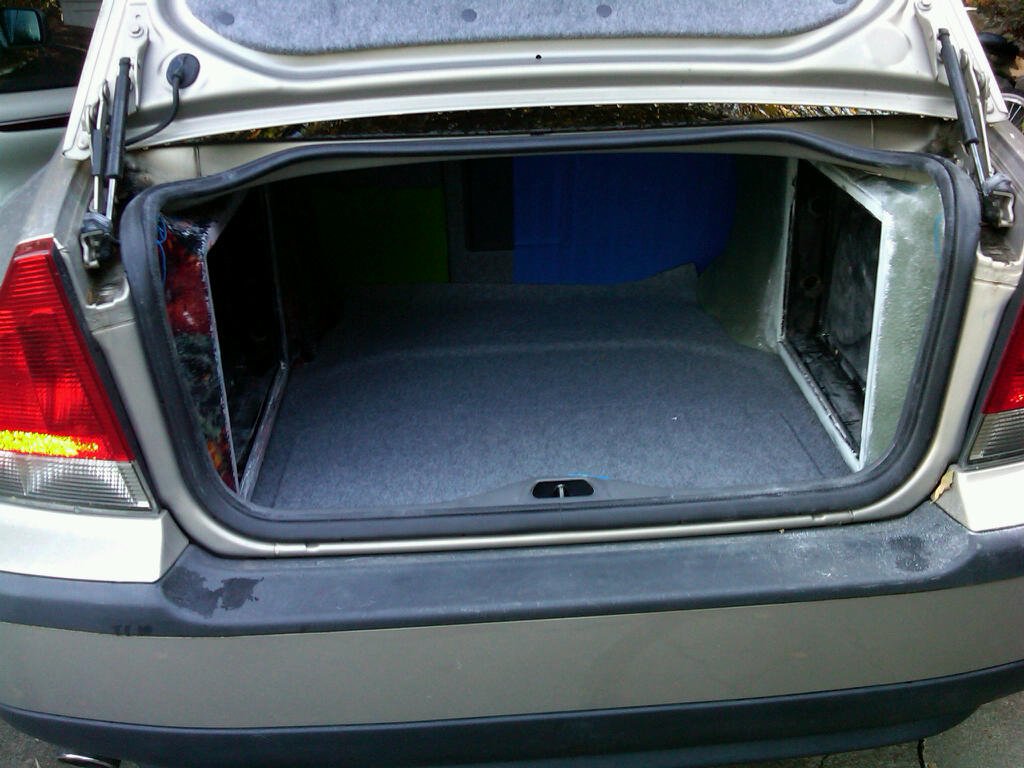
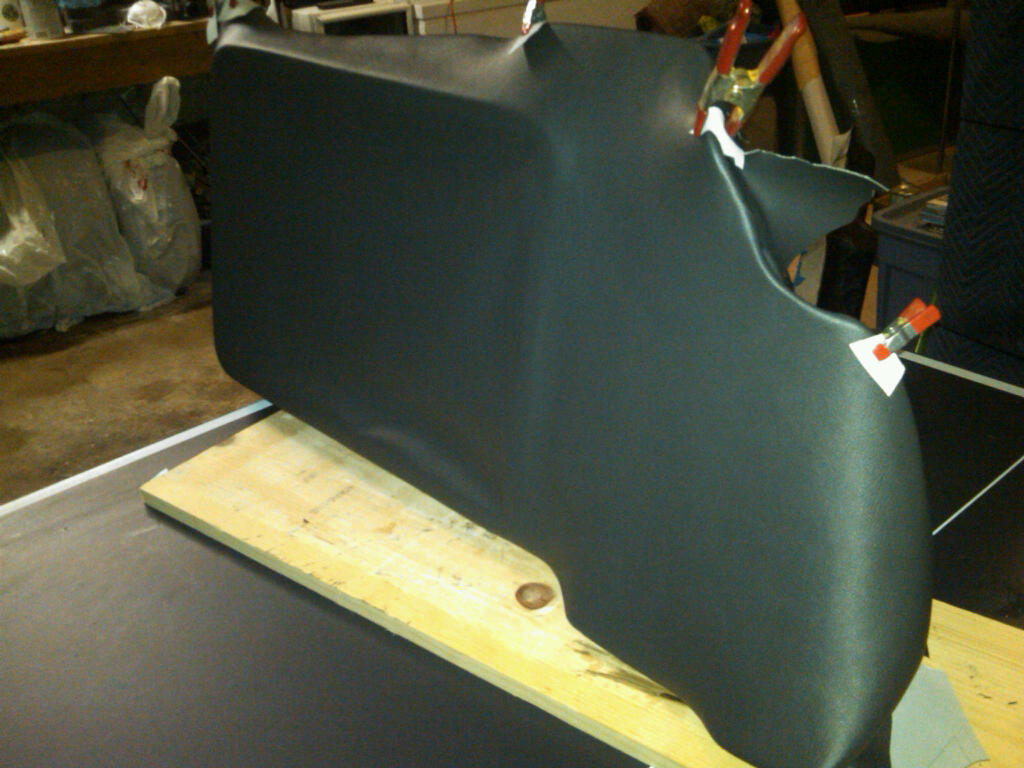
I'm also happy to report that the GT Mat has arrived. Thanks to Blake at GT for tossing in a sample of the 50mil deadener as well to try. So far I have deadened the trunk lid and some critical areas of the trunk such as larger side panels, wheel wells, etc. I've decided to take a conservative approach at this point with using the product in areas where it will do the most good such as the middle of large panels and anything that resonates a lot when I tap it. I've also been wrapping some wires in fleece. The largest area I have deadened so far is the trunk lid which on the volvo S60 consists of the metal body panels and also a composite panel which fits over it on the exterior. That composite panel resonated a lot, even when just slamming the trunk lid closed. So the trunk itself got 2-3 layers of GT mat in some places and the composite exterior piece was removed, treated with GT Mat, and then fixed back onto the vehicle. The trunk now shuts solidly with a satisfying 'thunk'! Did a bit of deadening behind my mids in the front door. So far I'm quite pleased with the GT Mat. It sticks on very well. I used a bit of heat to apply it because it's cold here but it did not take much, just 2-3 passes with the heat gun was enough. I've only used about half of my GT Mat at this stage. Like I said, I focussed on critical areas and I want to have plenty left over. When I have the subwoofers going then I'll identify other areas to focus on. For now, just got the obvious areas.

Next steps for this project will be a final layer of fiberglass on these amp enclosures, then will draw out the shape of the subwoofer enclosure bottom using cardboard. I'll be tracing around the footprint of the amp enclosures so the sub box will fit right in. Once I have the bottom of the sub enclosure cut, then I will make the rings/baffle for the woofers and start framing it in. The goal for the sub box is to have a nice custom fitted look but still be removable. The only wires going to the sub box will be the + - from the sub amp into a terminal hidden out of the way and that's it. The woofers will be arranged in a V shape on the front of the enclosure.

I'm planning this to be a ported enclosure with the woofers firing back, towards the trunk. What has proven to be the best direction to face the ports? I'm trying to weigh out the pros and cons. If I face the ports back, the same direction of the woofers, should I be concerned about cancellation? If I face them up, I may hear more port noise. Putting them on the back of the box, facing towards the cabin is something I've done in the past and it was OK. But I'm wondering what other people have done and what seems to get the best results? Again, the woofers I'm using are two Image Dynamics IDQv3 12".

trunk%20panel%2010.jpg


Last edited by a moderator:
I'll also add an amusing story from this weekend's car audio exploits. As I was deadening the composite trunk panel, there are wires there for the electric trunk lock and license plate lights. Well, I unplugged those to work on the piece. Then, in a hurry to make it to dinner, I put the piece back on and shut the trunk. Oops! Of course the remote would not unlock the trunk so it was stuck shut. Luckily, I realize that I left one of the back seats down so I was able to climb in with a flashlight, connect the wires back up, and unlock the trunk with the remote. Crisis averted! That may have been a costly locksmith call if I didn't leave that seat down.

 
I'm gearing up for work on the system this weekend and also next week when I have a few days off. There should be lots of progress here for you to check out. Here's a short list of what's left to do. This is basically in order of how I plan to take it on:

1. Put one more layer of chop mat and body filler on these amp pods, sand to 220 grit.

2. Cover pods. I'm planning a trip to an auto fabric shop in Tukwila this weekend called Perfect Fit McDonald. Do you guys know of any other good sources of carpet or vinyl in the Seattle area?

3. Final placement of the pods and attach to the vehicle.

4. Build subwoofer enclosure. I'm working with Frankie at Image Dynamics on the design.

5. Additional sound deadening, particularly around rear deck of vehicle and passenger door which has not been done yet.

6. Run wiring - need to run two sets of RCAs and the turn on lead from the deck to the trunk. Front RCAs will go from deck to the fronts amp and sub RCAs will go to the sub amp. I will run from the RCA out on the fronts amp to my center channel (mono) amp. Run power and ground to battery located in the trunk. Fuses or circuit breakers, etc.

7. Wire blue LED strips in trunk for illumination.

8. Test system. Work out any bugs. Add more layers of GT Mat and spray foam as needed, etc.

 
It looks like it's coming along nicely. That trunk layout looks good!
Thanks man. I put the final layer of fiberglass mat on the amp enclosures this weekend. Ready now to put a layer of body filler to smooth it out. Have a trip planned to Perfect Fit McDonald tomorrow to pick out a suitable covering. Looks like lots of choice vinyl and carpet on their website. I remember this place from way back in the day and they are still around. Looks like they have been around for a LONG TIME...since 1912!

Upholstery Fabric, Wholesale and Discount Auto, Marine, and Furniture Upholstery Fabrics

Are there any good tutorials out there on how to cover odd shaped fiberglass "enclosures" with vinyl or carpet? I've done tons of speaker box carpeting before but have never attempted something with such an odd shape. Any tips are appreciated.

Here are the amp racks with the final layer of fiberglass. I know it doesn't look like much progress but doing two of these in 30-40 degree temperatures is a challenge, takes a lot of time to dry and then of course I had to sand down the edges. The challenge here was adding the layer of fiberglass without disturbing the shape of the edges too much. I like the way these fit in the trunk now and didn't want to add too much fiberglass to the sides or back and change the shape. I put the layer of fiberglass mat right up to the edge and let it hang over. Then once it was dry, I dremeled it off and sanded the edges clean. That way the fiberglass just stuck to the front and didn't overlap over the sides, changing the shape. At this point, I have just enough extra space around the edges so it should fit really tight once I cover it with upholstery.

trunk%20panel%2011.jpg


I'd like to see interior-matched vinyl, I think carpeting over glass kind of defeats the purpose.
UnderFire thanks for the solid advice here. I went to Perfect Fit McDonald and they let me take a book of vinyl samples out to my car. After thumbing through a few hundred samples, I settled on this Enduratex Vinyl in Dark Flint which matches the grey color and pebble grain pattern in the trunk nicely. It's also very close to the interior grey on the steering wheel, emergency break, and other trim parts. It's a pretty good match. It also happens to have a pretty flexible backing on it which should lend itself well to this job. Here's what the vinyl looks like:

73509.jpg


Tonight I put a layer of body filler on one of the amp racks and sanded it smooth. Tomorrow I will work on the other one and then I should be pretty close to starting the subwoofer enclosure.

trunk%20panel%2012.jpg


Here's a couple more pics of the progress this week. I have finished the body filler and sanding on the amp racks and also spray painted the back of them black. Sanded to 60, 180, 220, and lastly an extra fine foam sanding block. I applied a couple large pieces of the GT Mat to the inside of the panels. Tonight was my first go at covering one of the panels with vinyl. I still have a few edges drying with some small clamps. Overall I found this vinyl really easy to work with and this was my first go at covering with vinyl. It was a pretty complex shape. So some time had to be spent on the edges, especially the curves. One spot especially took some patience. I have not yet cut out the vinyl around the amp rack. I'll do that tomorrow once everything has dried. It's exciting that I'll finally be in a place where I could mount one of the amps if I want and get the front stage going. I've decided to mount the front stage amps on the left (passenger side panel). On that panel will be a zed audio deuce and hidden behind will be the rodek amp which will power the center channel. For the center channel, I had a revelation this week. I can set the crossover on the deuce to hi pass for the front L/R and then send a low pass 3500 HZ signal to the center. I will use a passive HP crossover on the center at 300HZ so that should make a good bandpass. I can adjust the LP on the deuce amp variably so it gives me some room to dial in the crossover points to where the staging sounds best. For the center I will use a 6.5" pioneer D series coaxial. That will match well with the D series components in the doors. Also have been thinking of using some foam rubber to dampen the tweeter on the D series center if it sounds too bright, even with the crossovers set. We'll see how that goes. It will be a process of experimentation for sure. I can also experiment with various capacitors for the HP on that center channel.

trunk%20panel%2014.jpg


trunk%20panel%2015.jpg


Your fiberglass work looks great, its great to see another Volvo person customizing their ride. I am planning on up-grading the sound system in my 2001 Volvo C70 convertible but I am still planning the project.

Working with fiberglass is a skill that takes practice, the thing that I dislike about fiberglass is that you have to mix-up so much resin and the resin dosn't have much strength.

When I have small projects I like to use tubes of 2-step epoxy and fiberglass mat to create what ever it is that I want to make. The 2-step epoxy cost from $2.50 to around $5 per tube but its easy mix and work with and the 2-step epoxy is strong after it cures.

I just thought I would pass along that tip.

 
The 2-step epoxy cost from $2.50 to around $5 per tube but its easy mix and work with and the 2-step epoxy is strong after it cures.I just thought I would pass along that tip.
Thanks for the tip. Sounds like a really good and economical option for smaller jobs.

 
Activity
No one is currently typing a reply...
Old Thread: Please note, there have been no replies in this thread for over 3 years!
Content in this thread may no longer be relevant.
Perhaps it would be better to start a new thread instead.

Similar threads

Ok, but it sure seems strange that every other speaker I've ever seen has it wired to the positive, And they switched later too. It kind of goes...
8
810
Well, I've owned probably over 100 different drivers in the last 40 years and almost every single speaker in the NVX line-up over the last 8...
16
723
https://www.youtube.com/@therealmatty_s/videos
0
442
I think you're gonna have to get good with fiberglass or something, or find someone with a 3d laser scanner that can 3d print or mold you some...
7
900

About this thread

americannight

10+ year member
Senior VIP Member
Thread starter
americannight
Joined
Location
Bellevue, WA
Start date
Participants
Who Replied
Replies
122
Views
38,456
Last reply date
Last reply from
audiobaun
Image 5-2-24 at 8.16 PM (1).jpeg

slater

    May 2, 2024
  • 0
  • 0
Image 5-2-24 at 8.16 PM.jpeg

slater

    May 2, 2024
  • 0
  • 0

Latest topics

Top