GP Challenger Build log, pics and vidoes

  • 2
    Participant count
  • Participant list

GPcarAudio.com
Pro Seller

Supporting Vendor
1,062
2
Missouri
Whats up fellow audio enthusiasts. We built a challenger last week and figured i'd post up the video, and photo build logs, I will post the video build logs in this first post, followed by the photo build log

I will also note, we were on a slim time schedule so there is a few things left that have to be done next time we can work on the car, he was from out of state and we could only have the vehicle for so many days. I will also note, we are not in the installation business so this was done on our own time in the evenings to very late after all orders were packed and shipped out.

#1 thing on the list to complete is to seal everyone off into the cabin, there was just no way to get this step finished with our slim schedule.

Overview


OK so here is the photo part,

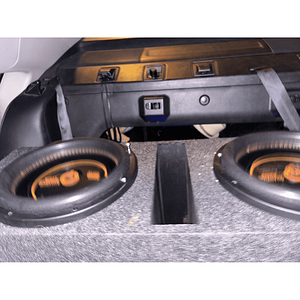
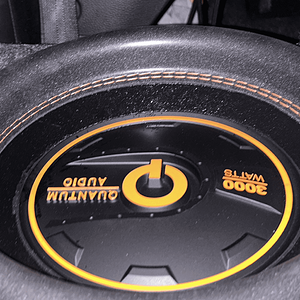
We got the car and in it contained 2 sundown ZV5 12", a crescendo bc5500 and items he had shipped to him from us over the last 4 months for the build.

Northstar AGM31 for starting, Northstar SMSAGM220 for the battery bank, GP OHFC 2/0 wiring, lugs shrinks, fuses and blocks, GP STFU sound deadener, 320 amp team gp alternator

Everything to to do the build.

20507109_1948318662077114_7406024095948660250_o.jpg


The first step was stripping everything out of the trunk and getting a Northstar AGM31 in the stock location (trunk starting battery)

20449110_1948318685410445_8352262076549280719_o.jpg


While mike worked on that, I proceeded to deaden the doors with the GP STFU 250mil sound deadener

20369894_1948318712077109_4215157264491098775_o.jpg
[/img]

And then on to the trunk

20424268_1948318742077106_8254036103187134498_o.jpg


Heres how the Northstar agm31 will sit, mounted up with the GP SAE machined terminals

20449076_1948318765410437_5495845711836060850_o.jpg


The orange wire is the stock charge cable

20233000_1948318805410433_9002871841436748802_o.jpg


Continuing to deaden the trunk

20424260_1948318828743764_4896670707789788899_o.jpg


Under the backseat

20424076_1948318858743761_3676457056355893058_o.jpg


Passenger side floor

20424239_1948318978743749_8796536594781276837_o.jpg


trunk completed

20413943_1948319038743743_2396483305483416877_o.jpg


Installing the 320 amp Team GP Alternator

20451914_1948318945410419_3814751011541928684_o.jpg


20374464_1948318998743747_869572593283143225_n.jpg


Charge wire ran,

Now I will note, on a 5k+ setup, with an underhood starting battery we would always do 2 runs of power front to back, but since this has a trunk starting and a factory 1/0 run of wire, the addition of the single run of 2/0 is more than sufficient to efficiently get all that power delivered to the rear

20375890_1948319075410406_1889167386945078051_n.jpg


Crimped a fresh UL listed copper lug on the stock charge wire, and replaced the factory 8 AWG power wire with the GP 4 AWG OFHC, replaced factory ground with GP OFHC 2/0

20423902_1948319132077067_1090991071317614875_o.jpg


Ok everything is back in place, test spot for the Northstar SMSAGM220, and even though brand new and fresh out of the factory, following the standard procedure of being sure the batteries are topped off with the NOCO G26000 charger before starting the car with the new high output alternator
20369684_1948319165410397_5252038853219272061_o.jpg


Black TEAM GP emblem to flow with the all blacked out car

20368914_1948319185410395_2491956994759432413_o.jpg


OK, now the main charge wire is hooked up, GP 2/0 AWG

20414293_1948663942042586_5353937461391436241_o.jpg


Installed the new 1" shorted belt and fired it up

20448928_1948664108709236_8568433550963554261_o.jpg


Now its time to create a grounding location

here we found the thickest metal on the car, made a ground distro, and welded it in, this gives us a simple direct path for the 220 to be hooked up based off of its location

20449261_1948664045375909_4670313902049873527_o.jpg


20429787_1948663845375929_1610041084658025870_n.jpg


20431505_1948663775375936_3798871738859020012_n.jpg


Now back to the amp, we made some angled risers, I did not get any pictures of how we did these but it was simple, we had 1/4" thick 2" wide rubber, and created sort of a shock absorber for the amp to be mounted to being on top of the enclosure.

These pieces are side mounted so any vibration is absorbed by the rubber and not passed on to the amp. it worked out very well

20507528_1949583818617265_3933977996865988802_o.jpg


Starting to wire it up

20616843_1949583765283937_8865094265633578513_o.jpg


20507245_1949583731950607_1777392776115401375_o.jpg


20525857_1949583708617276_5565564208717608293_n.jpg


starting to clean it up

20476346_1949583688617278_6119826739490465727_n.jpg


20451962_1949583671950613_5380566057299752086_o.jpg


Plugged in the GP Ultra HiFi RCA's, and fired it up

20476598_10210080129614904_8834294002799886763_n.jpg


See this playing on the first post

This was our stopping point, as it needed to be tuned and picked up to head back out of state

Will update as we see this ride again

 
Activity
No one is currently typing a reply...
Old Thread: Please note, there have been no replies in this thread for over 3 years!
Content in this thread may no longer be relevant.
Perhaps it would be better to start a new thread instead.

About this thread

GPcarAudio.com

Pro Seller
Supporting Vendor
Thread starter
GPcarAudio.com
Joined
Location
Missouri
Start date
Participants
Who Replied
Replies
11
Views
659
Last reply date
Last reply from
GPcarAudio.com
IMG_6578.png

saints747

    May 7, 2024
  • 0
  • 0
IMG_6579.png

saints747

    May 7, 2024
  • 0
  • 0

Latest topics

Top