2005 Scion tC SQ Hertz Audison Pioneer Build Log

keep_hope_alive
Premium Member

Acoustics Engineer
I figured I should share the work I do with the forum, since I'm giving everyone advice and guidance.

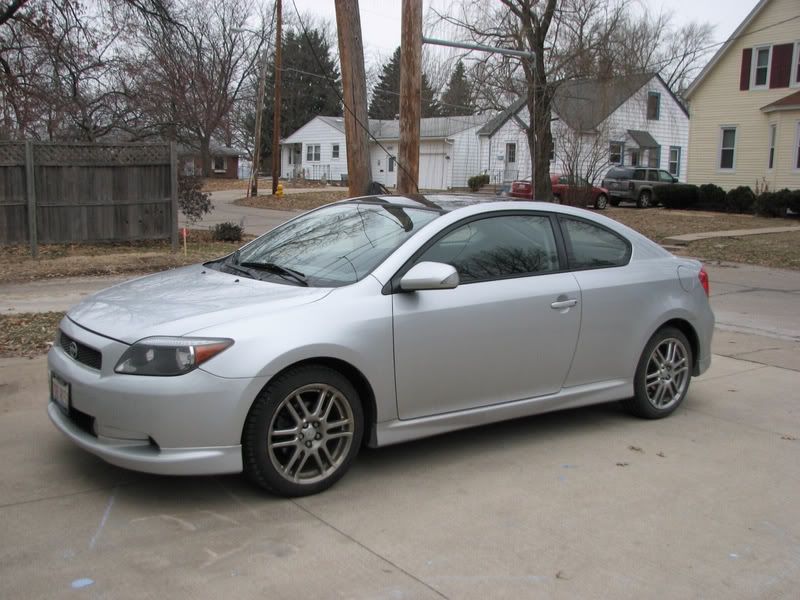
This is a co-workers 2005 Sction tC. He is a recording engineer/musician/and sound tech and also works as an Acoustician with me.

I convinced him to upgrade his sound system and have a rolling reference system.

I am doing this build on weekends. Every time we finish for the day, he required that there was functionality. I am leaving out a lot of intermediate steps.

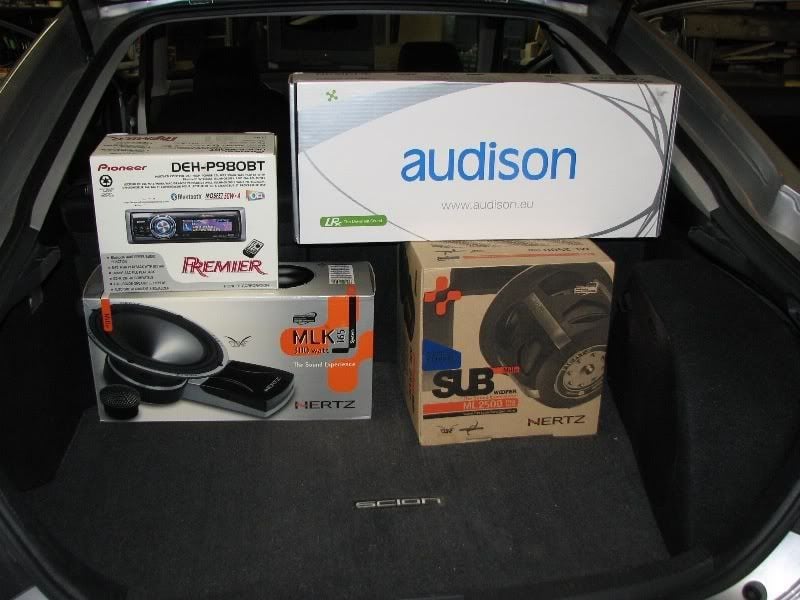
Equipment list is as follows:

Head Unit: Pioneer DEH-980BT

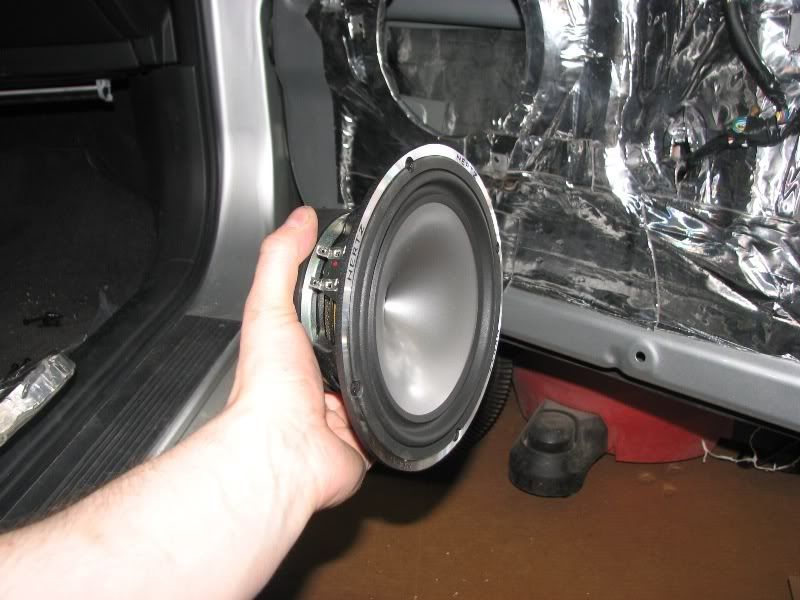
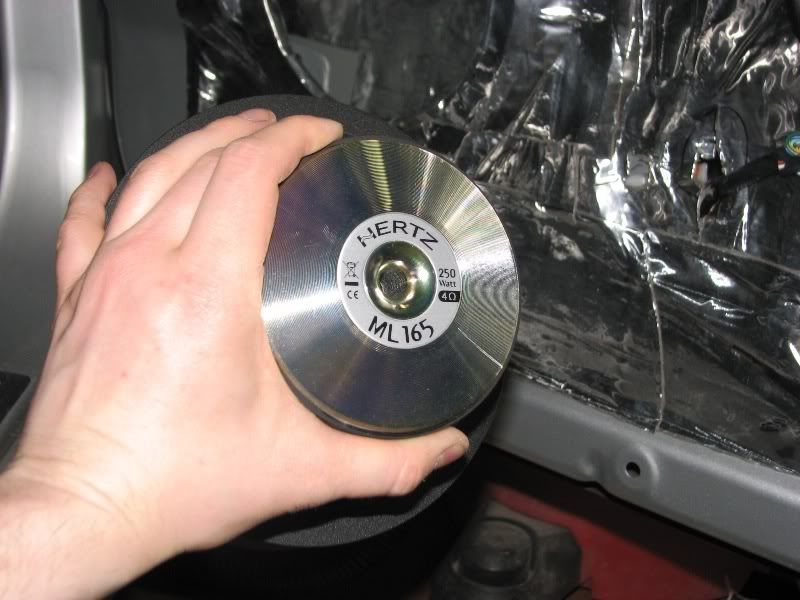
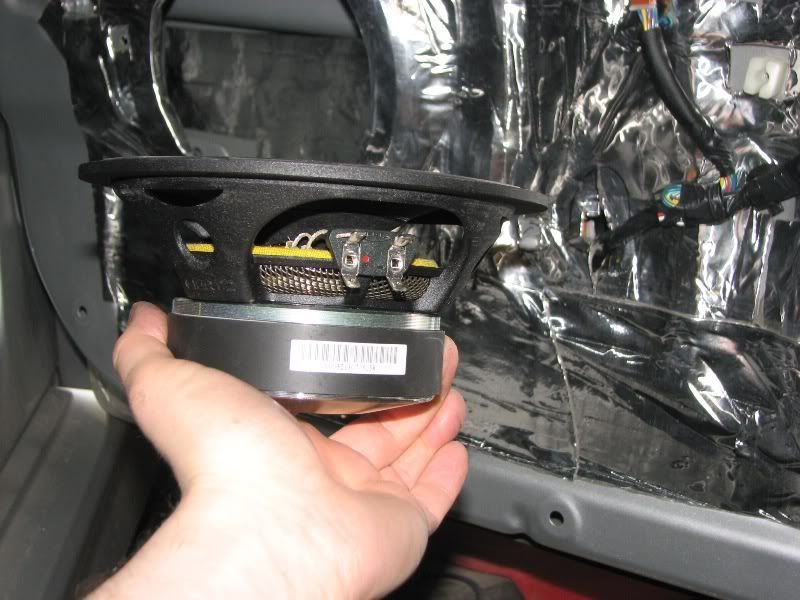
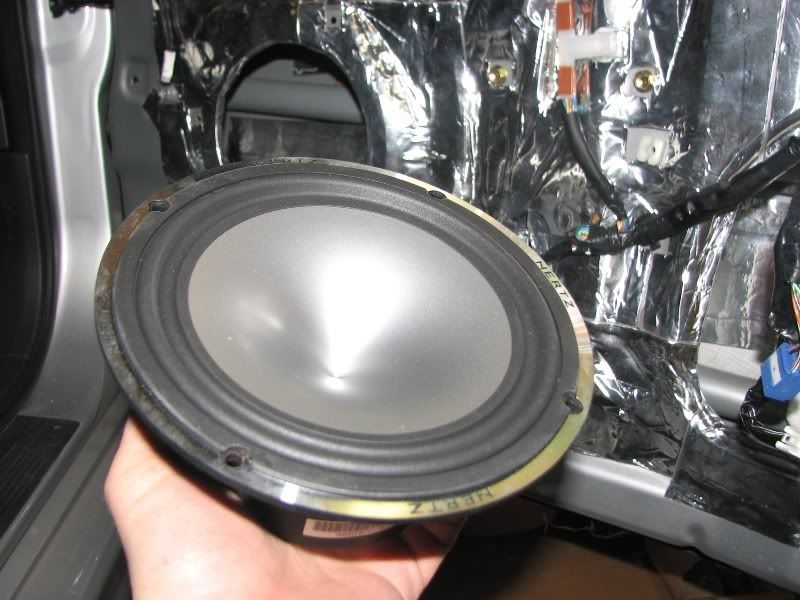
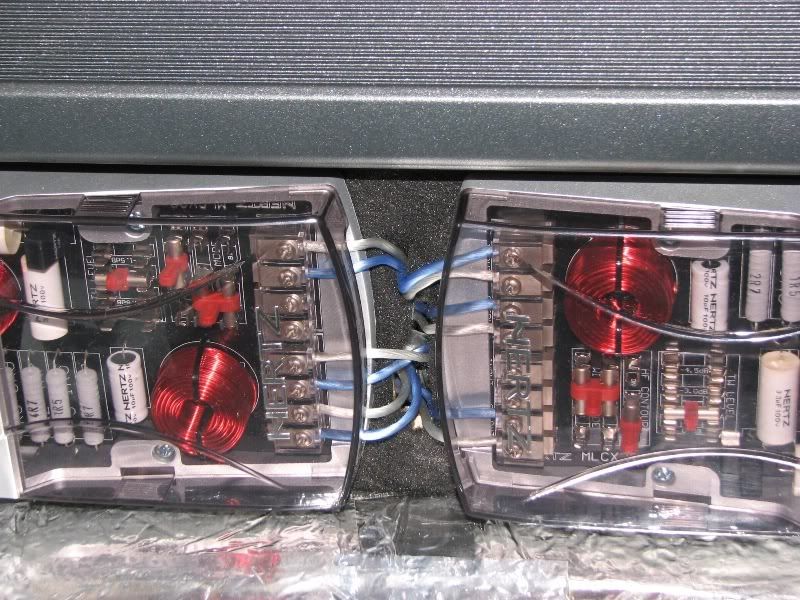
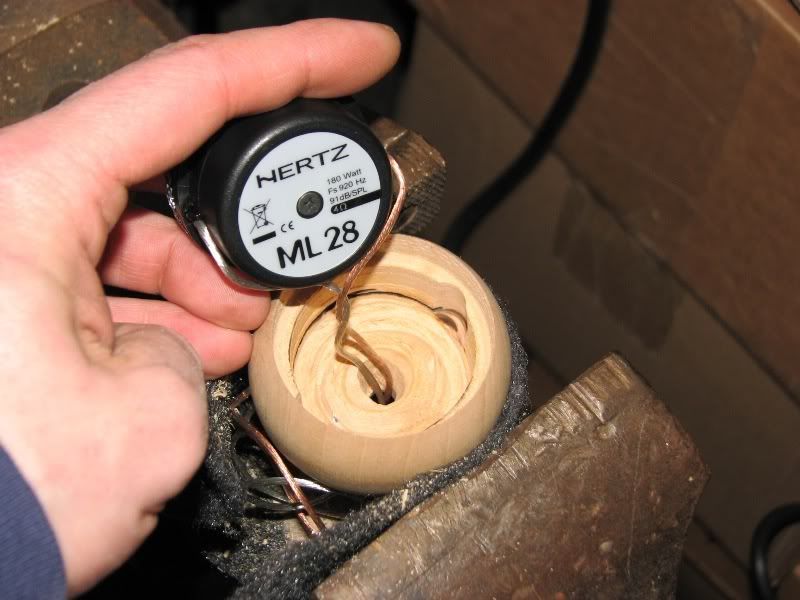
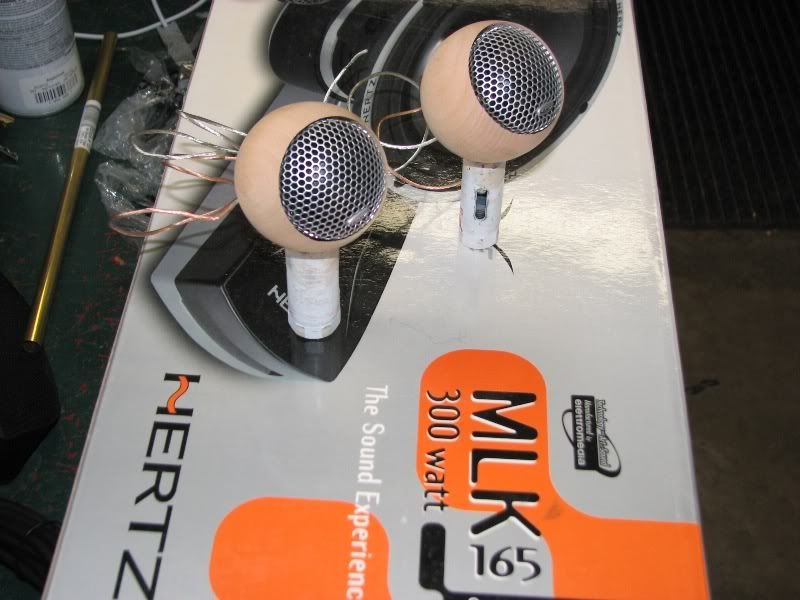
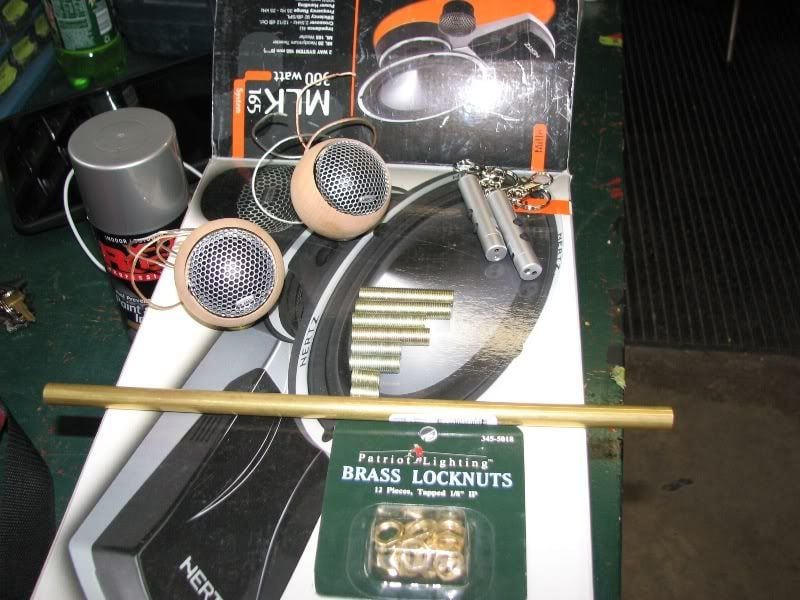
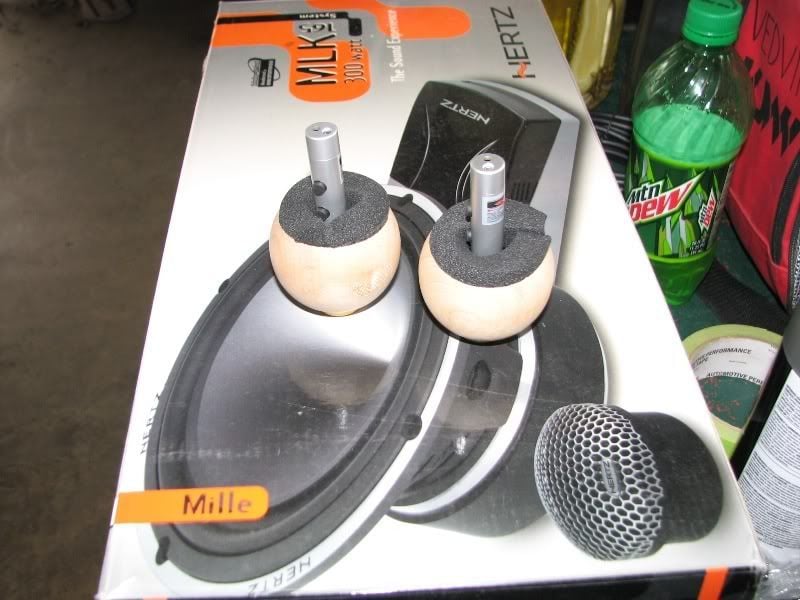
Front Speakers: Hertz Mille MLK-165 has a ML165 6.5" + ML28 tweeter

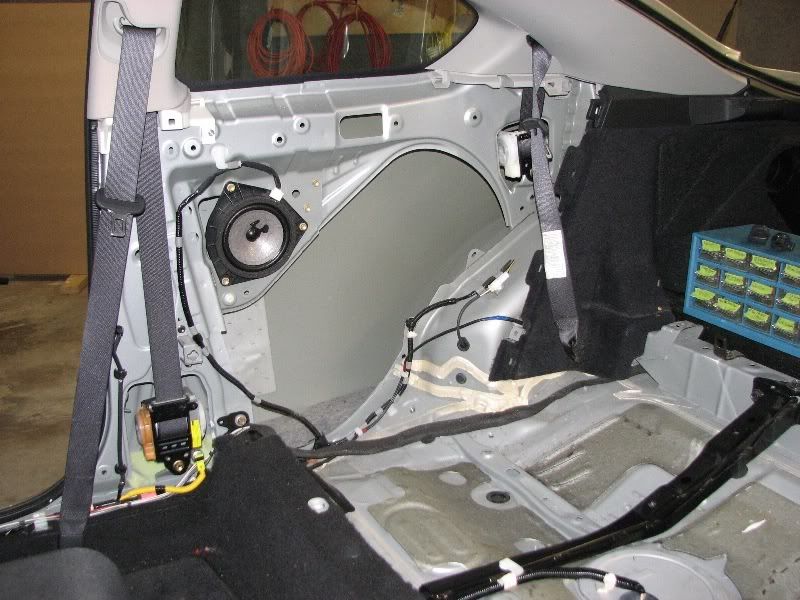
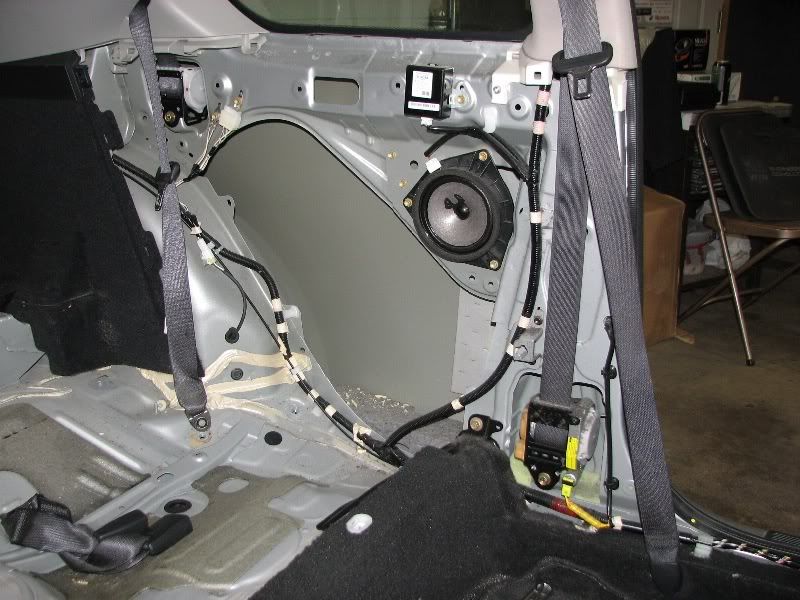
Rear Speakers: Hertz Mille ML2500 10"

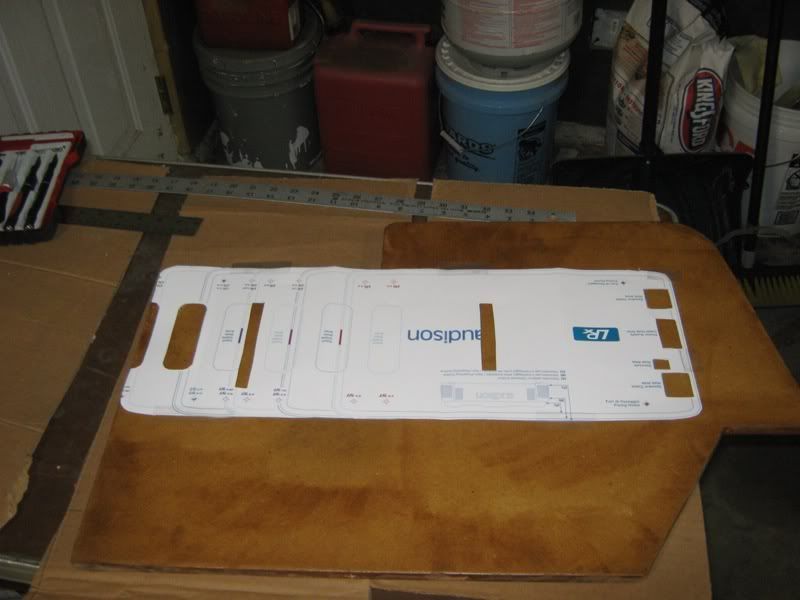
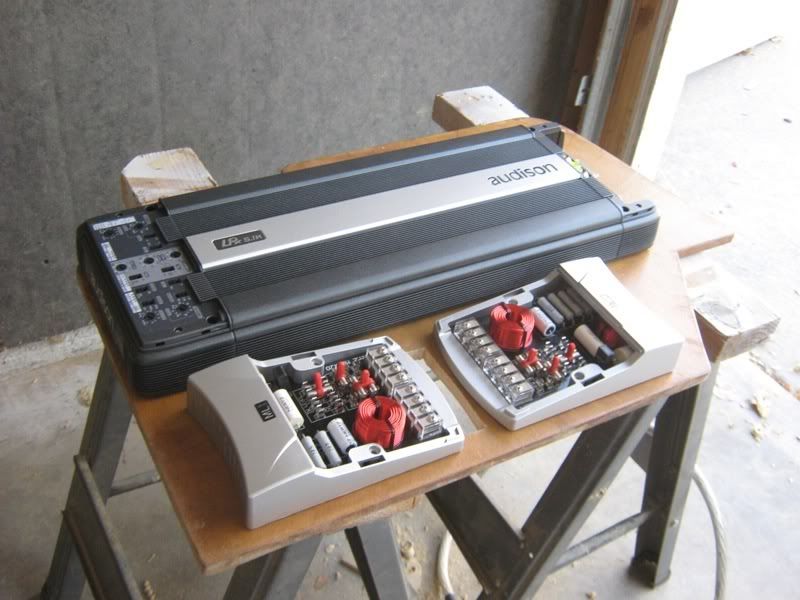
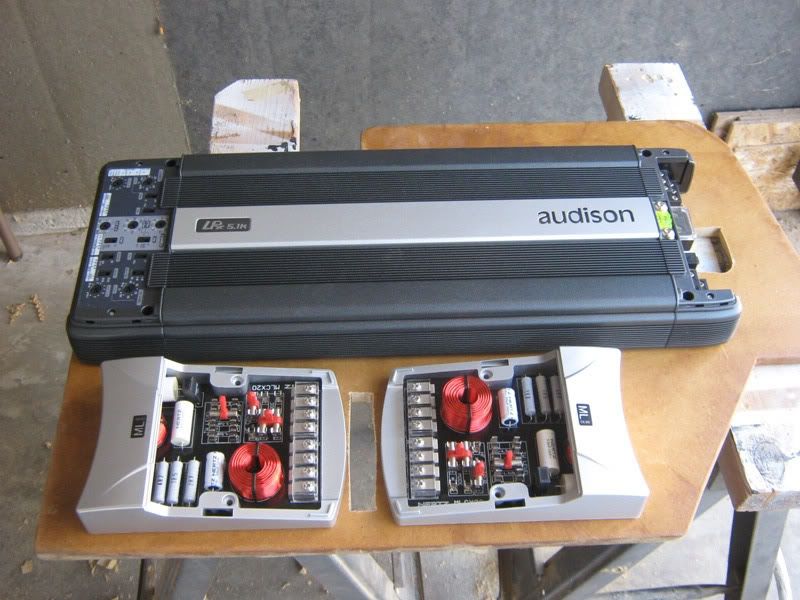
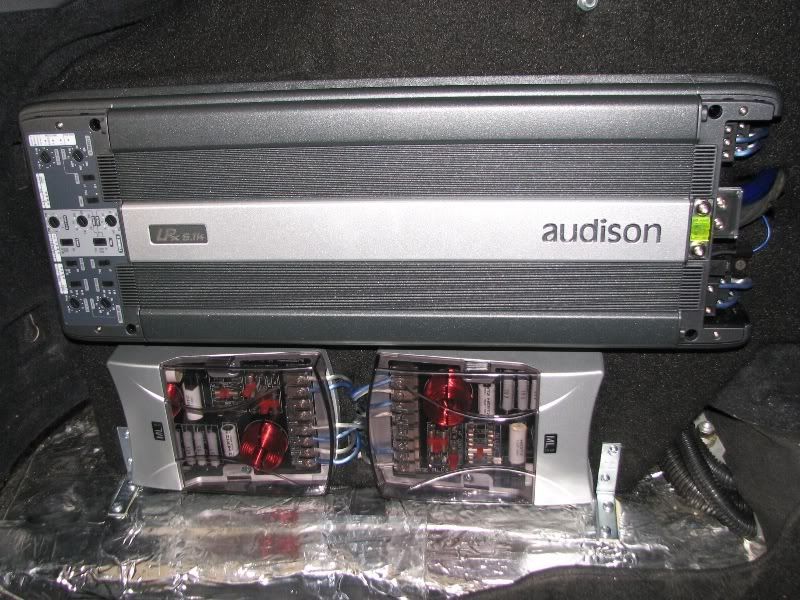
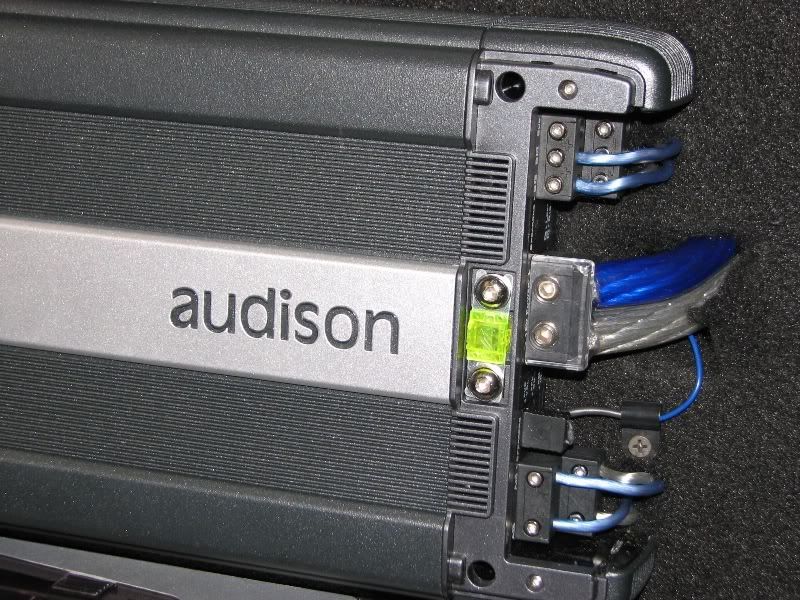
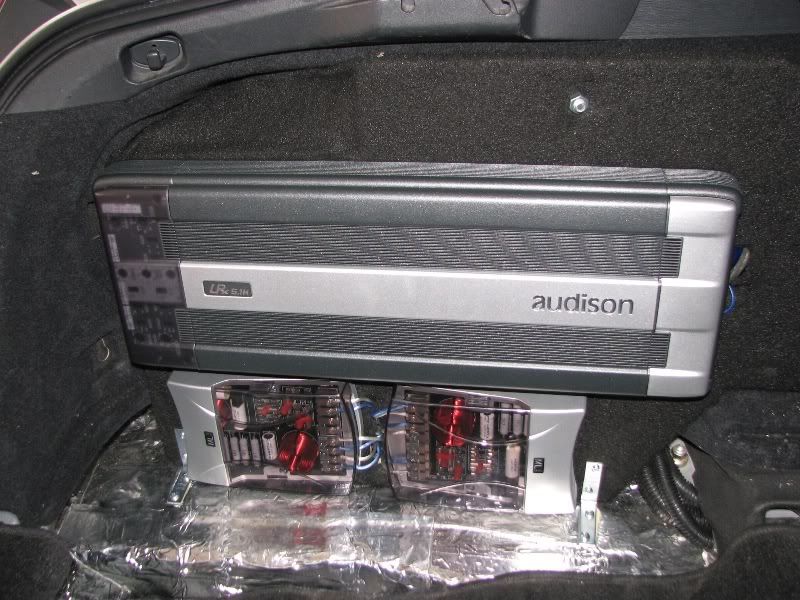
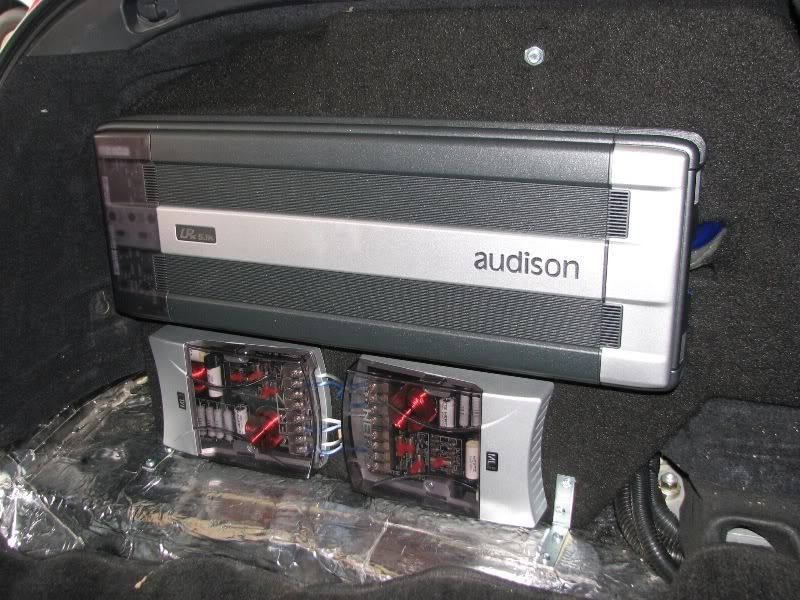
Amp: Audison LRx 5.1k

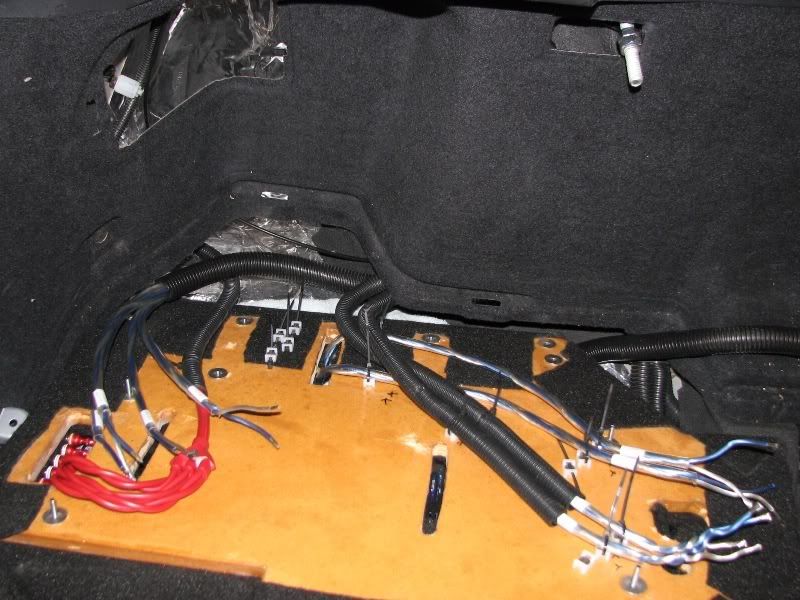
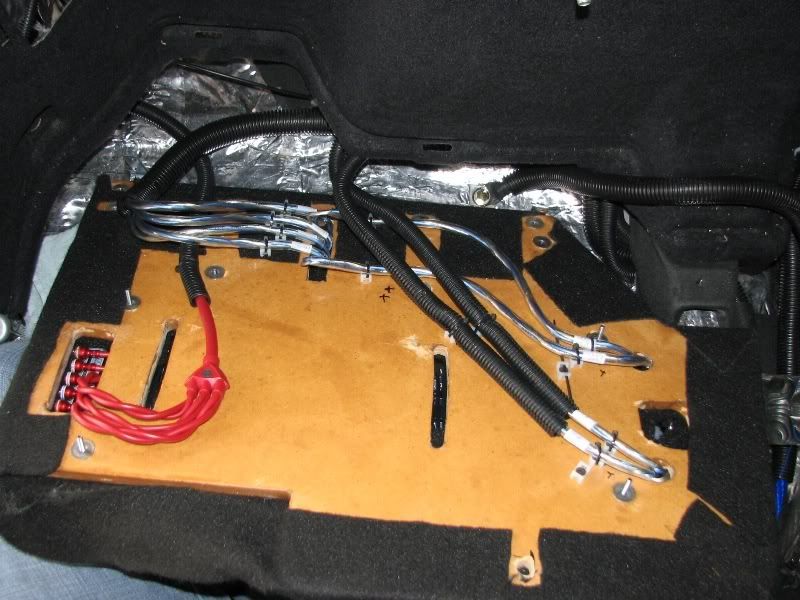
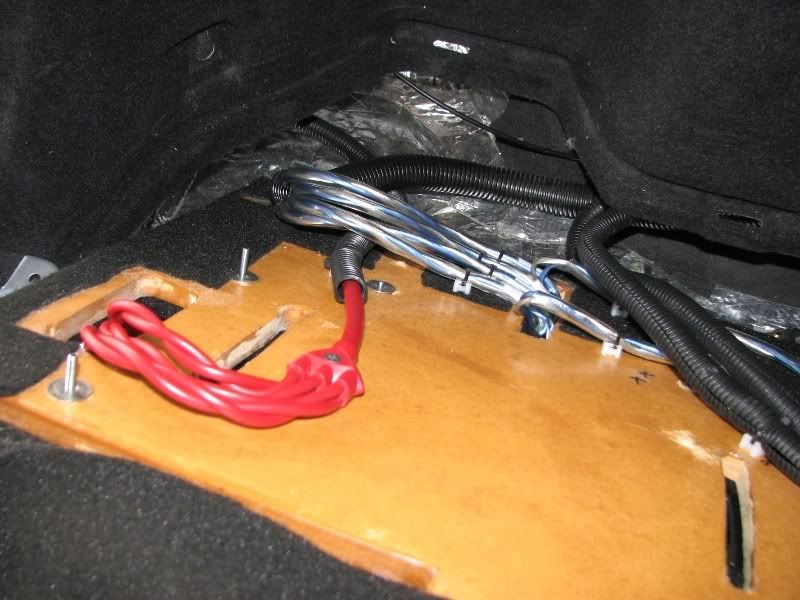
Power Wire: Streetwires 1/0 amp kit

Speaker Wire: Tsunami 12awg

Interconnects: Monster Cable 6-channel

This list of equipment is all purchased authorized from a local shop. Owner didn't want anything used. Their prices are the same as online and they warranty directly. Cost of equipment listed is about $4000.

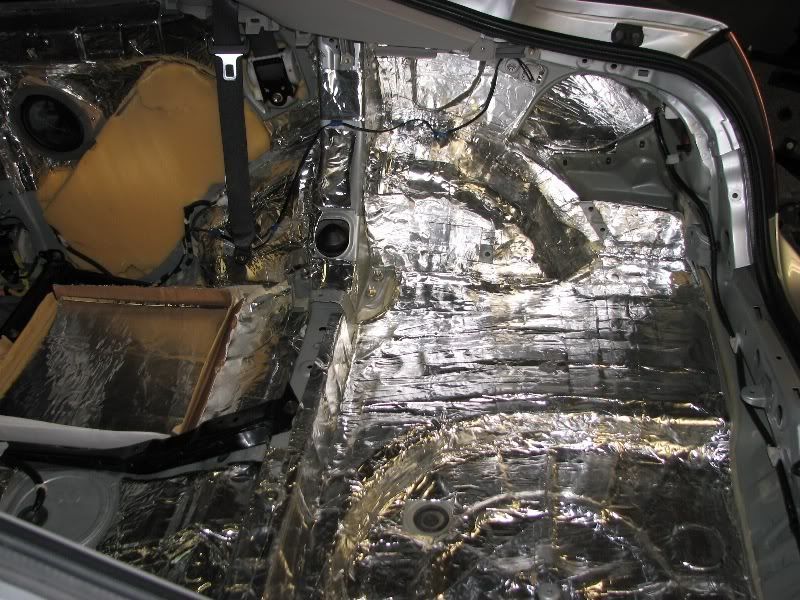
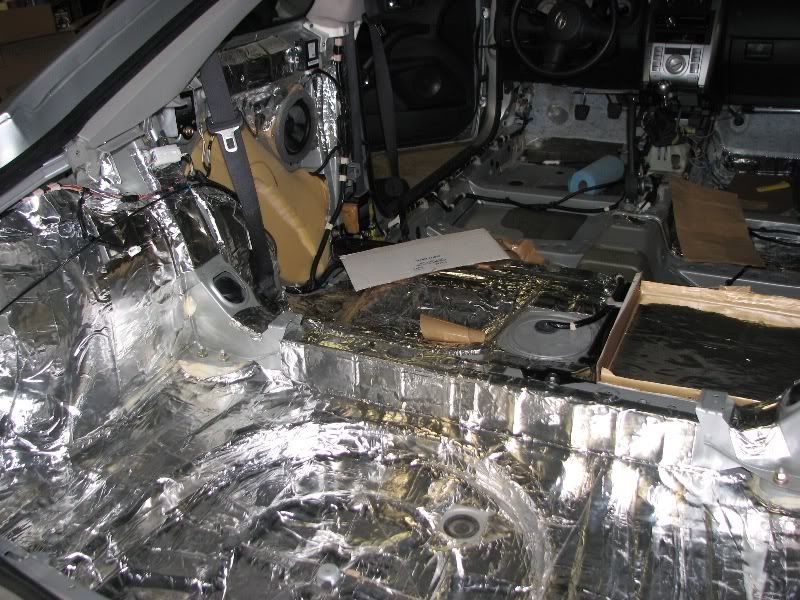
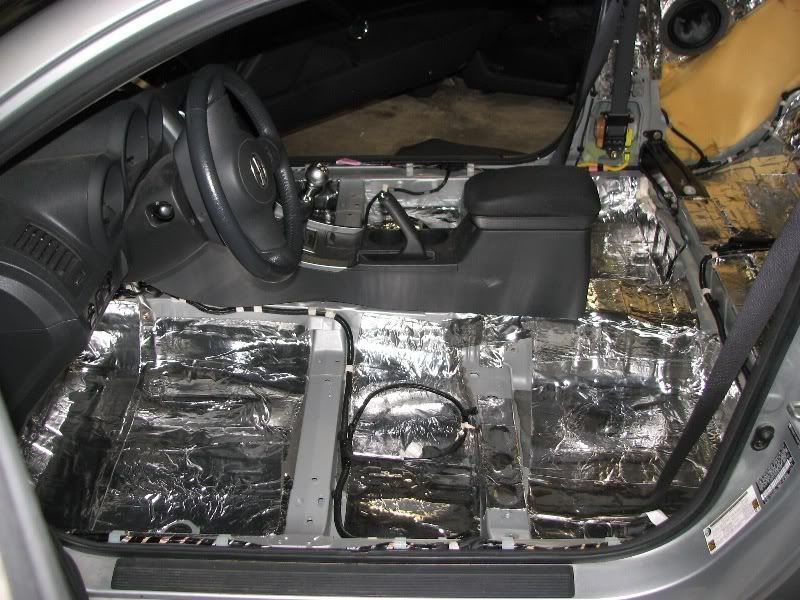
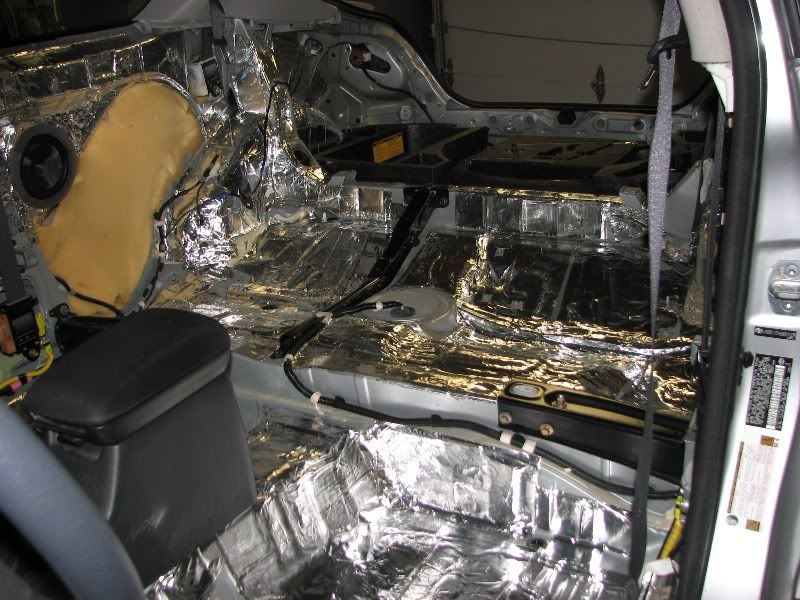
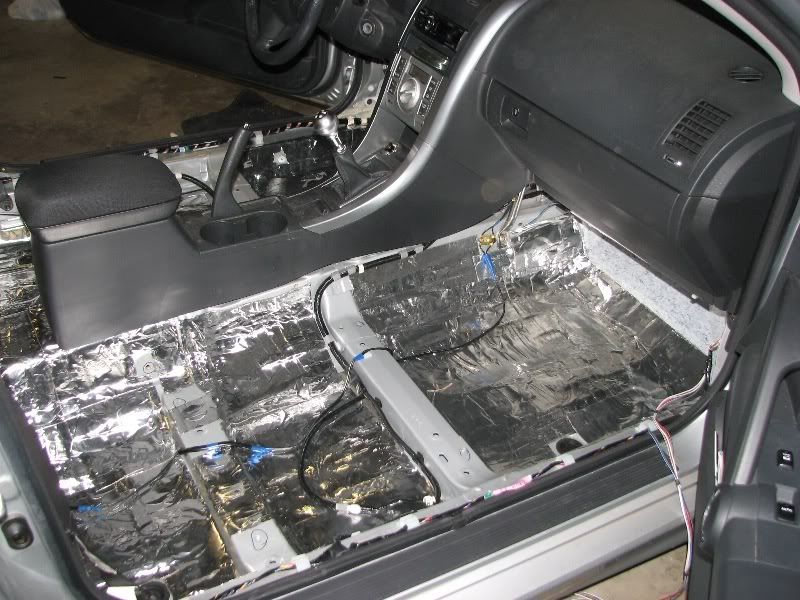
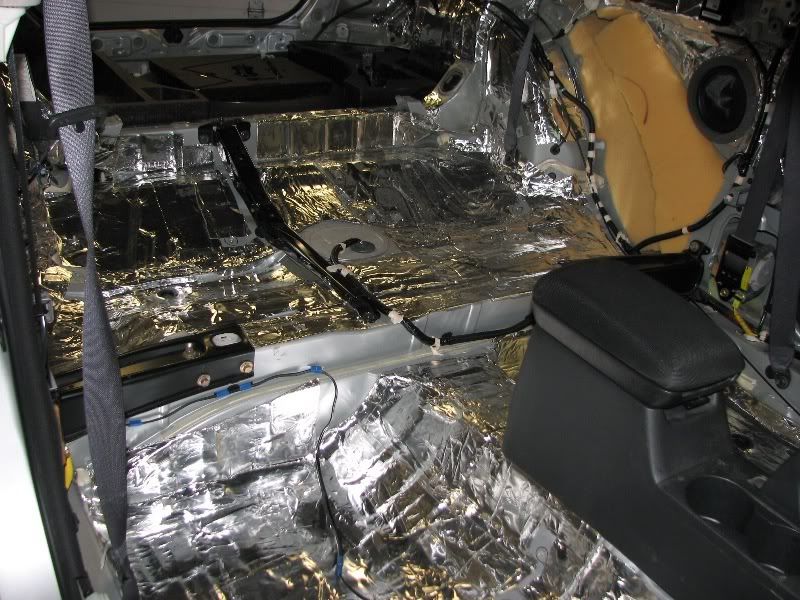
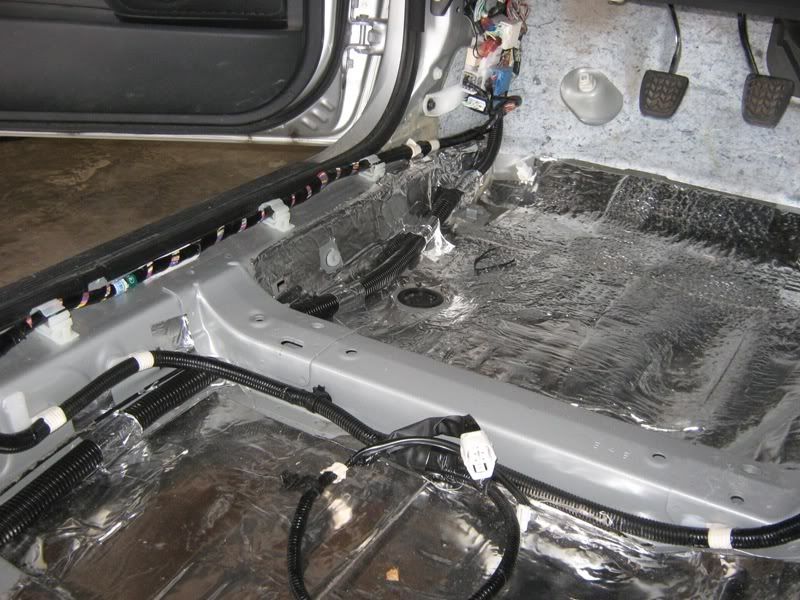
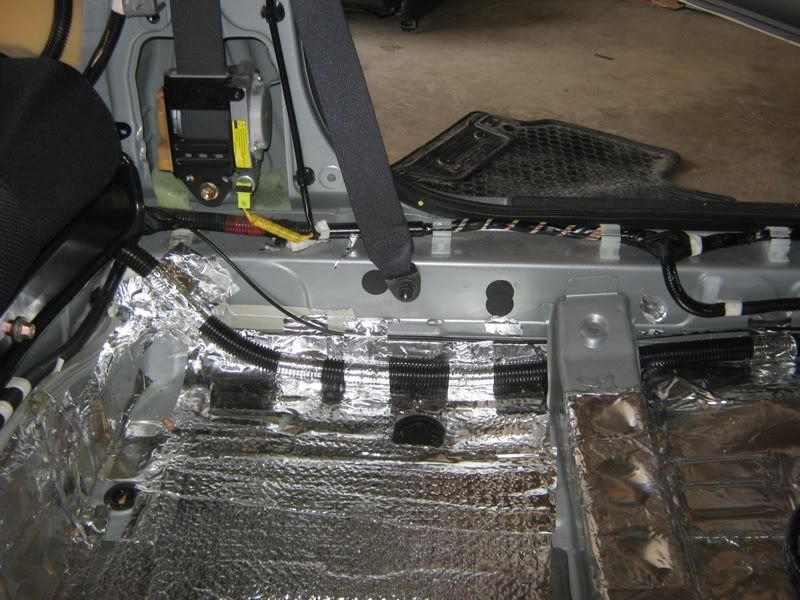
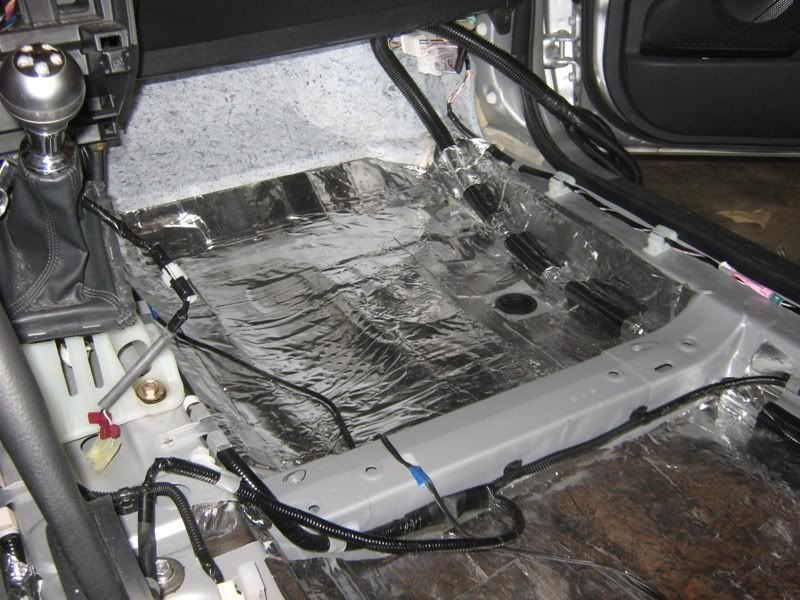
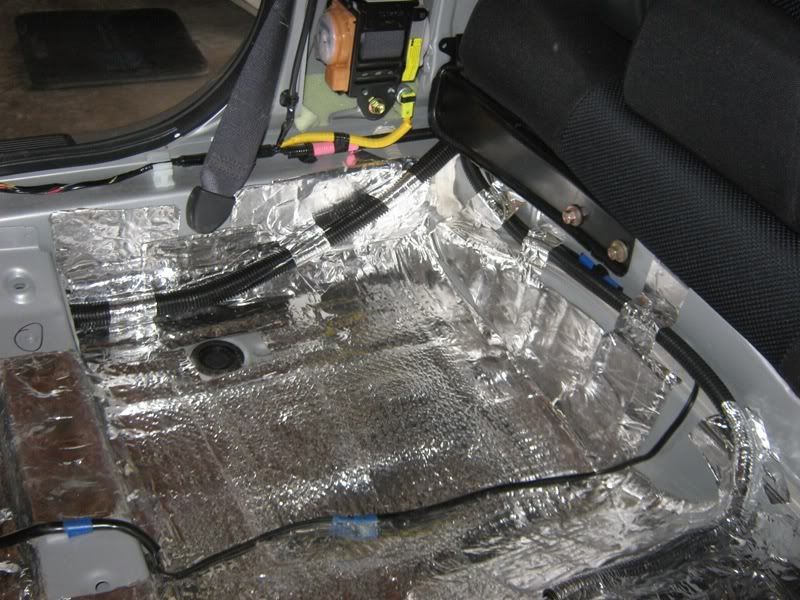
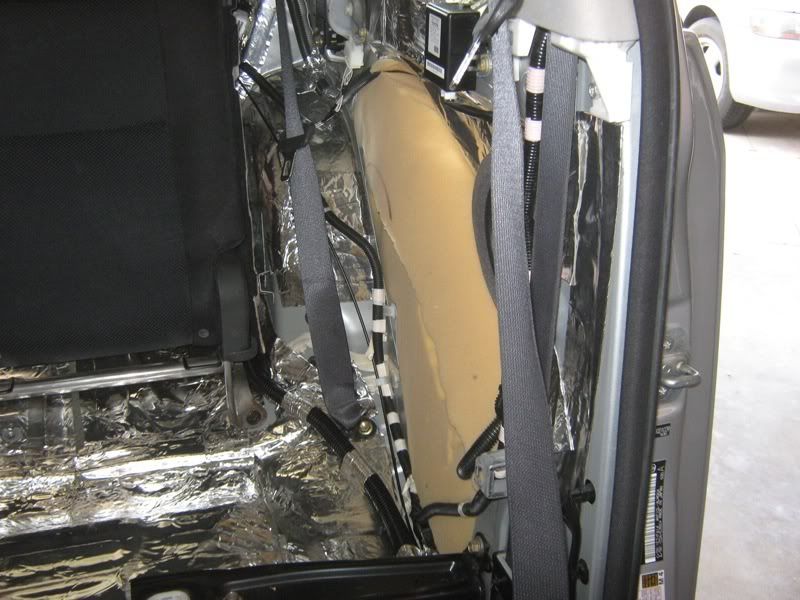
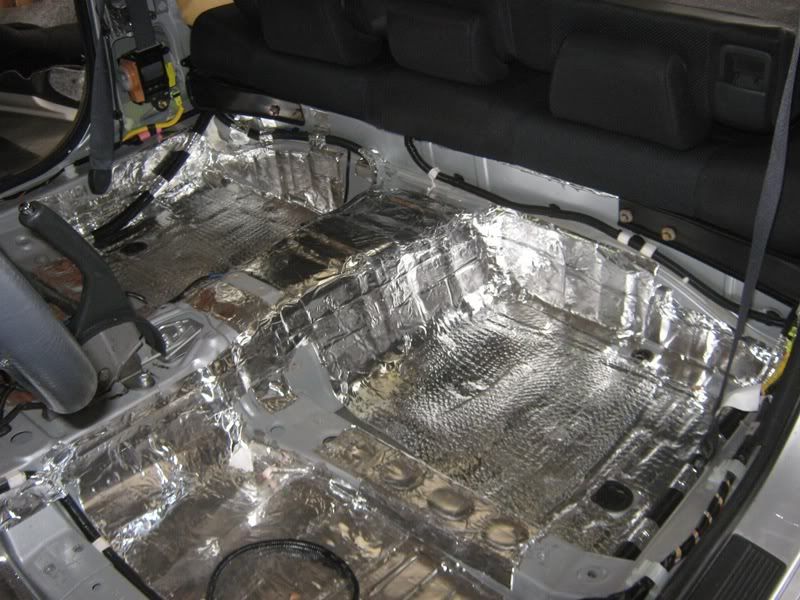
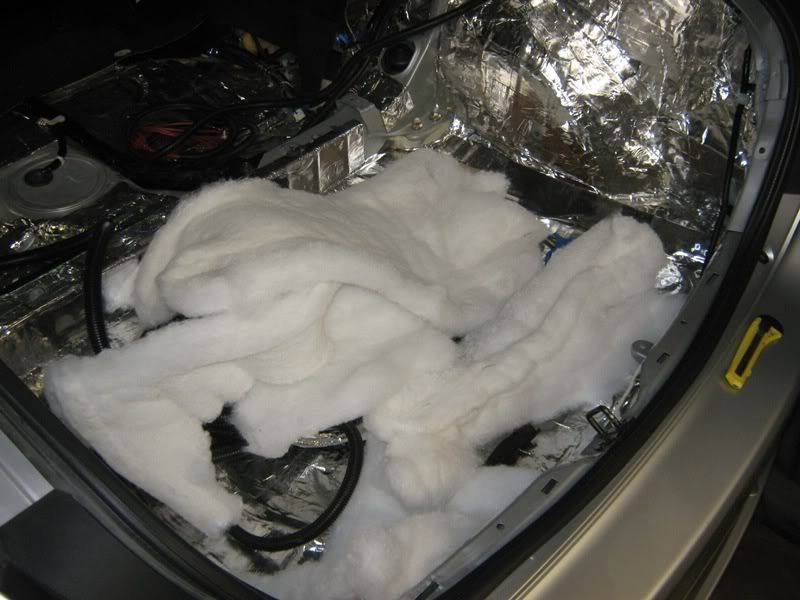
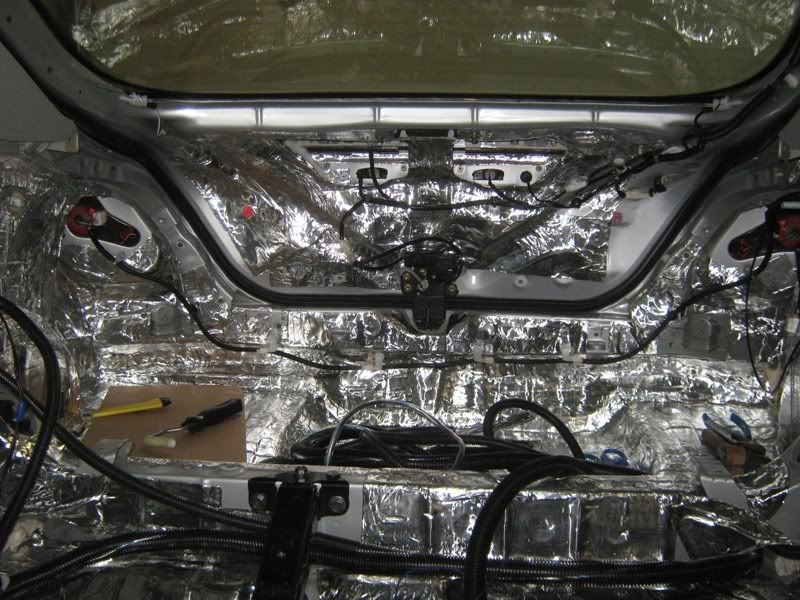
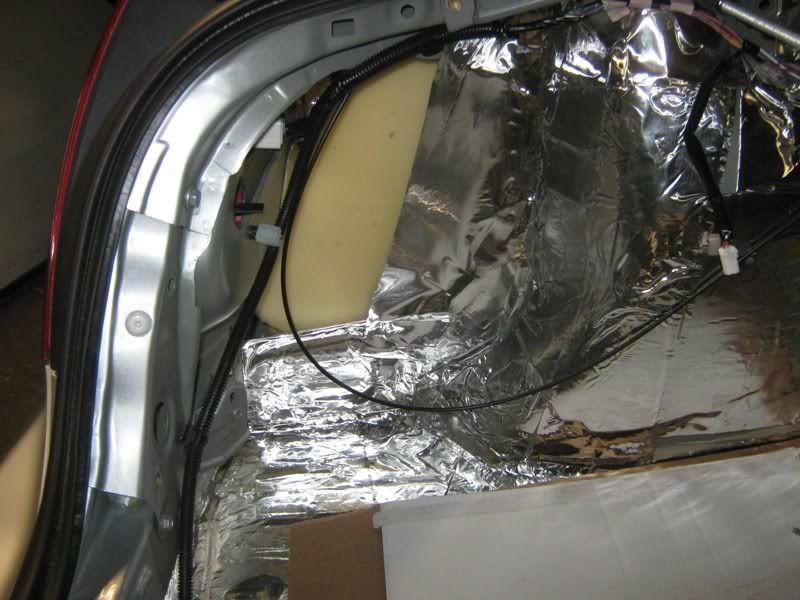
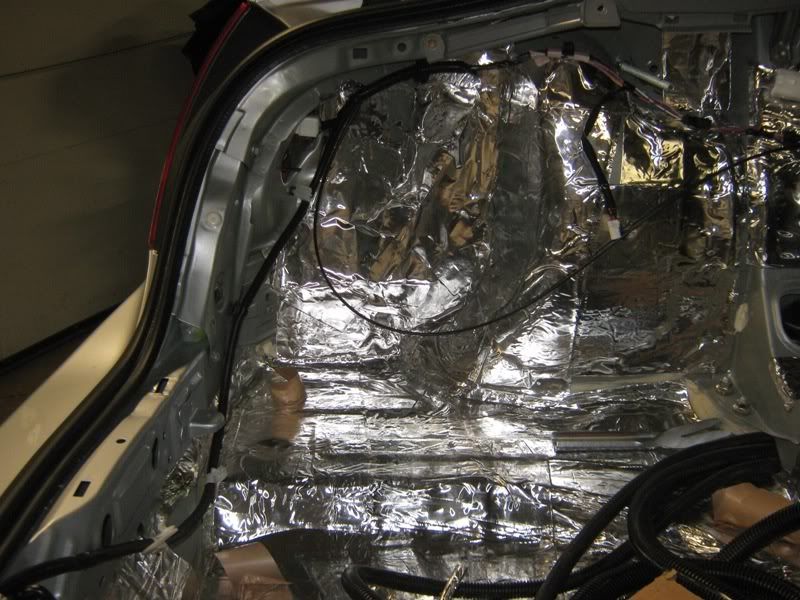
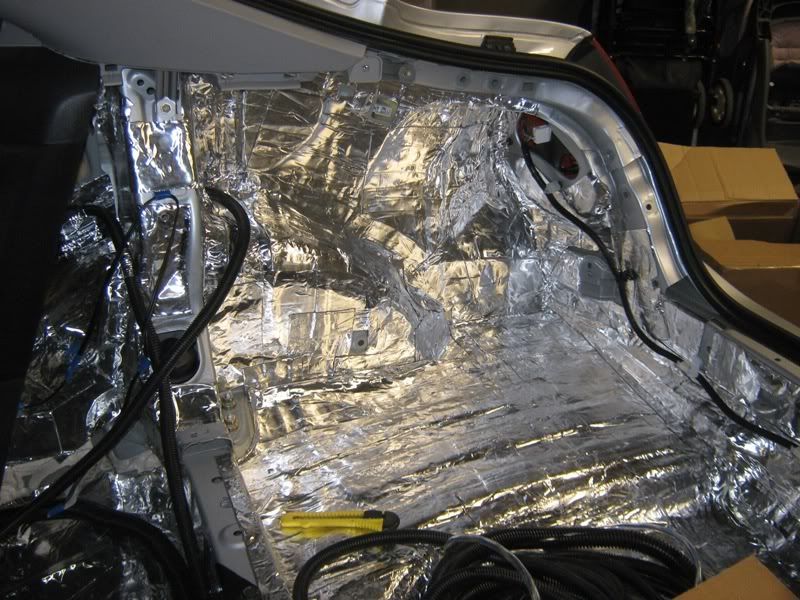
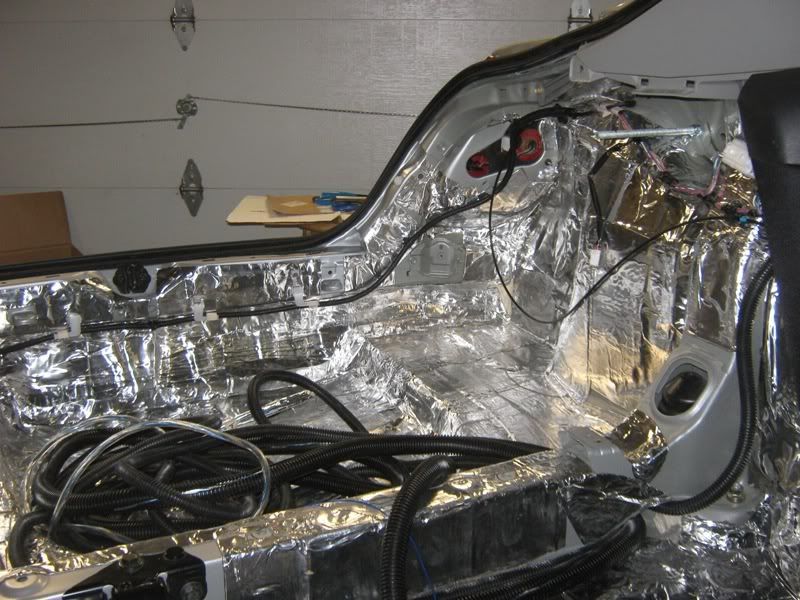
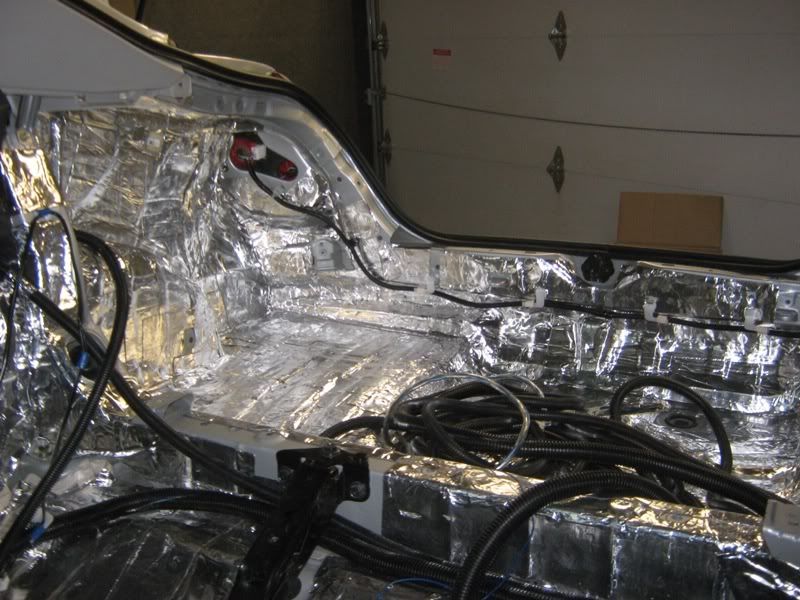
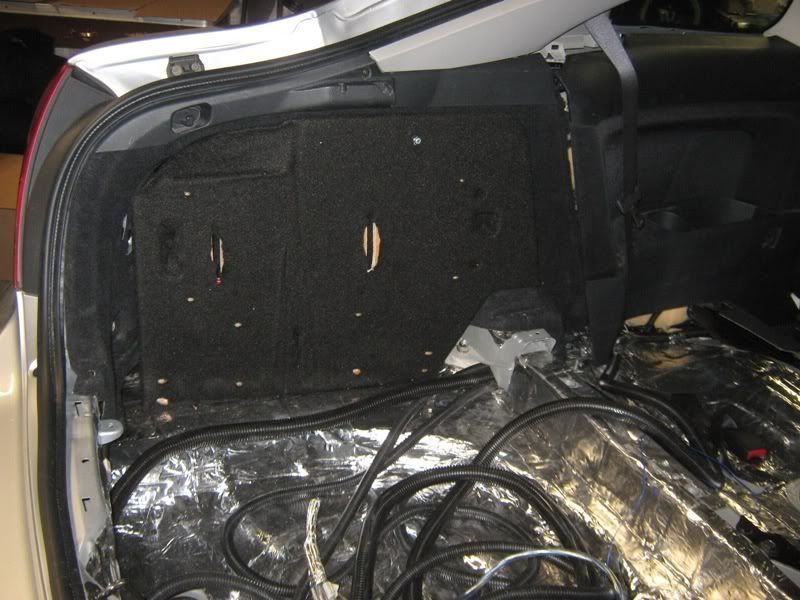
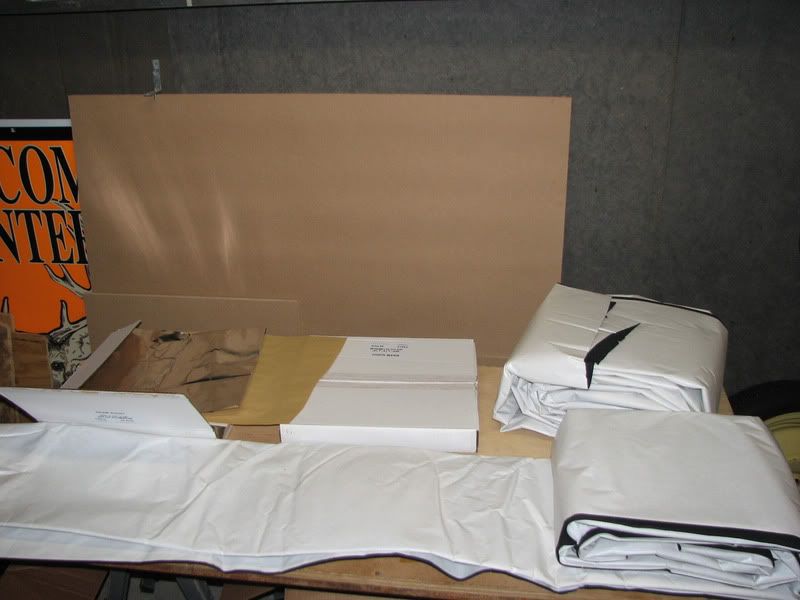
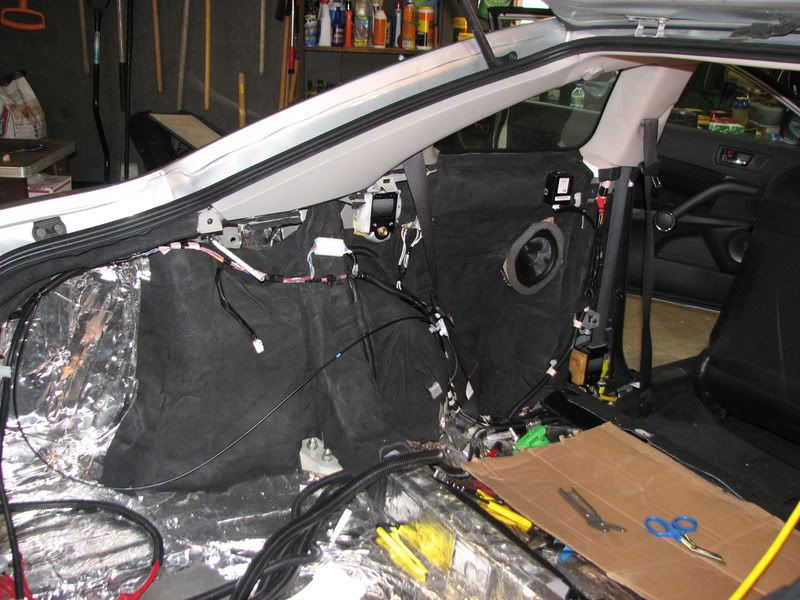
We also picked up 200st. ft. of Raammat BXT II and 200 sq. ft. of adhesive Ensolite ($800 total). The entire vehicle will be treated.

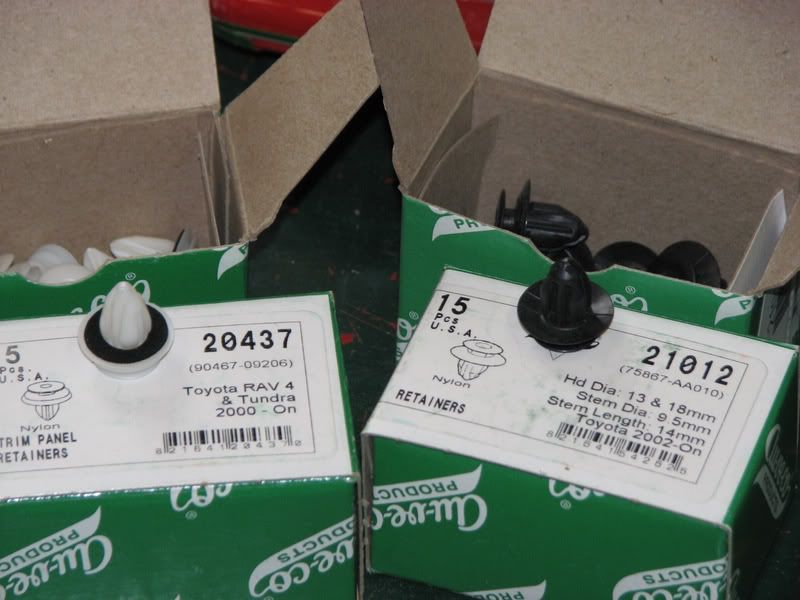
Then we bought lots of install accessories - wire, parts, resin, fiberglass, MDF, and our total is over $7000.

On to the pictures...

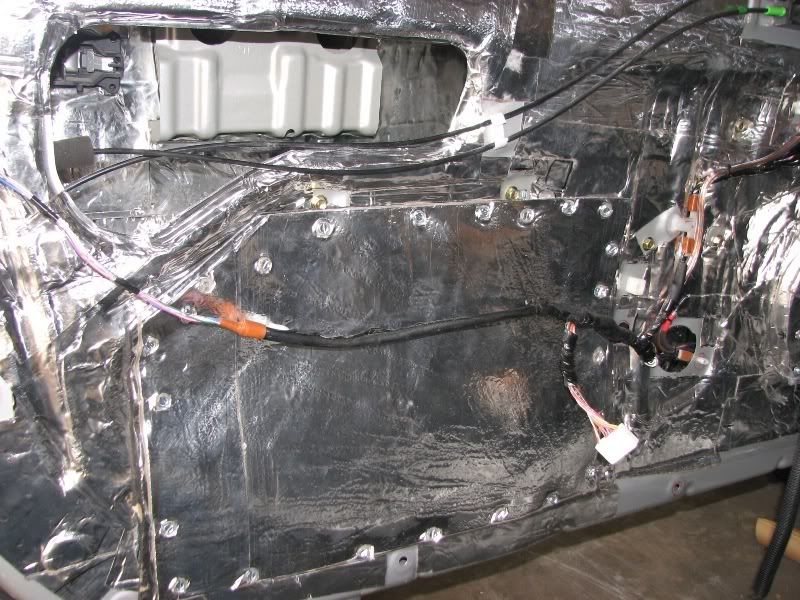
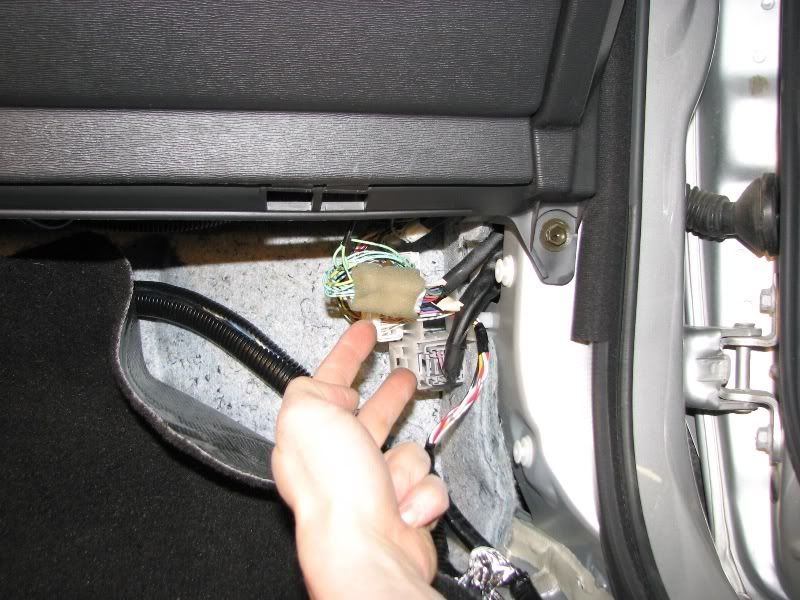
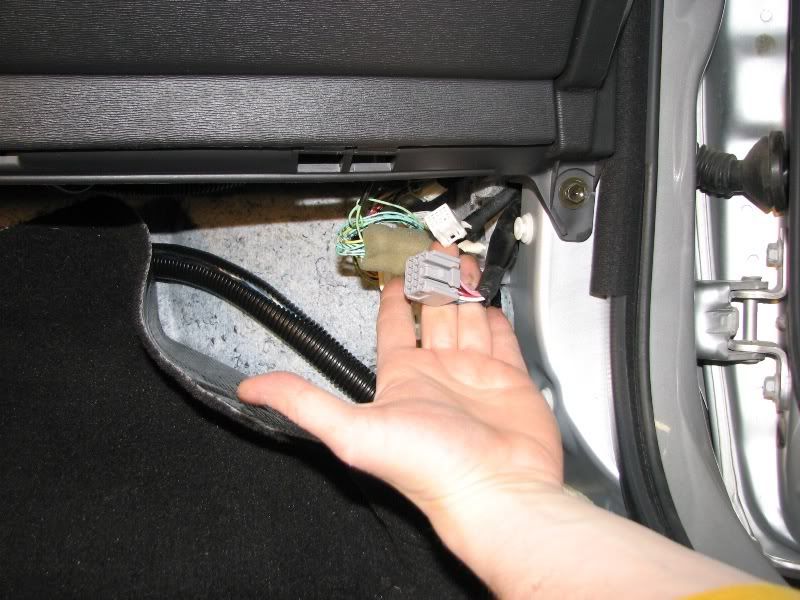
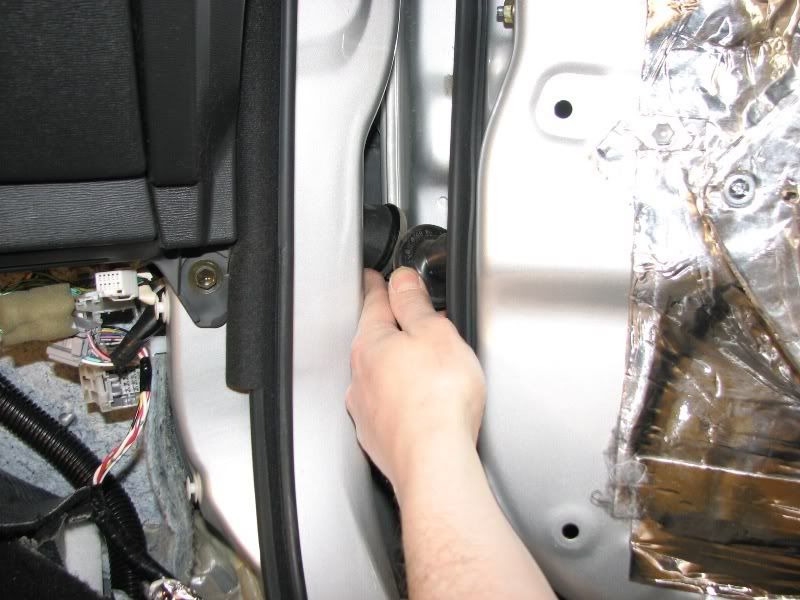
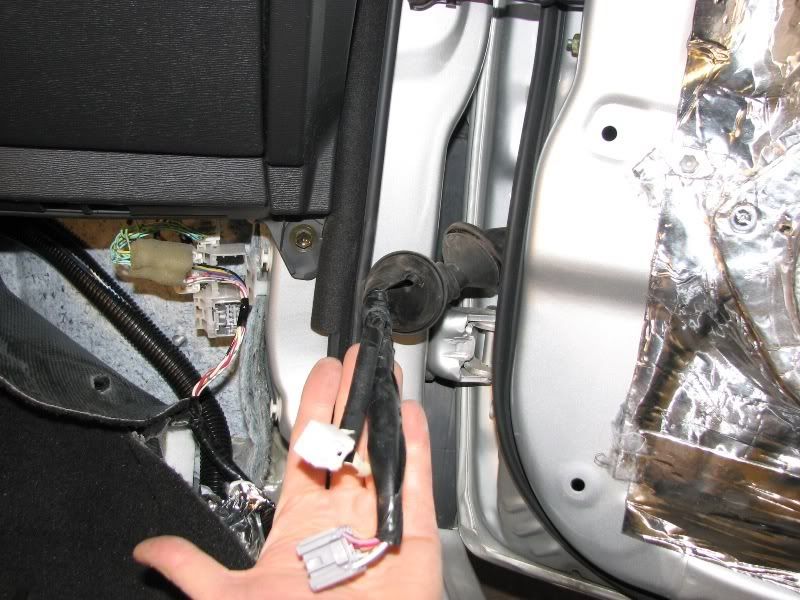
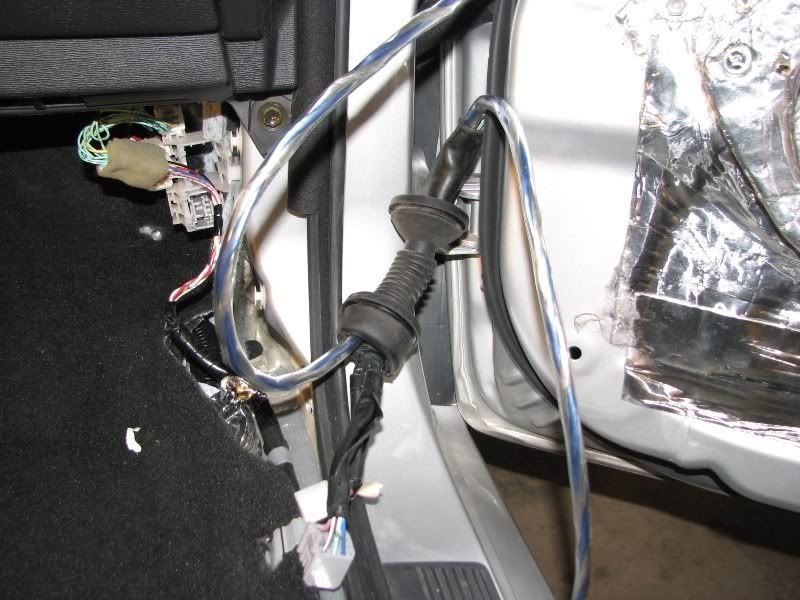
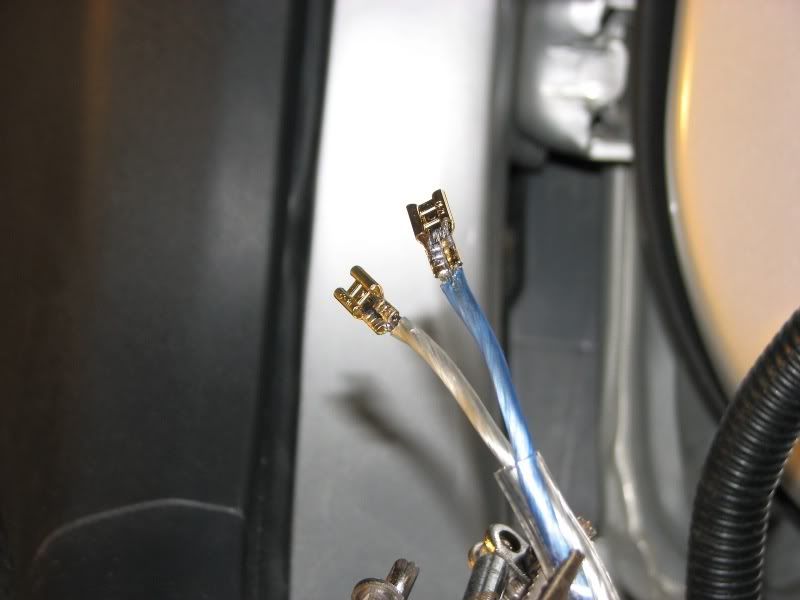
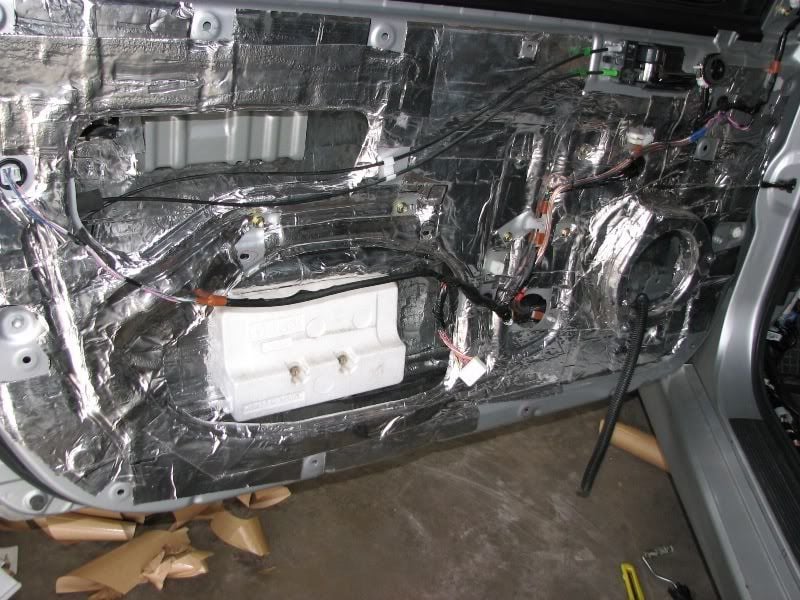
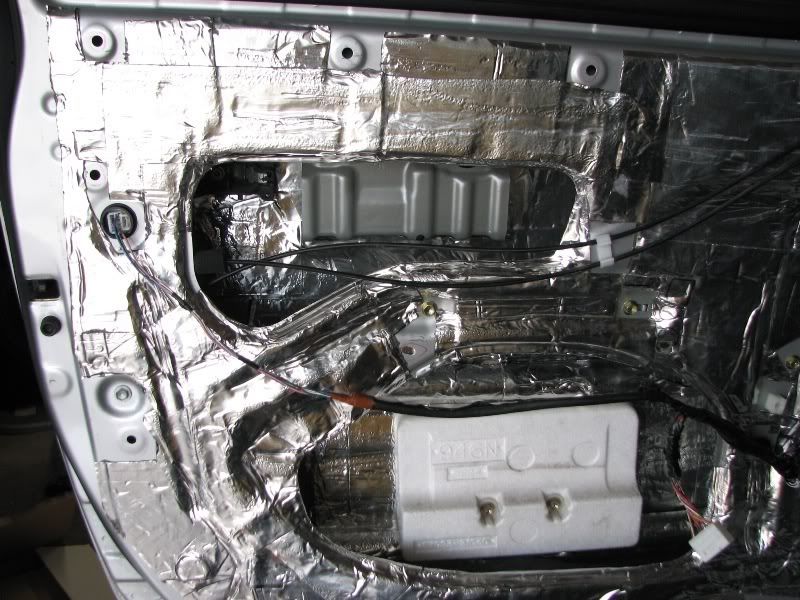
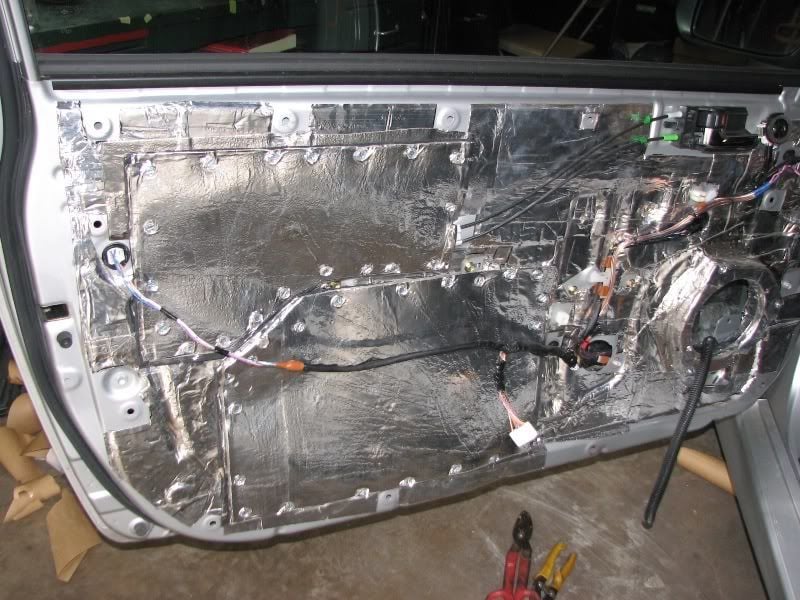
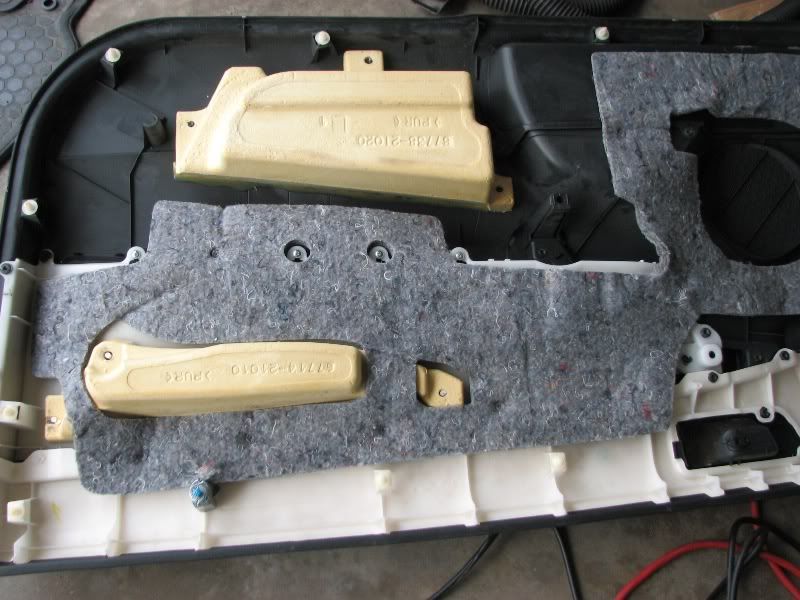
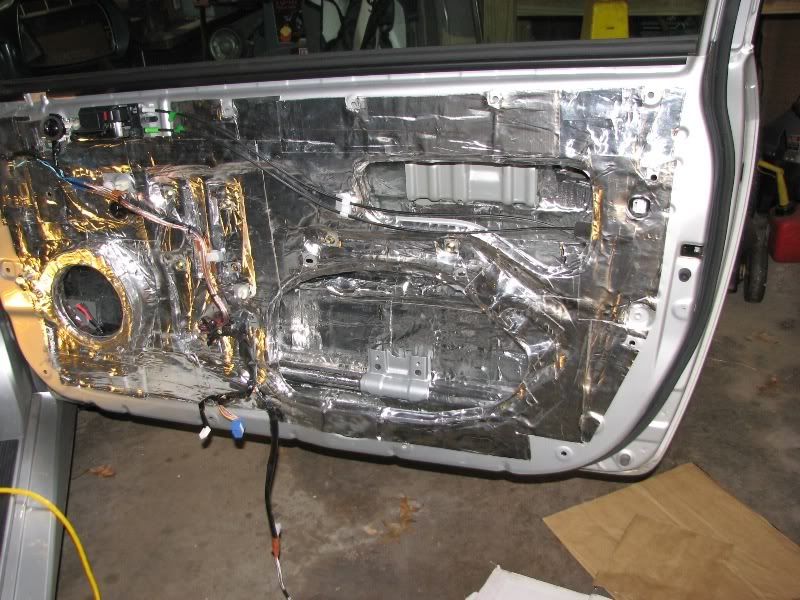
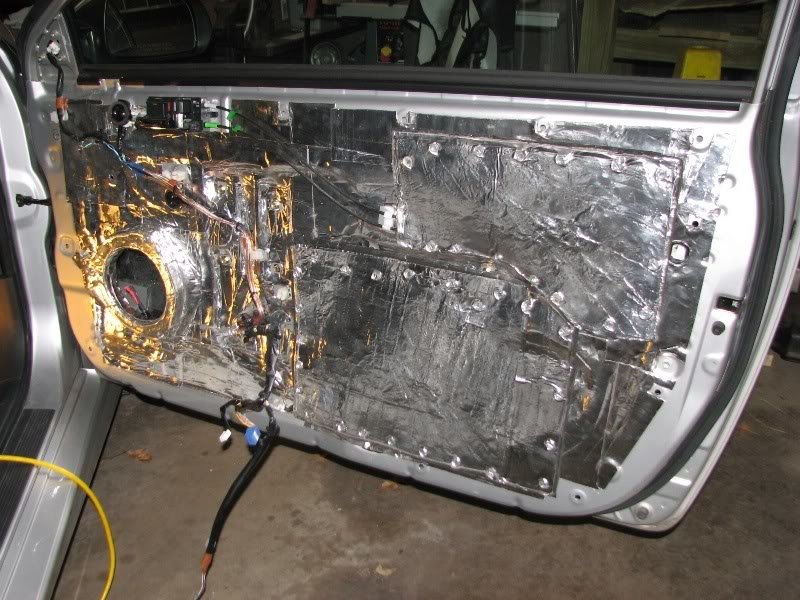
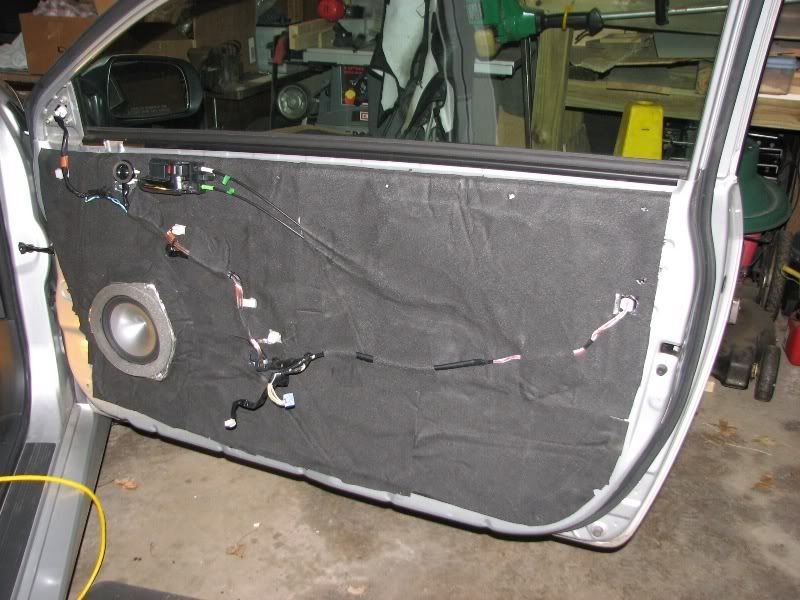
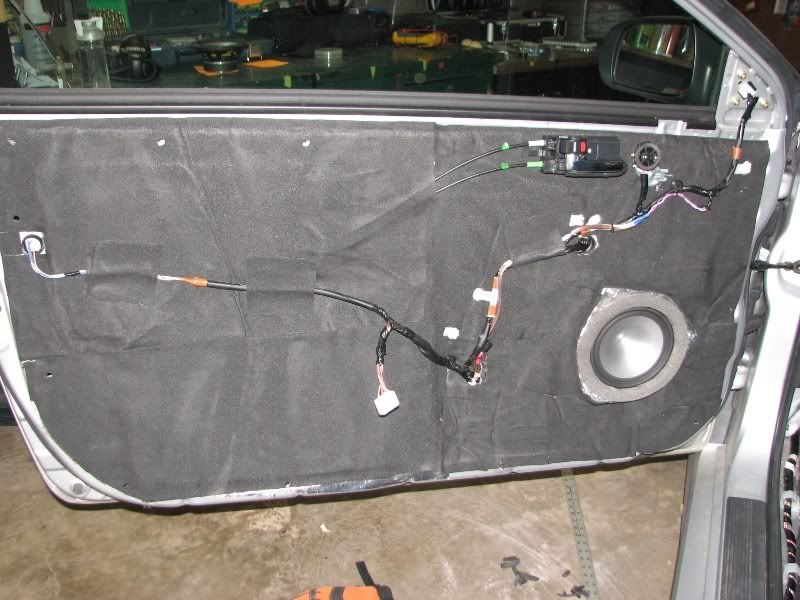
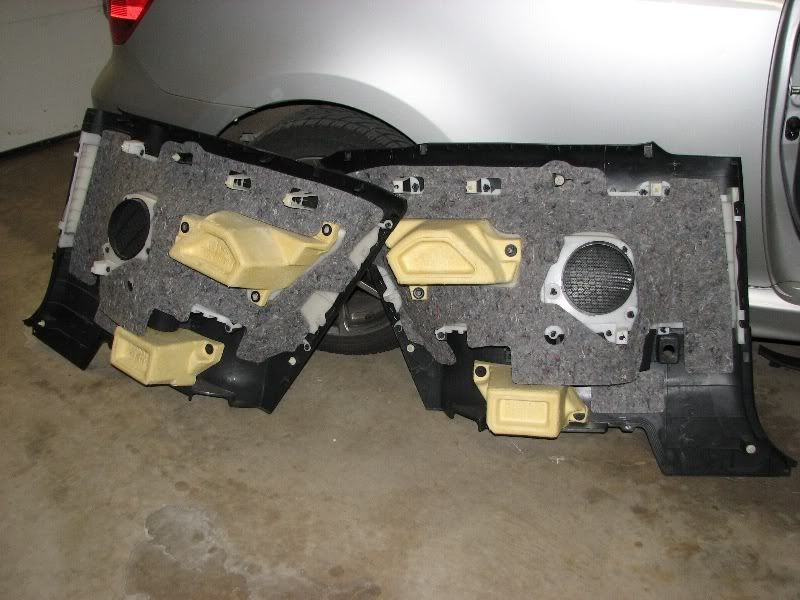
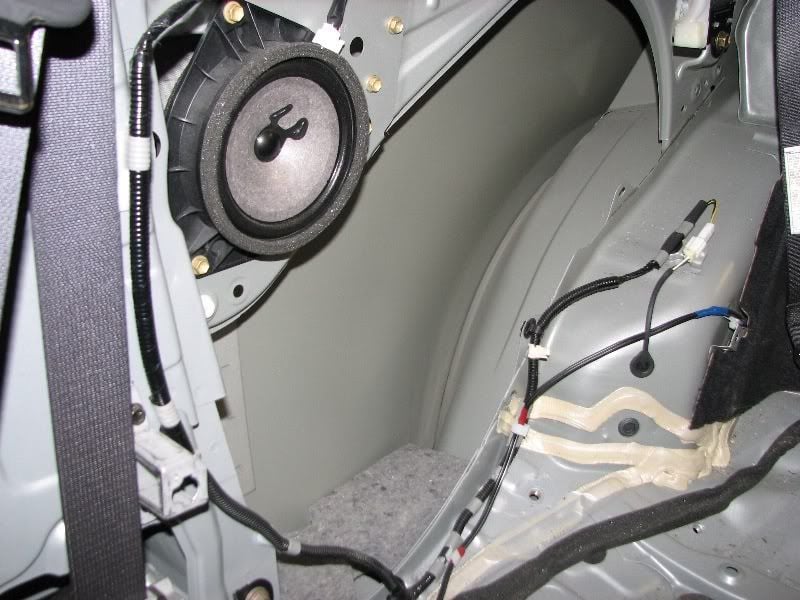
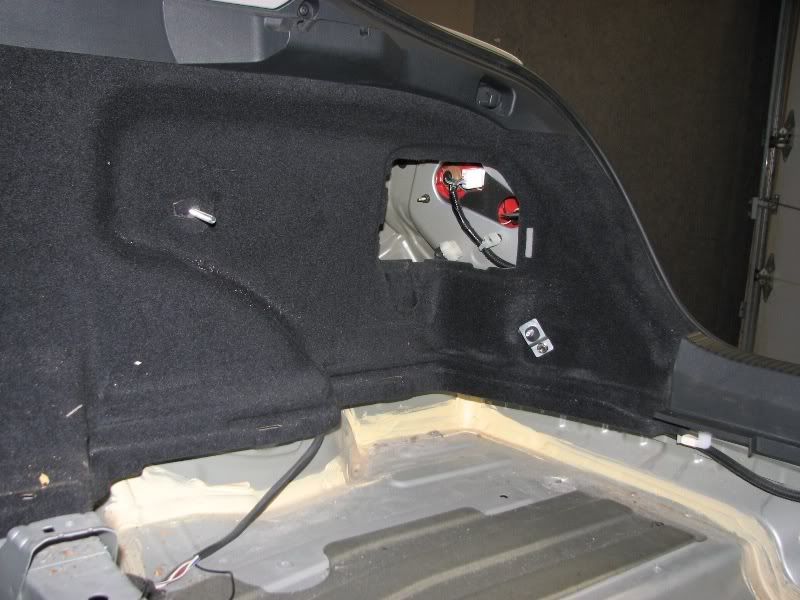
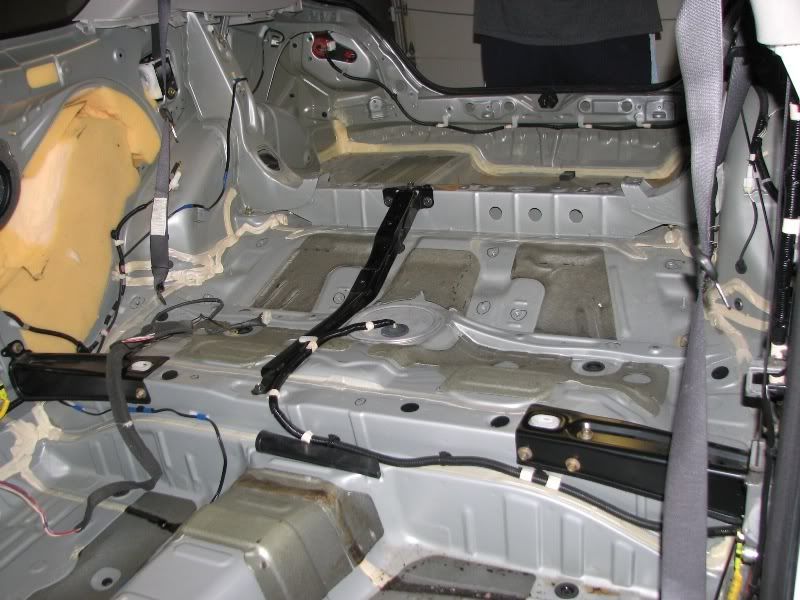
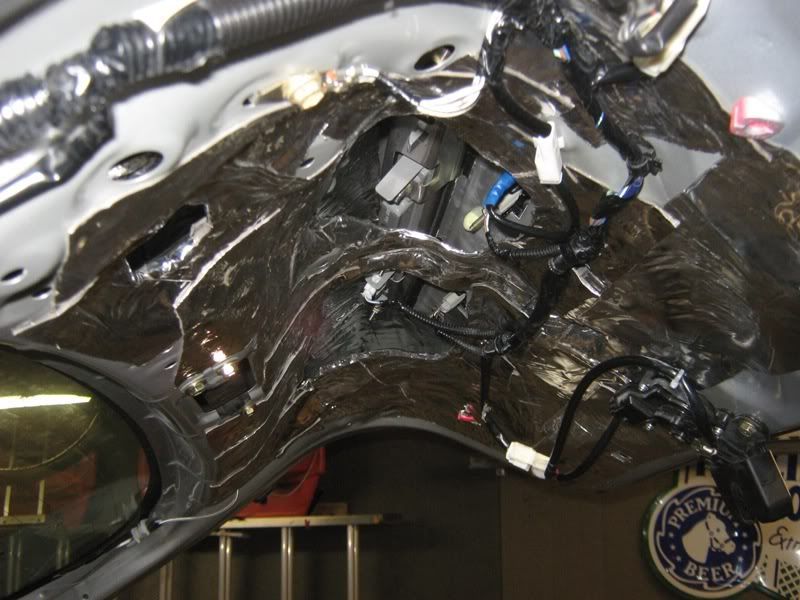
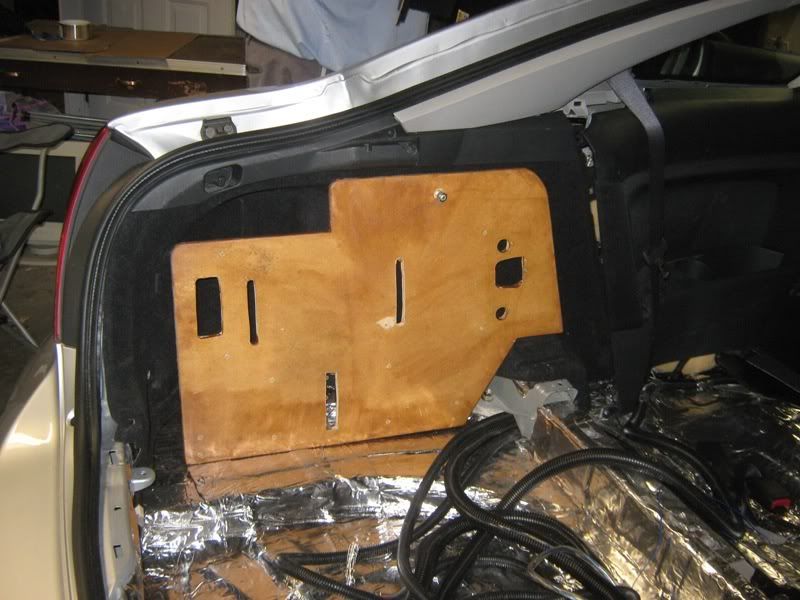
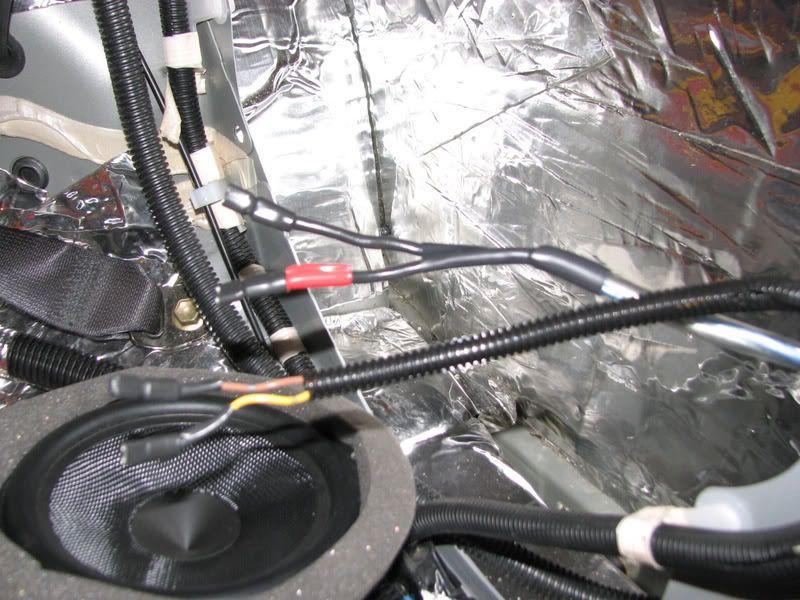
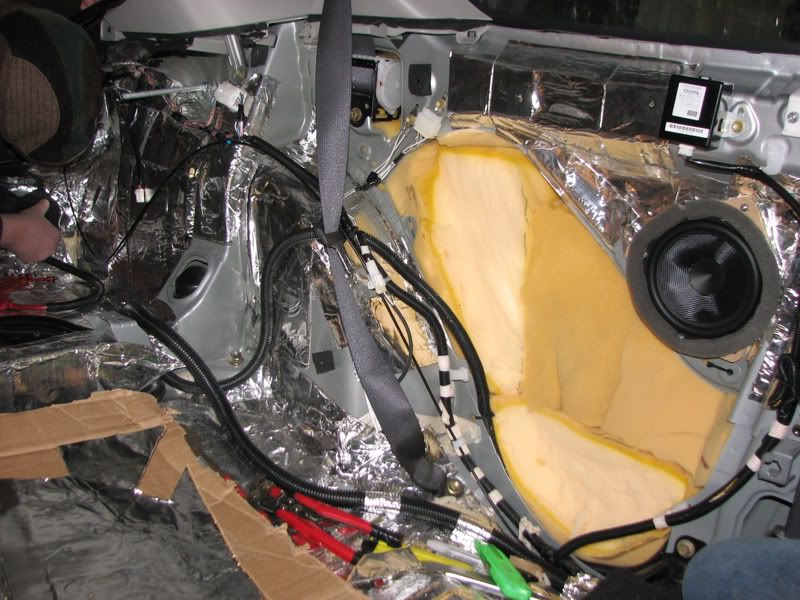
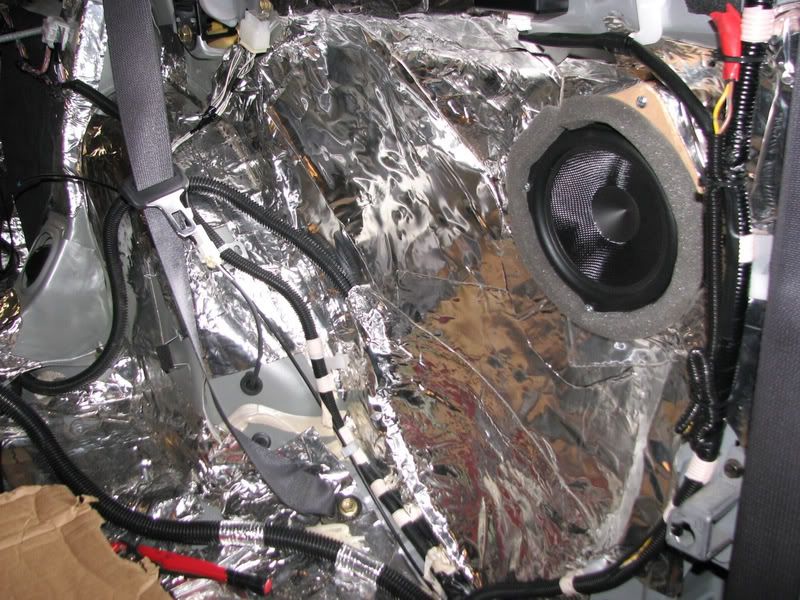
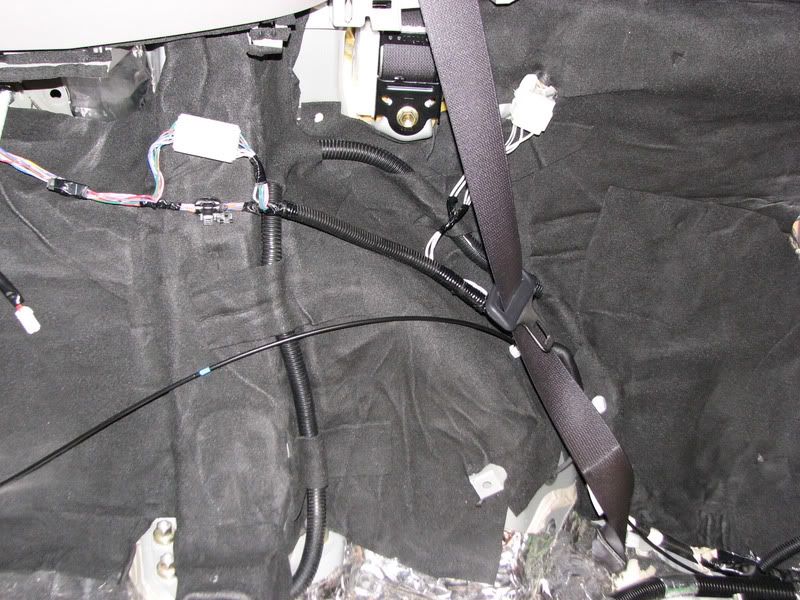
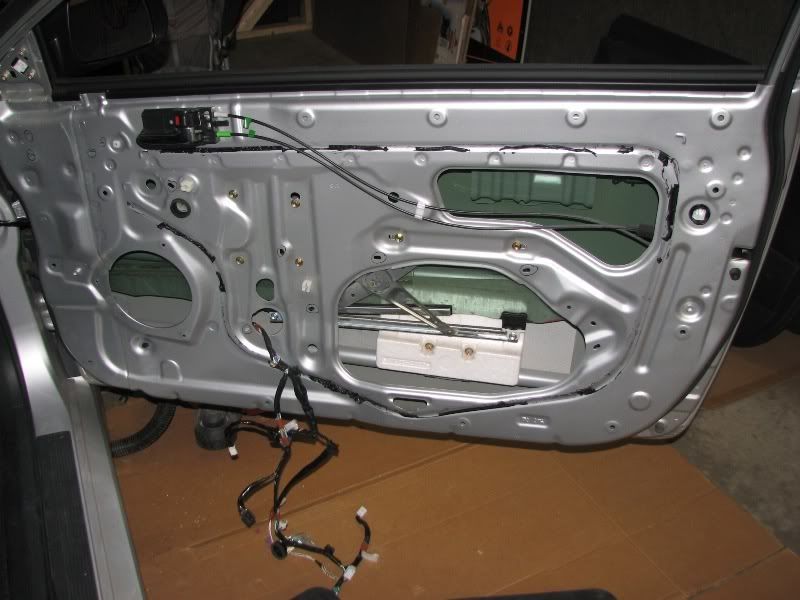
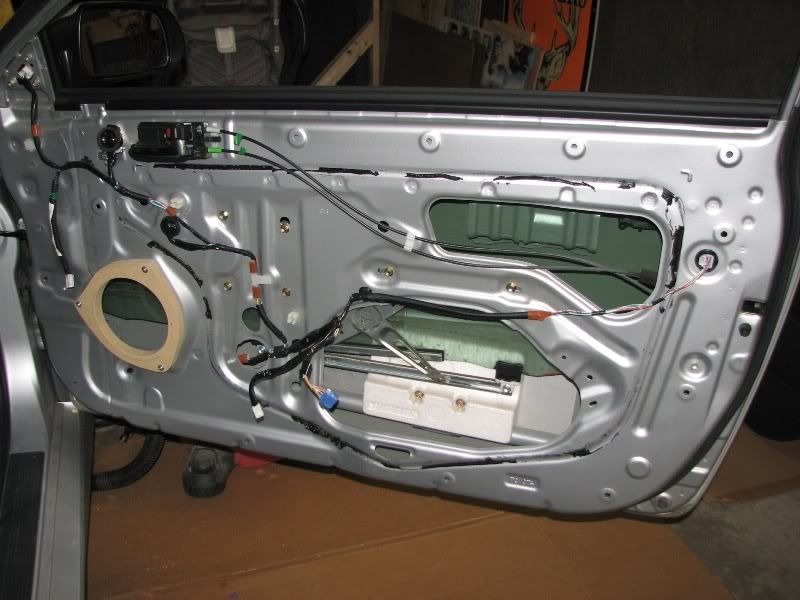
Factory Door - remove panel, remove all wiring clips, remove factory speaker, and clean all metal surfaces

2005tC_doors004.jpg


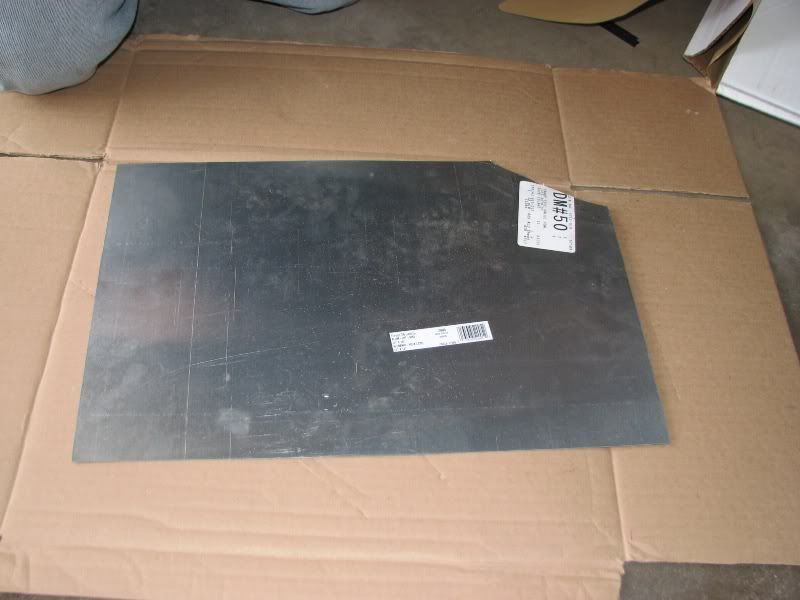
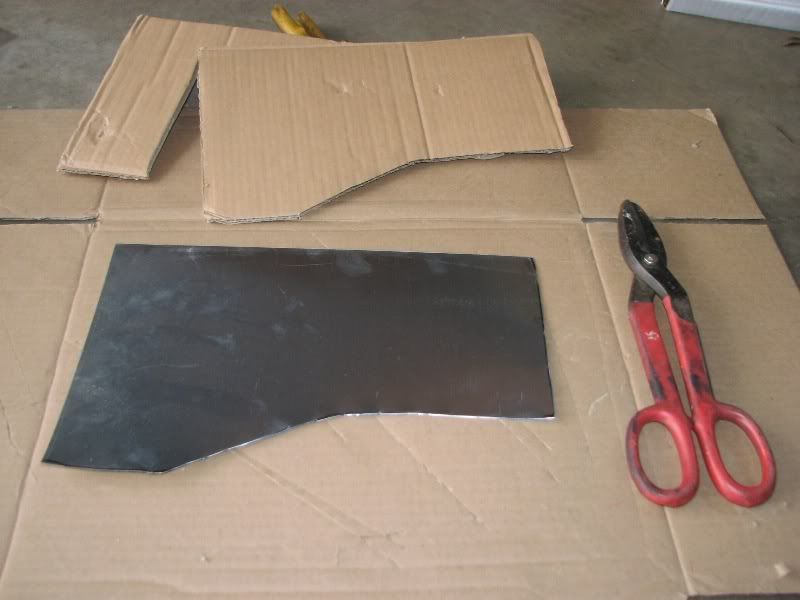
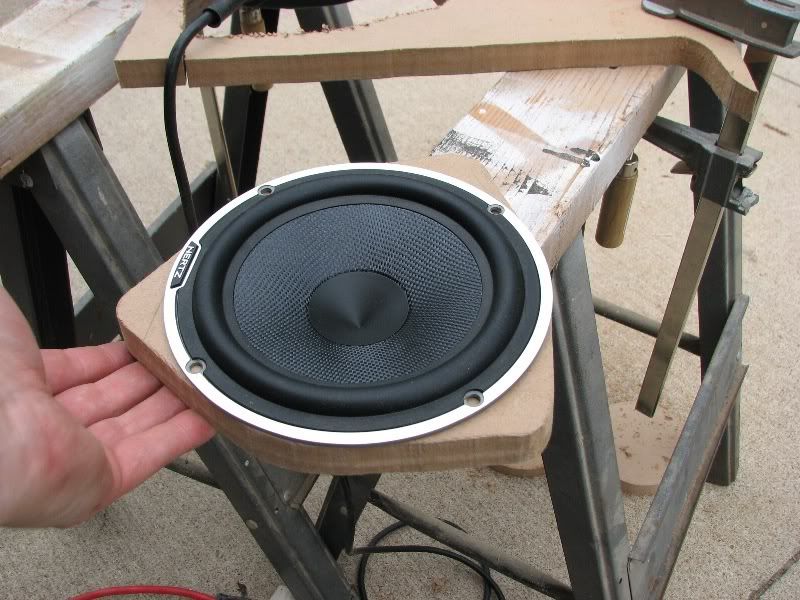
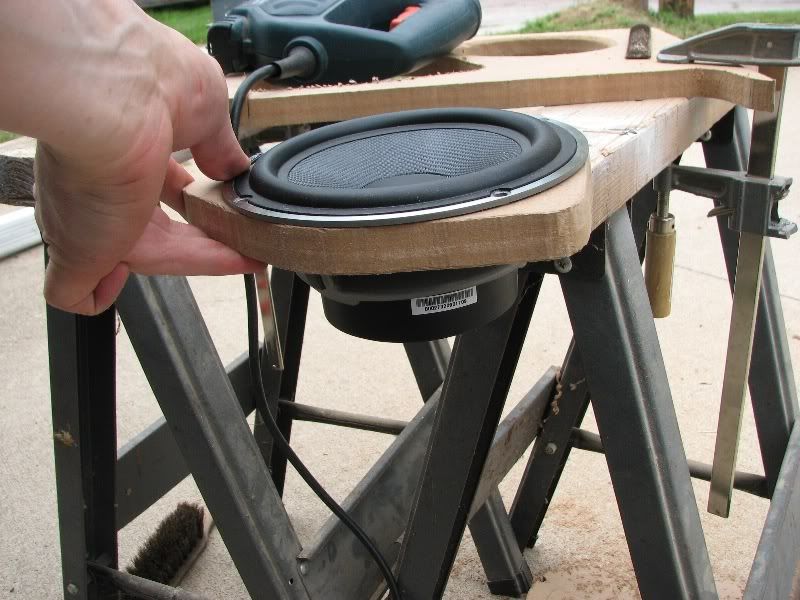
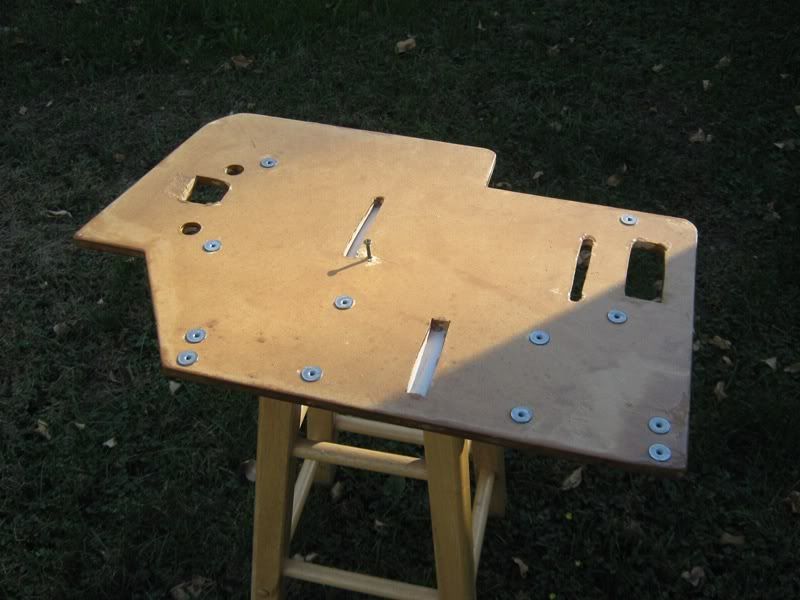
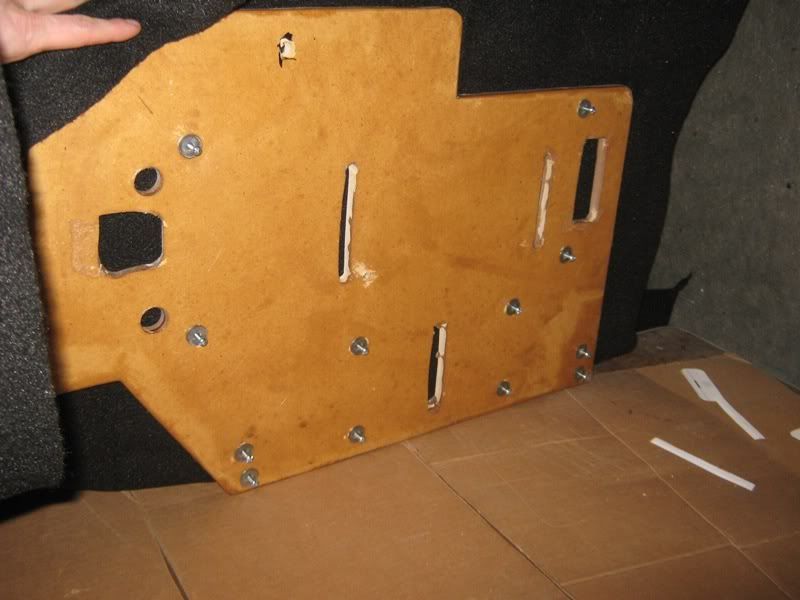
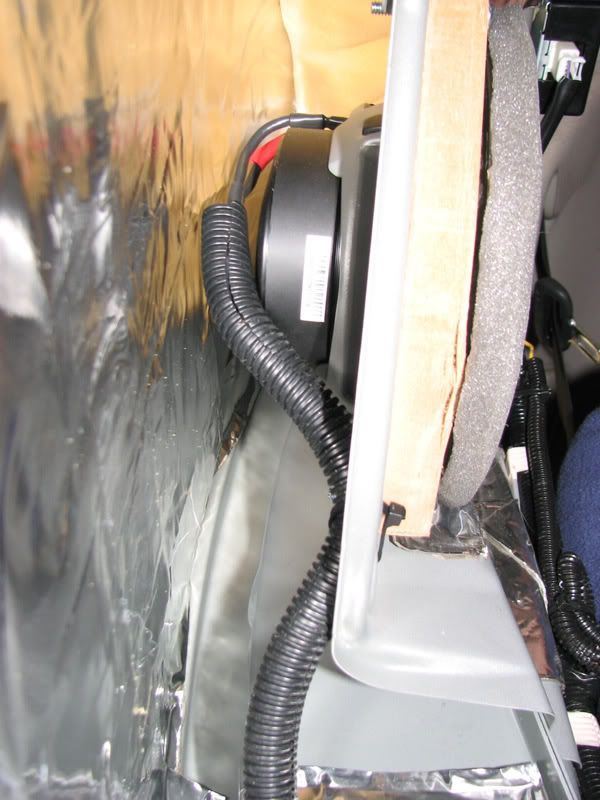
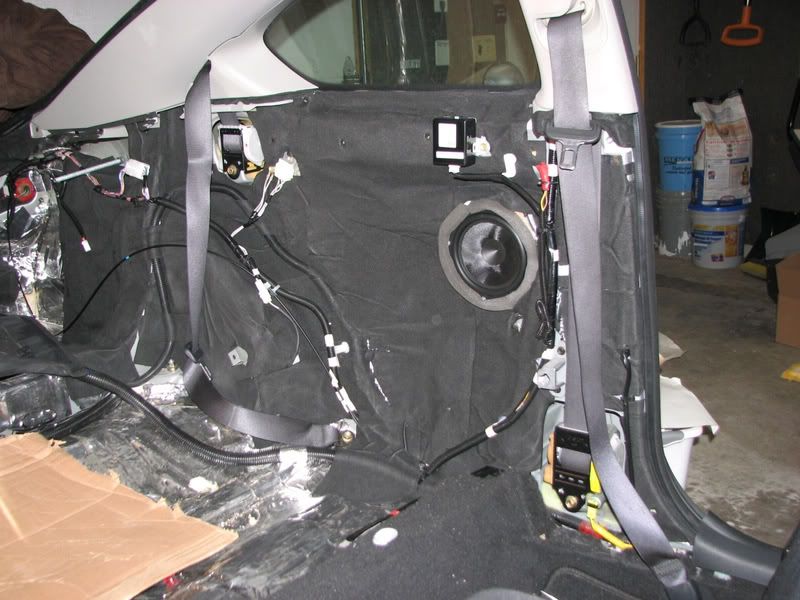
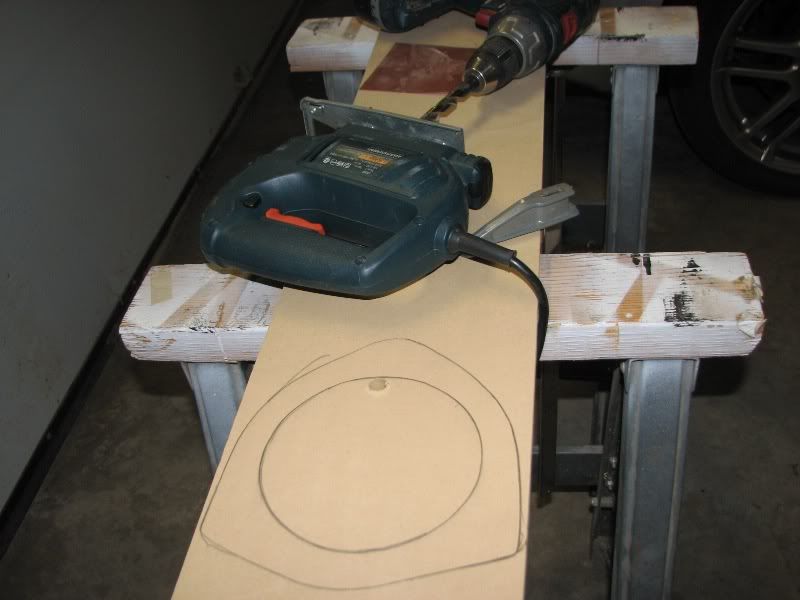
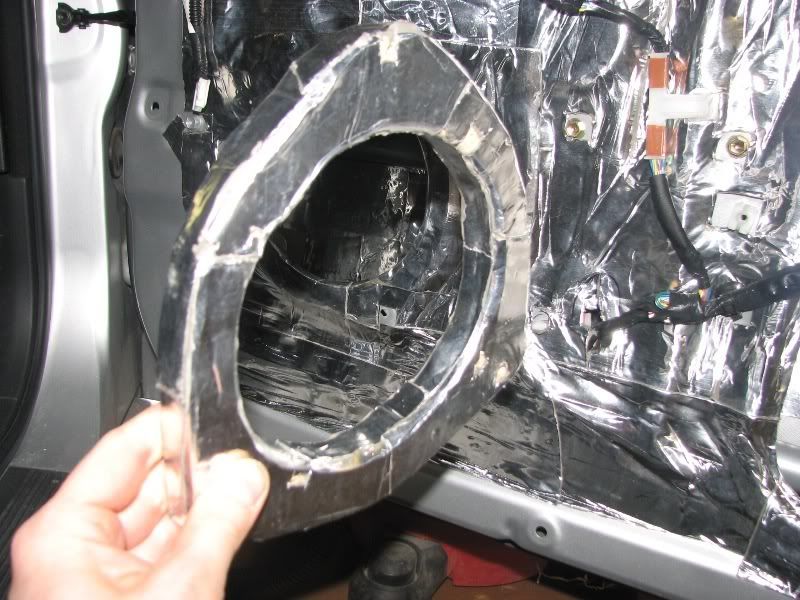
Trace the factory speakers and make a new baffle out of 3/4" MDF

2005tC_doors005.jpg


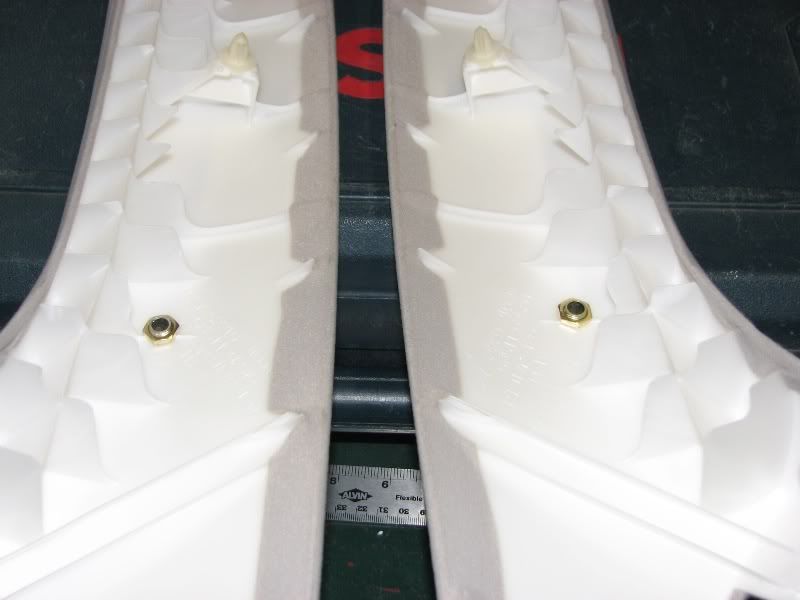
Mount using the factory speaker rivet holes and a 1.5" 10-24 machine screw and bolt.

2005tC_doors002.jpg


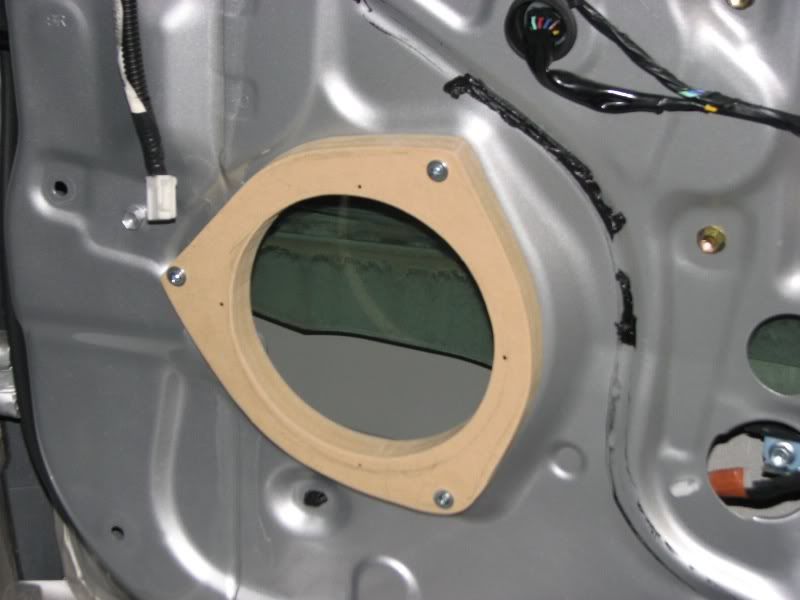
Test fit before deadening

2005tC_doors001.jpg


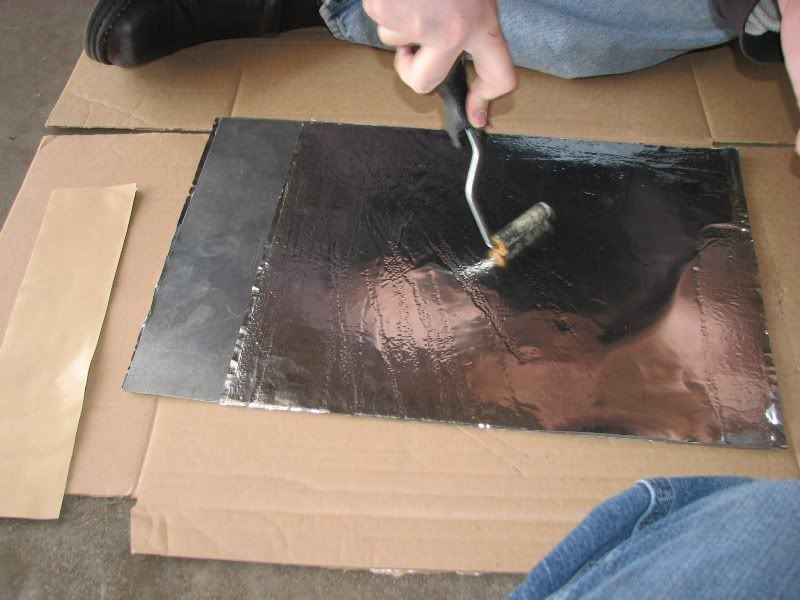
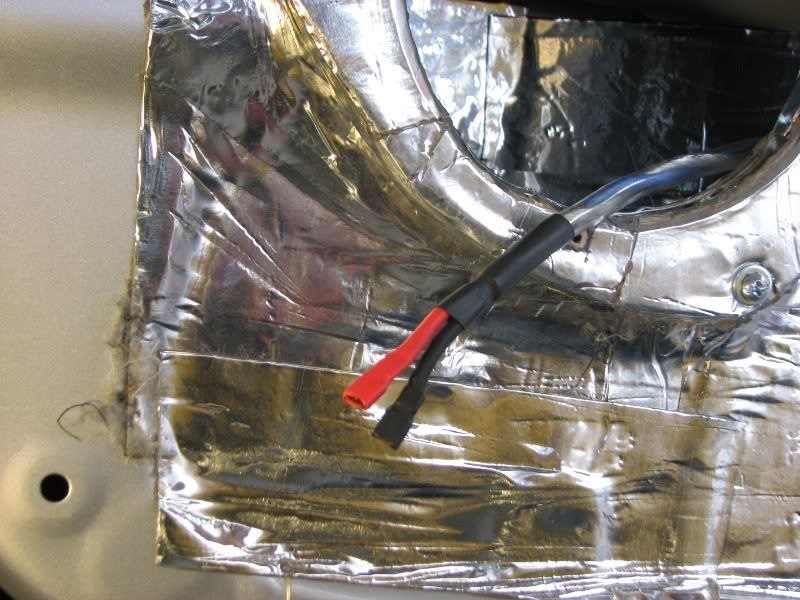
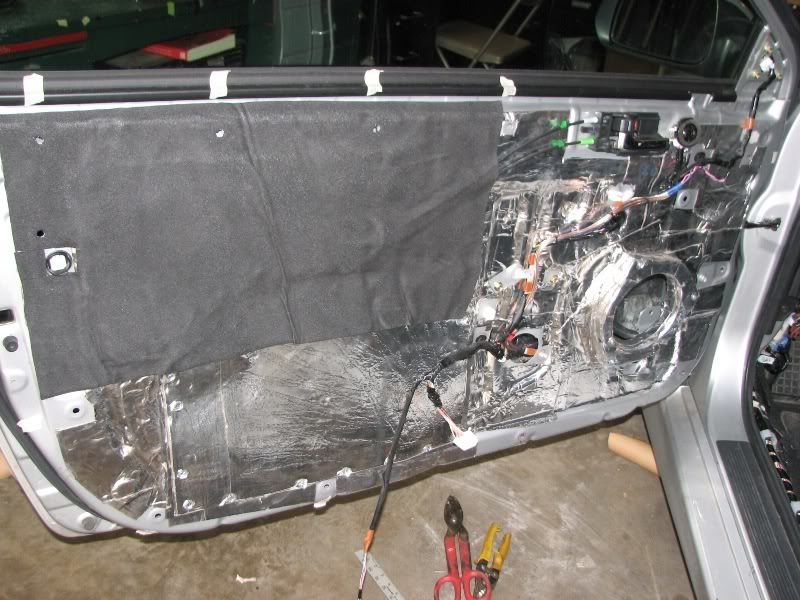
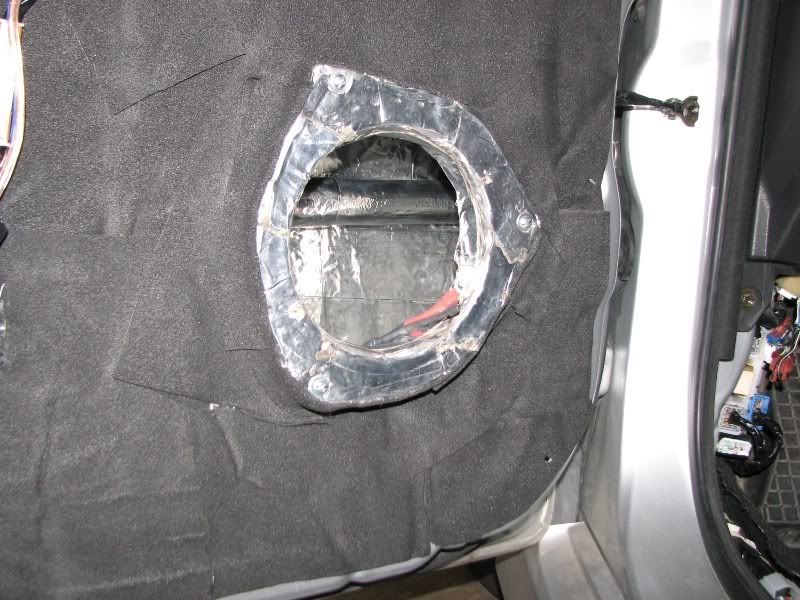
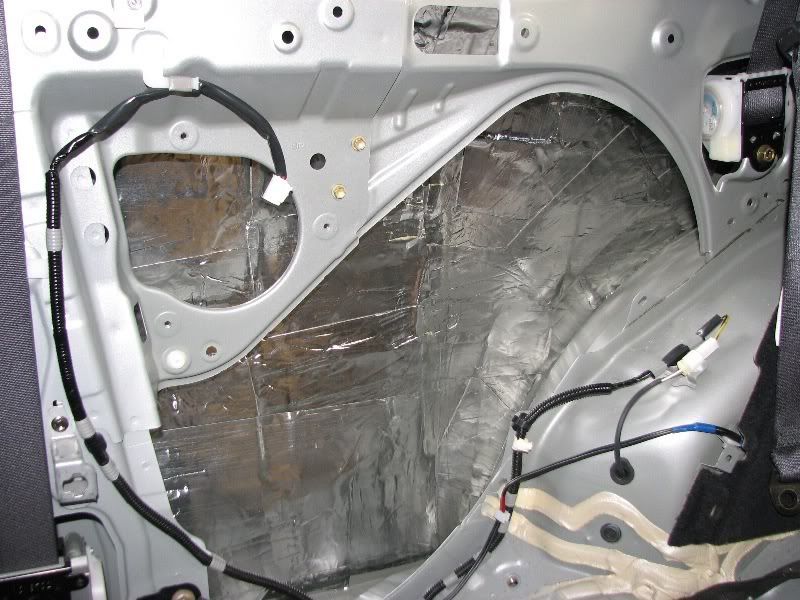
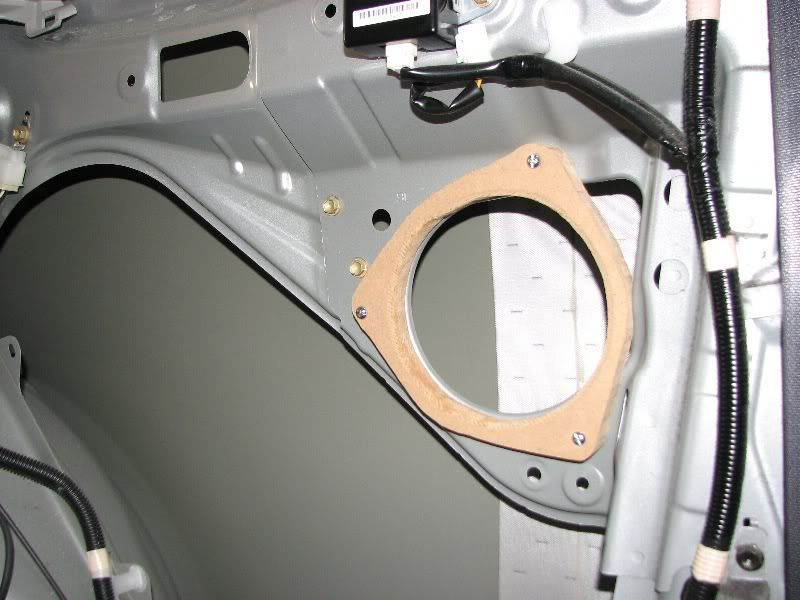
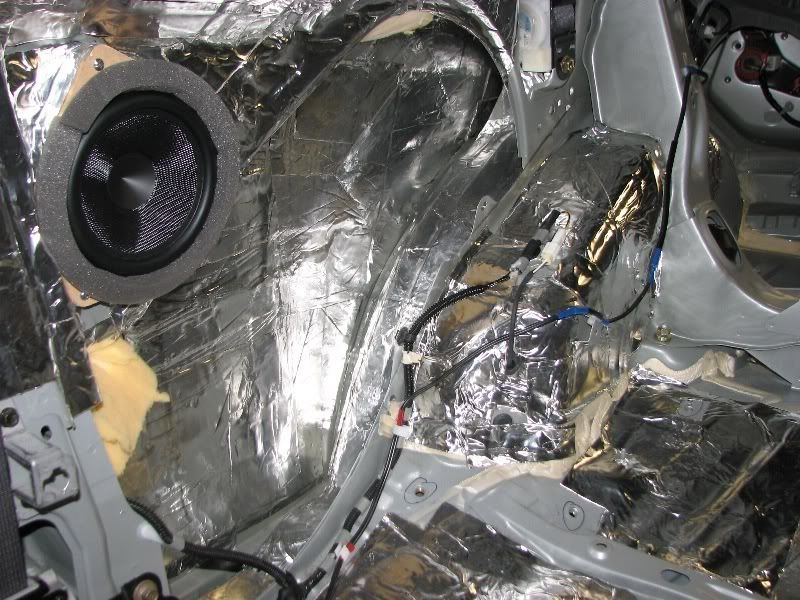
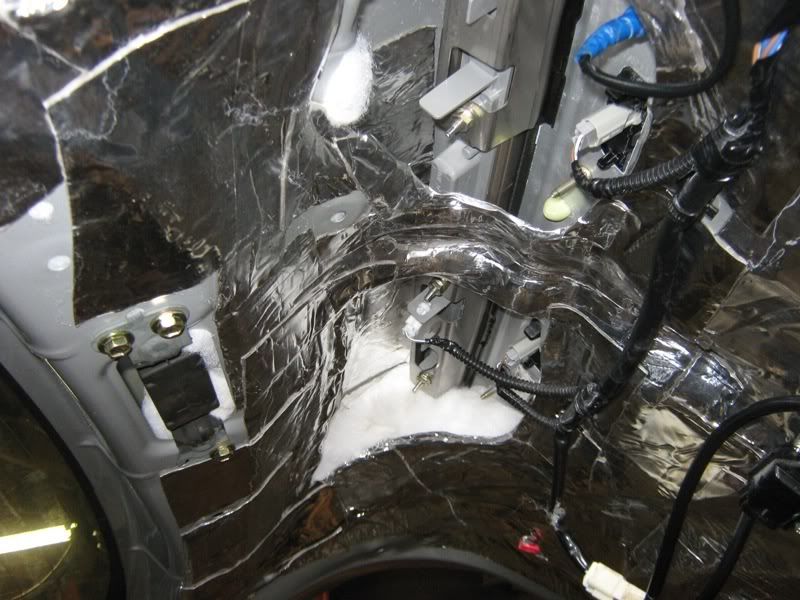
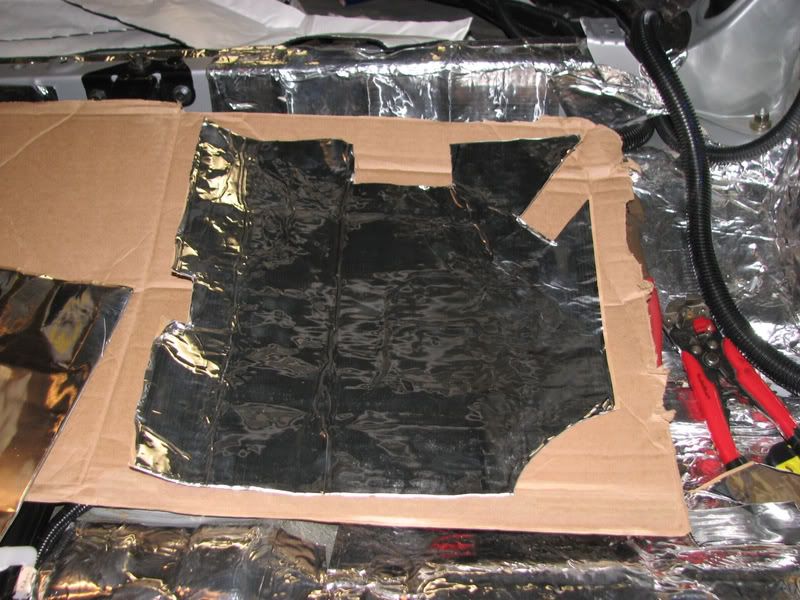
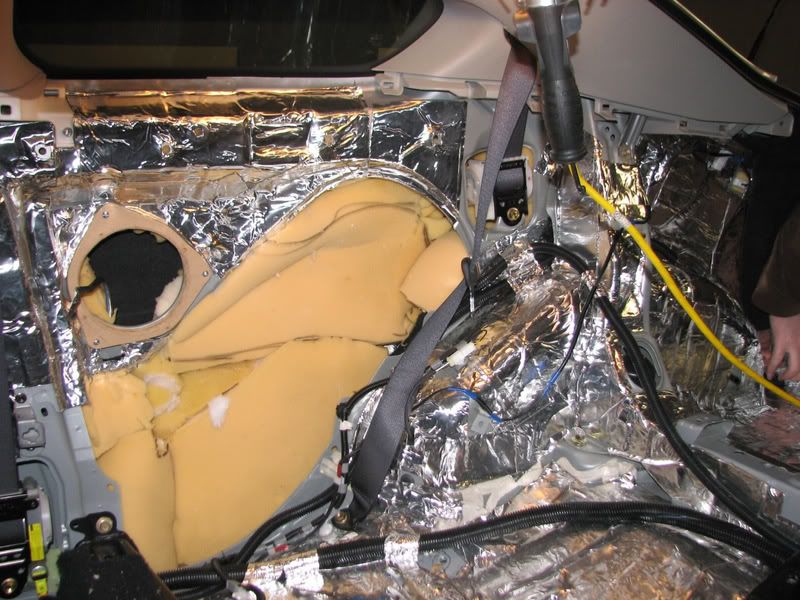
You can't let MDF get wet - deaden the baffle
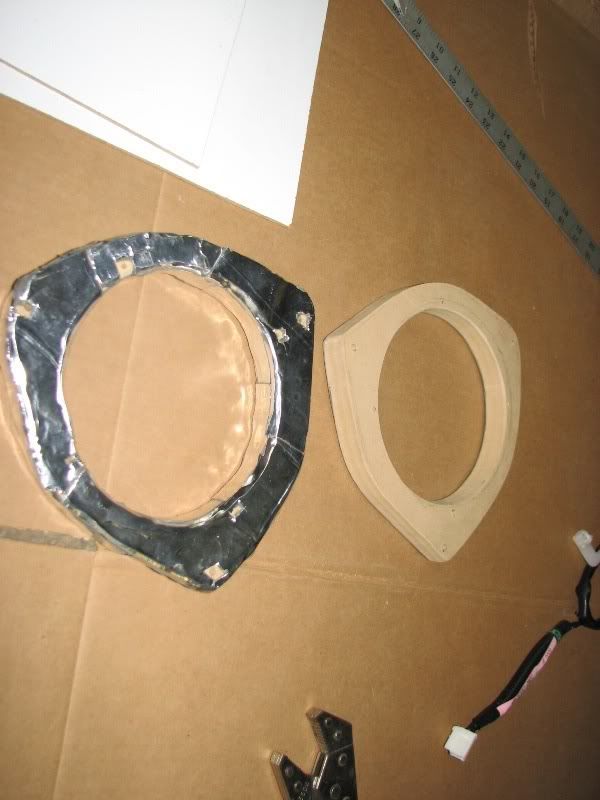
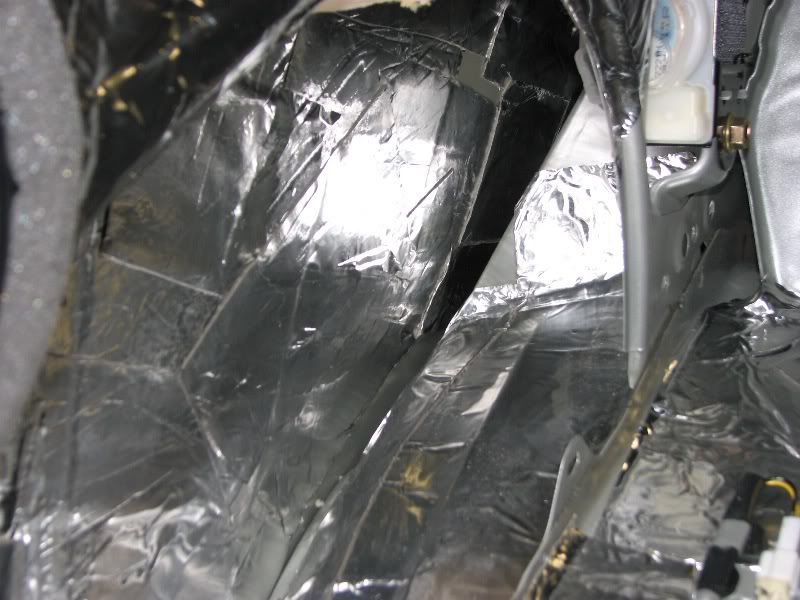
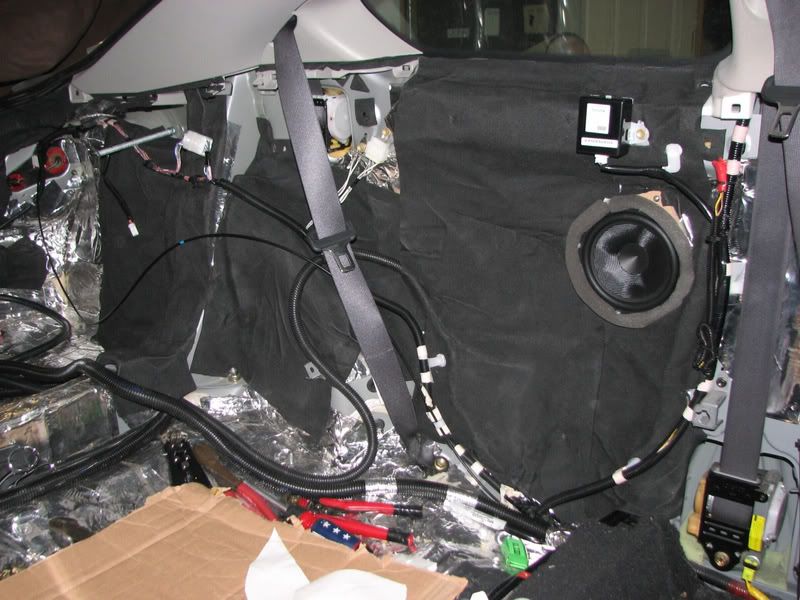
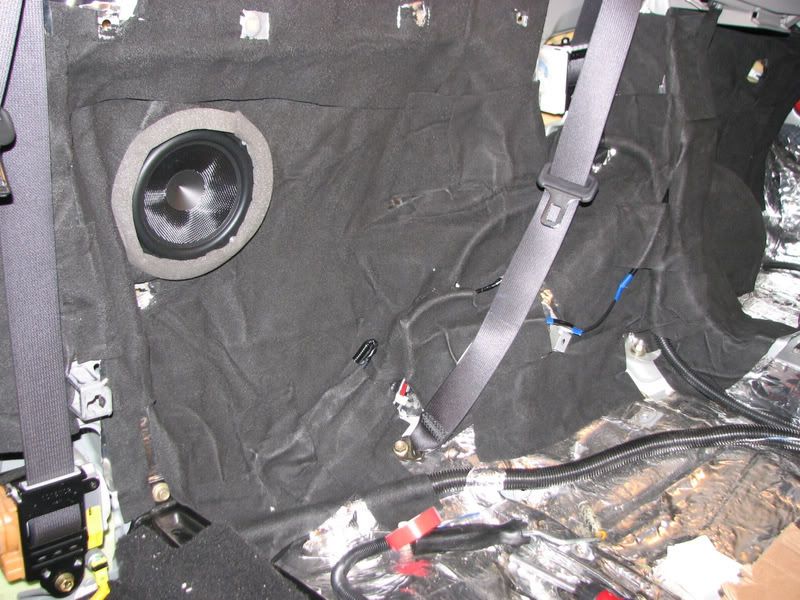
2005tC_doors006.jpg


Cover it 100%

2005tC_doors008.jpg


but don't cover the mounting holes! //content.invisioncic.com/y282845/emoticons/smile.gif.1ebc41e1811405b213edfc4622c41e27.gif

2005tC_doors007.jpg


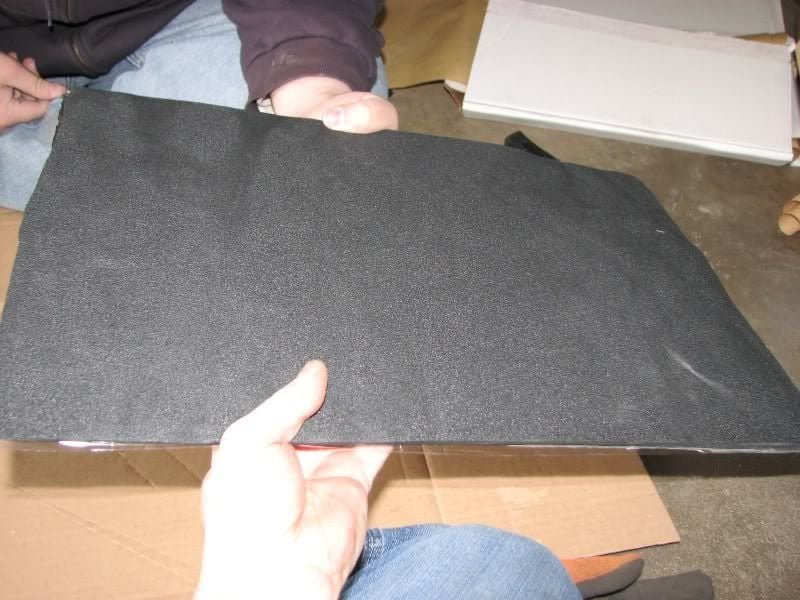
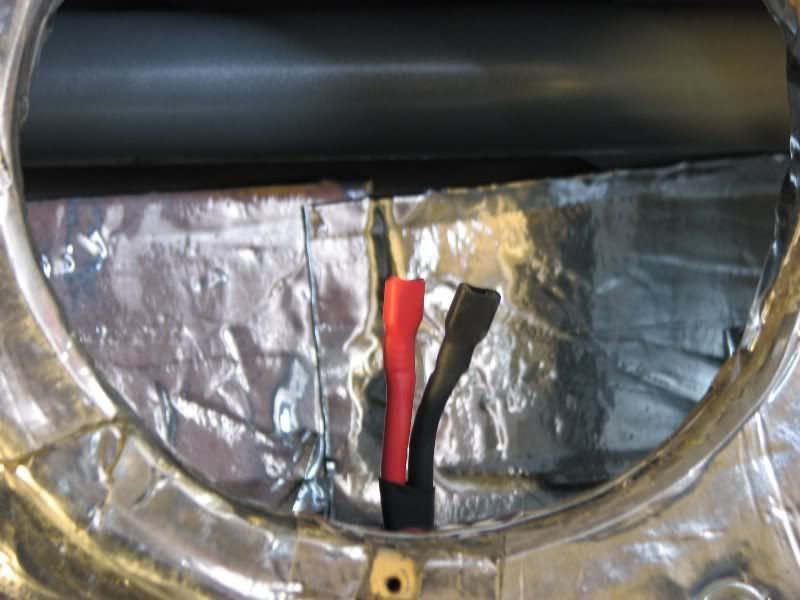
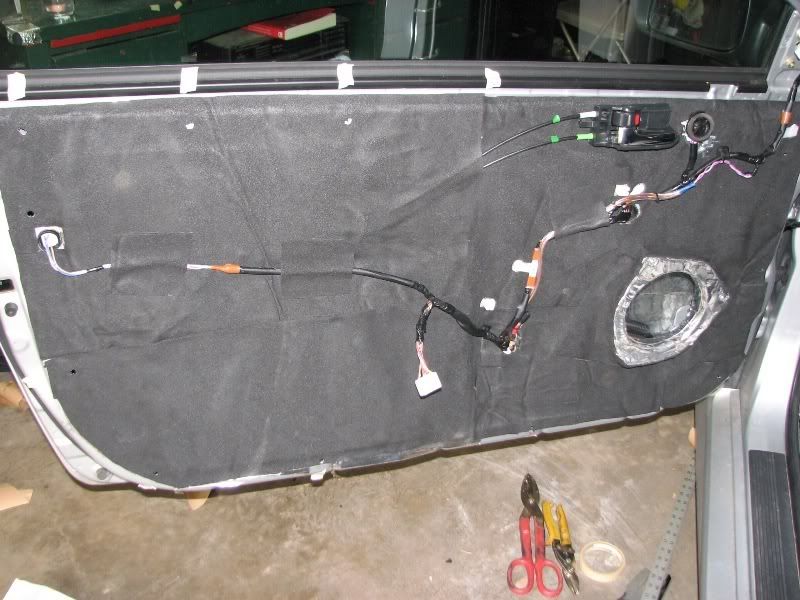
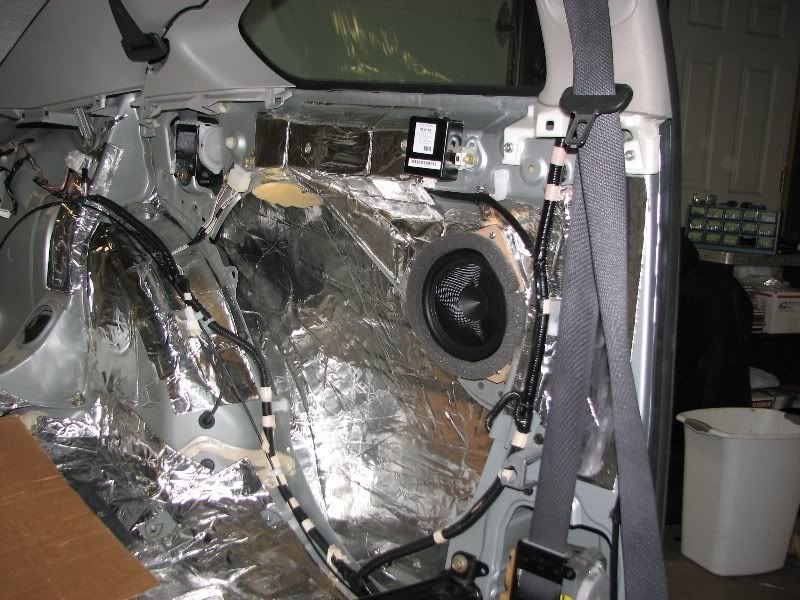
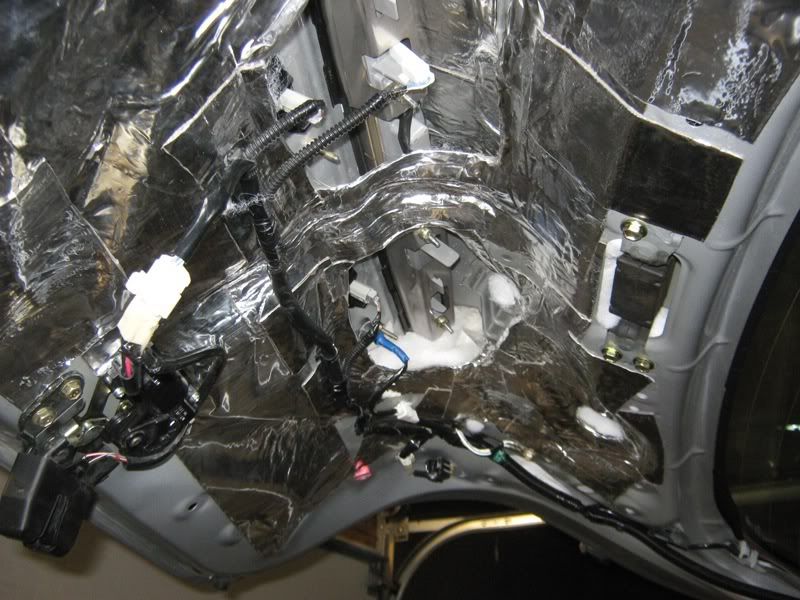
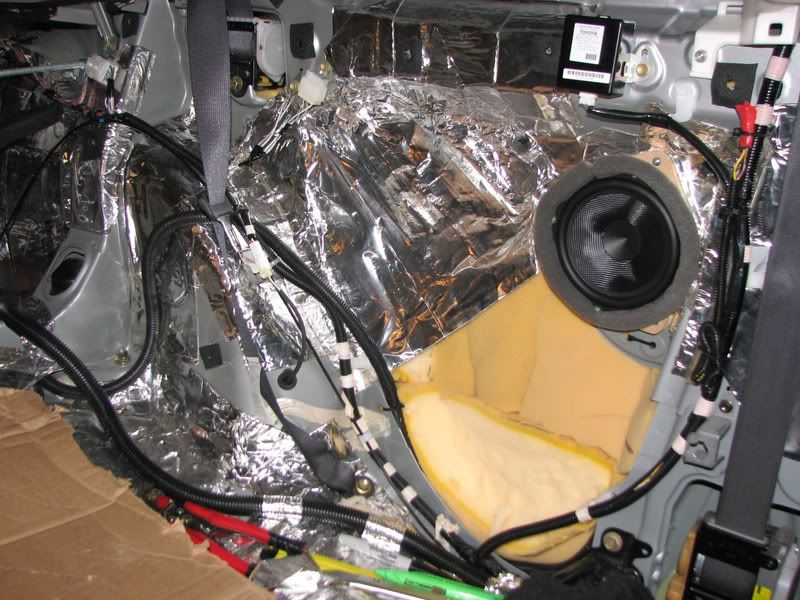
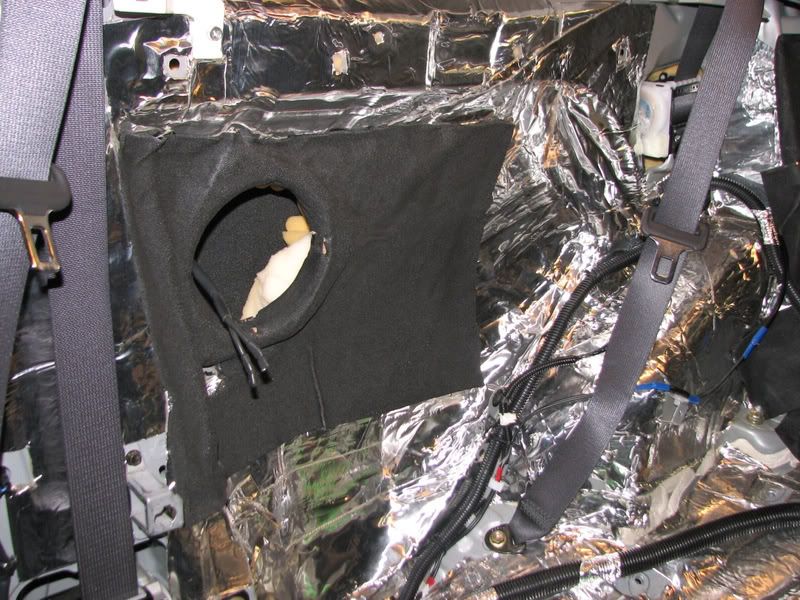
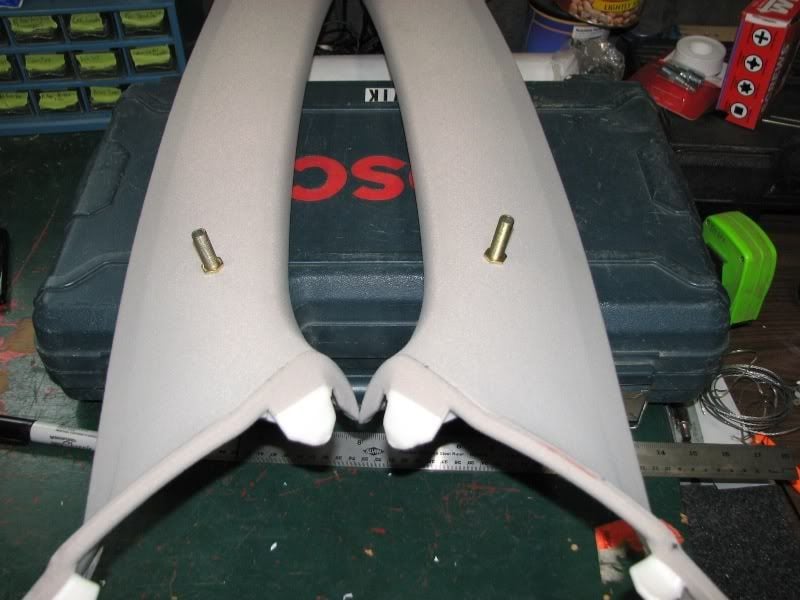
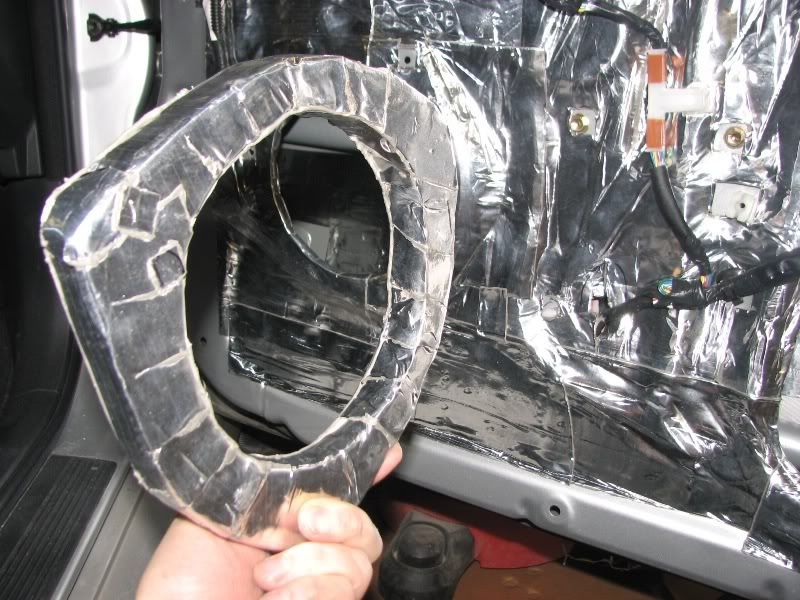
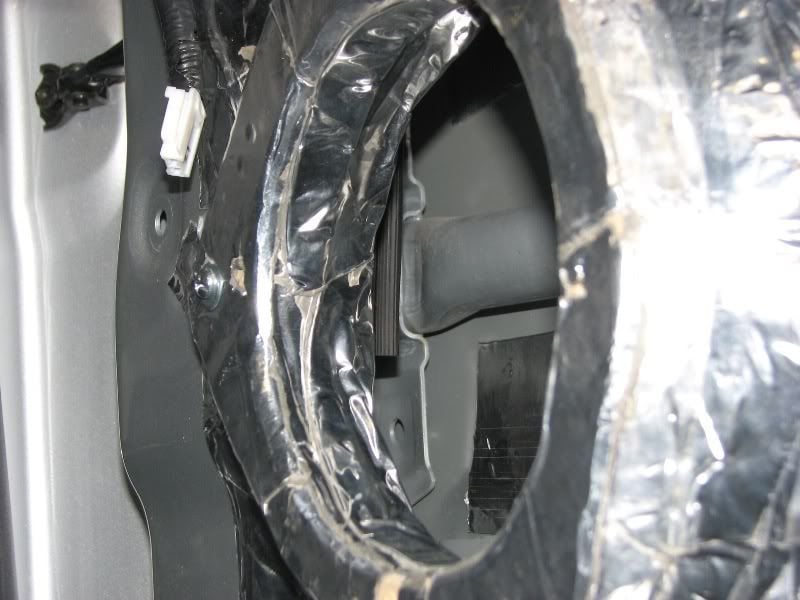
you must protect the speaker from rain water. i use 3/4" closed cell foam weatherstripping along the top of the inside of the opening. gives the water a channel to follow AROUND the speaker.

2005tC_doors020.jpg


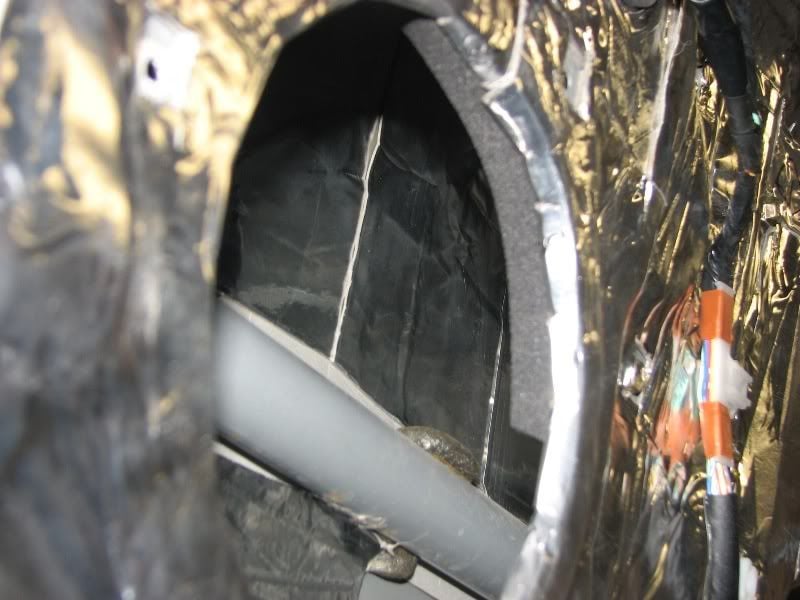
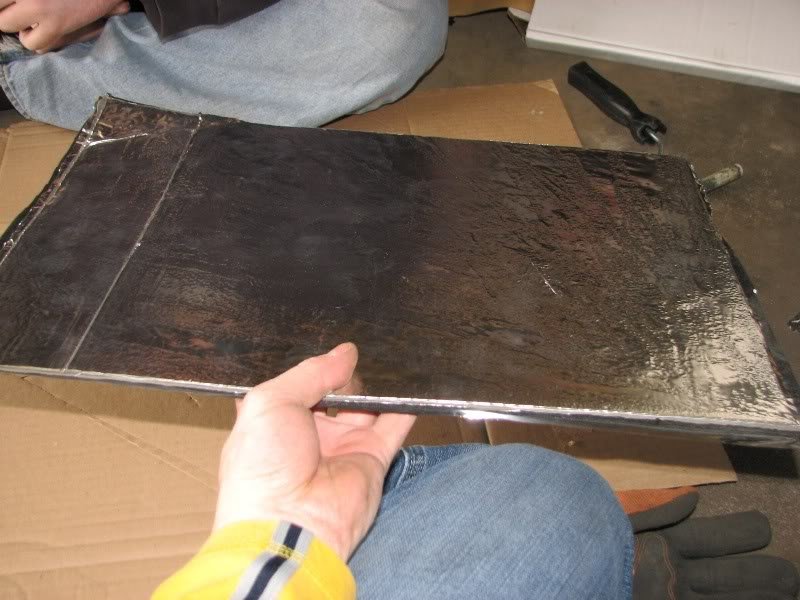
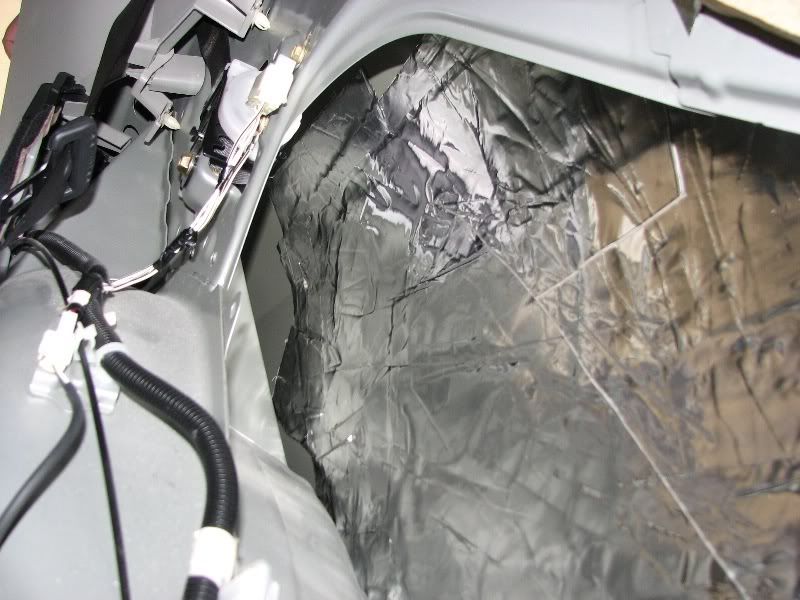
then deaden the seam between the baffle and the door and over the foam

2005tC_doors023.jpg


Hertz Mille MLK-165 pics

2005tC_doors017.jpg


2005tC_doors016.jpg


2005tC_doors014.jpg


2005tC_doors012.jpg


so how do you seal those **** holes?!?!?

with sheets of aluminum with a layer of BXT II on each side and a layer of CCF on one side, that's how. //content.invisioncic.com/y282845/emoticons/smile.gif.1ebc41e1811405b213edfc4622c41e27.gif

IMG_1551.jpg


IMG_1557.jpg


IMG_1558.jpg


IMG_1559.jpg


then you use a ton of self-piercing sheet metal screws

IMG_1560.jpg


running wire through the doors is easy. unplug the two harnesses inside the kick panel and pull the entire wire/boot assembly out.

IMG_1533.jpg


IMG_1534.jpg


IMG_1535.jpg


IMG_1536.jpg


IMG_1538.jpg


IMG_1539.jpg


next i soldered on disconnects and heat shrink

IMG_1542.jpg


IMG_1544.jpg


IMG_1549.jpg


This is the gear for the vehicle, minus the 165XL box since the local shop gave us the mids out of a 165XL comp set.

sciontC_reardoors034.jpg


It is comical what they have in the rear of this car. Two thin pieced of sheet metal combine at this rear speaker location, the speaker is mounted to this flimsy piece of metal surrounded by open area - can you say "free air"? The seal created by the rear grill panel is very important.

notice the blue organizer drawer - i use that to keep track of screws - i don't lose screws/bolts or end up with missing or extra parts.

sciontC_reardoors005.jpg


sciontC_reardoors009.jpg


sciontC_reardoors008.jpg


sciontC_reardoors010.jpg


this is part one of this effort, so we focused on deadening the outside skin - two layers of Raammat BXT II.

sciontC_reardoors017.jpg


sciontC_reardoors029.jpg


While the owner was laying the deadener, I made 3/4" MDF mounting baffles

sciontC_reardoors015.jpg


sciontC_reardoors016.jpg


sciontC_reardoors018.jpg


started by doing the wheel wells. i worked on the back seat while the owner worked on the trunk -

SciontCdeadening016.jpg


SciontCdeadening017.jpg


SciontCdeadening018.jpg


more than 2 layers on the trunk where the Mille sub is going. we spent a lot of time in the rear getting deadener as far as our arms could reach up the rear pillar cavity.

SciontCdeadening019.jpg


SciontCdeadening021.jpg


SciontCdeadening022.jpg


then we moved to the cabin floors

SciontCdeadening023.jpg


SciontCdeadening024.jpg


SciontCdeadening025.jpg


SciontCdeadening026.jpg


pics of wire routing and amp rack.

all wiring in split loom then taped to car using aluminum foil tape. Streetwires 1/0 on drivers side, remote on driver's side. Four 12awg wire pairs on passenger side, 6 channel Monster Cable RCA's down passenger side (along transmission hump). In all cases, signal cables are separate and only cross at 90deg angles for any noise rejection.

octoberamprack008.jpg


octoberamprack007.jpg


octoberamprack006.jpg


octoberamprack005.jpg


octoberamprack017.jpg


octoberamprack015.jpg


amp rack is 1/2" MDF coated in resin. Here we see the Audison LRx5.1k and the Hertz MLK-165 crossovers on the board. this will be mounted on the driver's side and allows for access to tail lights

octoberamprack001.jpg


octoberamprack003.jpg


octoberamprack002.jpg


8-32 Hurricane nuts are used for all mounting

octoberamprack019.jpg


added three sheets of BXT II inside the rear hatch, reaching inside the cavity was time consuming, but worth the effort. Then we stuffed a lot of "polyfill" (part cotton) inside the cavity. The result is a much more satisfying "thud" when rapping on the hatch.

trunk011.jpg


all of this

trunk012.jpg


up here

trunk013.jpg


and here

trunk014.jpg


and a few more sheets on the rear of the car - yes, i also see the spot on the driver's side hatch that could use a bit more to even out the panel, not that it would make a difference at this point, we still have two more flat boxes of BXT II left so i'll be done.

trunk015.jpg


we also stuffed the rear quarters with open cell foam and deadened over the opening. 3-4 layers of BXT II made for a nice covering. i wanted to eliminate that cavity as a source of audible resonance, which should be low enough now to not cause issues.

trunk002.jpg


trunk003.jpg


trunk006.jpg


trunk008.jpg


trunk009.jpg


then we carpeted the amp rack, cut out holes for mounting bolts, cables, and venting. the amp rack will have L-brackets on bottom (even have hurricane nuts for those) with a 3/8" threaded rod secured to the vehicle framing, through a factory trunk light opening, and through the panel.

trunk001.jpg


trunk017.jpg


trunk018.jpg


tip for carpeting a panel with mounting holes -you don't want carpet in the threads.

start by carpeting the outside (visible) side with room for overlap.

trunk022.jpg


drive screws through the hurricane nuts (or t-nuts) to expose them on the carpeted side (as bumps)

trunk021.jpg


now back out the screws, one at a time, and cut off the hump. now you have exposed all of the screws and you won't have issues with carpet

trunk023.jpg


amp rack placed in the car - even this won't be visible as we will build a beauty panel to hide everything once we are finished.

trunk024.jpg


prep

scionamprack002.jpg


wired rack with wires secured on back for strain relief

scionamprack003.jpg


RCA is a 6-channel Monster Cable with small head shells that fit inside the Audison. Includes as screw mounting hole as well.

scionamprack004.jpg


wires are secured in the order they are connected

scionamprack005.jpg


scionamprack006.jpg


all speaker wires are 12 awg.

scionamprack007.jpg


1/0 power and ground

scionamprack010.jpg


with caps

scionamprack011.jpg


scionamprack012.jpg


We need to make a new floor that will integrate with a beauty panel for the amp. the amp will be visible but the crossovers will not.

 
Here is an exterior shot of the car

SciontC_rearcavity002.jpg


We terminated the new 12 awg wiring for the rear speakers, disconnected the factory wiring.

SciontC_rearcavity005.jpg


SciontC_rearcavity006.jpg


I zip-tied the loom below the speaker to provide strain relief

SciontC_rearcavity007.jpg


Next came the foam. we had to trim down on the foam in order to have adequate panel depth. this foam is important for several reasons - absorption and a firm surface for the deadener. Yes, we are adding deadener on top of this foam in order to provide a sealed cavity.

SciontC_rearcavity008.jpg


cutting the deadener in preparation for placement

SciontC_rearcavity009.jpg


SciontC_rearcavity010.jpg


sealing it up first layer

SciontC_rearcavity011.jpg


multiple layers

SciontC_rearcavity012.jpg


then adding Closed Cell foam (with PSA adhesive) from Raammaudio

SciontC_rearcavity013.jpg


we have 200 SF of the foam and two boxes of BXT II left

SciontC_rearcavity014.jpg


foam on the rear quarter

SciontC_rearcavity015.jpg


SciontC_rearcavity016.jpg


You will want new clips for these panels.

SciontC_rearcavity021.jpg


The white clips worked best. The black clips were for a Lexus.

Driver Side ready for the panel

SciontC_rearcavity023.jpg


Passenger Side

SciontC_rearcavity026.jpg


SciontC_rearcavity027.jpg


SciontC_rearcavity029.jpg


SciontC_rearcavity030.jpg


Rear panels are now installed and hopefully won't be removed until the car is scrapped and the system is stripped. //content.invisioncic.com/y282845/emoticons/smile.gif.1ebc41e1811405b213edfc4622c41e27.gif

 
The tweeter spheres for Hertz ML28 tweeters. Driver side is the same. DIYMA has a long thread on tweeter spheres, and they do sound amazing. diffraction is real, an so is the ensuing phase interference. the spheres eliminate most of this.

sciontweeterspheres014.jpg


sciontweeterspheres017.jpg


sciontweeterspheres020.jpg


sciontweeterspheres022.jpg


sciontweeterspheres024.jpg


aiming

sciontweeterspheres025.jpg


sciontweeterspheres028.jpg


sciontweeterspheres029.jpg


sciontweeterspheres030.jpg


We have brass tubing to cover the threaded shaft that we will paint silver. we'll fill and paint the sphere. the tweeter logo will be horizontal and upright. wire is through the threaded rod and will terminate in a plug or terminal. end product should look good.

 
Activity
No one is currently typing a reply...
Old Thread: Please note, there have been no replies in this thread for over 3 years!
Content in this thread may no longer be relevant.
Perhaps it would be better to start a new thread instead.

Similar threads

I had a '99 Chevy Venture with the 3.8 and buddy had one with the 3.4. Any of those engines including the 3.9 are known to leak coolant at the...
12
499
Then you need what I listed. You also need to find out if your Honda Element has an OEM amplifier or not. And if you have steering wheel controls...
6
864
https://www.sonicelectronix.com/ci95-2005-buick-lacrosse-wiring-harness-to-install-a-new-car-stereo.html?sort_order=price_asc lots of options...
6
2K
Can anyone in here participate in a short interview I am doing for school about the installation of a Kenwood DMX4070S in my 2005 Ford Expedition...
0
984
So this has been a pain in the butt as I will show you. The fabrication is the normal stuff but getting the two to line up and match is proving...
125
60K

About this thread

keep_hope_alive

Premium Member
Acoustics Engineer
Thread starter
keep_hope_alive
Joined
Location
Quad Cities, IL
Start date
Participants
Who Replied
Replies
114
Views
54,386
Last reply date
Last reply from
LosIsATool
IMG_7545.png

Chris Gerrish

    Apr 25, 2024
  • 0
  • 0
IMG_7544.png

Chris Gerrish

    Apr 25, 2024
  • 0
  • 0

Latest topics

Top