Mini Cooper S Illusion Audio & Mosconi tons of pics

Octave
10+ year member

Member
When Bao picked up his new Mini he knew from the start we were going to do a lot with it. Being a close friend this allowed him some liberties…..like driving me crazy, but what are friends for. So starts Operation: Mini Mike.

The build was to be competition ready while being OEM and stealth. What follows is an adaption of the competition install log and over the following months going into finals we will be adding an iPad in dash, custom leather seats and some other accents to tie the whole interior together.


Equipment list:

Sony

MEX- GS600BT

Illusion Audio

Carbon C6

Carbon 12

Mosconi

4to6 optical

Gladen One 120.4

Gladen One 240.2

Straight Wire

Wave Guide speaker wire

Musicable RCAs

Symphony RCAs

A 4 gauge quick disconnect was used to connect a power supply while at competitions. Wire was covered in flex loom to match with the OEM flex loom inside the engine compartment with ends done in color-coded heat shrink.


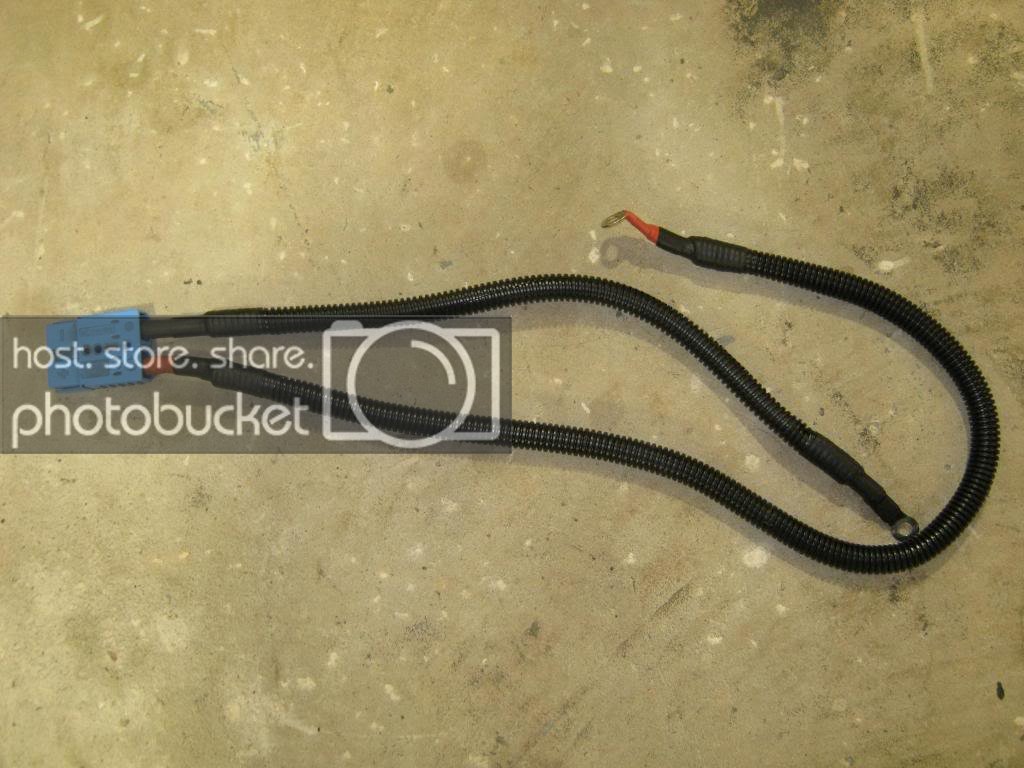
Positive connection was made at the front fuse box at the main power location.


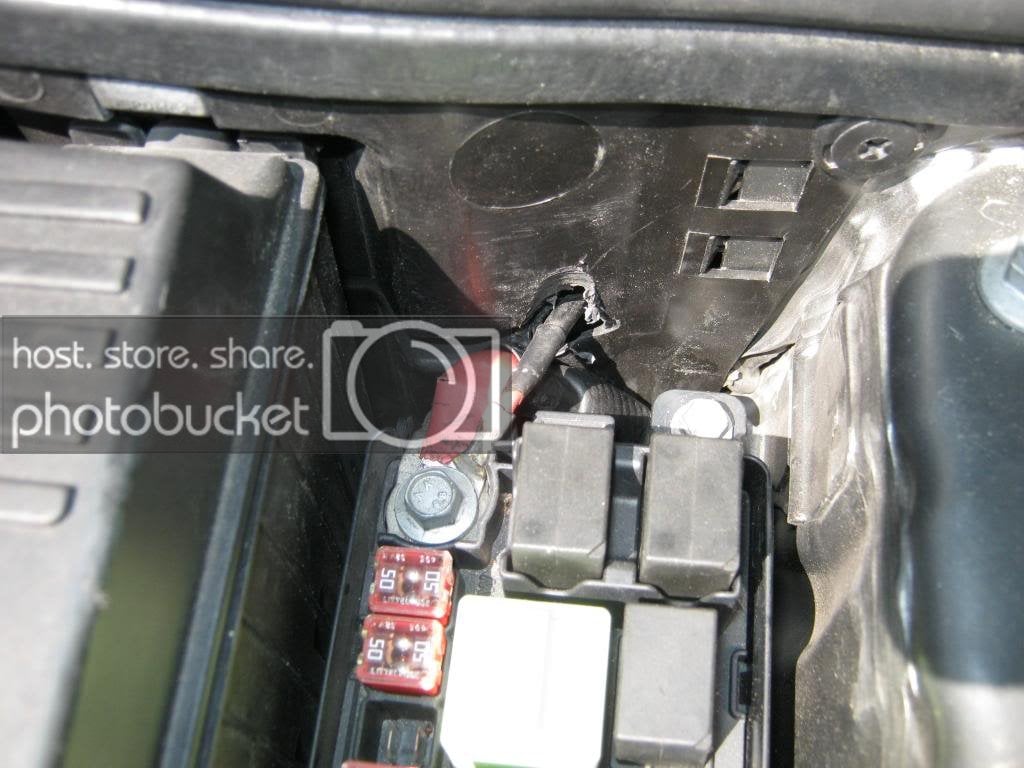
Ground uses an OEM grounding point.


The wires were ran out to the wheel for easy hook up.


Quick disconnects with color-coded heat shrink were used to allow the tweeters to be easily serviced.


The tweeters were aimed to follow the angle of the windshield to minimize first reflections. The pillar was wrapped in Genuine Alcantara to blend in with the headliner.


The tweeters were molded into the pillar to give an OEM appearance. They were also covered in the same grille cloth as the door grilles to further integrate them into the interior.


With following the angle of the windshield the tweeters were given an off axis mounting. With the pillars wrapped in Alcantara the pillars blend into the Alcanatara headliner further integrating them into the interior.


OEM driver side door jam molex plug before modification to pass speaker wire through.


Plastic on the top of the plug was cut away to allow the speaker wire to pass through.


A relief was put in the plastic to compensate for the speaker wire.


With the modification done the speaker wire can pass through the boot and plug.


Same modifications were done to the passenger side door.


Passenger door before modifications.


A mounting ring was made out of plexiglas to ensure that moisture from the door would not distort the ring over time.


The mounting ring is secured to the door using 10-24 nutserts and sandwiches the Focal BAM mat as a decoupler.


A foam gasket seals the speaker to the mounting ring and offers another layer of decoupling.


The mounting ring was drilled and tapped to accept 10-24 screws that were used to secure the Illusion Audio Carbon C6 speaker to the mounting ring.


Once mounted the ring and speaker form a complete seal to the mounting surface.


Hush Mat sound damping was applied to the outside skin of the door and Focal BAM sound dampening was applied to the inside skin. The combination of sound dampening mat and foam that makes up the Focal mat provides dampening in the 0-6000hz range isolating the rear wave of the speaker from the front wave.


The passenger door received the same treatment as the driver door.


The part of the door panel that fits into the opening on the door received a layer of the Focal BAM mat to complete the door dampening.


The OEM speaker grille is made up of 3 separate parts with one of those parts being a metal mesh that resonated like no one's business. The grille was separated and the metal mesh and inner structure was removed to eliminate the resonance and to allow the speaker to breathe easier into the interior.


Once the modifications were completed the grille was reattached to the door panel.


Back on the door the grille has an OEM appearance wrapped in the same grille cloth as the tweeters.


4 wires were only used for the radio wire up. Power, ground, ignition and remote were soldered to the OEM wiring then heat shrunk.


The wiring harness was zipped tied together to clean up the wiring.


Th eradio fit into the OEM mount without any modifications. The radio's steel mounting basket was used for mounting.


Tweeter wire zip tied to OEM wiring.


Hush Mat Quite Tape was used to secure the speaker wire. It was run along the door jam above the OEM wiring.


The Quite Tape was applied every 6-8".


The passenger side received the same treatment as the driver.


The speaker wire was ran to a singular point and secured with Quite Tape.


Speaker wire and RCAs are isolated from each other and secured with Quite Tape.


Main system fuse is within 18" of connection at the battery. Main ground is grounded at an OEM grounding point by the battery.


Corners of the subwoofer enclosure were fiberglassed to allow the enclosure to fit into the small trunk area.


To increase the enclosure compliance Black Hole Stuff was used to fill the subwoofer enclosure.


Straight Wire Sextet 6 core speaker wire was used for the subwoofer lead. Ends were heat shrunk and color coded.


The subwoofer enclosure/amp rack was designed to be one complete unit that will easily come out for servicing purposes. All speaker wires terminate at the amplifiers. No barrier strips were used due to the loss of signal and a break in the line.


Removing the side trunk cover panel gives access to the USB interface cable to the Mosconi 4to6.


Mounting hardware for the components is a mixture of #8 phillips head screws and torn security #8 screws. The mixture of the 2 was to make it more difficult and time consuming to remove the equipment.


Since the Mosconi 4to6 sat higher than the enclosure a piece of 1/4" ABS was attached to the enclosure and then the 4to6 was mounted to the ABS panel using the same mixture of screws as the other components.


The wireless Bluetooth module is used for easy access to the 4to6 for tuning.


The trim panel is covered in red Alcantara with a vinyl center portion to trim out the subwoofer. Te vinyl is matched to the seat grain because the grain of the interior side panels is impossible to match given its unique pattern.


The trim panel is held down by 4 #12 screws with aluminum struts as spacers to space the cover panel just above the equipment.


The top trim panel matches the contours of the sides around it. The panels are pressure fit, which allows easy access to the lower level trim panel. It was wrapped in the same vinyl as the center subwoofer panel.


For accent frosted plexiglas is back lit by LEDs and trims out the equipment. The LEDs are amber to match the OEM dash lights.


A removable panel was made to cover the enclosure that would allow daily use of the trunk.


The attention to detail in the rest of the install is also seen in the cover panel. Vinyl trims out the bottom side of the panel.


With the carpeted panel in place the trunk may be used daily while not interfering with the subwoofer.


At the time of me typing this log we had already competed in the 2014 SBN event. So how did we do?

IASCA - Pro/Am

5th SQ (tuff class of 10. other cars had 3-way set ups)

2nd Install

MECA - Street

3rd SQ

1st Install

2nd RTA


Not a bad haul for its first full competition. We are looking forward to the coming season. We will be attending the show in Texas in June and definitely be at finals.

Now onto my impressions. This being my first experience with the Carbon mids I must say I am happy with them. Being hard dome tweeters they are not bright or harsh. The mids are warm and have plenty of mid bass given there shallow mounting. I have written glowing reviews of the Carbon subwoofers and I must say the ORCA boys did their magic on the mids as well. We still need some fine tuning but as the car stands now it almost scored perfect on imaging. Looks like we are on the right track.

 
Activity
No one is currently typing a reply...
Old Thread: Please note, there have been no replies in this thread for over 3 years!
Content in this thread may no longer be relevant.
Perhaps it would be better to start a new thread instead.

Similar threads

I updated the original post to simplify it a bit and re-frame it with the new Scosche floating ground adapter. This adapter *is* different, as it...
4
1K
  • Locked
I got a Gladen RC-90C2 thats pretty small 90x2 @ 4 ohms i'll be removing from my rig in a few days if interested.
3
2K
So I am planning to build a system in my Ford Excursion and can’t decide on whether I want to use an iPad mini with a sound processor behind it or...
0
1K
  • Locked
I am looking for the illusion audio C3 carbon's. I would prefer just the midrange as i already have a C6 componet set and I am looking to do a 3...
0
2K

About this thread

Octave

10+ year member
Member
Thread starter
Octave
Joined
Location
Orlando, FL
Start date
Participants
Who Replied
Replies
13
Views
5,352
Last reply date
Last reply from
Beau M
20221010_113336 (5).jpg

audiobaun

    Apr 27, 2024
  • 0
  • 0
20221010_113007 (5).jpg

audiobaun

    Apr 27, 2024
  • 0
  • 0

Latest topics

Top