nkrell11 10+ year member
CarAudio.com Elite
Alright so I've never wrote a tutorial or anything like this before so please bear with me. I'm not a pro by any means this was my first time ever doing anything like this I just wanted to share what I had learned. This post may be a little long winded I apologize in advance. I watched some youtube videos before attempting this but most of them weren't very helpful in my opinion. This is the best one that I watched gave some useful tips especially for mixing resin. There's a 50 minute video but ain't nobody got time for that.
I'll start out with a list of supplies that I used not all are mandatory but they are all certainly helpful. I used bondo fiberglass resin and fiberglass mat just because I wanted something small to get my feet wet. If you plan to go large scale I would suggest US composites (I ordered through them to get the stuff for when I do my doors).
-Fiberglass Resin
-Fiberglass Mat (Seems like 1.5oz mat is popular)
-Ponte Fabric
-Body Filler (I used Rage Gold but I know there are other options)
-2 Inch Chip Paint Brushes
-Disposable 9 oz Dixie Paper Cups
-Stir Sticks
-Disposable Gloves
-Router or a Jigsaw would do
-Dremel definitely not necessary but really helpful
-Sand Paper I used 120,220 and 320 grit
-Dowel
-Hot Glue
-Stapler & Staples
-Spray Adhesive
-Wood
-Whatever you want to cover them with
Alright so first step was making my rings to mount the tweets in, I used a plunge router and a small Jasper jig but you could get by with a jigsaw or a hole saw if you didn't happen to have a router.
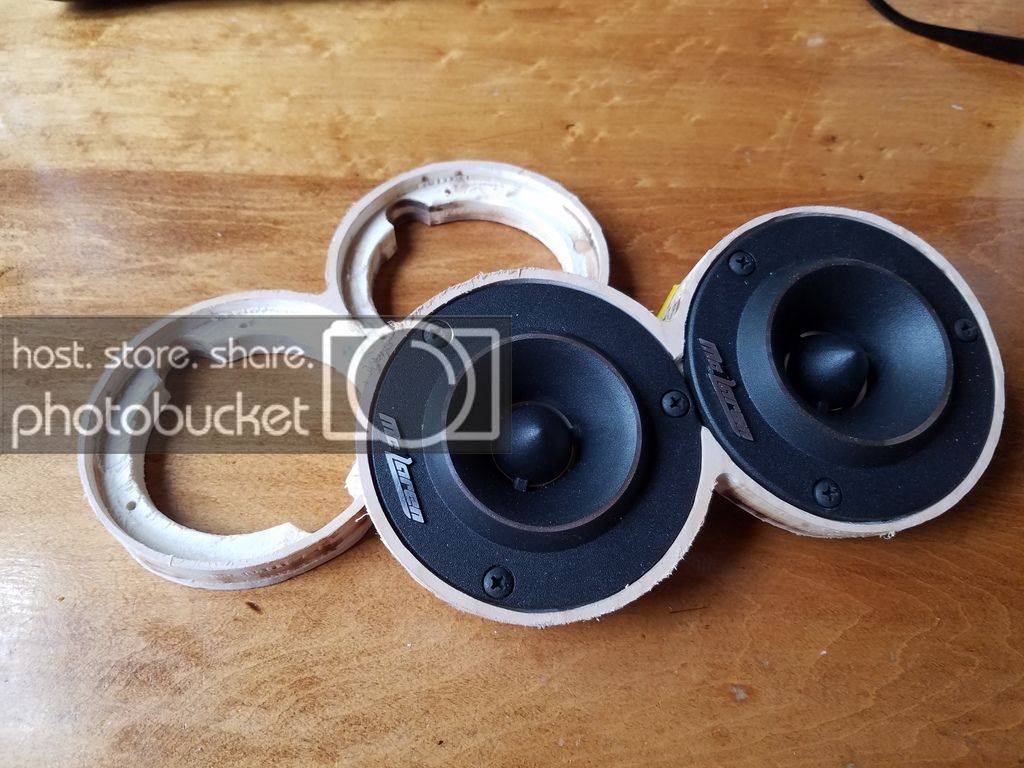
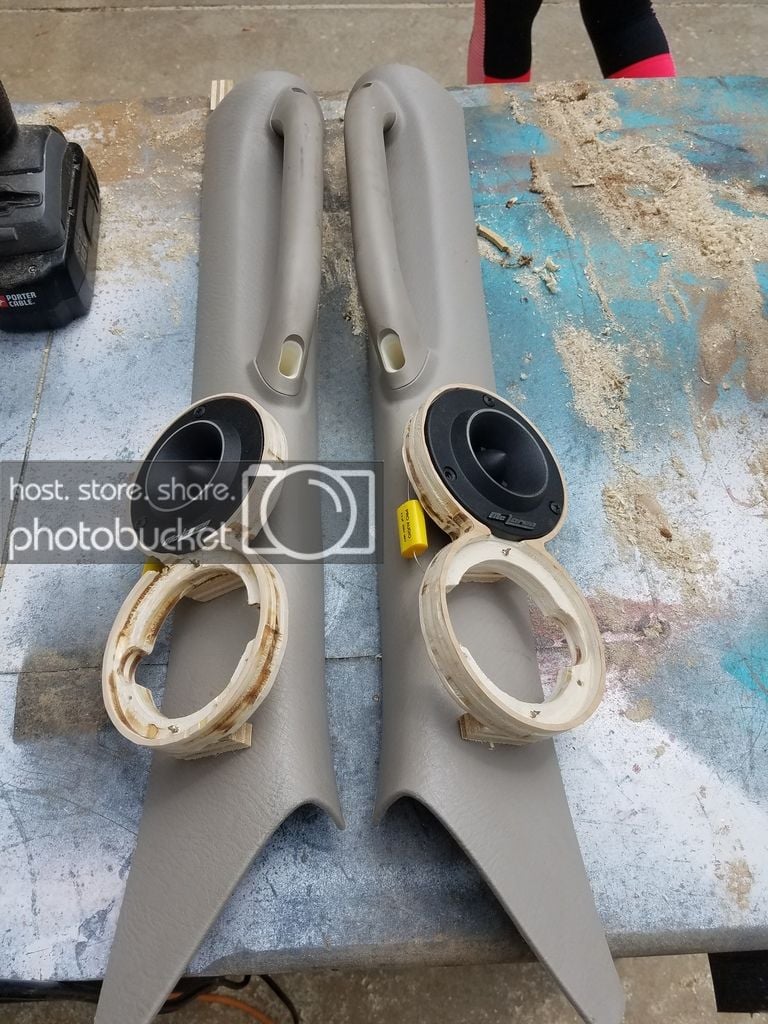
Afterwards it was time to mount the rings to the pillars. I understand that most people use hot glue and dowel to mount them. I just used a couple small wood blocks and a couple wood screws. Make sure you have enough clearance on the back side of the rings to clear your tweeters.
Next it's time to wrap your work piece in fabric, I used ponte which you can find at the fabric store it's nice and stretch which helps in avoiding wrinkles. Some people use fleece but it takes a lot of resin and doesn't really add strength so it's not your best choice. I used a combination of staples, spray adhesive and hot glue to attach the fabric. I'll have a note about the spray adhesive later though.
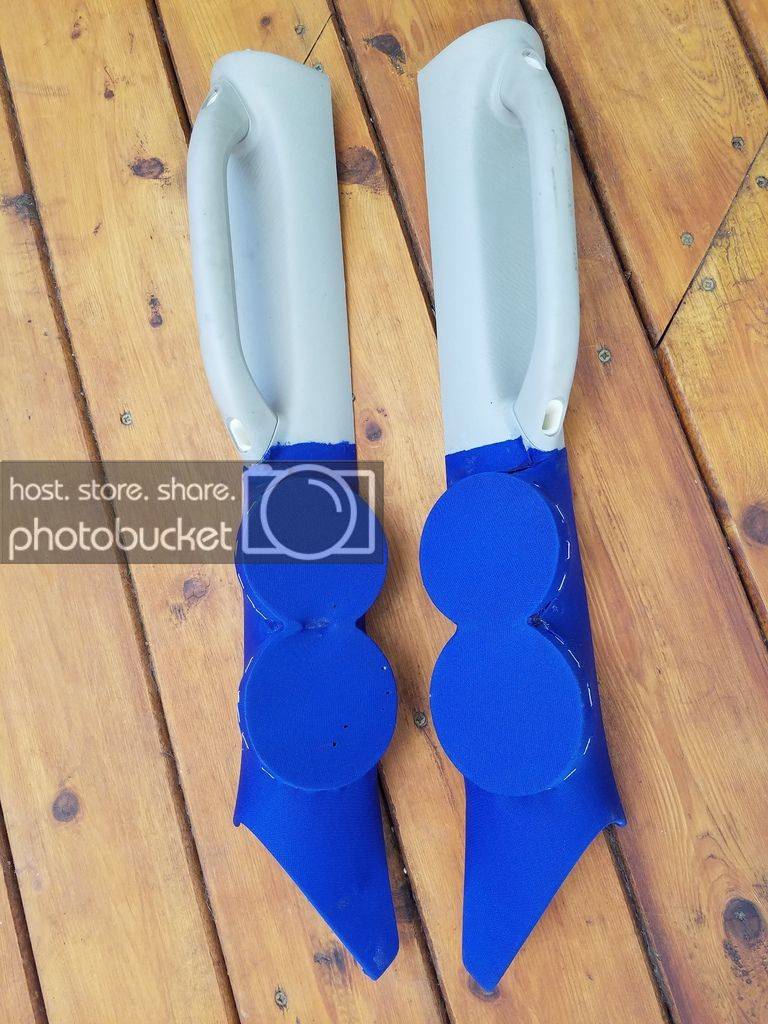
Alright next step is application of your resin. I believe each ounce of resin requires 10 drops of hardener. I mixed small batches to avoid waste and not having to worry about working super fast. Ok here's what I didn't know DO NOT APPLY RESIN TO SPRAY ADHESIVE IT CAUSES IT TO DISBOND!!!! You can see where I had to put staples in the top because I did not know this, I also applied it to the back and it cause things to disbond but I got lucky and didn't have any long term problems. Let resin cure according to manufacture specs.
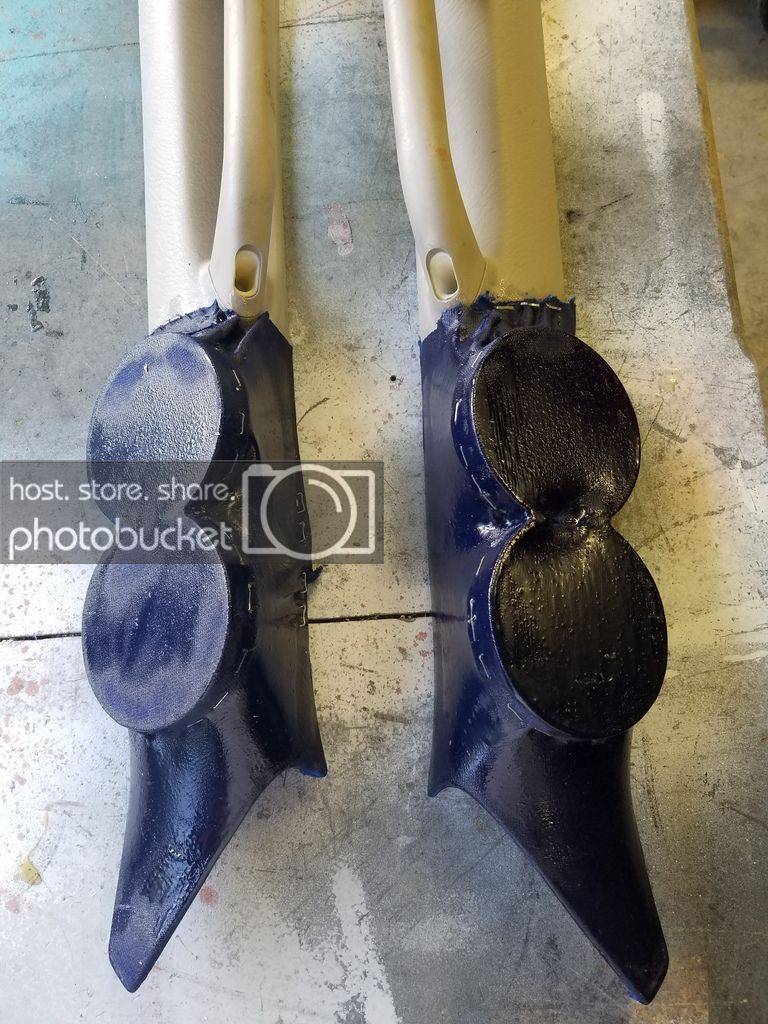
Next step apply fiberglass mat. I tore mine into pieces as I didn't have scissors on hand. I painted down a little resin first then set the mat on and then applied resin over top. Try and avoid any air bubbles you can see them underneath usually, they cause weak spots in your project. Afterwards let cure don't worry you can always add more later where you need it. In this picture I had already sanded down some high spots etc.
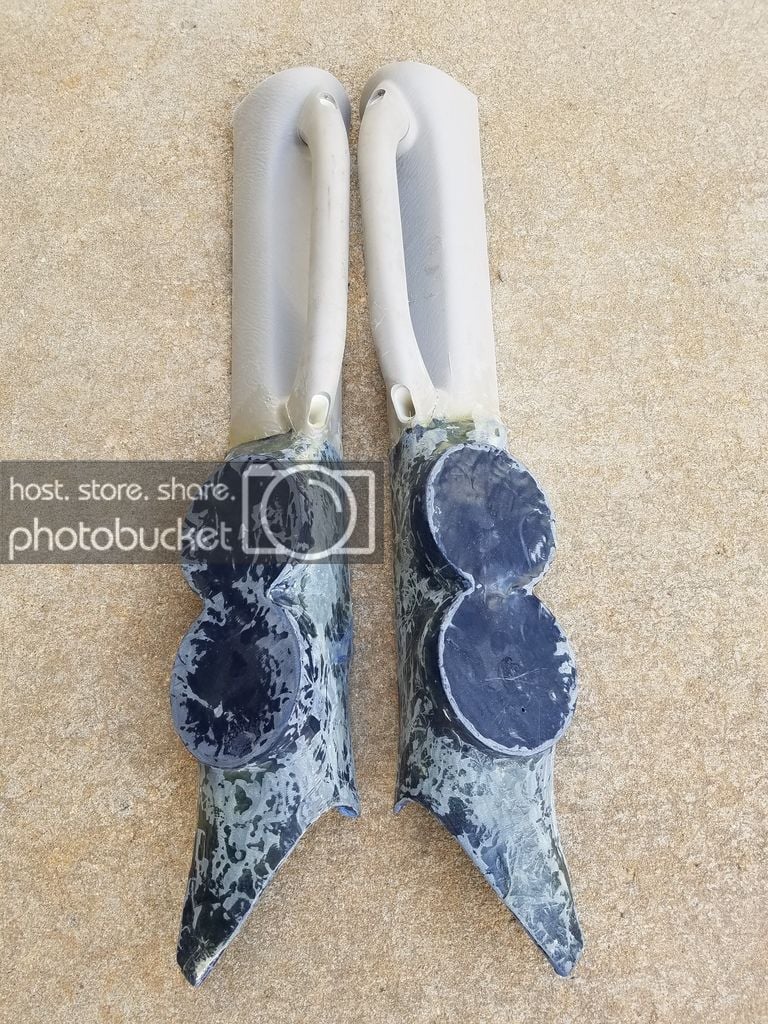
Alright after you get all your mat on and your project feels solid it's time for body filler. Tips for this in my experience are don't lay it on to thick you can always add more but its a pain to sand off too much. Don't apply filler if you don't have time to sand it gets harder the longer you wait. After it dries up sand it down you kind of just have to go by feel. Sadly I don't have any pictures of this step but you'll know when you have it right I guess.
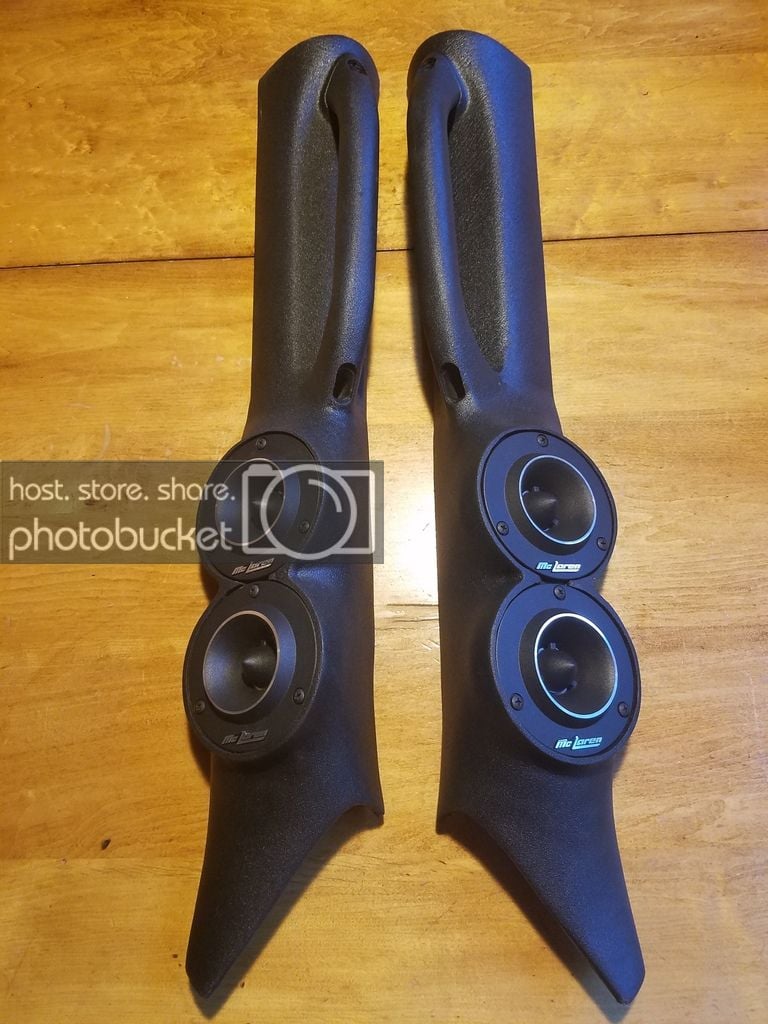
Lastly prime and paint or wrap your project. I used duplicolor spray on bedliner. It worked great and was just what I wanted as I didn't want a smooth finish. Here's my finished product. I hope this tutorial has helped anyone that reads it in some way. The biggest key is patience you can't get in a hurry when doing this stuff it will lead to mistakes that are hard to go back and fix.
I'll start out with a list of supplies that I used not all are mandatory but they are all certainly helpful. I used bondo fiberglass resin and fiberglass mat just because I wanted something small to get my feet wet. If you plan to go large scale I would suggest US composites (I ordered through them to get the stuff for when I do my doors).
-Fiberglass Resin
-Fiberglass Mat (Seems like 1.5oz mat is popular)
-Ponte Fabric
-Body Filler (I used Rage Gold but I know there are other options)
-2 Inch Chip Paint Brushes
-Disposable 9 oz Dixie Paper Cups
-Stir Sticks
-Disposable Gloves
-Router or a Jigsaw would do
-Dremel definitely not necessary but really helpful
-Sand Paper I used 120,220 and 320 grit
-Dowel
-Hot Glue
-Stapler & Staples
-Spray Adhesive
-Wood
-Whatever you want to cover them with
Alright so first step was making my rings to mount the tweets in, I used a plunge router and a small Jasper jig but you could get by with a jigsaw or a hole saw if you didn't happen to have a router.

Afterwards it was time to mount the rings to the pillars. I understand that most people use hot glue and dowel to mount them. I just used a couple small wood blocks and a couple wood screws. Make sure you have enough clearance on the back side of the rings to clear your tweeters.

Next it's time to wrap your work piece in fabric, I used ponte which you can find at the fabric store it's nice and stretch which helps in avoiding wrinkles. Some people use fleece but it takes a lot of resin and doesn't really add strength so it's not your best choice. I used a combination of staples, spray adhesive and hot glue to attach the fabric. I'll have a note about the spray adhesive later though.

Alright next step is application of your resin. I believe each ounce of resin requires 10 drops of hardener. I mixed small batches to avoid waste and not having to worry about working super fast. Ok here's what I didn't know DO NOT APPLY RESIN TO SPRAY ADHESIVE IT CAUSES IT TO DISBOND!!!! You can see where I had to put staples in the top because I did not know this, I also applied it to the back and it cause things to disbond but I got lucky and didn't have any long term problems. Let resin cure according to manufacture specs.

Next step apply fiberglass mat. I tore mine into pieces as I didn't have scissors on hand. I painted down a little resin first then set the mat on and then applied resin over top. Try and avoid any air bubbles you can see them underneath usually, they cause weak spots in your project. Afterwards let cure don't worry you can always add more later where you need it. In this picture I had already sanded down some high spots etc.

Alright after you get all your mat on and your project feels solid it's time for body filler. Tips for this in my experience are don't lay it on to thick you can always add more but its a pain to sand off too much. Don't apply filler if you don't have time to sand it gets harder the longer you wait. After it dries up sand it down you kind of just have to go by feel. Sadly I don't have any pictures of this step but you'll know when you have it right I guess.
Lastly prime and paint or wrap your project. I used duplicolor spray on bedliner. It worked great and was just what I wanted as I didn't want a smooth finish. Here's my finished product. I hope this tutorial has helped anyone that reads it in some way. The biggest key is patience you can't get in a hurry when doing this stuff it will lead to mistakes that are hard to go back and fix.