Volvo S60 build resurrected! Old School!

americannight
10+ year member

Senior VIP Member
So a couple years ago I started this build. Lots of reasons for the delay. But finally I am back at it! This equipment has been safely stowed away in my garage. The plans for the build remain the same.

For a recap here's a link to the old (closed) thread where you can see a diagram of the system and the amp enclosure build:

http://www.caraudio.com/forums/car-audio-build-logs-cars-trucks-suvs/487015-volvo-s60-build.html

http://www.caraudio.com/forums/car-audio-build-logs-cars-trucks-suvs/487015-volvo-s60-build.html

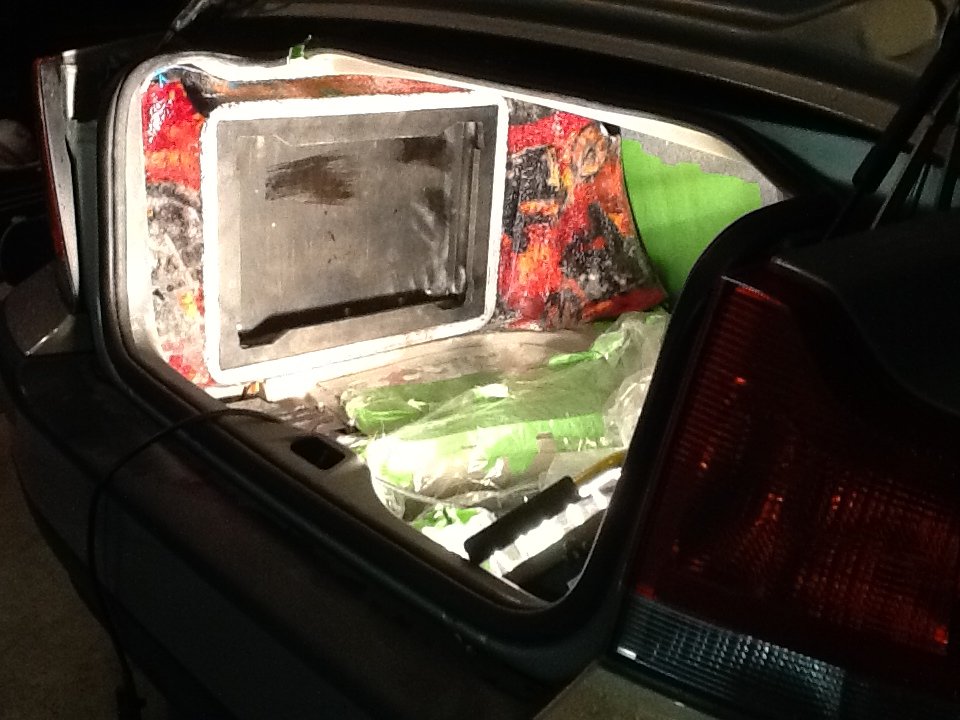
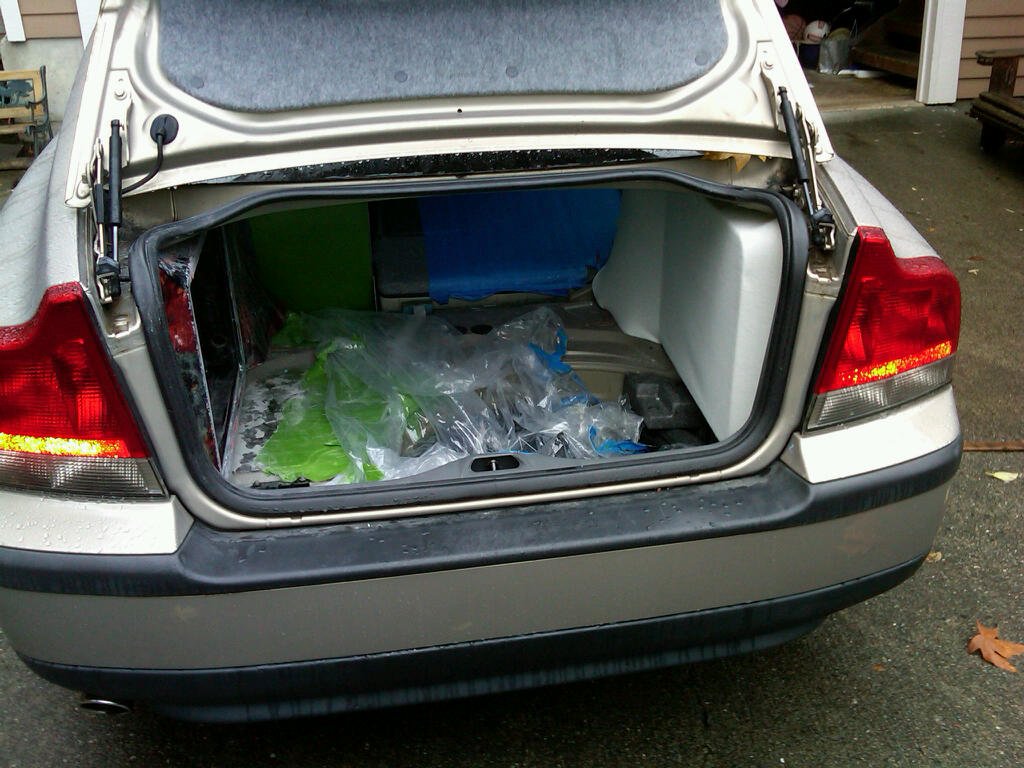
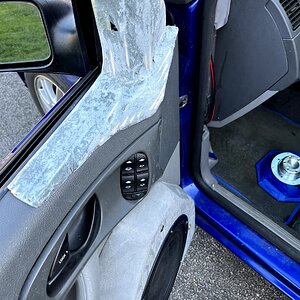
Each Zed Audio Deuce amp will be mounted in a trunk sidewall, one on the left, one on the right. It's hard to describe how physically large these amps are without seeing them yourself. The amps also have large feet on each corner which makes the footprint they need even larger. So each amp will get it's own enclosure in a fiberglass panel on the trunk sidewall.

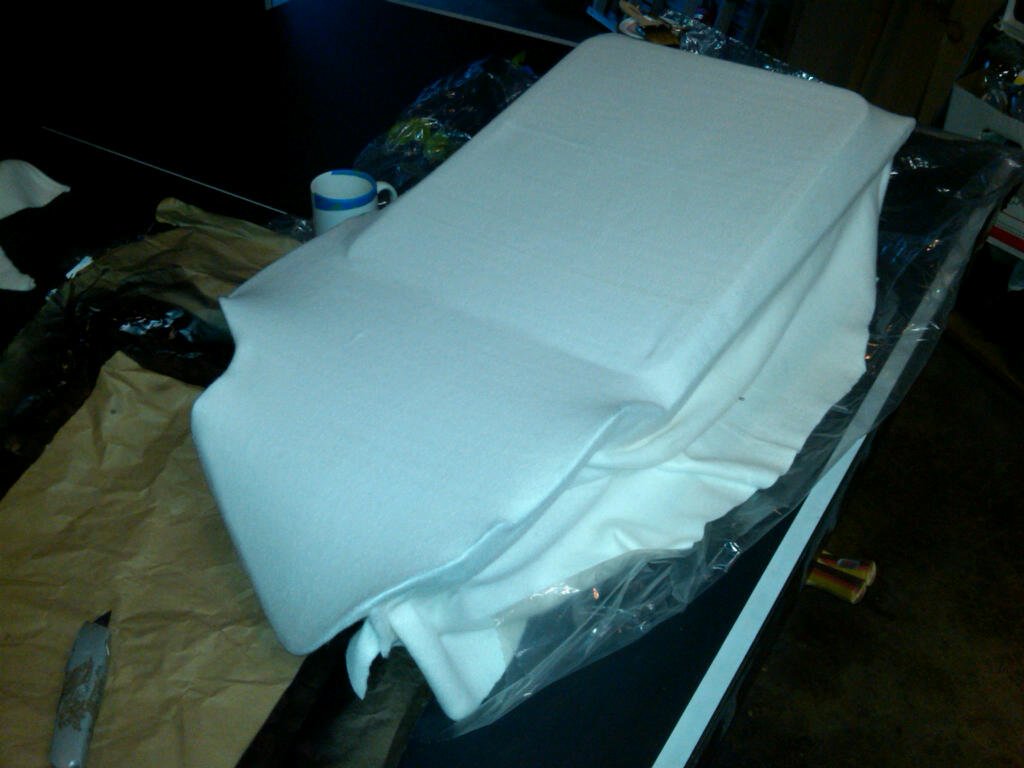
Last weekend me and an old friend who was generous to help out gave the left trunk panel a go. Mind you, this is the first time doing this for either of us. We've done lots of speaker box building and car audio systems over the years but never have we attempted using fiberglass. I think if someone has more experience with this, they would have done both trunk panels at the same time. However, because we are rookies and knew we would make mistakes, we chose to do one panel first, learn from it, and then attempt the rest of the build (other trunk panels, speaker box, etc.).

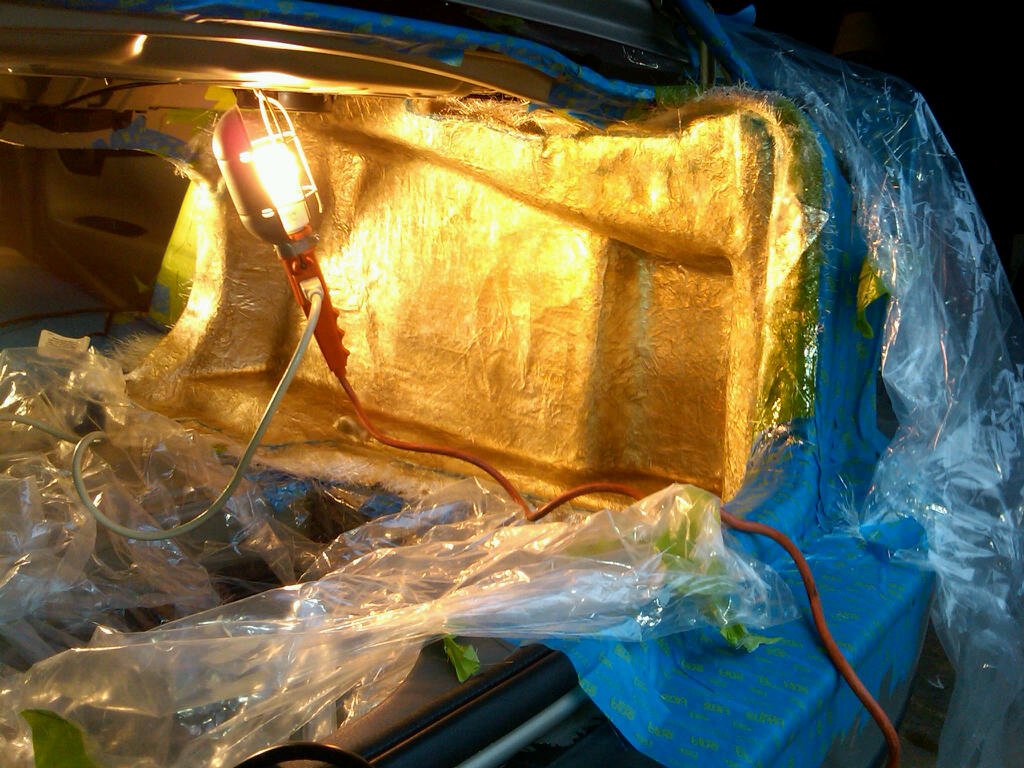
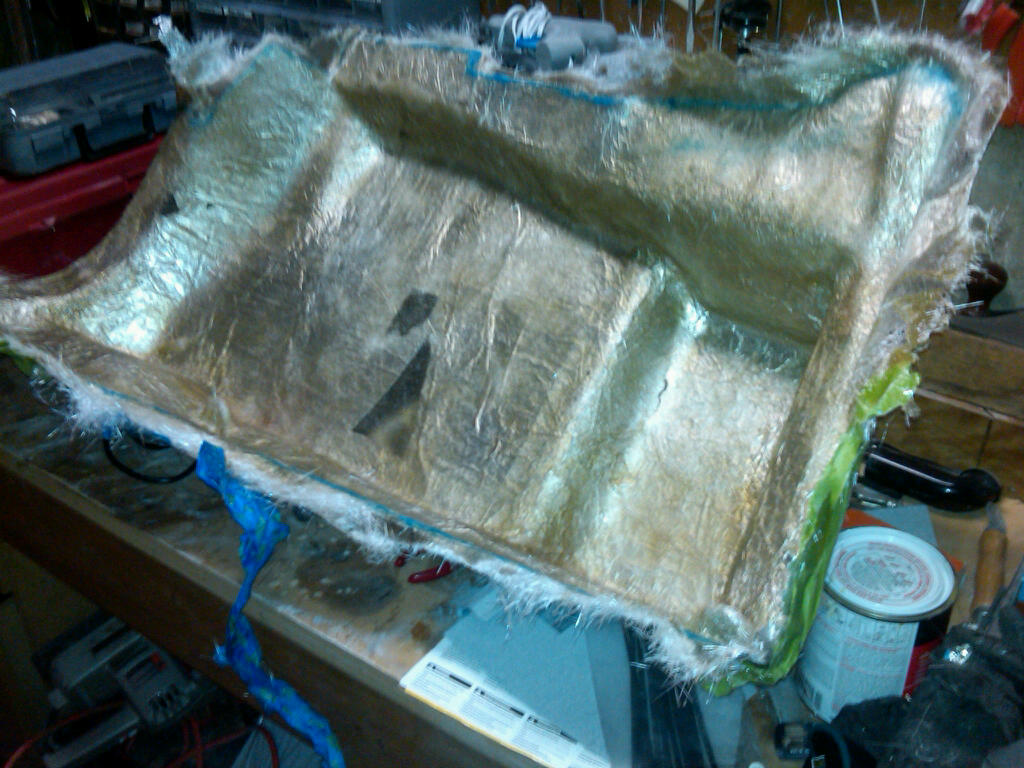
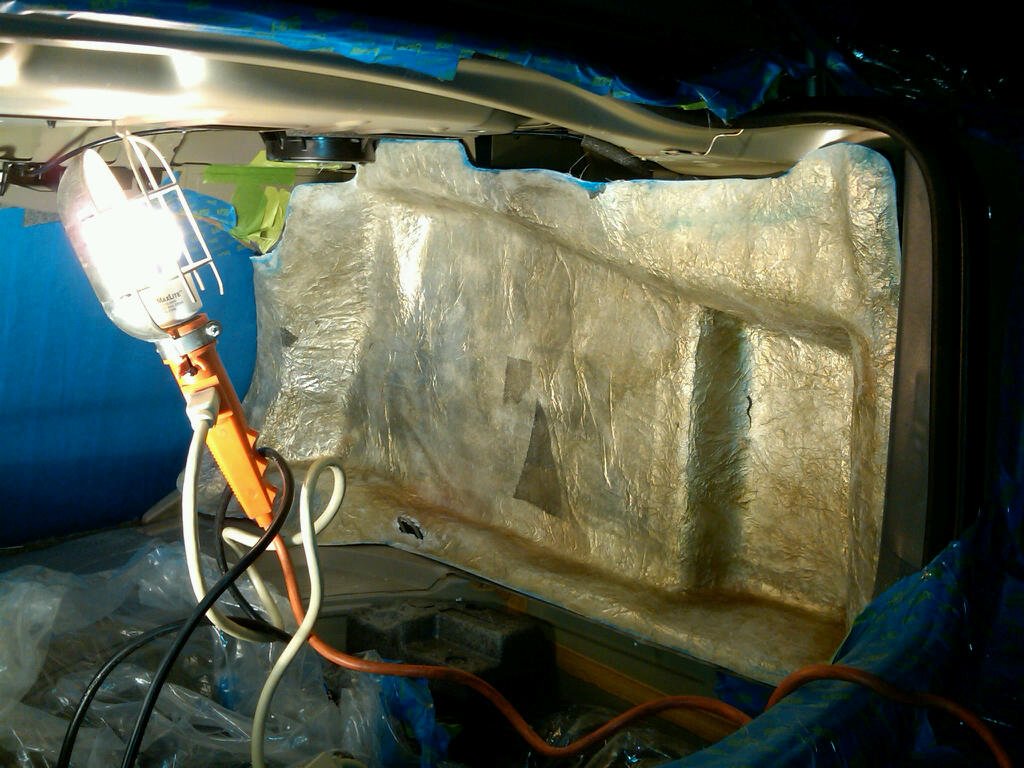
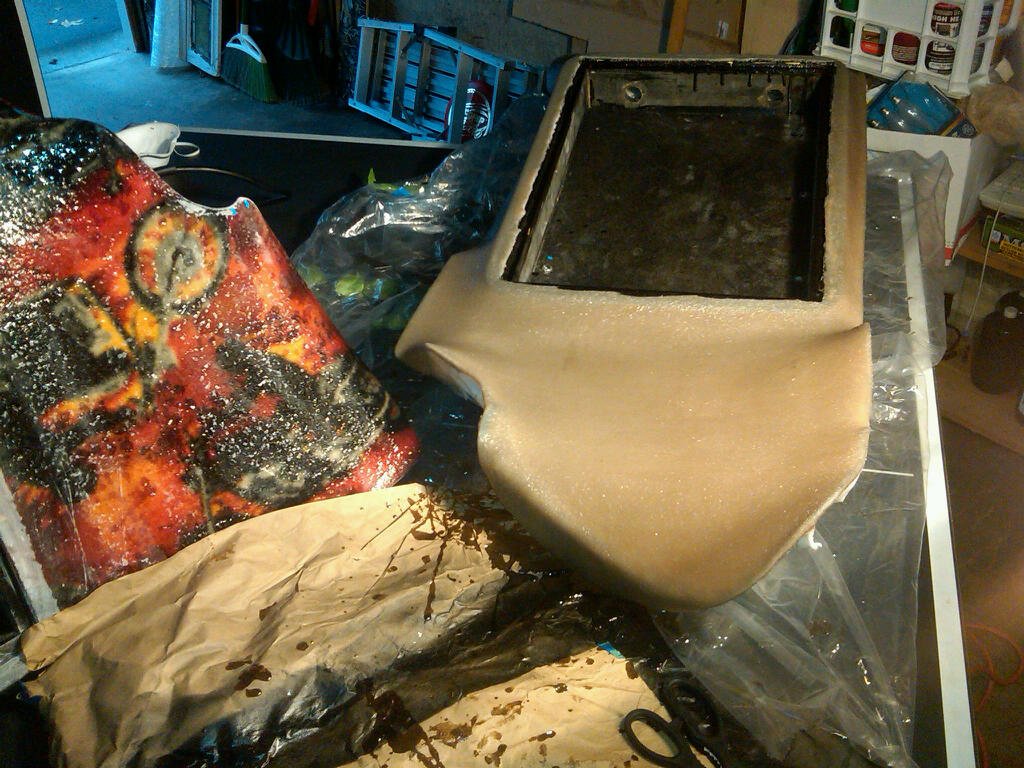
So after one weekend of work, here is a pic of the left side trunk panel with the amp enclosure glassed in.

trunk%20panel%201.JPG


trunk%20panel%202.JPG


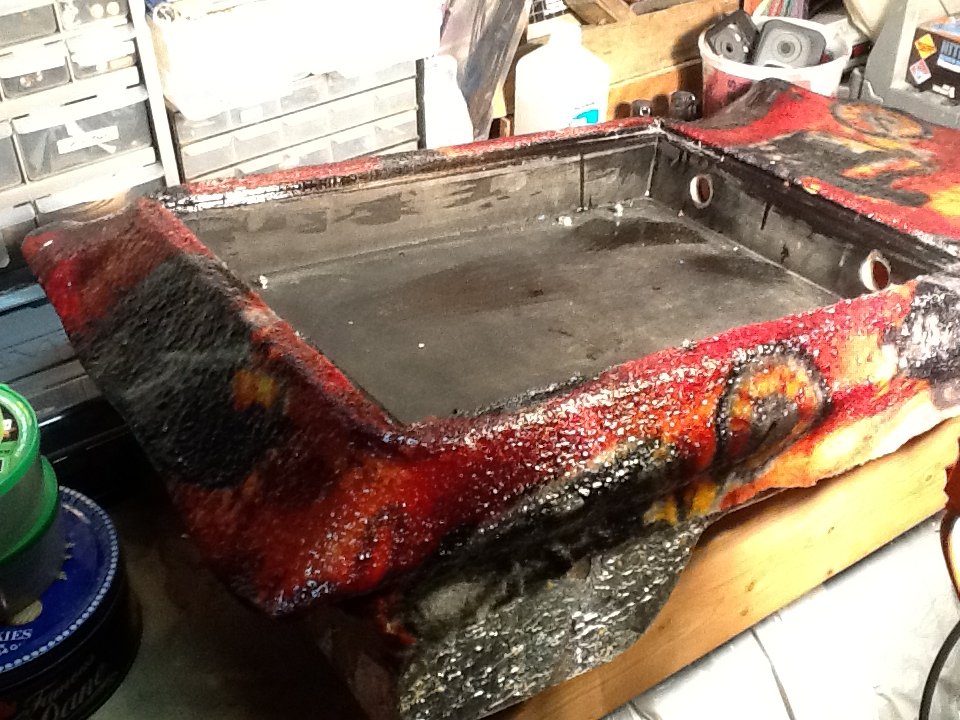
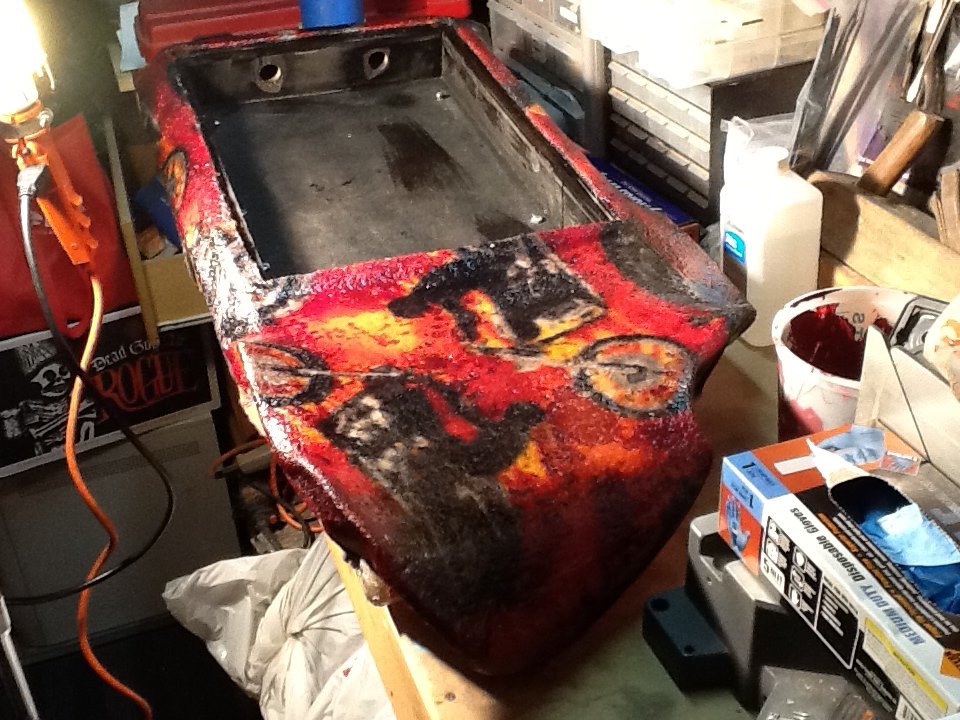
Like I said, this is our first time doing this so if anyone sees anything in the pics that looks terribly wrong or could be done a better way, your suggestions are much appreciated!

I was wondering how hard the fleece wrapping should get once the fiberglass resin is dry? I am using TAP brand polyester laminating resin and MEPK hardener. I am finding that some areas, especially larger, flatter, areas are still pretty flexible after two coats. How hard should that stuff get and is a coating of body filler recommended regardless for strength and a smoother surface?

 
Last edited by a moderator:
Resin itself isnt strong at all. It gets hard, but it is brittle, especially over large, flat surfaces. Resin and glass are incredibly strong when the glassed piece has a bunch of curves and angles in it. You will want to lay down some fiberglass chop mat over the thing and give it another layer of resin to soak it in. Just make sure it lays down smooth to save sanding work later.

 
Thanks for the tip! The resin cured harder than I thought it would at first. The weather here is getting pretty cold so it took about 24 hours to really set. I'm looking forward to trying the body filler and sanding for smoothness. Then I can put a layer of chop mat over that as a final layer, correct?

 
Will do. Should I be concerned that the resin coating on the fleece at this stage is bumpy or is that pretty normal? I'm noticing that with this type of fabric, it did not dry smooth. The fleece dried with little bumps all over it. Just trying to get an idea if there was a better technique I should have used or a better choice of fabric or if this is pretty normal. I think you can see in the photo that the finish is pretty bumpy at this stage.

 
Is the resin bubbling while it cures creating little air pockets making it bumpy? Try using less activator if that's the case. I'm no fiberglass pro by any means but I have played around with it on a few projects.

 
Good info you sent me in the private message, Matt. I read your note and also the tutorial on building kick panels. Good stuff.

I'm going to make mistakes here. That's to be expected the first time. The biggest goof I've made here is not soaking the fleece all the way through. I thought it was soaked all the way but I could not see the back of the fleece. Now I can see that it's not soaked all the way. I have some shaping and sanding to do here, especially around the edges of the panel which are now thick with the fleece so don't fit back into the vehicle. I have some chop mat to lay down and body filler to do. Since I discovered the issue with the fleece, I plan to hit the back of the fleece with some fiberglass resin from the backside. I can cut a hole in the panel and hit it. If anyone sees a problem with this, let me know. It seems like an easy way to fix my goof here.

 
Made some small progress tonight. Sanded the amp rack panel mainly in areas where the fleece folds around to make it flush with the back. Then fit it into place in the trunk. It's a rough fit at this point. I can see areas where the panel needs to be shaped for a better fit and improved. But it is encouraging to see this is actually going to fit. Already starting to feel more comfortable with the fiberglass medium. Ready to put a layer of chop mat over this and shape with body filler. I am noticing some drawbacks to copying the factory panel as the back. Mainly, the factory panels aren't that good. They don't fit snug around the trunk. Hoping to improve that with the custom panels.

trunk%20panel%203.JPG


Me and a friend did the fiberglass on the right side trunk panel today. It's almost dry now, ready to pop it off. Here's a picture of the work so far today. We can already tell that we're more comfortable with this process. This panel is going to turn out way better than the other side. The other side will be fine but I anticipate it will require a lot more sanding and body filler to adjust than this side. We also noticed the right side factory panel fits a lot better than the left. It's almost like it was created by a different designer. Lots of subtle differences in how it fits. Much more snug to the trunk.

trunk%20panel%204.jpg


Some small progress today. Put in about an hour to pop the mold. This time it was MUCH easier! We used less glue on the foil. Tip: use just enough to hold on the foil. Lesson learned...

trunk%20panel%205.jpg


I'm getting set to start working on the project. Hope to have a few updated pictures of the progress over the course of the weekend. I placed an order for 50 sq ft of GT Mat 80mil sound deadener which will arrive next week. The folks at GT Mat were kind enough to also throw in a 10 sq ft sample pack. I will provide a review of their product here in the build log. Thanks GTMAT! GTMAT Automotive Sound Deadener Dampening Dynamat/Fatmat Alternative is their url in case anyone else wants to look into the product. ~Nate

 
Yep, they have a store on ebay too. If you call their 800 number they'll give you a small discount vs. the ebay or website pricing which was a nice surprise. Obviously if money were no object I would foot the bill for dynamat. There seems to be a proliferation of discount products out there such as GT Mat. What seemed legit about this product is they make very reasonable claims if you watch their videos on the website. We'll see how it goes. So far I'm impressed with their personable service. I also have been reading the sound deadener showdown website and seems to me from what I am reading there that good results can be had with any product of reasonably good quality if you strategically place the deadener where it will do the most good. Also use of other types of sound proofing materials as described on that site seems to be a good idea such as the CLF foam, etc. Here's some pictures of this weekends progress so far. I've mainly been spending time on the second fiberglass amp panel. The fleece is drying now under the lamps as I take the time to post this. One of the more time consuming things was just in getting the amp enclosure mounted so it looks symmetrical with the other side. I don't think I got it 100% perfect but it does look good to the eye and seems about 90% symmetrical. As I noted above, the trunk itself is not perfectly symmetrical, the panels are different. So this is to be expected. I think it looks good to the naked eye. If someone gets out a protractor on me, they'll probably find something to nit pick.

One thing I learned on this panel by using a thinner fleece the resin did soak in easier as I had hoped. However I did note that once the resin soaks in, it loosened the rubber cement I used to tack down the fleece. So it started to pull away around the edges of the amp enclosure. Luckily it was not enough to completely come loose, however, it does make it so I will need to use some body filler and sanding to make those edges nice and straight.

Also I tried my hand at patching up a couple areas on the first amp enclosure. I trimmed back a couple corners to make it fit better in the trunk and then patched those areas with fleece from the inside. I hit that fleece with the resin and once it dries, I will patch with body filler and sand smooth.

If you look at the middle picture here, you can see how these will fit in the trunk. The subwoofer enclosure will go between the two amp pods with the woofers firing back. I wanted to wait until the amp pods were done so that I can design an enclosure that is both removable, fitting between that area, but also can get a fiberglass baffle which fits seamlessly between the two pods to create a custom look that is at the same time functional with the sub enclosure being removable in case I need to haul something.

trunk%20panel%207.jpg


trunk%20panel%208.jpg


trunk%20panel%209.jpg


Last edited by a moderator:
Activity
No one is currently typing a reply...
Old Thread: Please note, there have been no replies in this thread for over 3 years!
Content in this thread may no longer be relevant.
Perhaps it would be better to start a new thread instead.

Similar threads

Ok, but it sure seems strange that every other speaker I've ever seen has it wired to the positive, And they switched later too. It kind of goes...
8
786
Well, I've owned probably over 100 different drivers in the last 40 years and almost every single speaker in the NVX line-up over the last 8...
16
544
https://www.youtube.com/@therealmatty_s/videos
0
363
I think you're gonna have to get good with fiberglass or something, or find someone with a 3d laser scanner that can 3d print or mold you some...
7
804

About this thread

americannight

10+ year member
Senior VIP Member
Thread starter
americannight
Joined
Location
Bellevue, WA
Start date
Participants
Who Replied
Replies
122
Views
38,401
Last reply date
Last reply from
audiobaun
IMG_0632.jpg

just call me KeV

    Apr 19, 2024
  • 0
  • 0
IMG_0629.jpg

just call me KeV

    Apr 19, 2024
  • 0
  • 0

Latest topics

Top